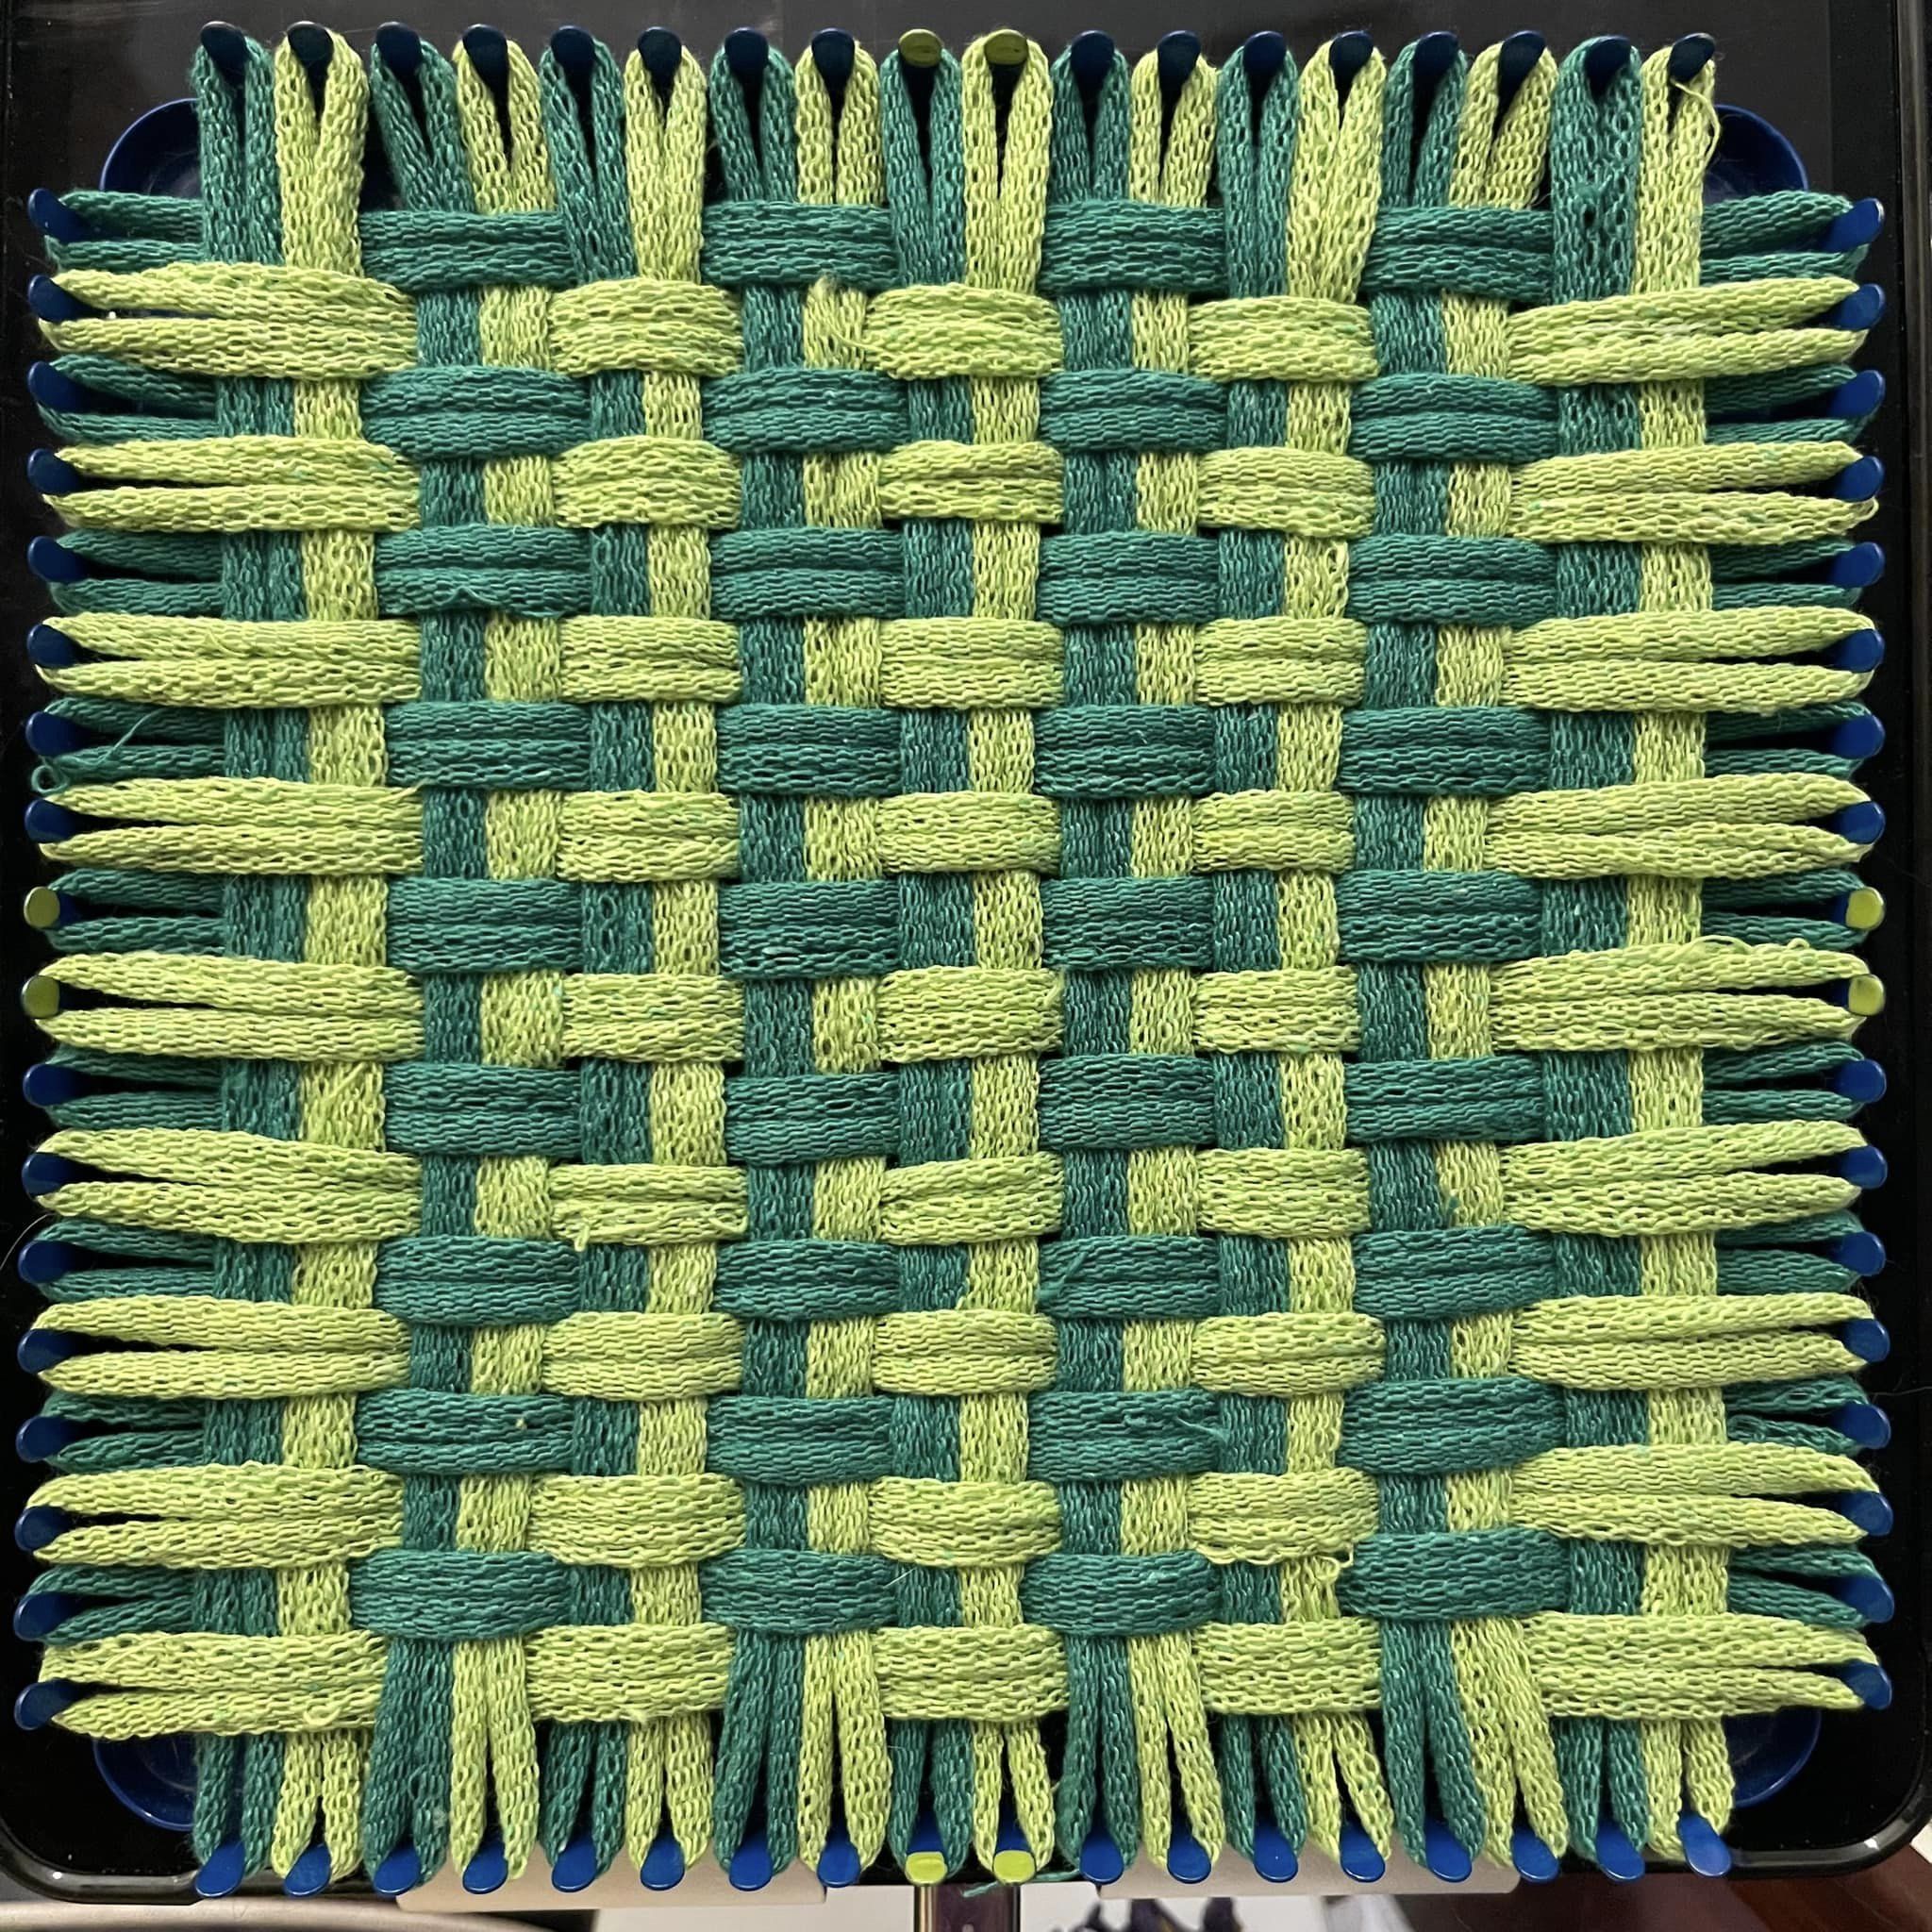
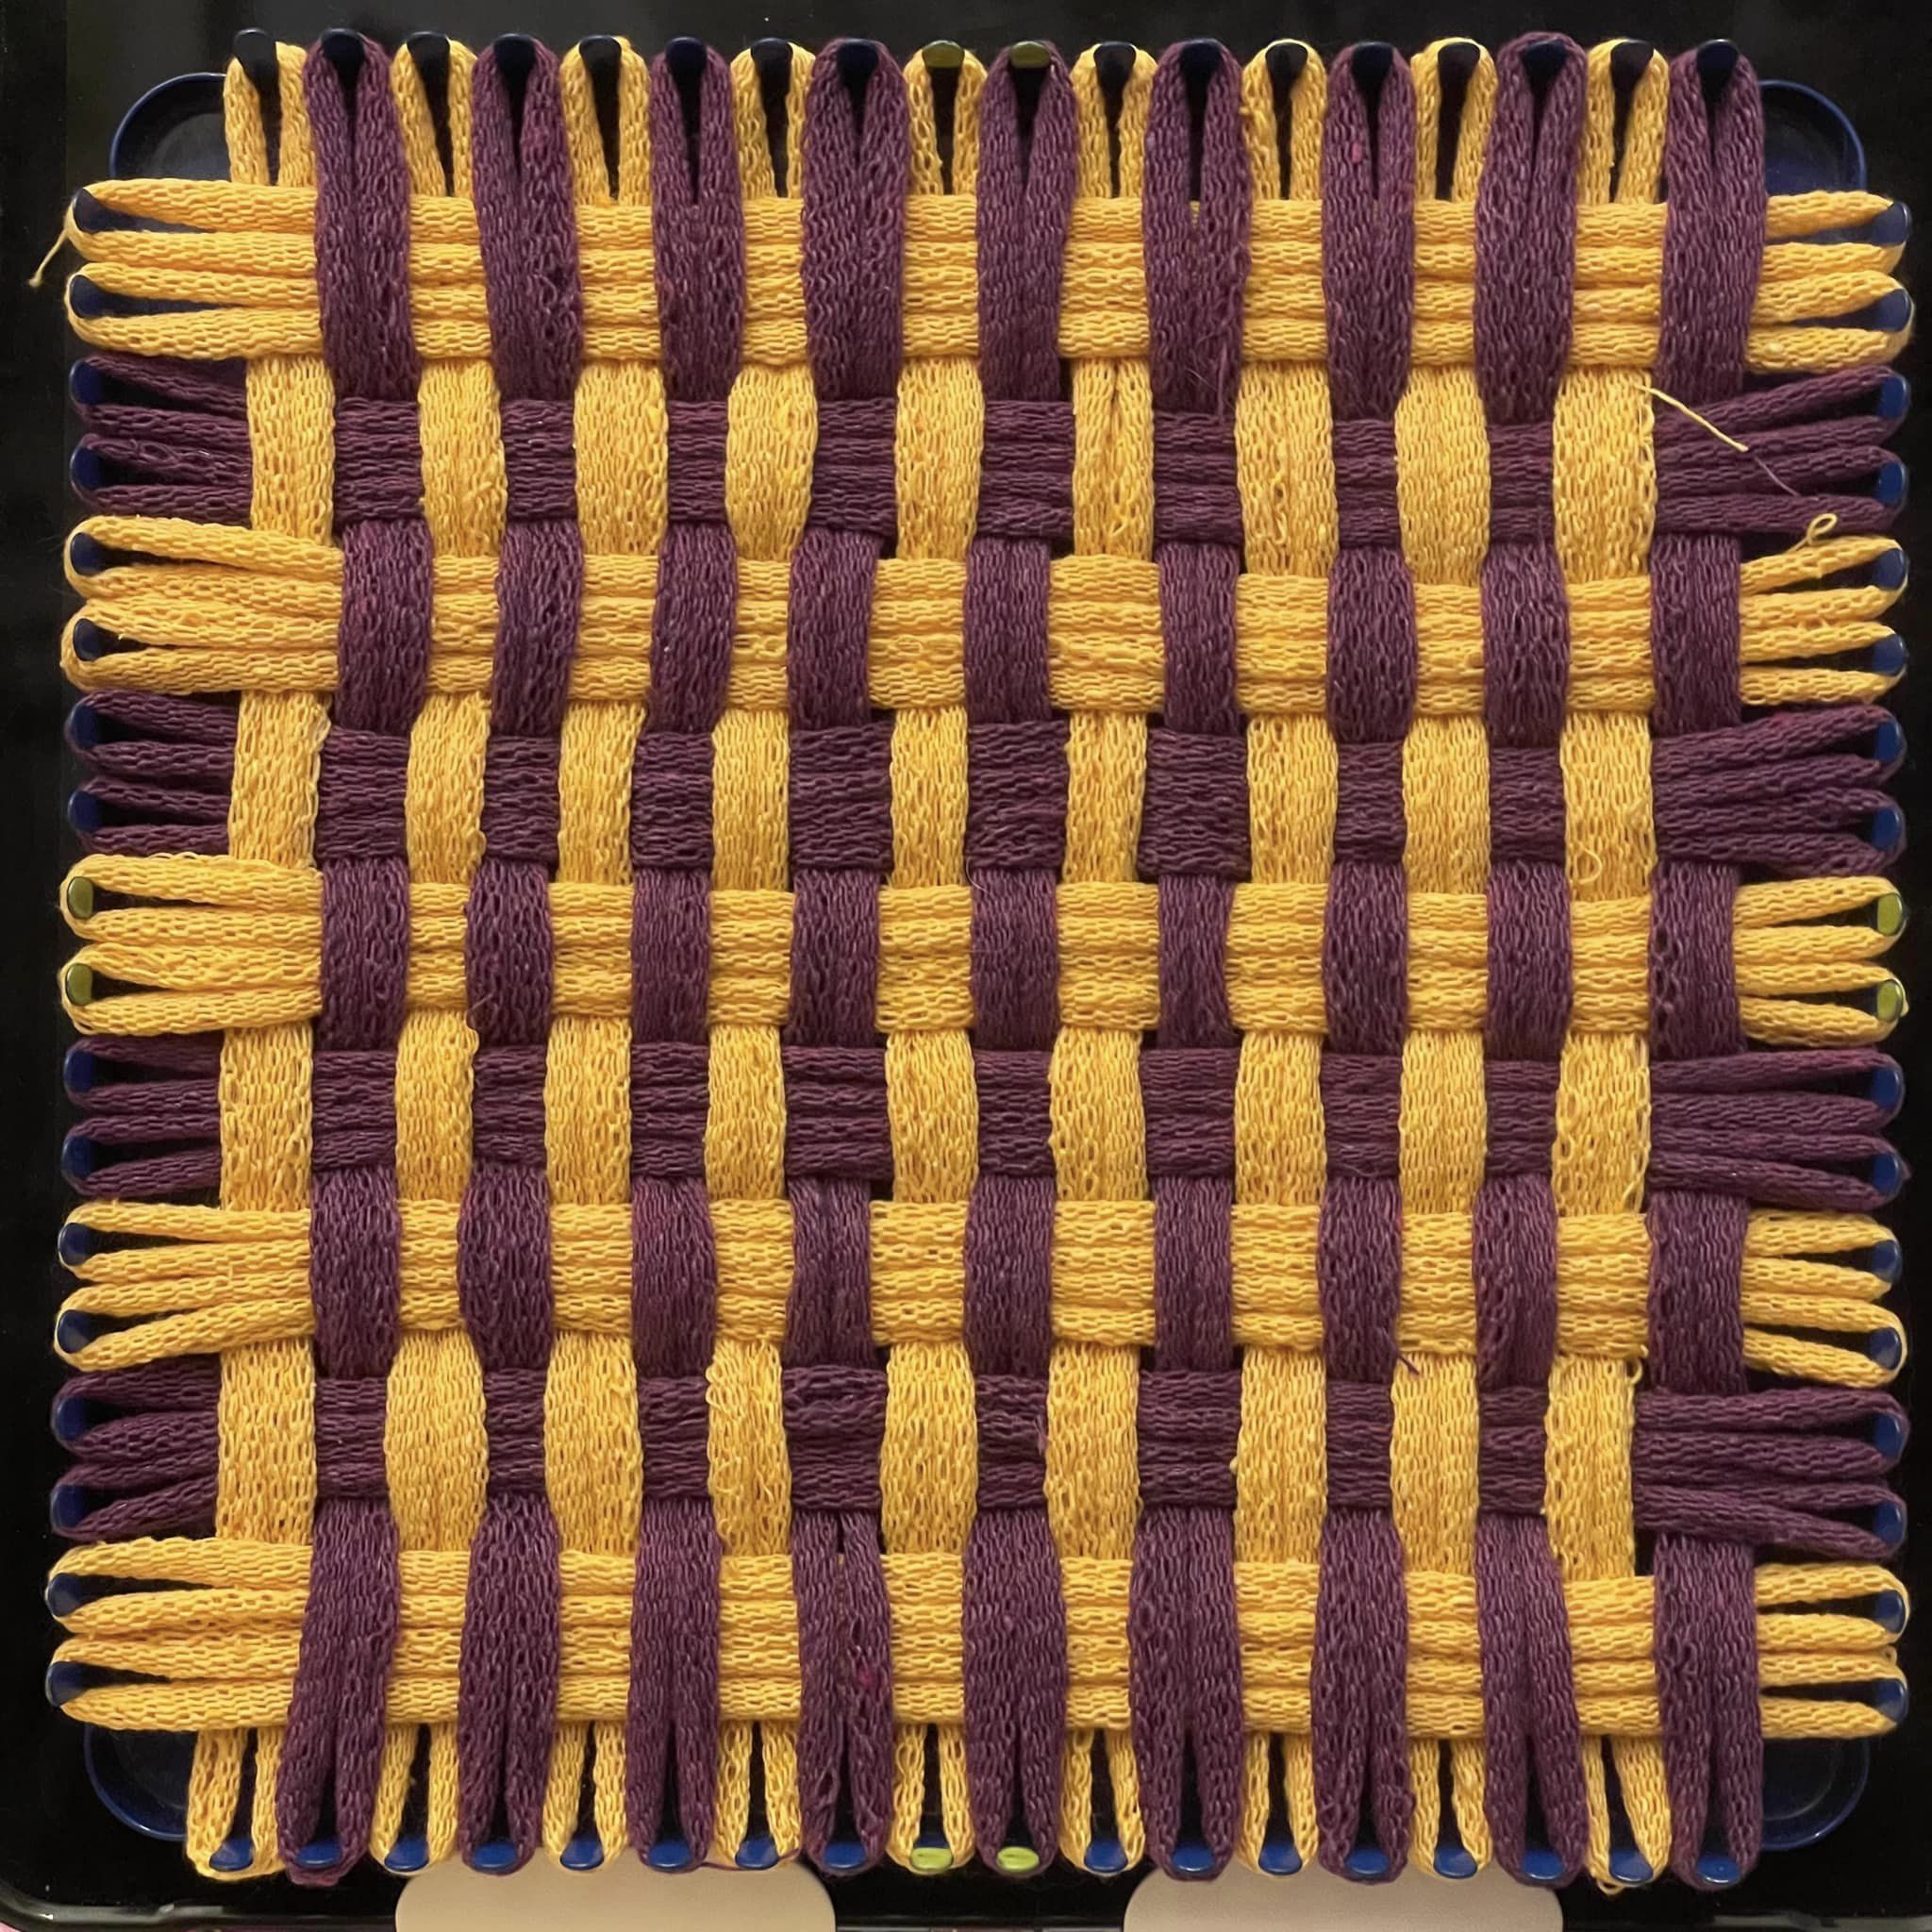
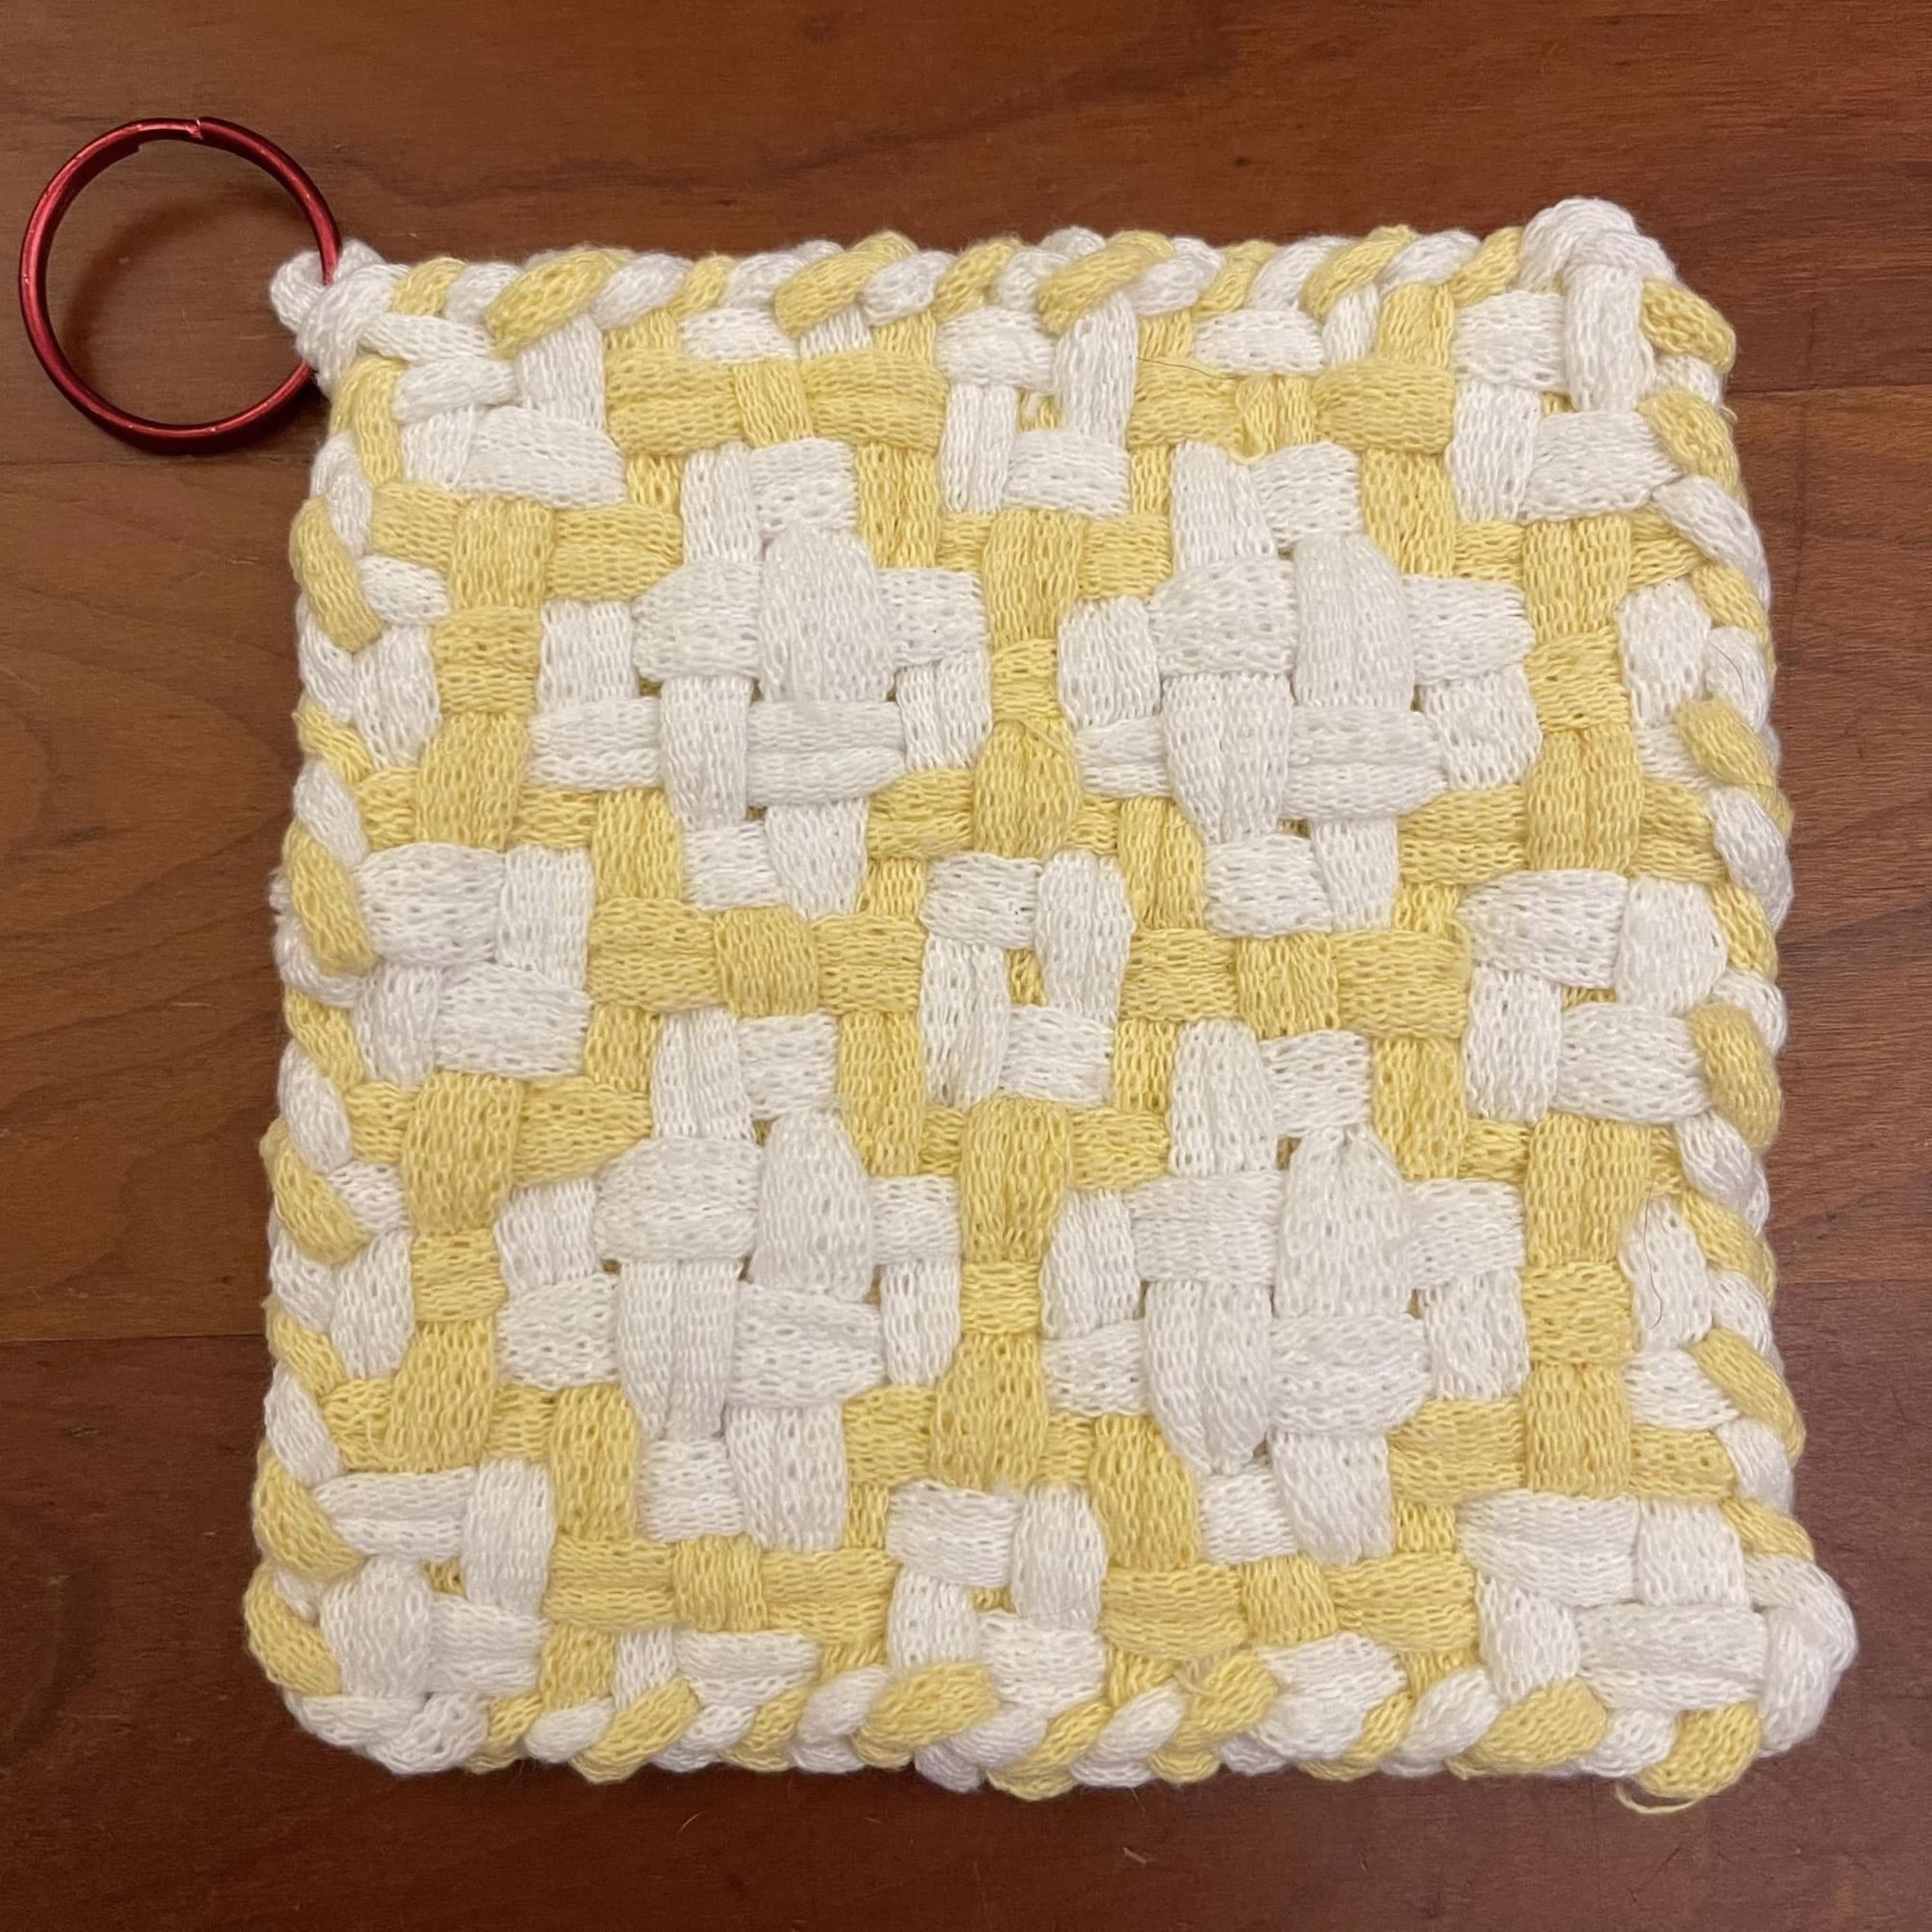
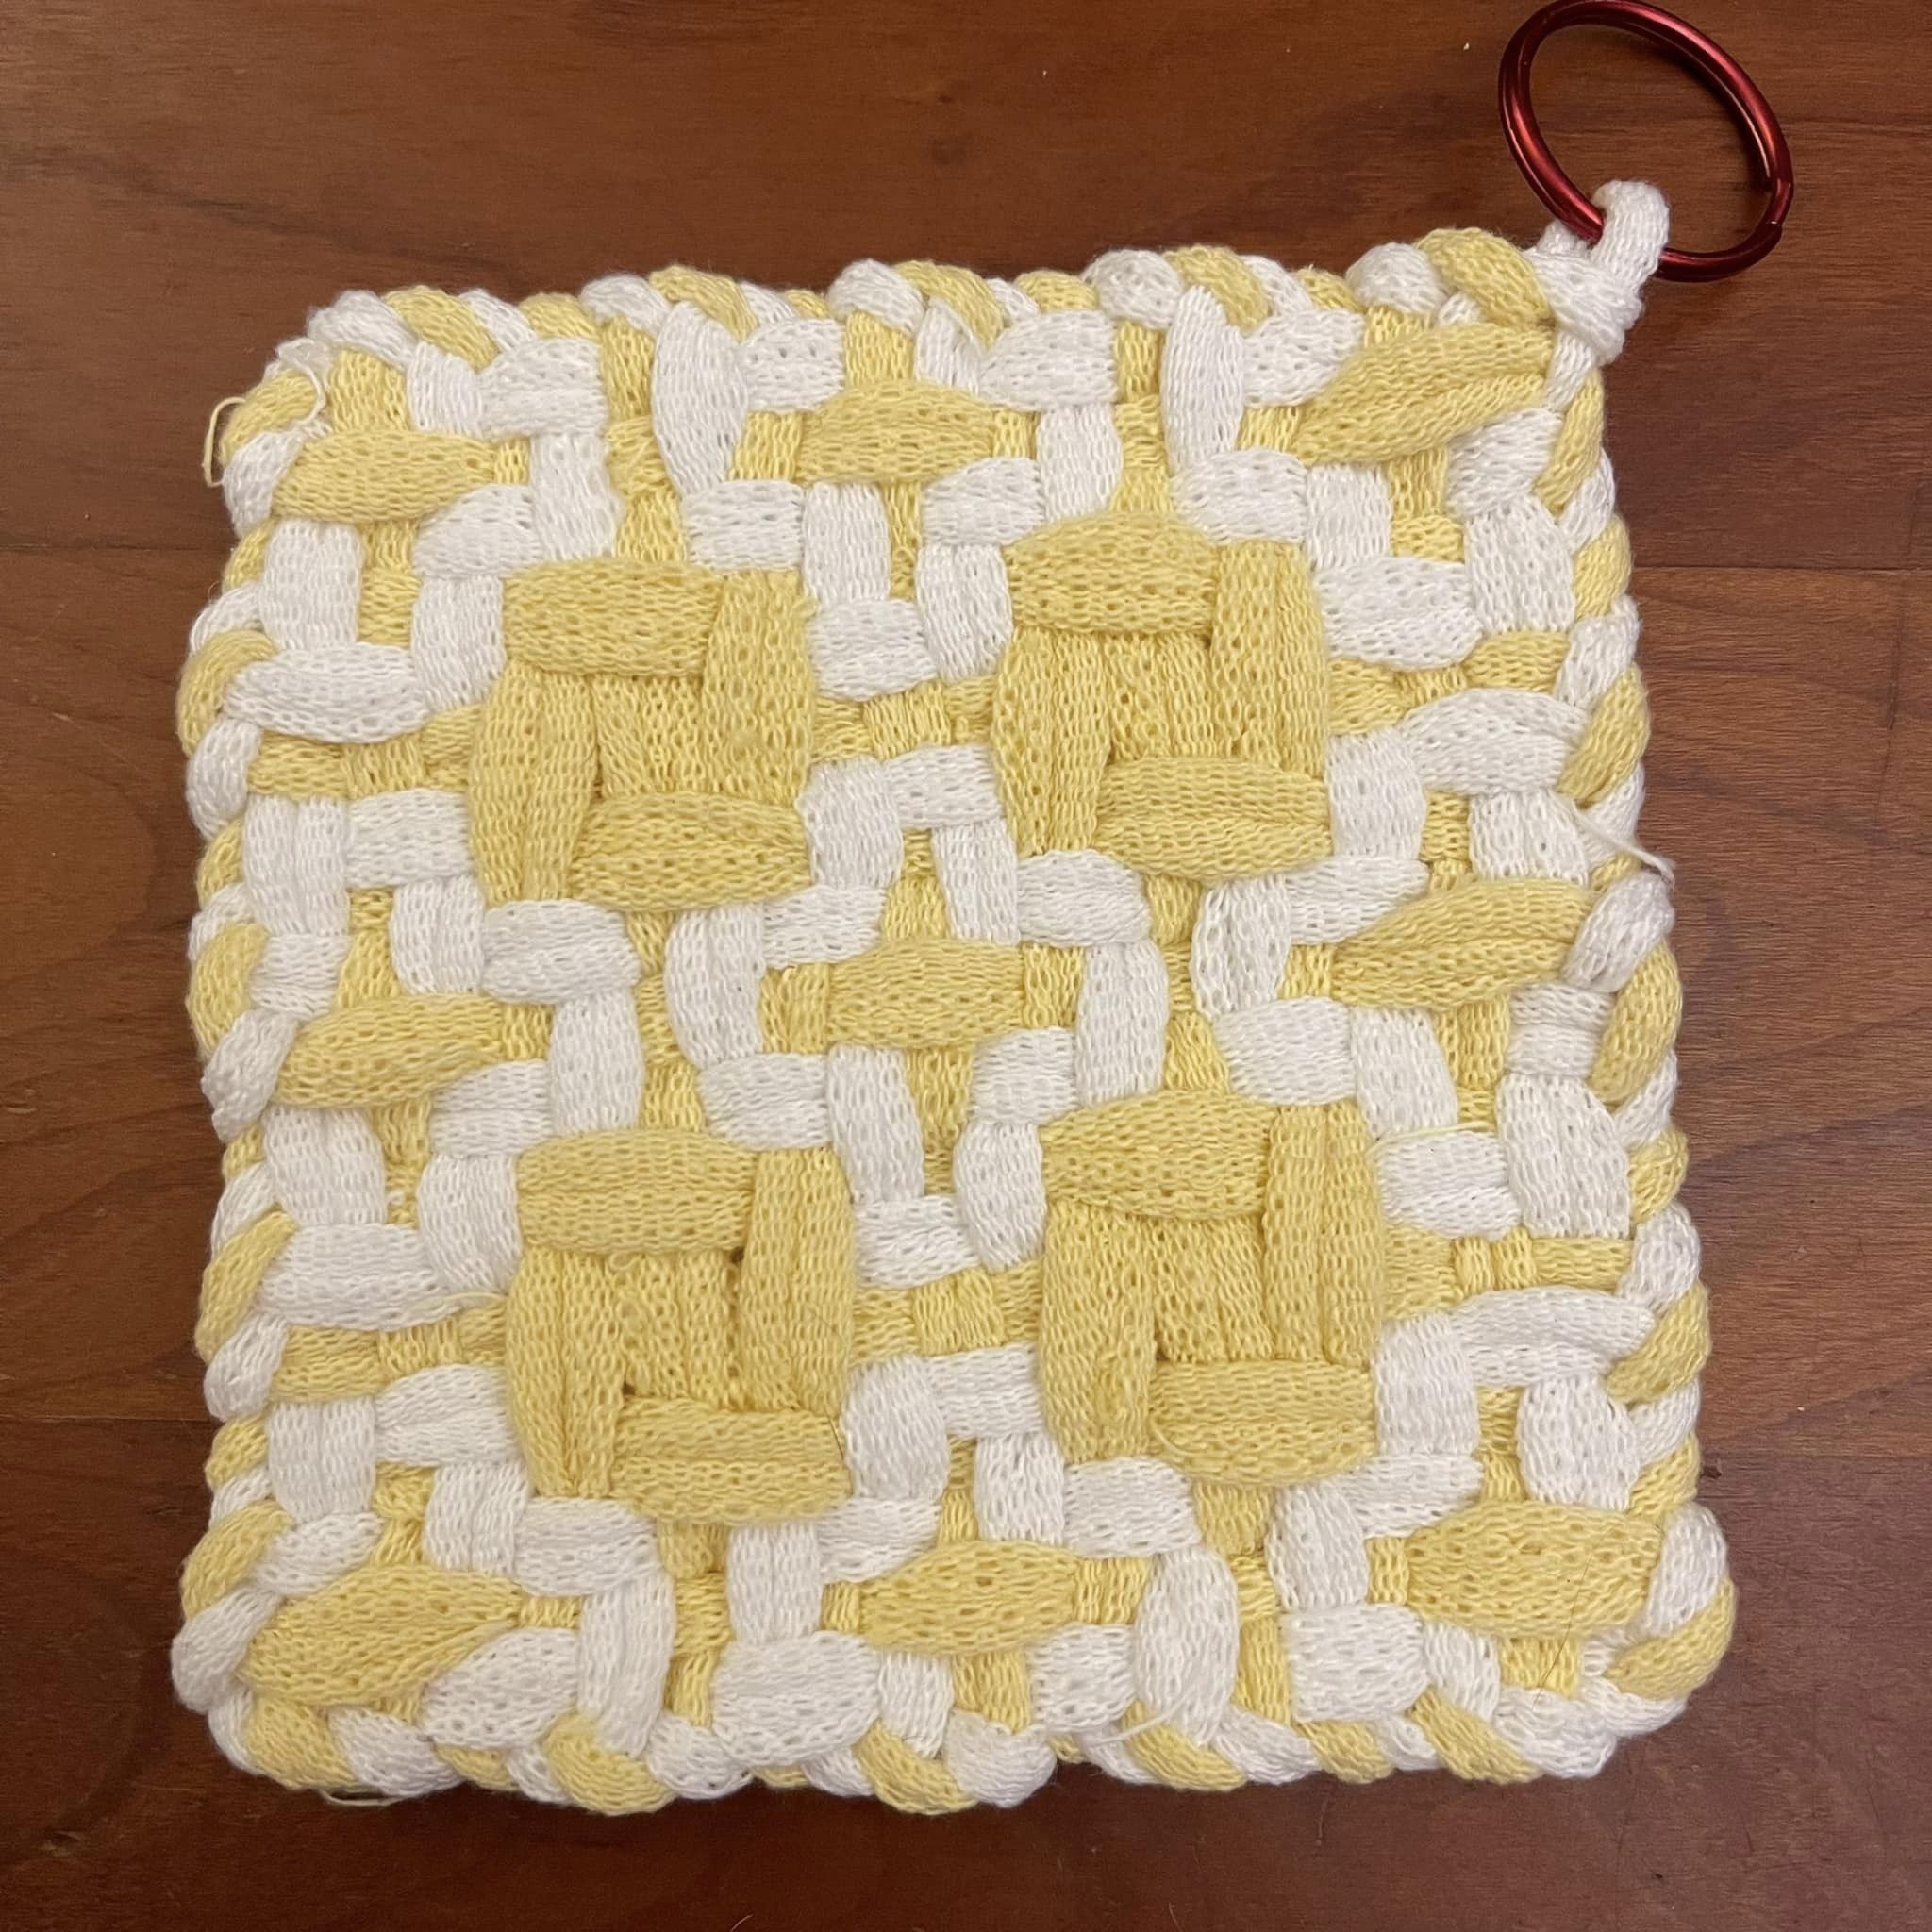
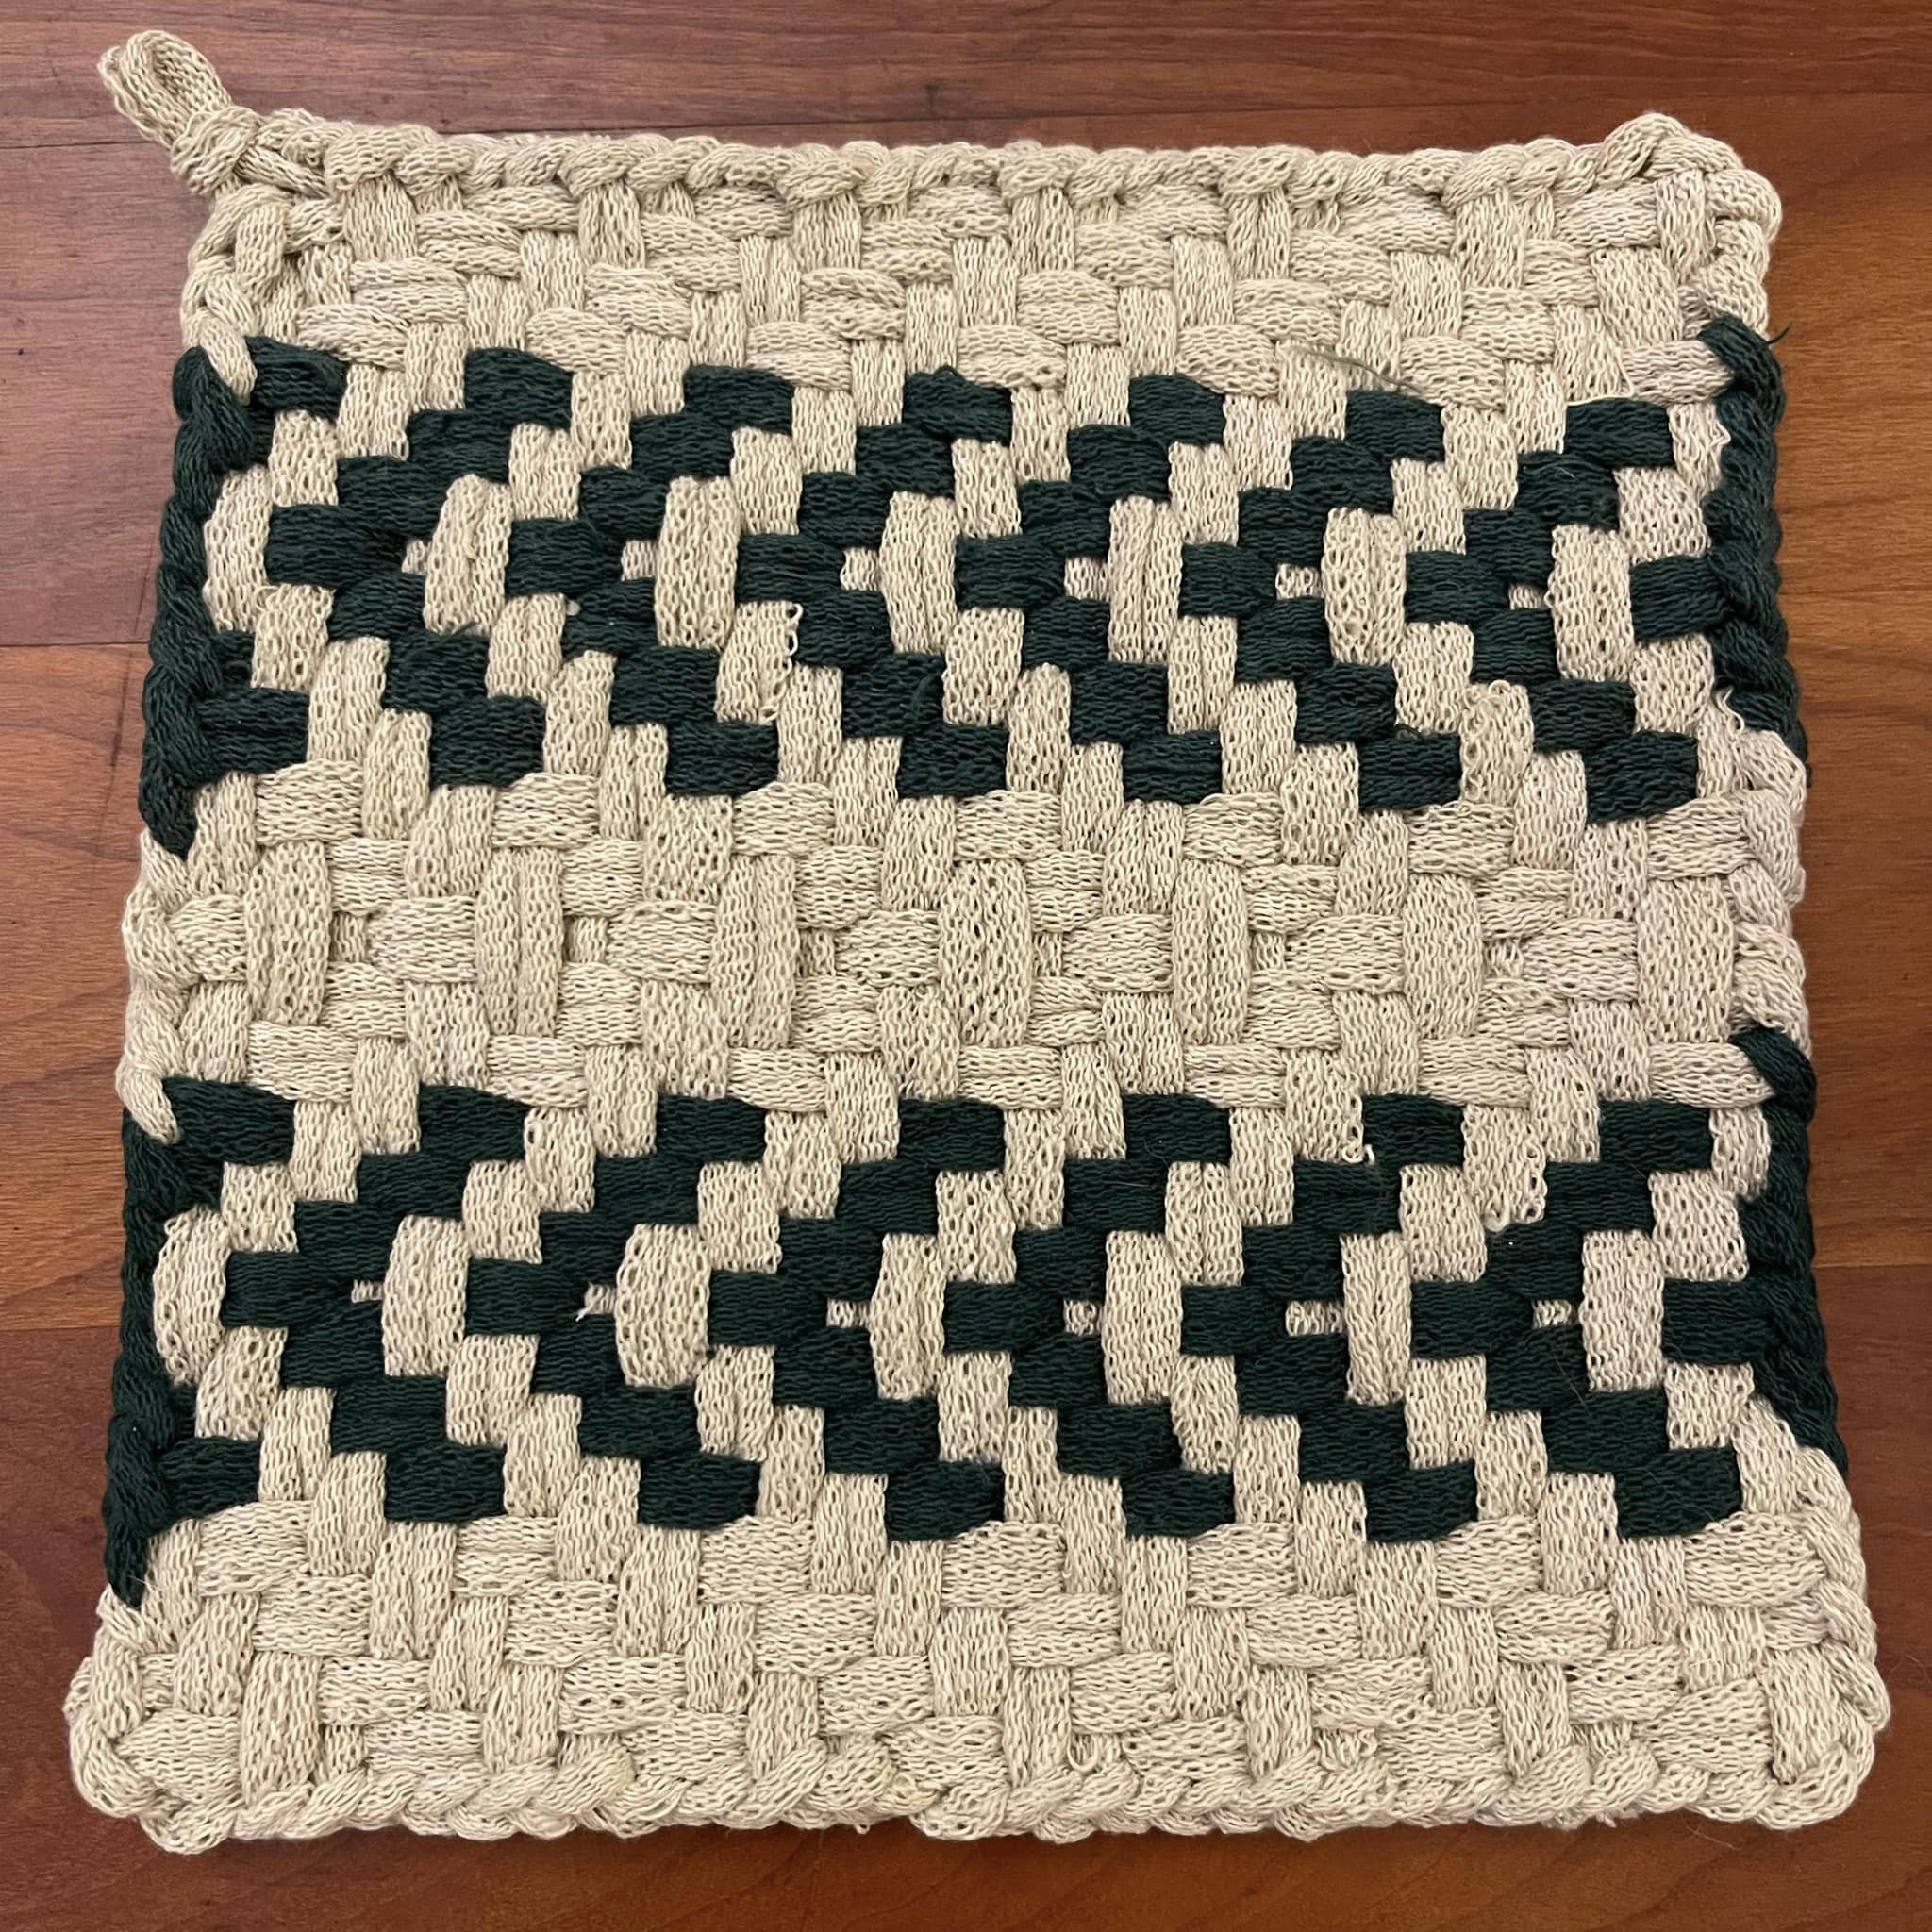
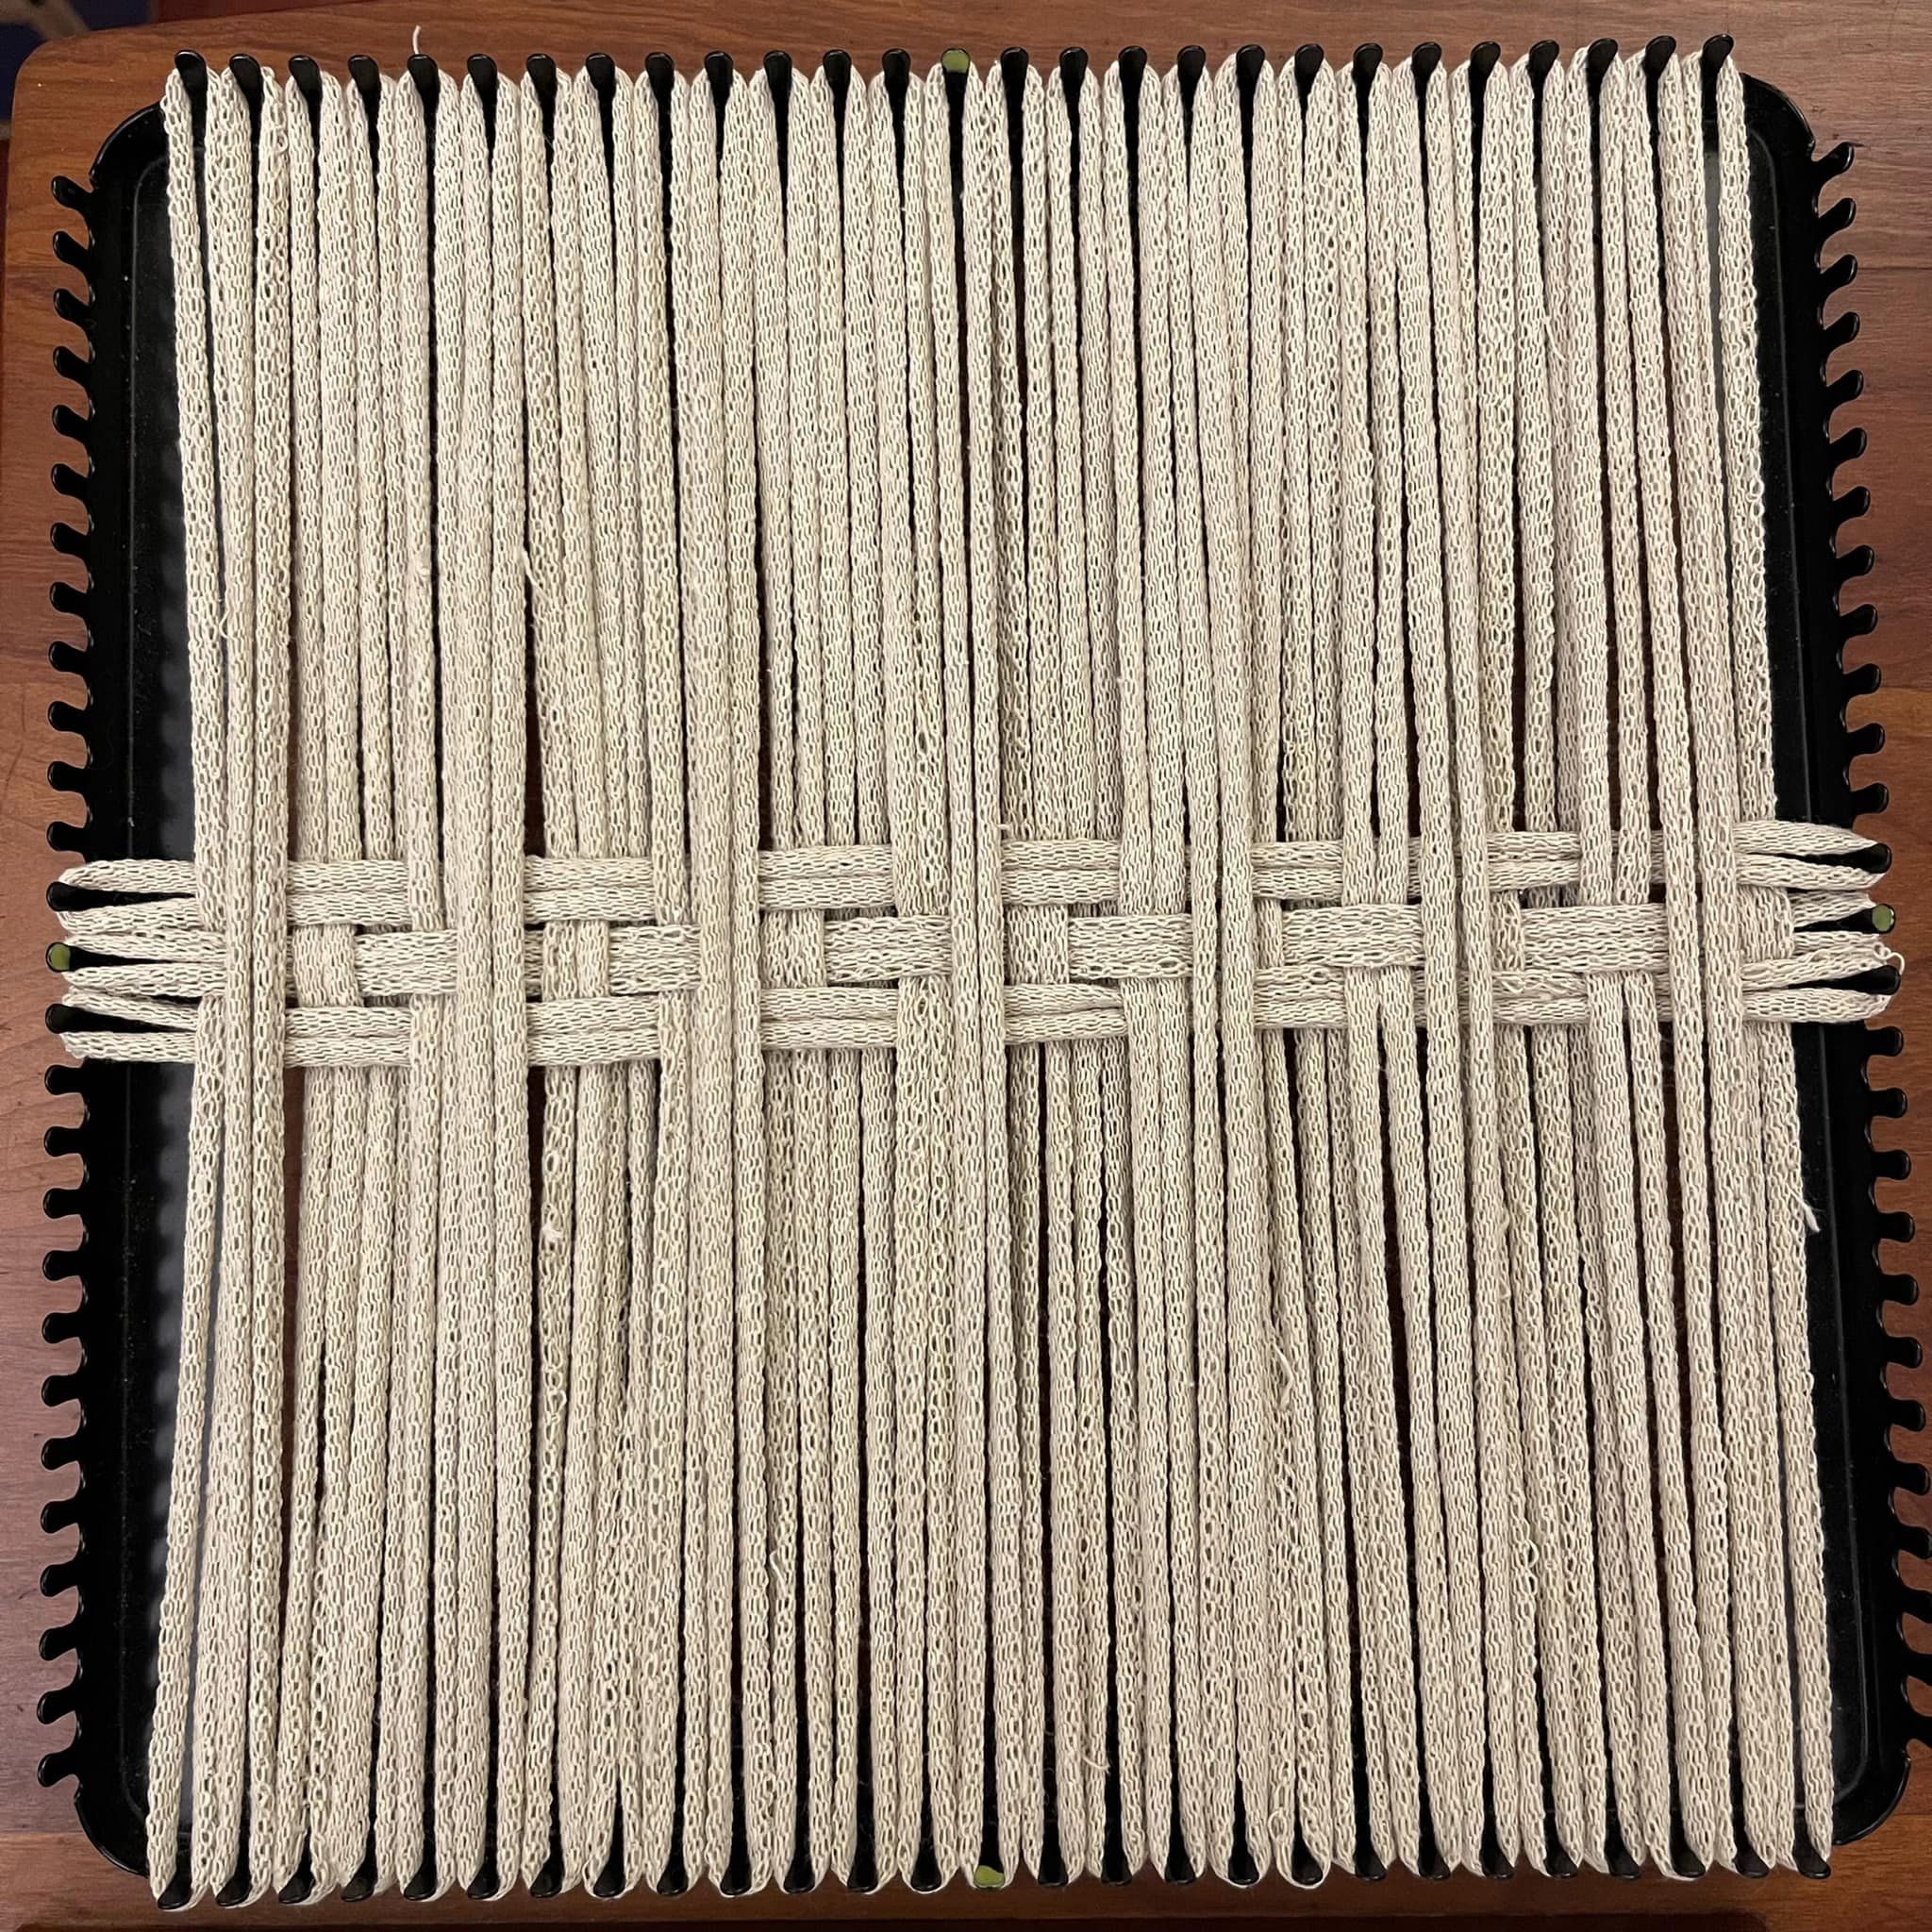
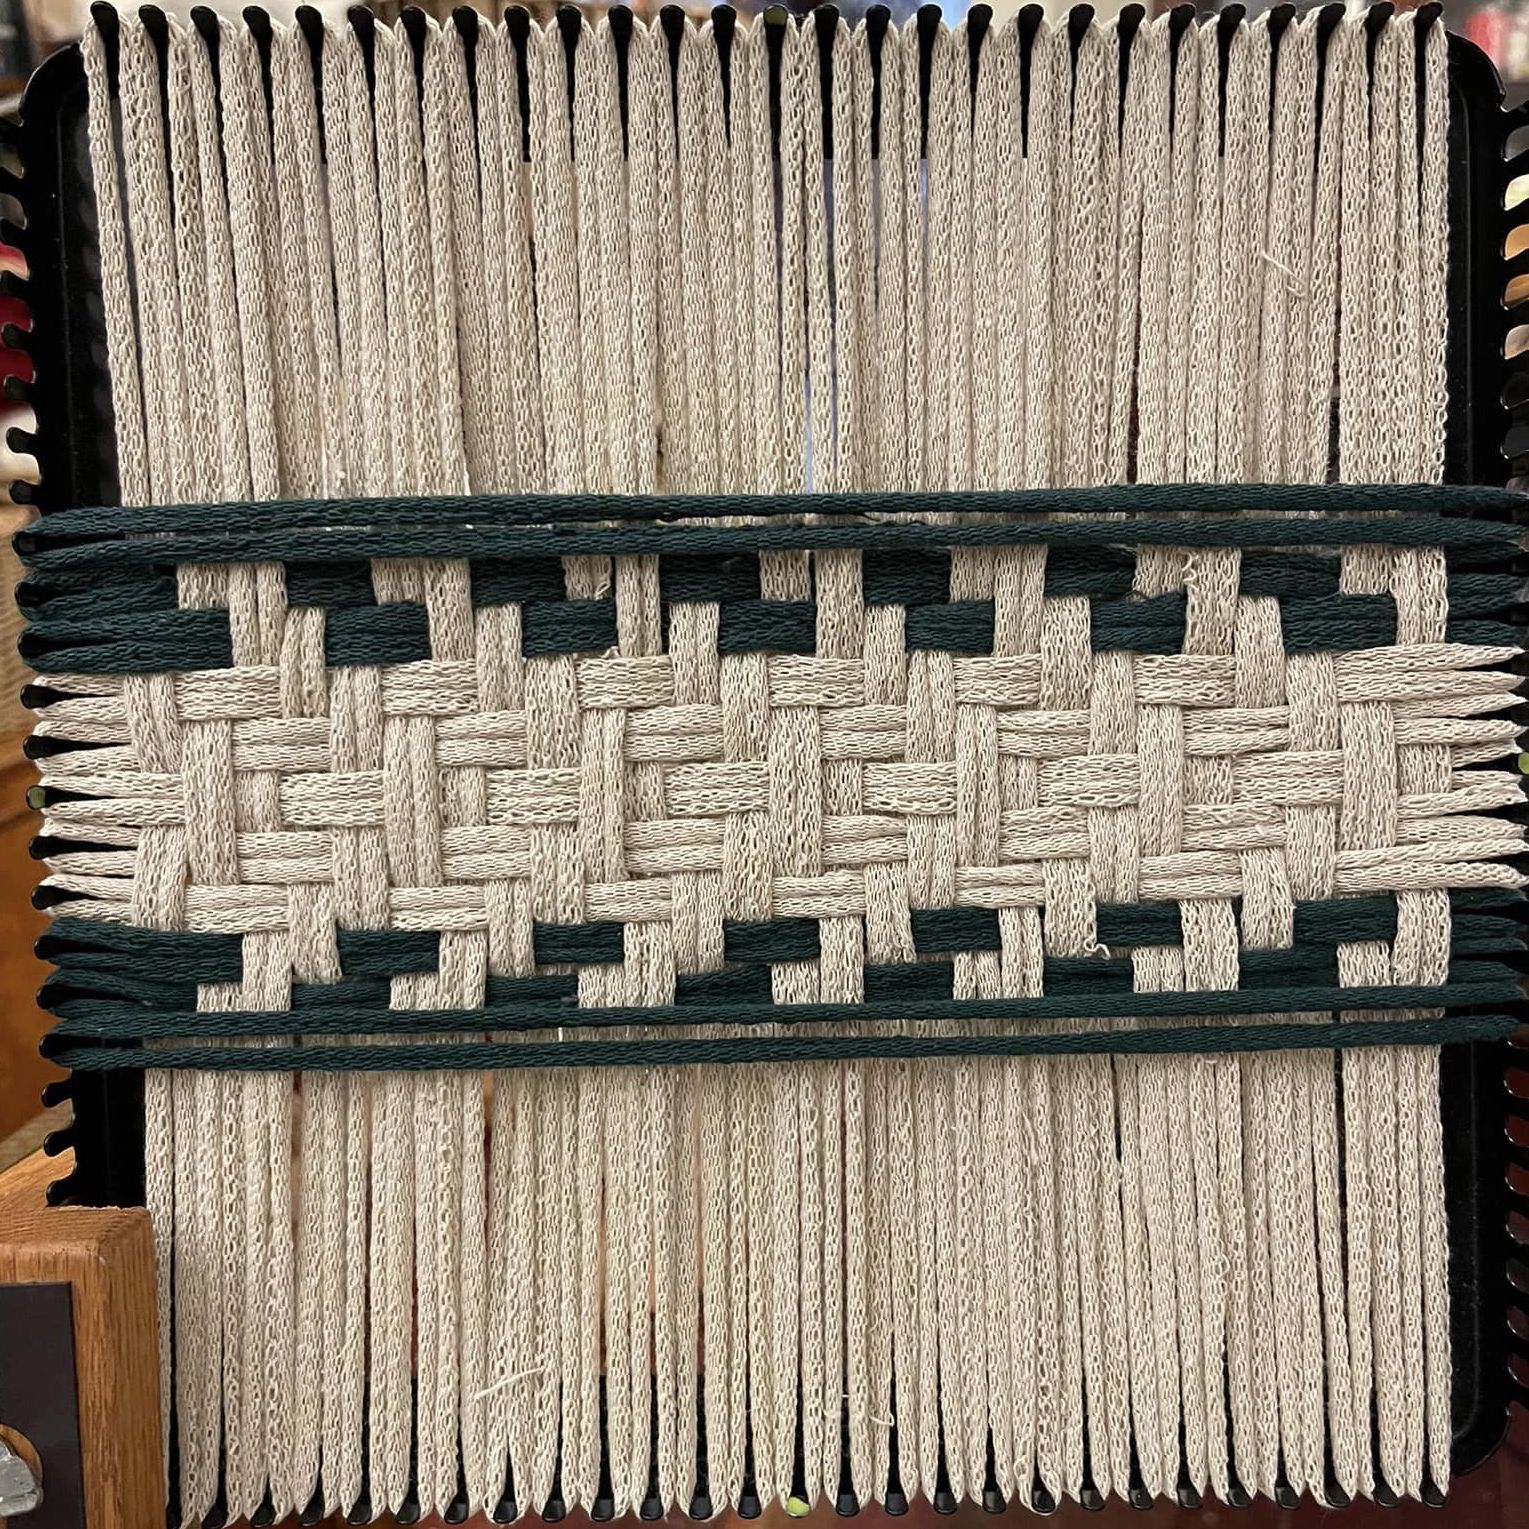
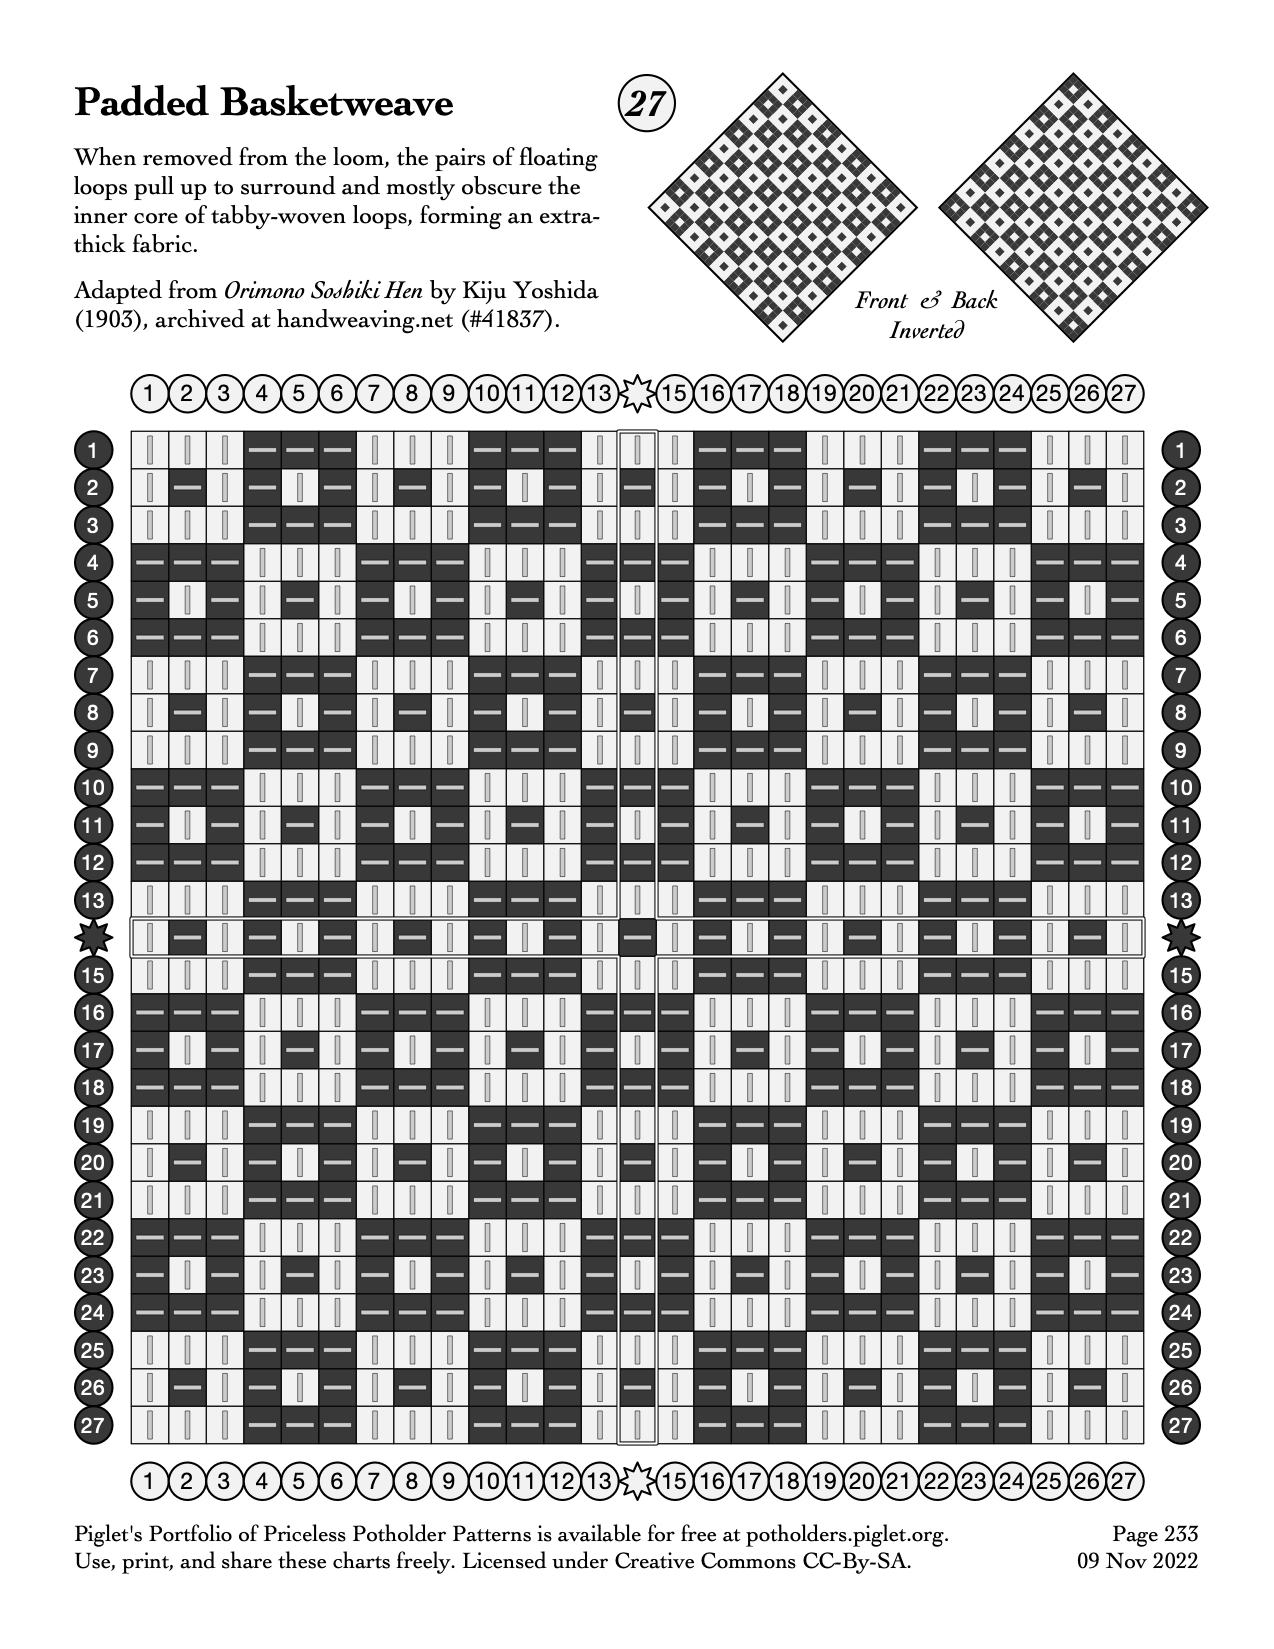
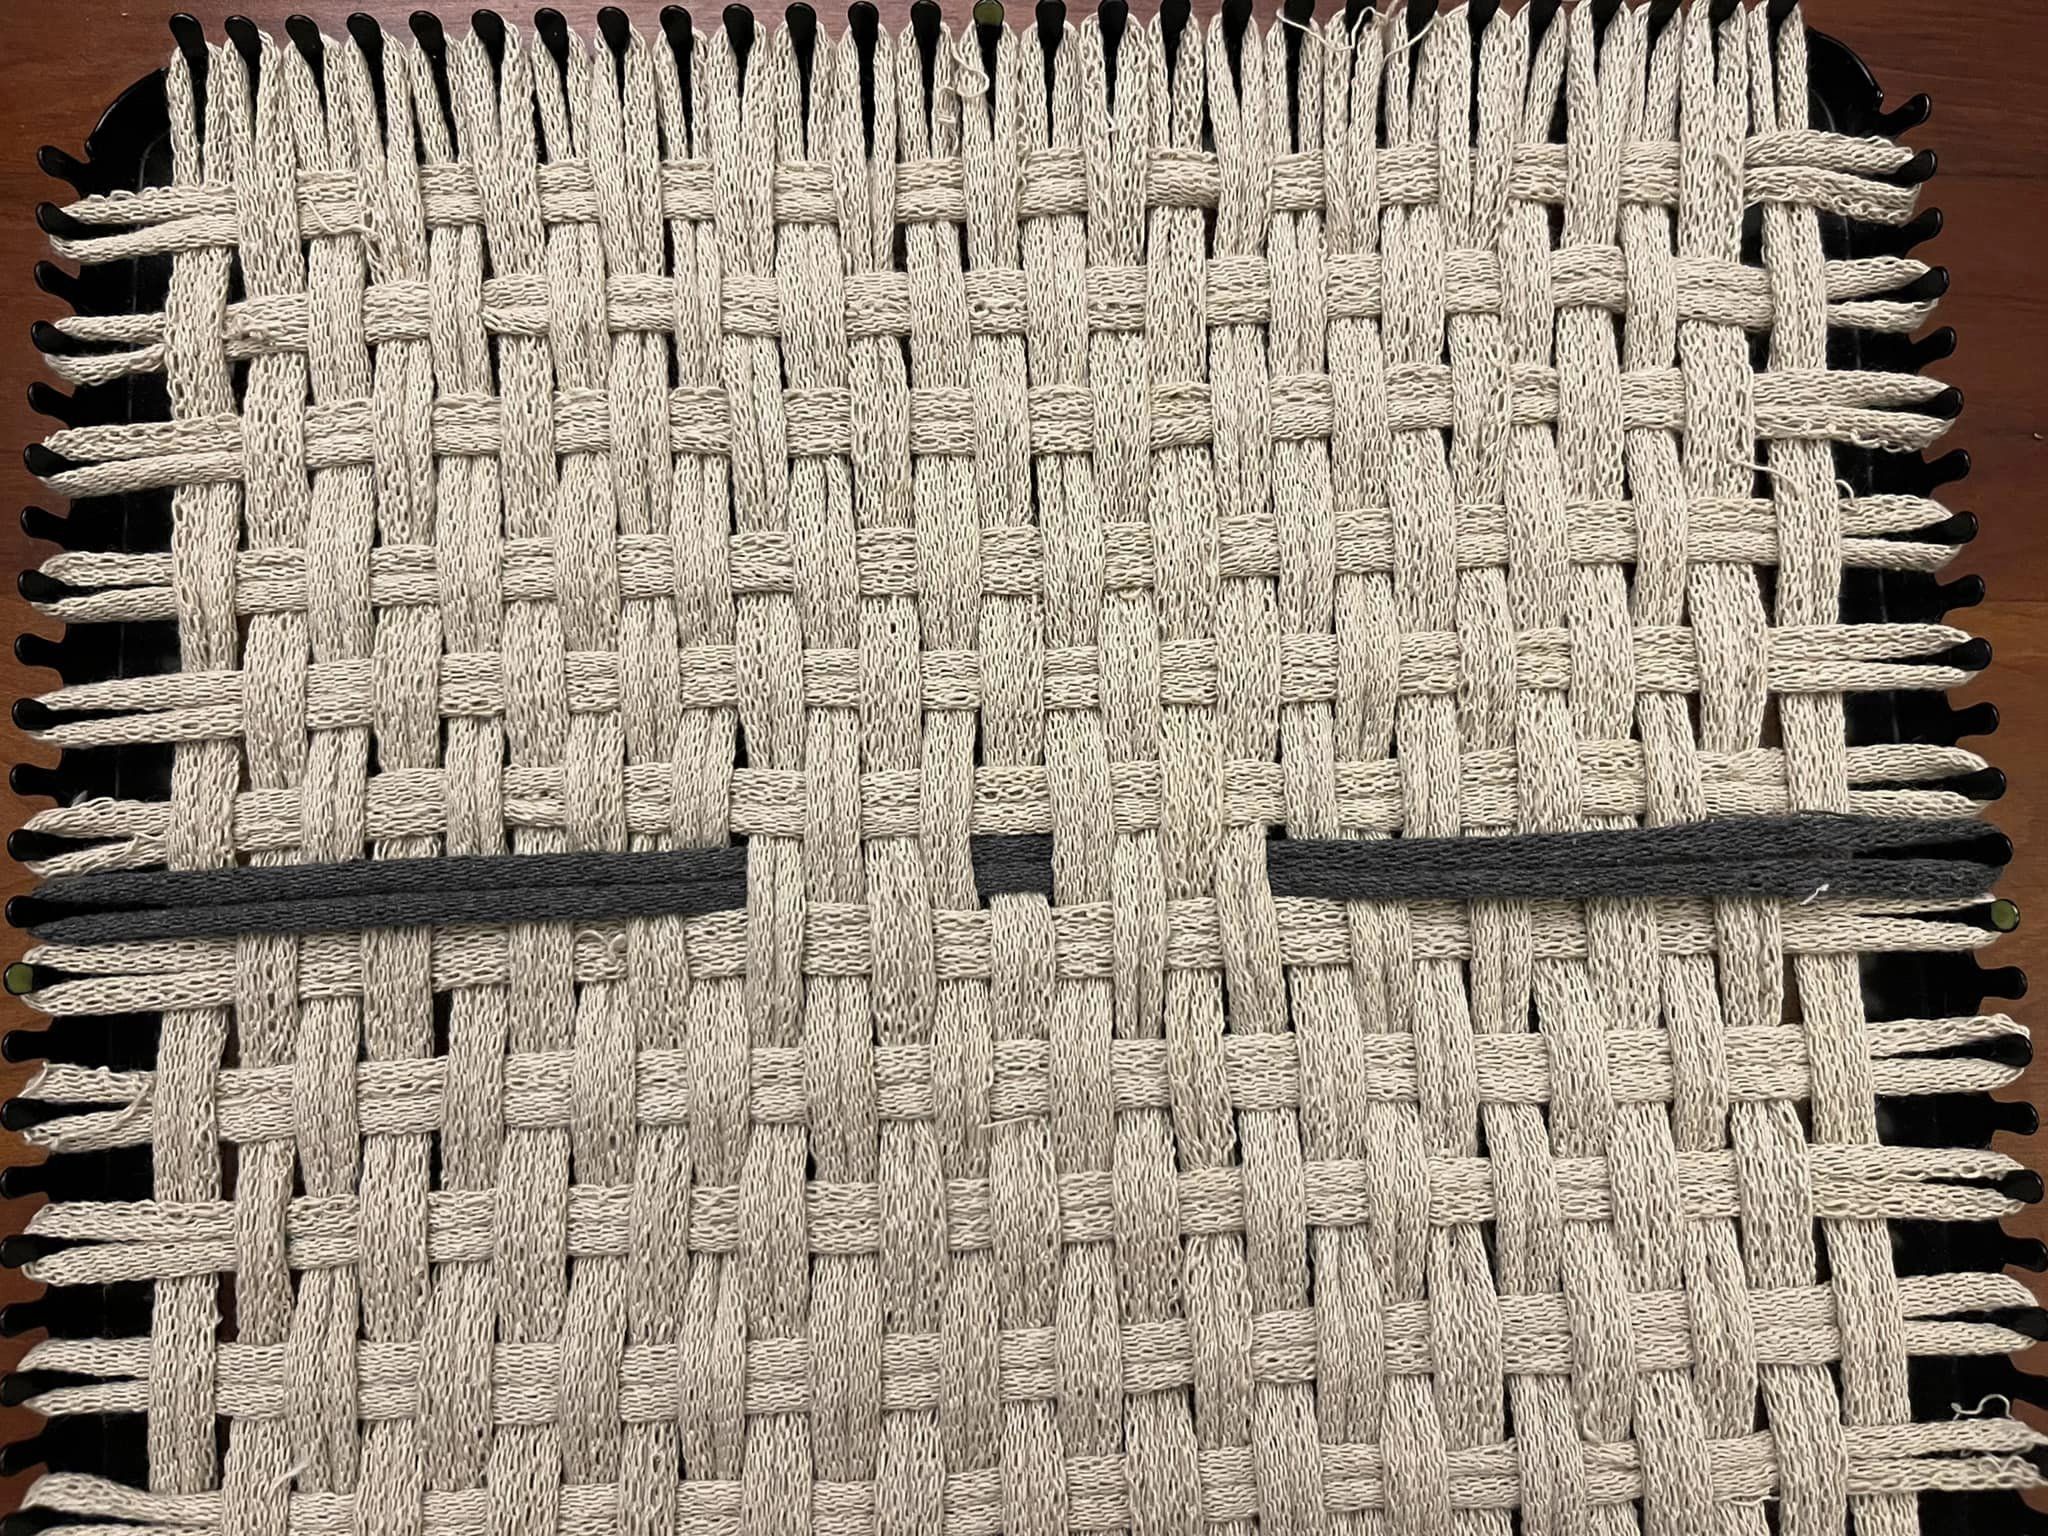
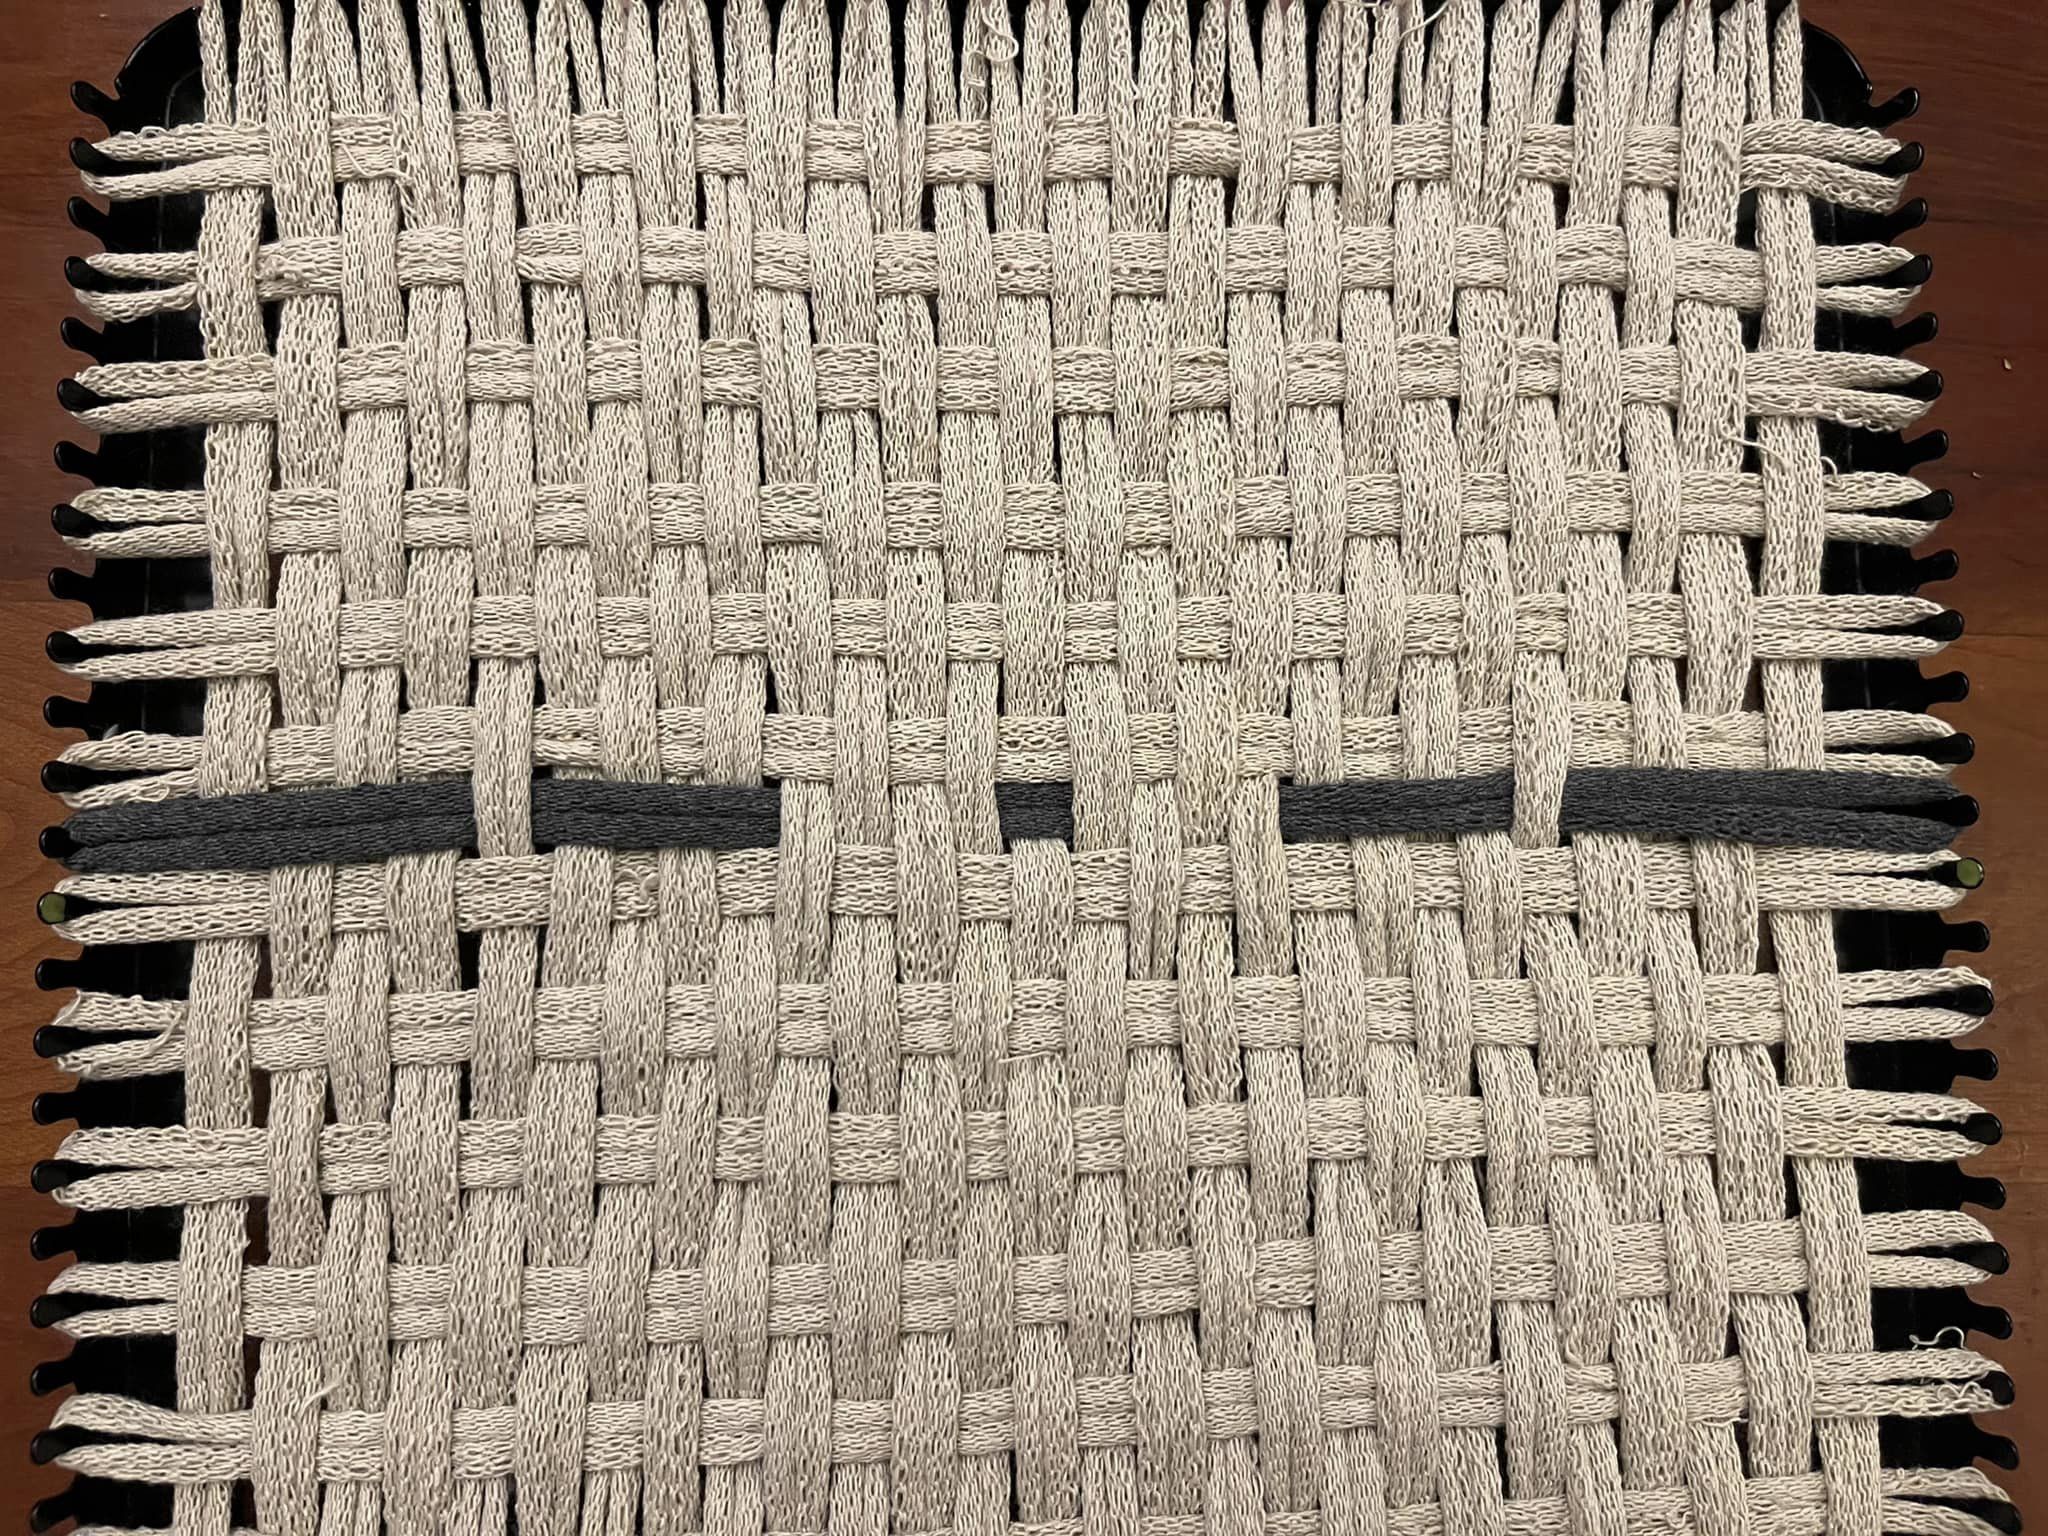
Okay, this is fun! Inspired by the background weave pattern on the “Outstanding in her field” potholder I wove this morning, I whipped up a sample with just that weave throughout. It’s a 1/2 basketweave, by which I mean over-2/under-2 across the row, then shift 2 columns to weave over-2/under-2 across the next row. (See photos on the loom, below.)
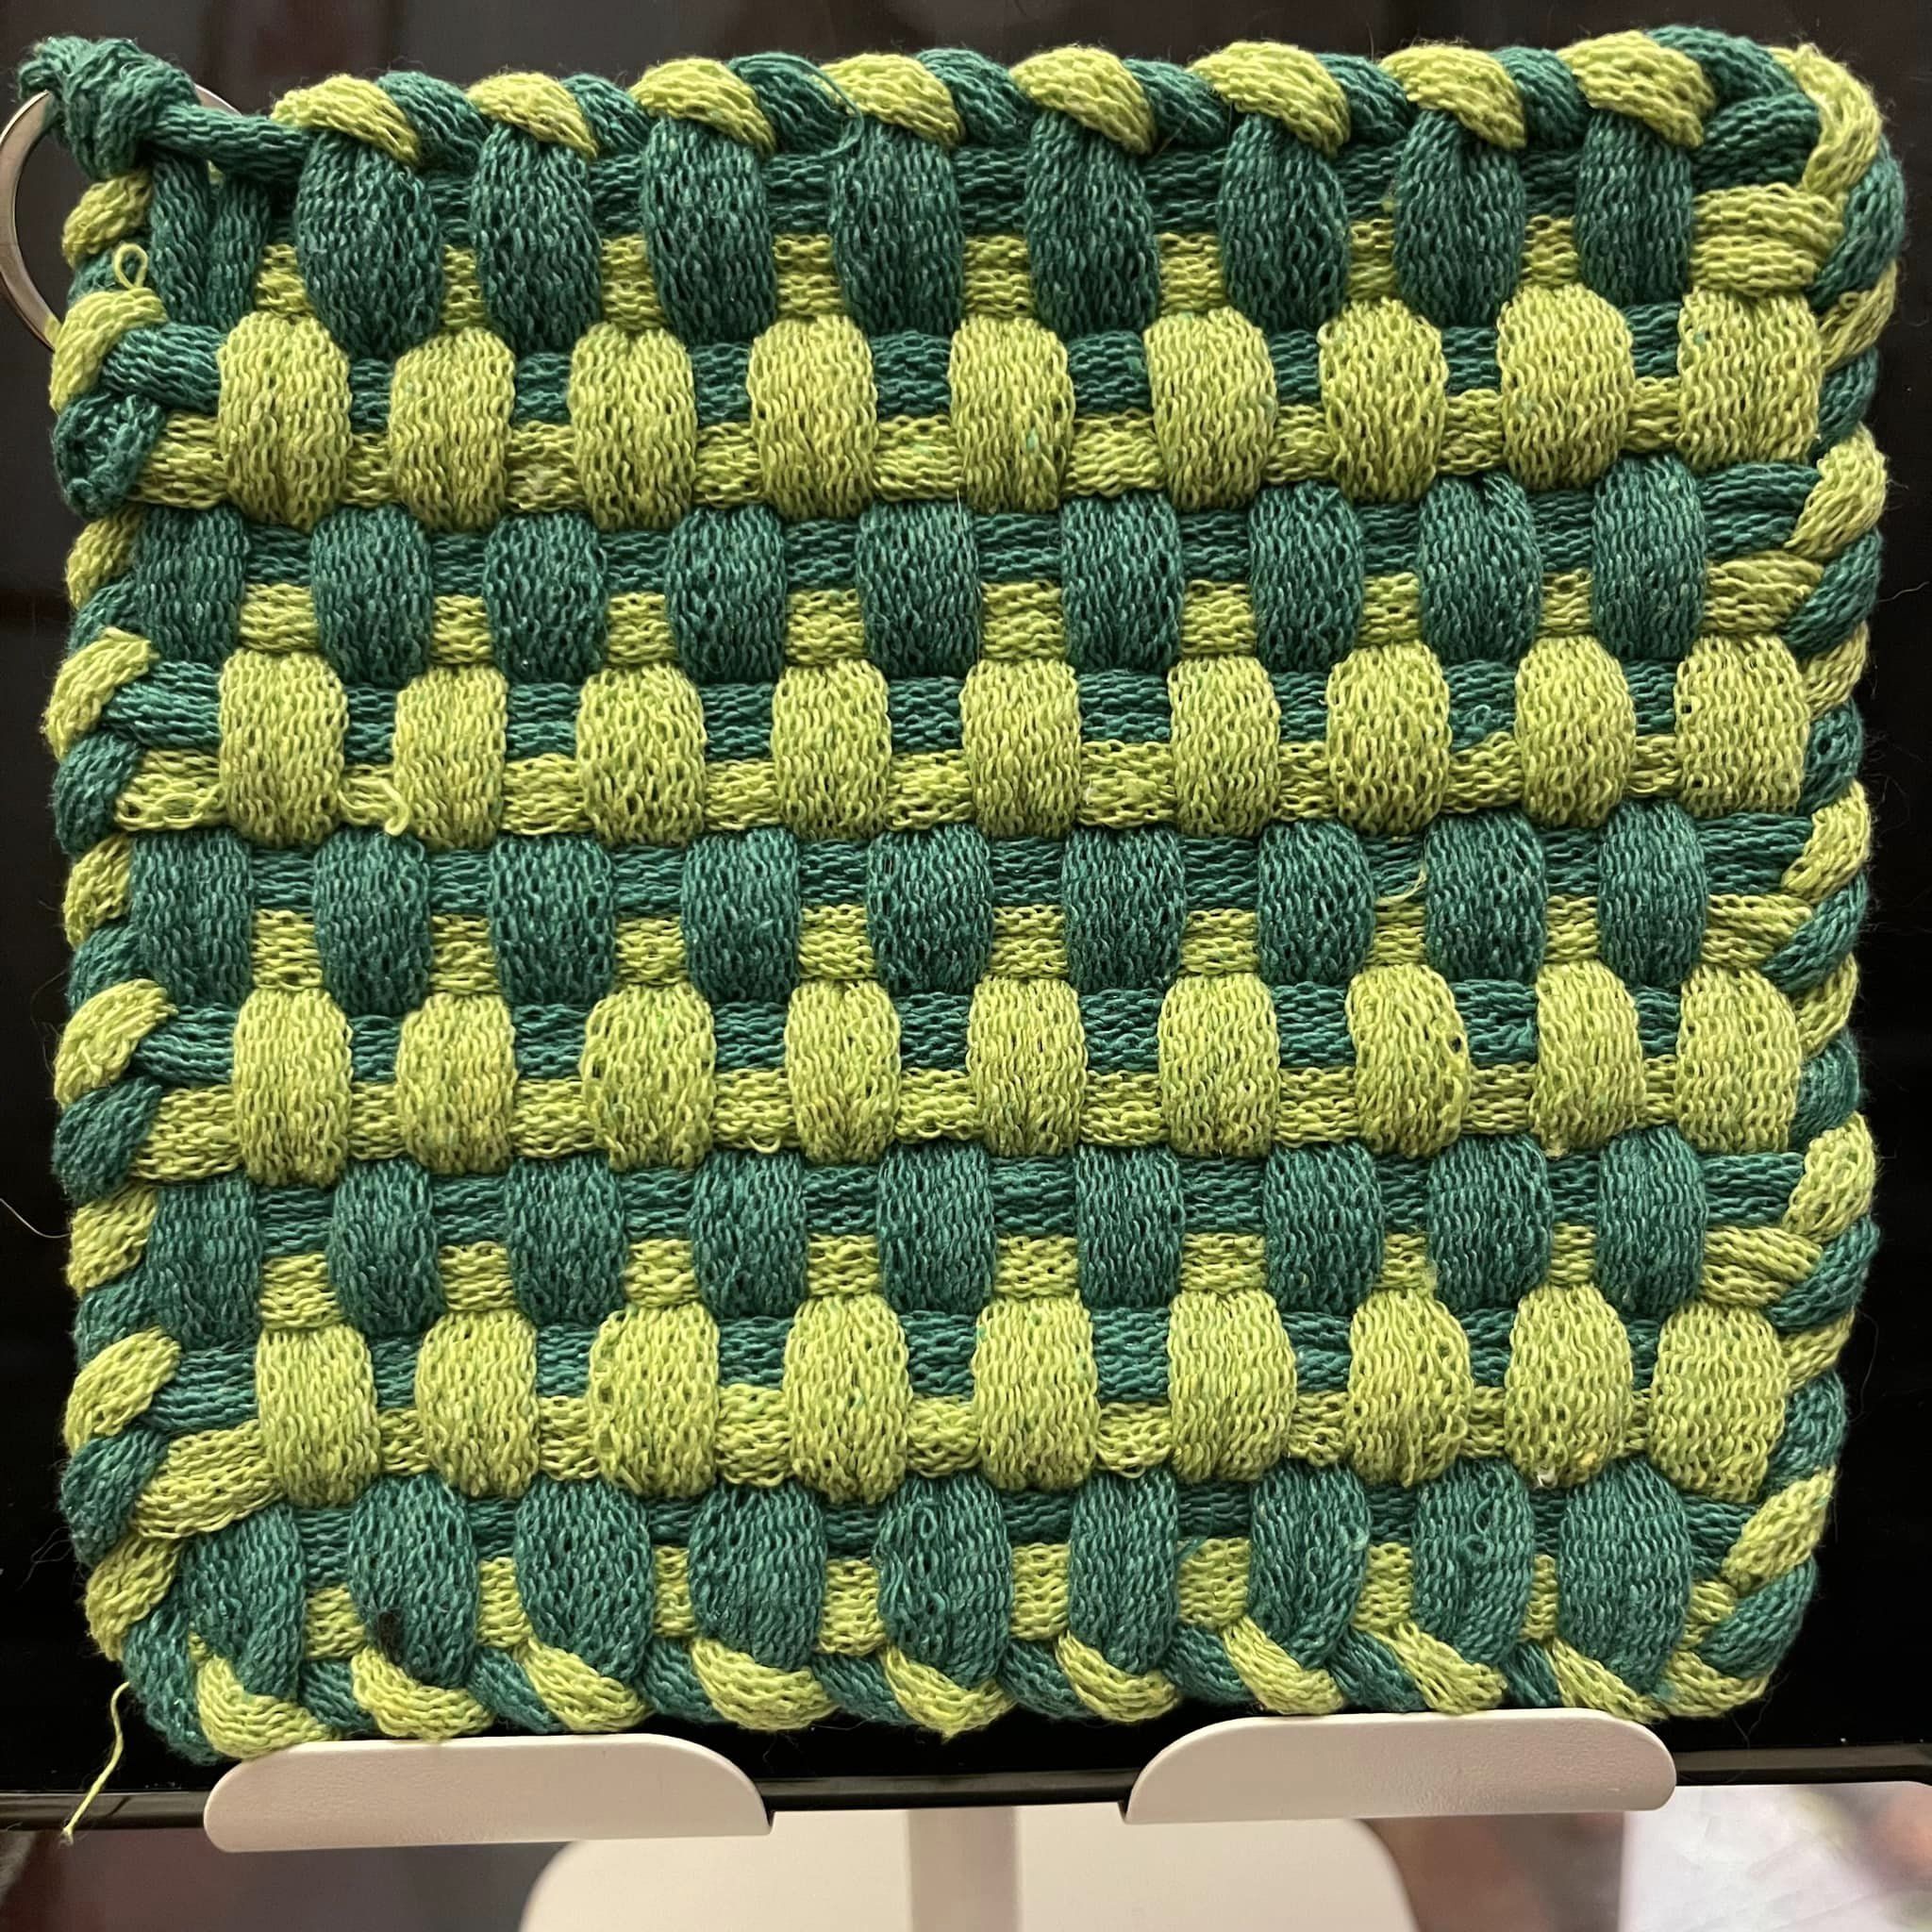
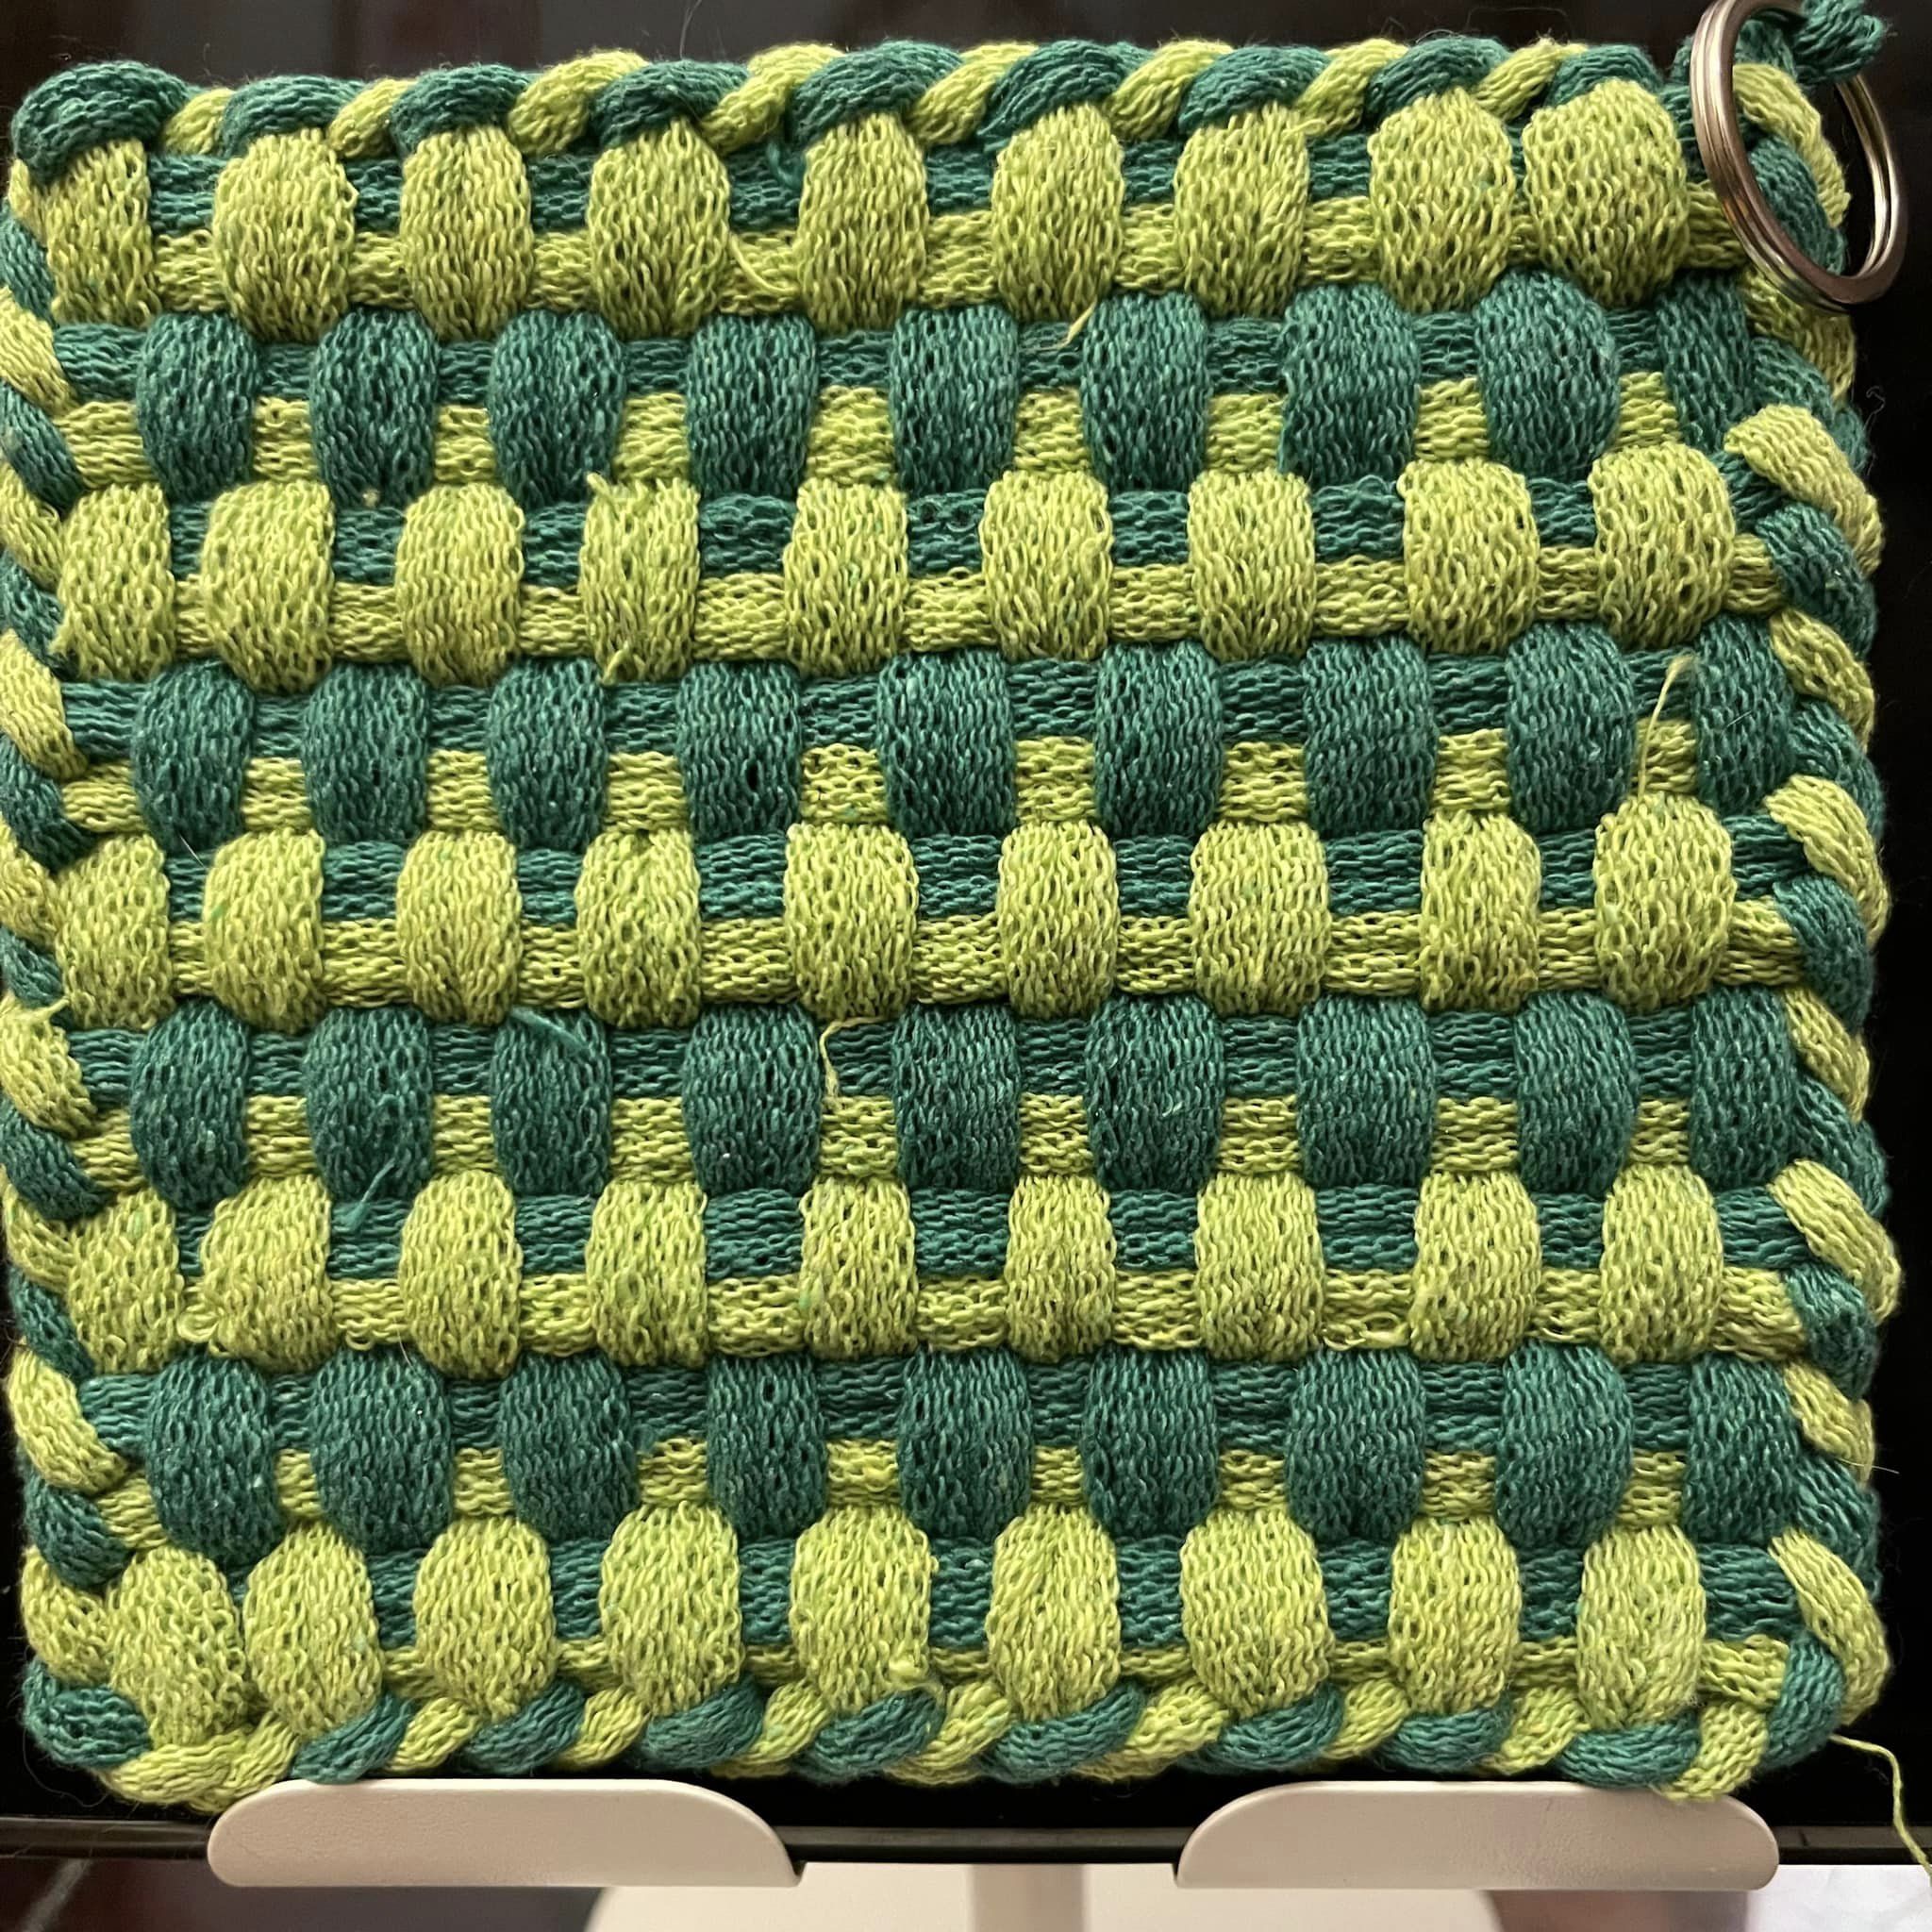
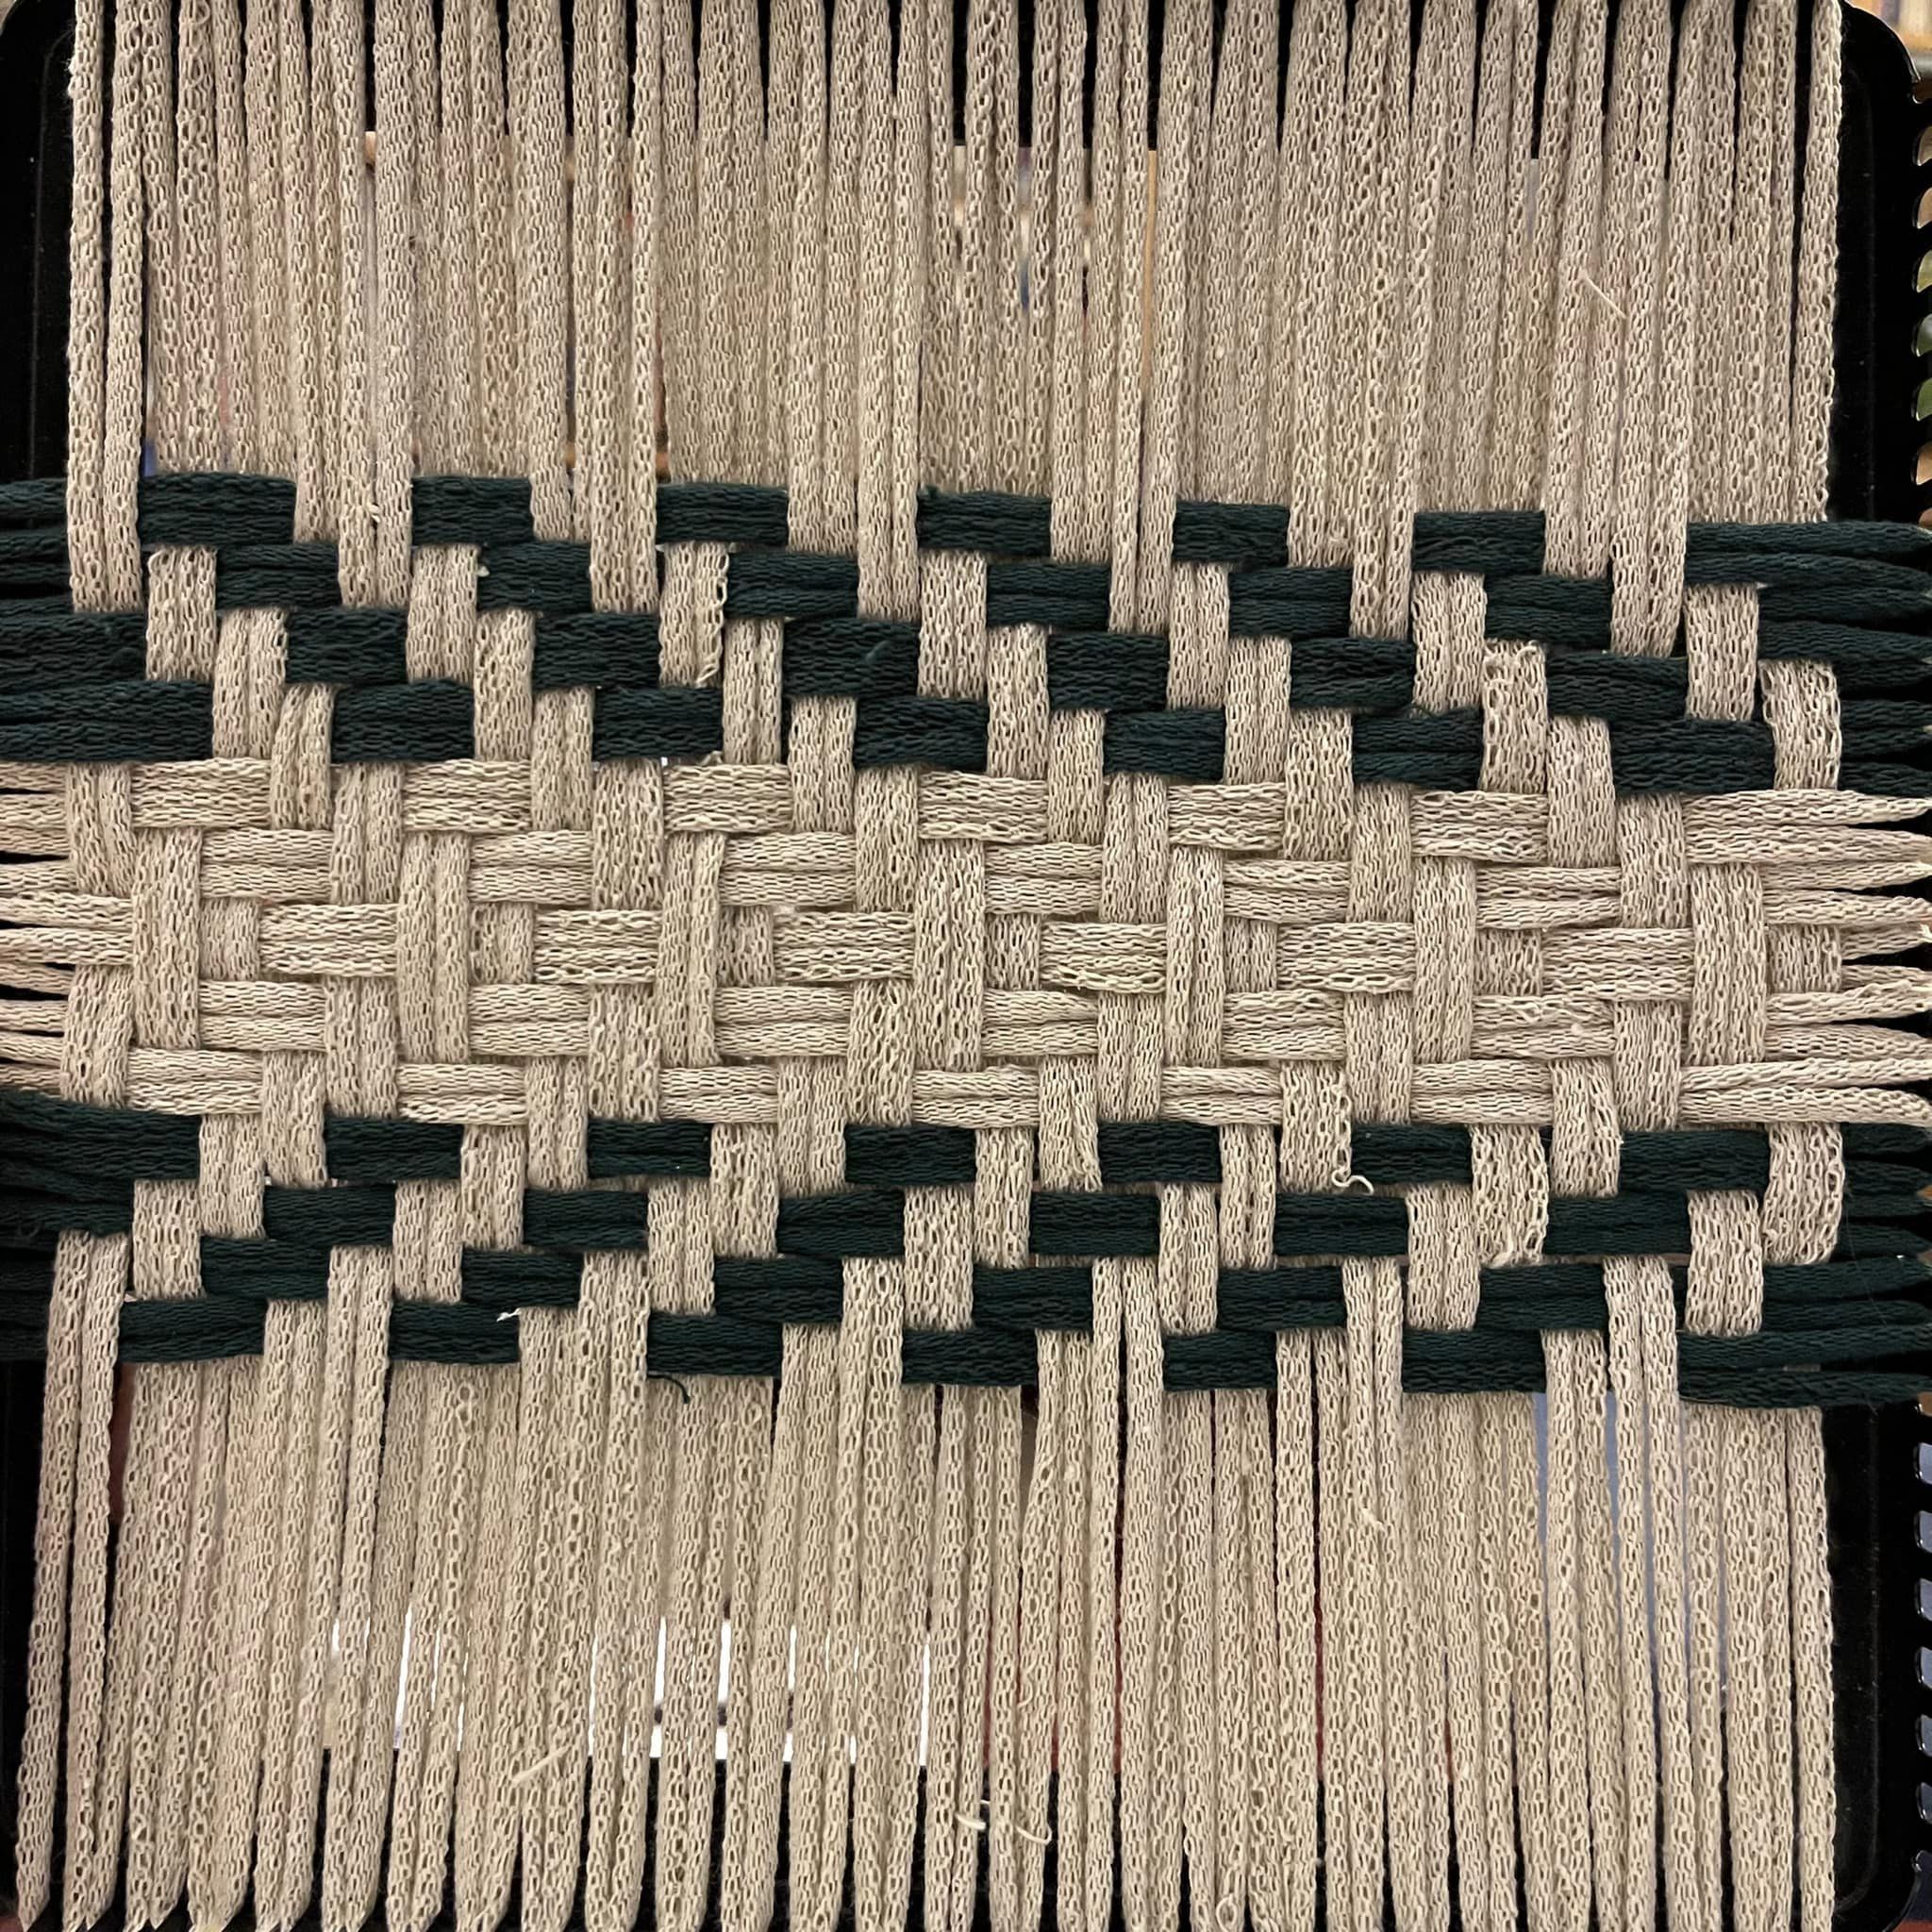
Love the “teeth” of the green & lime potholder, which uses a 1/1 alternating color sequence for both rows and columns.
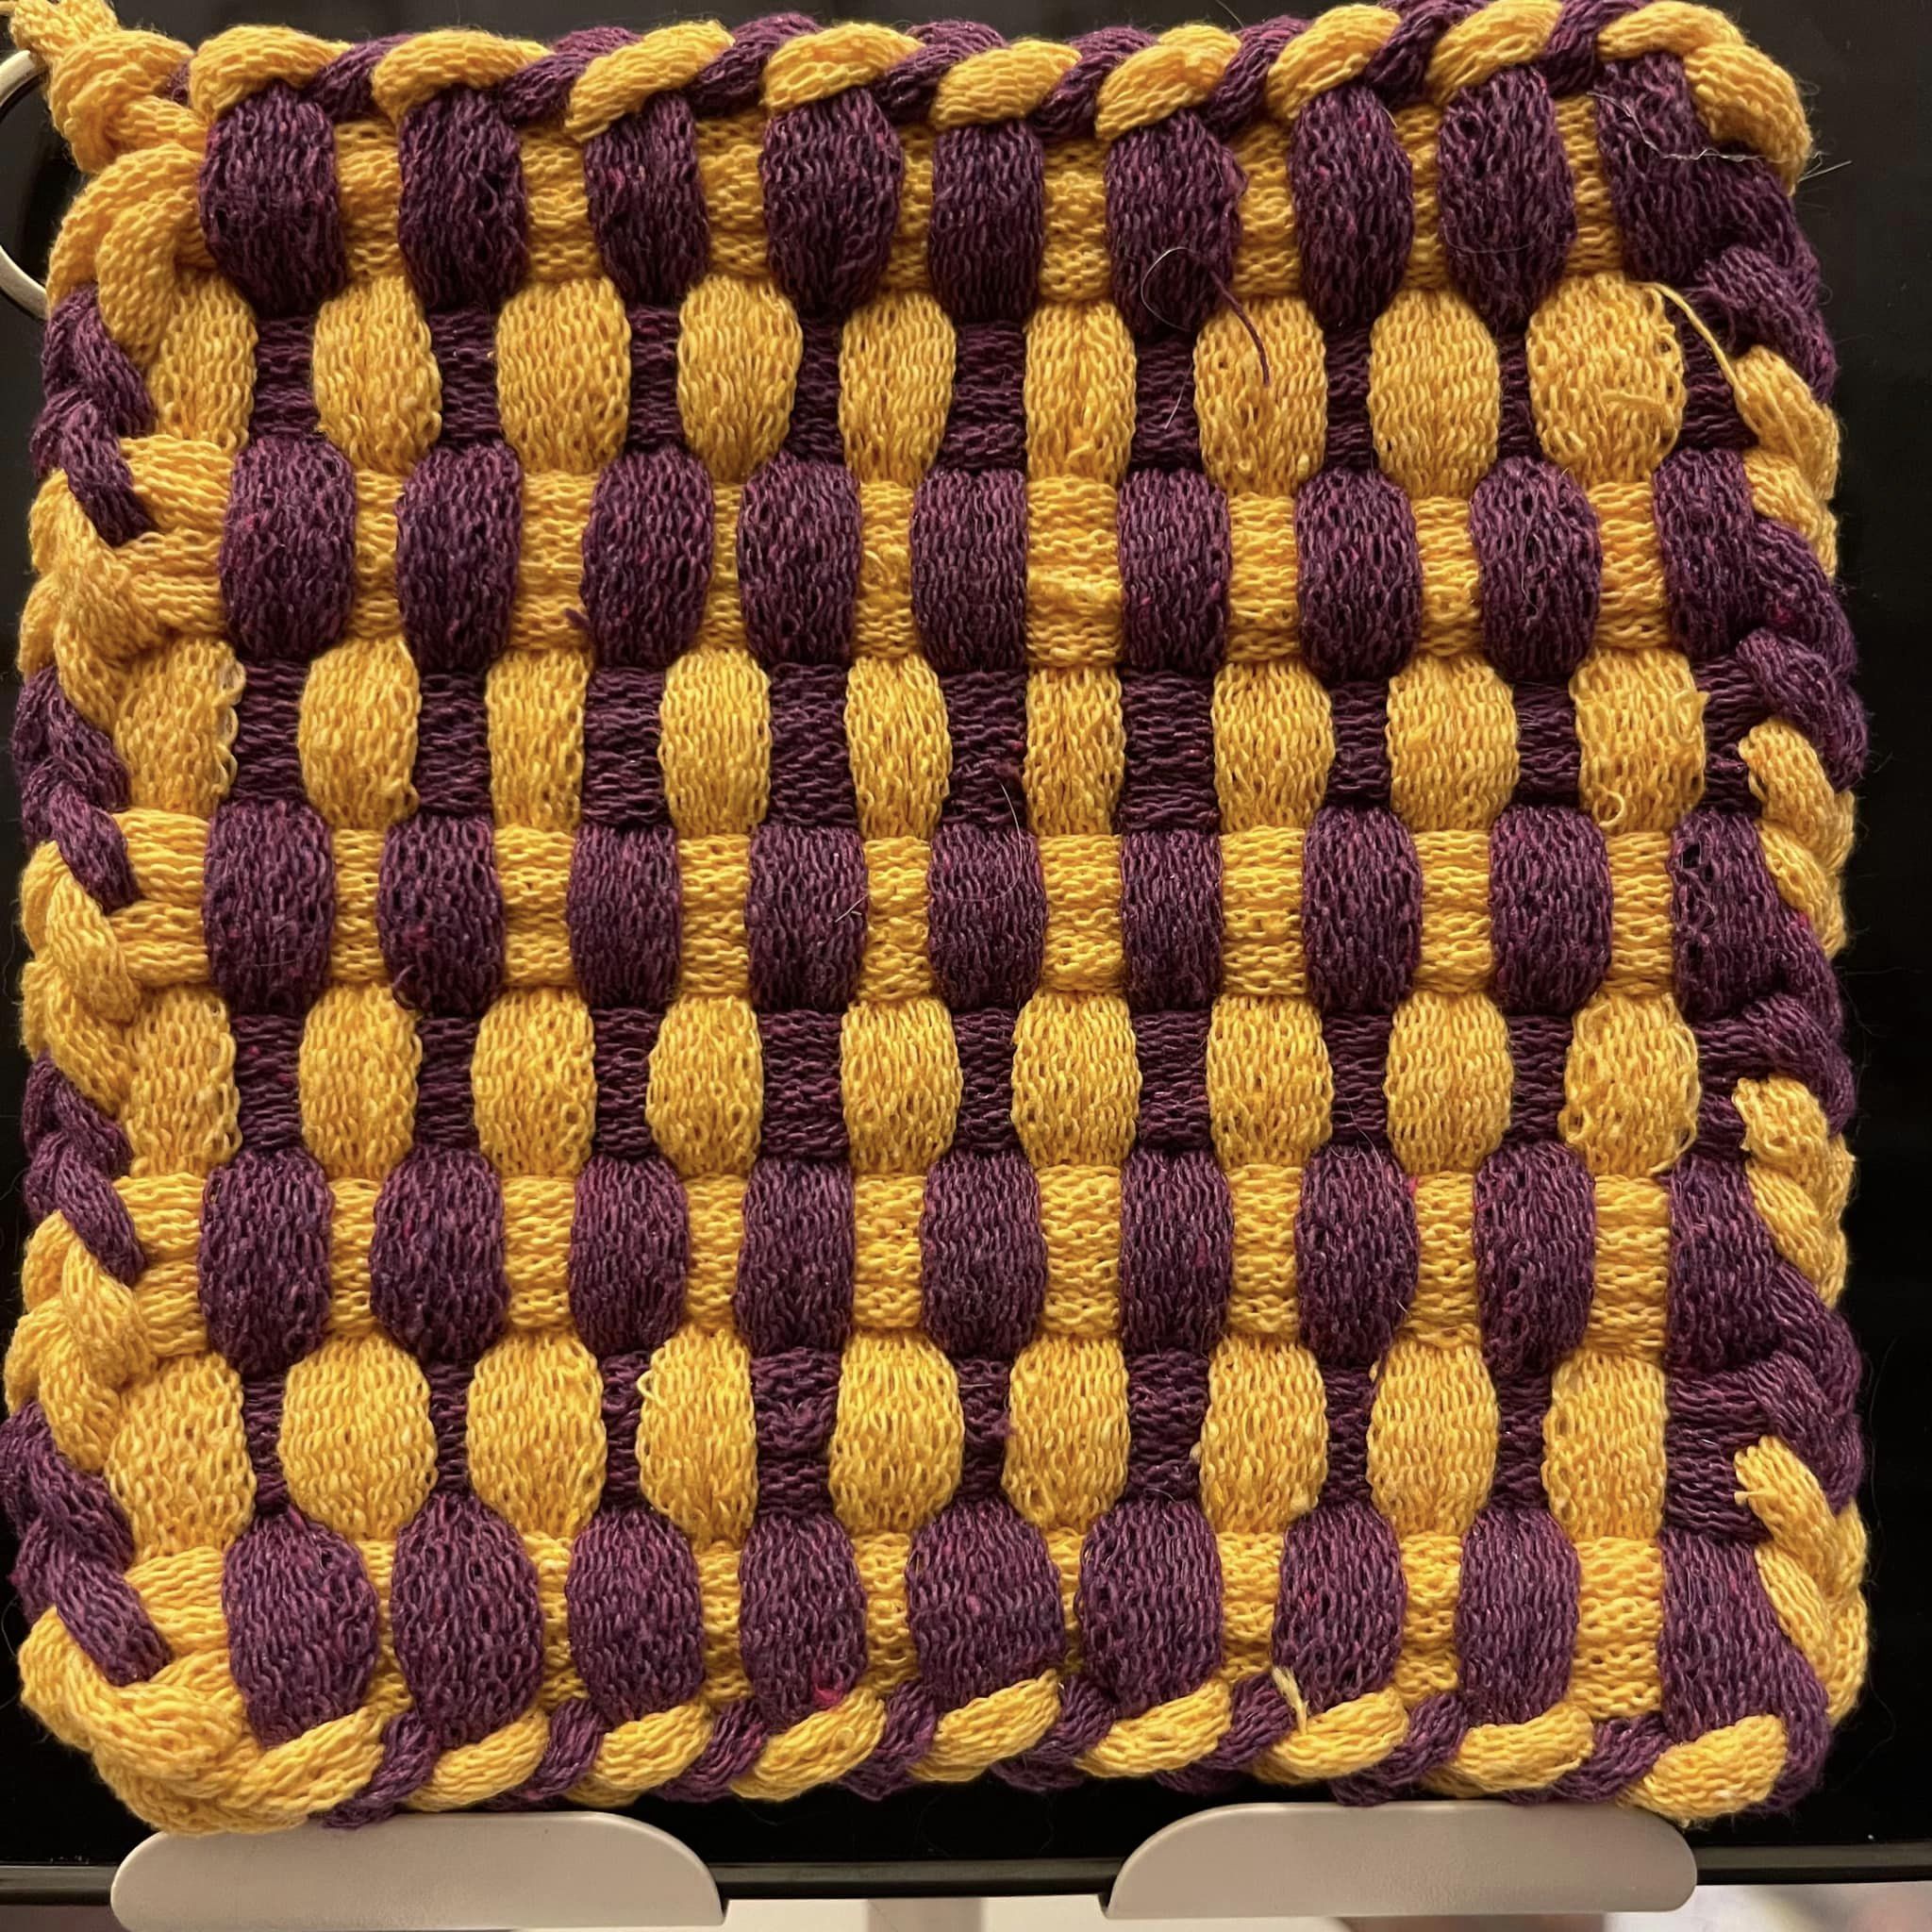
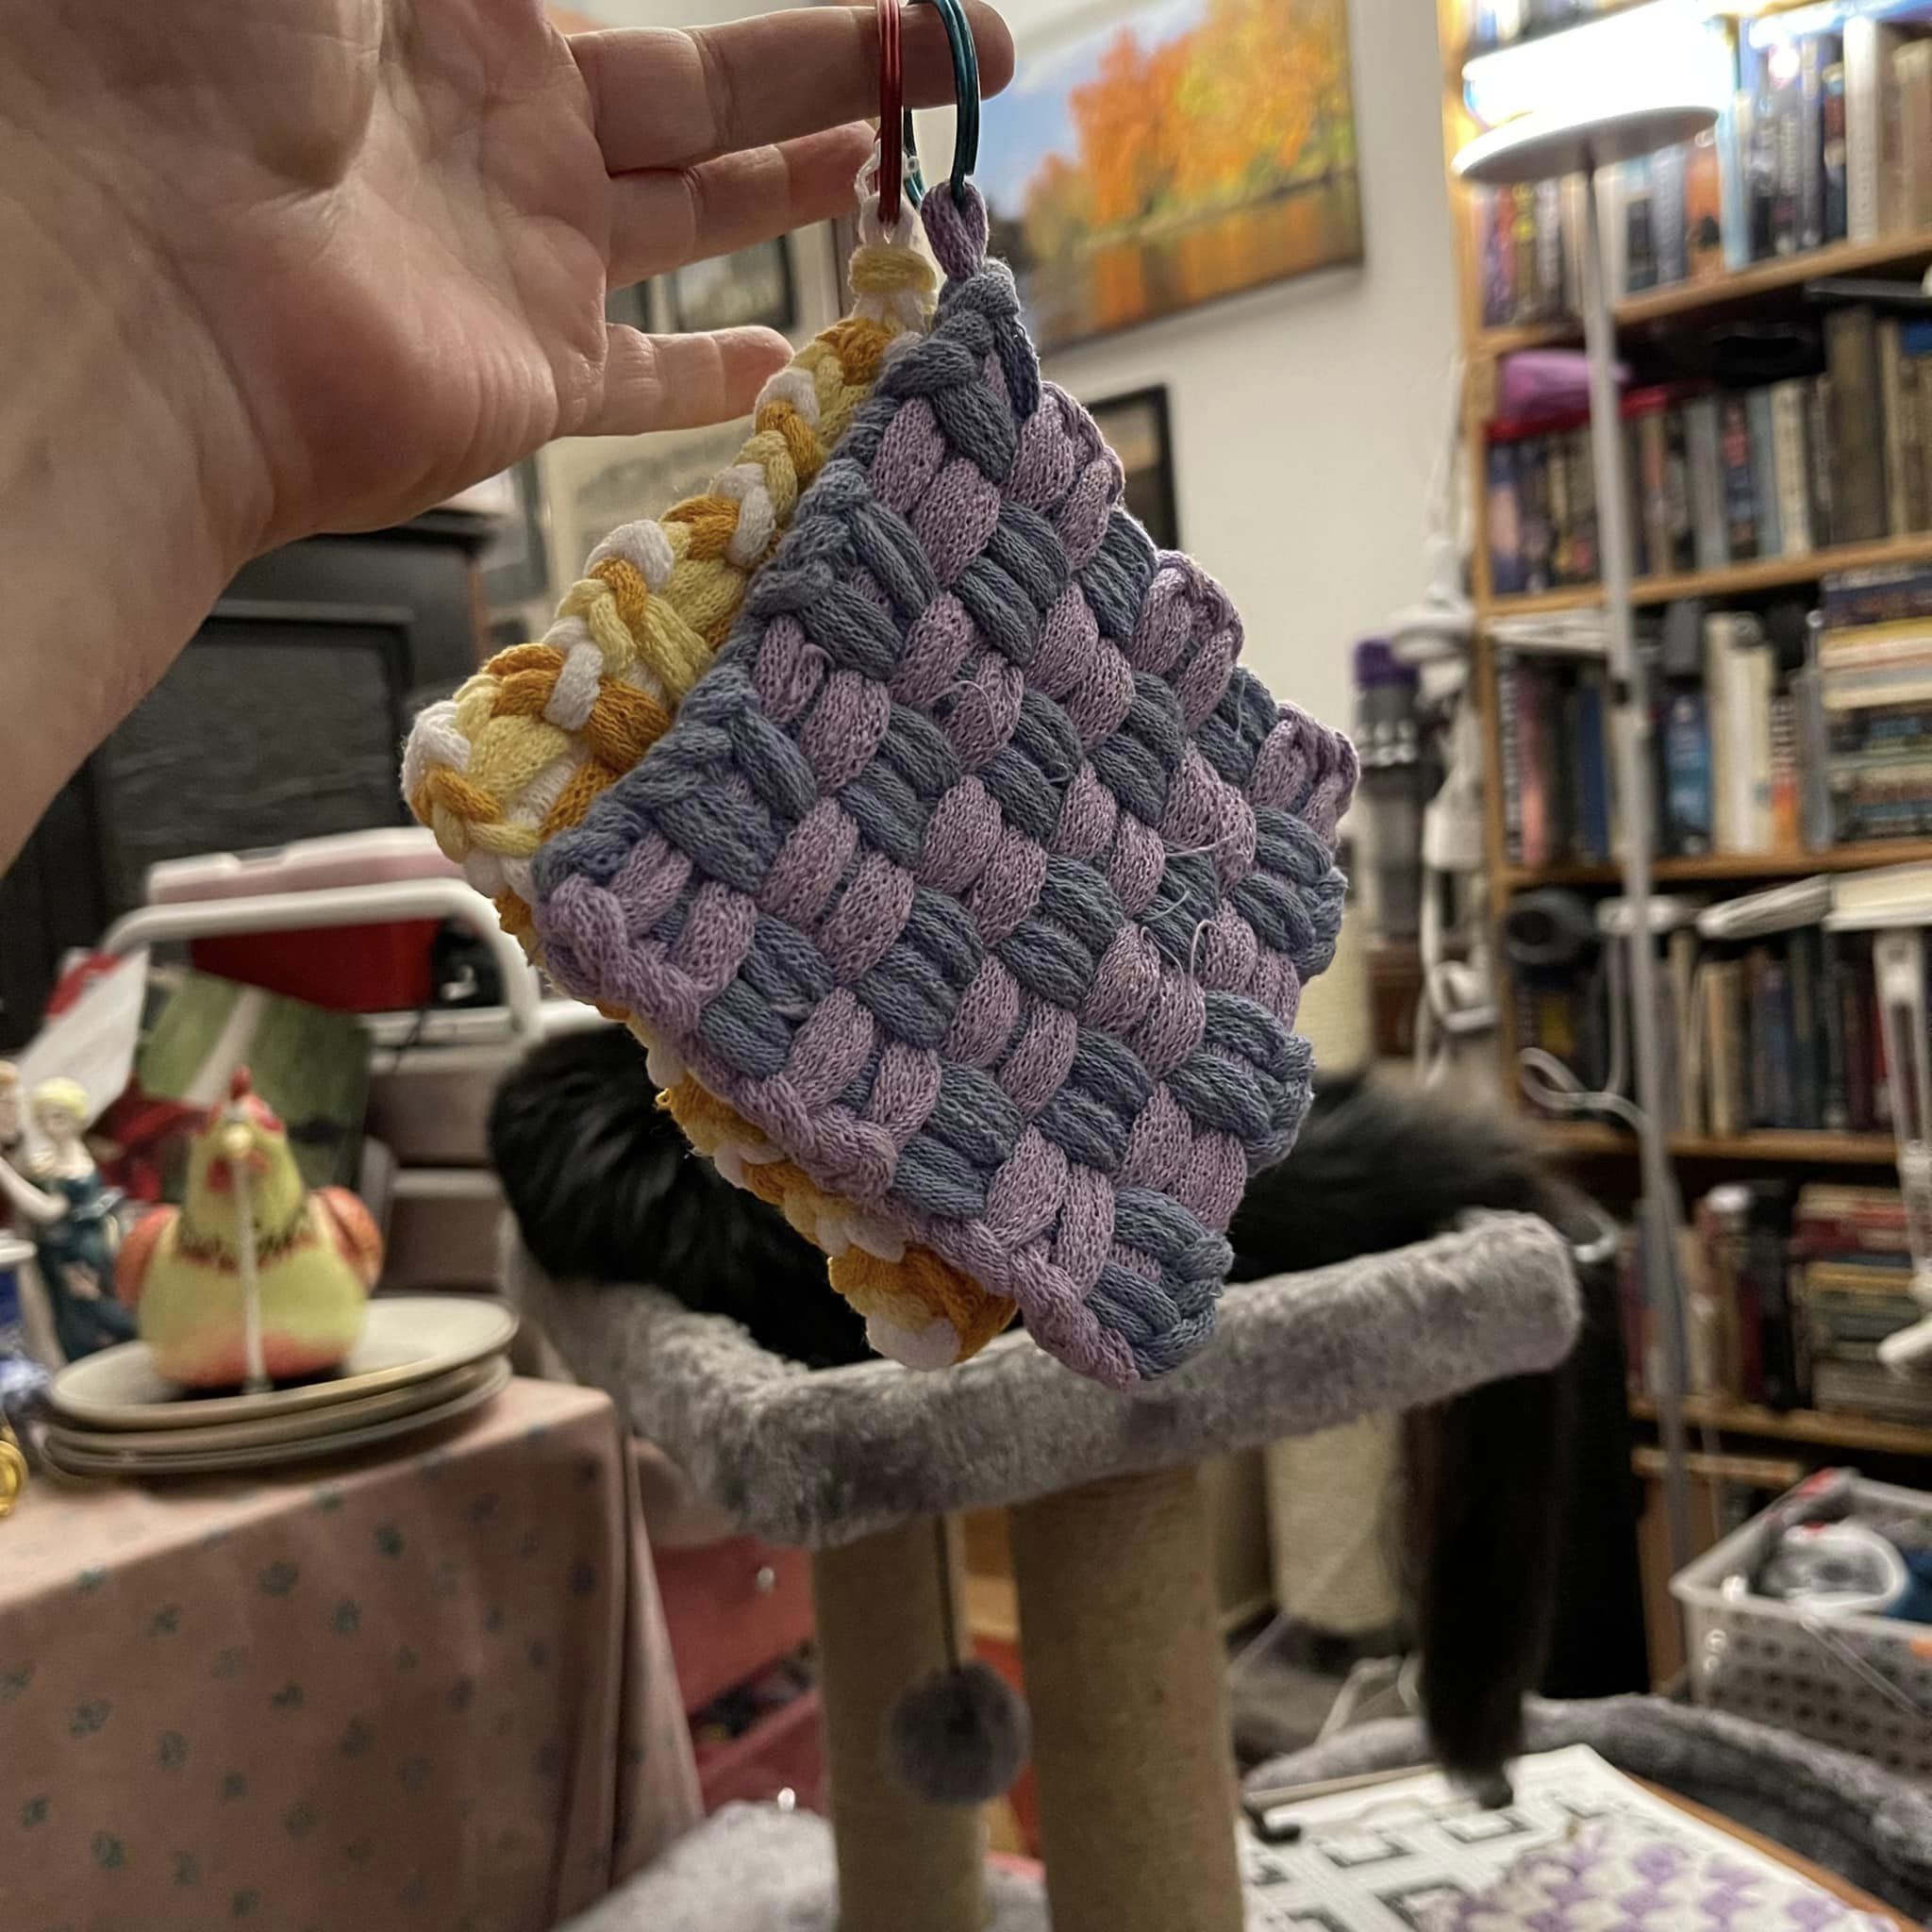
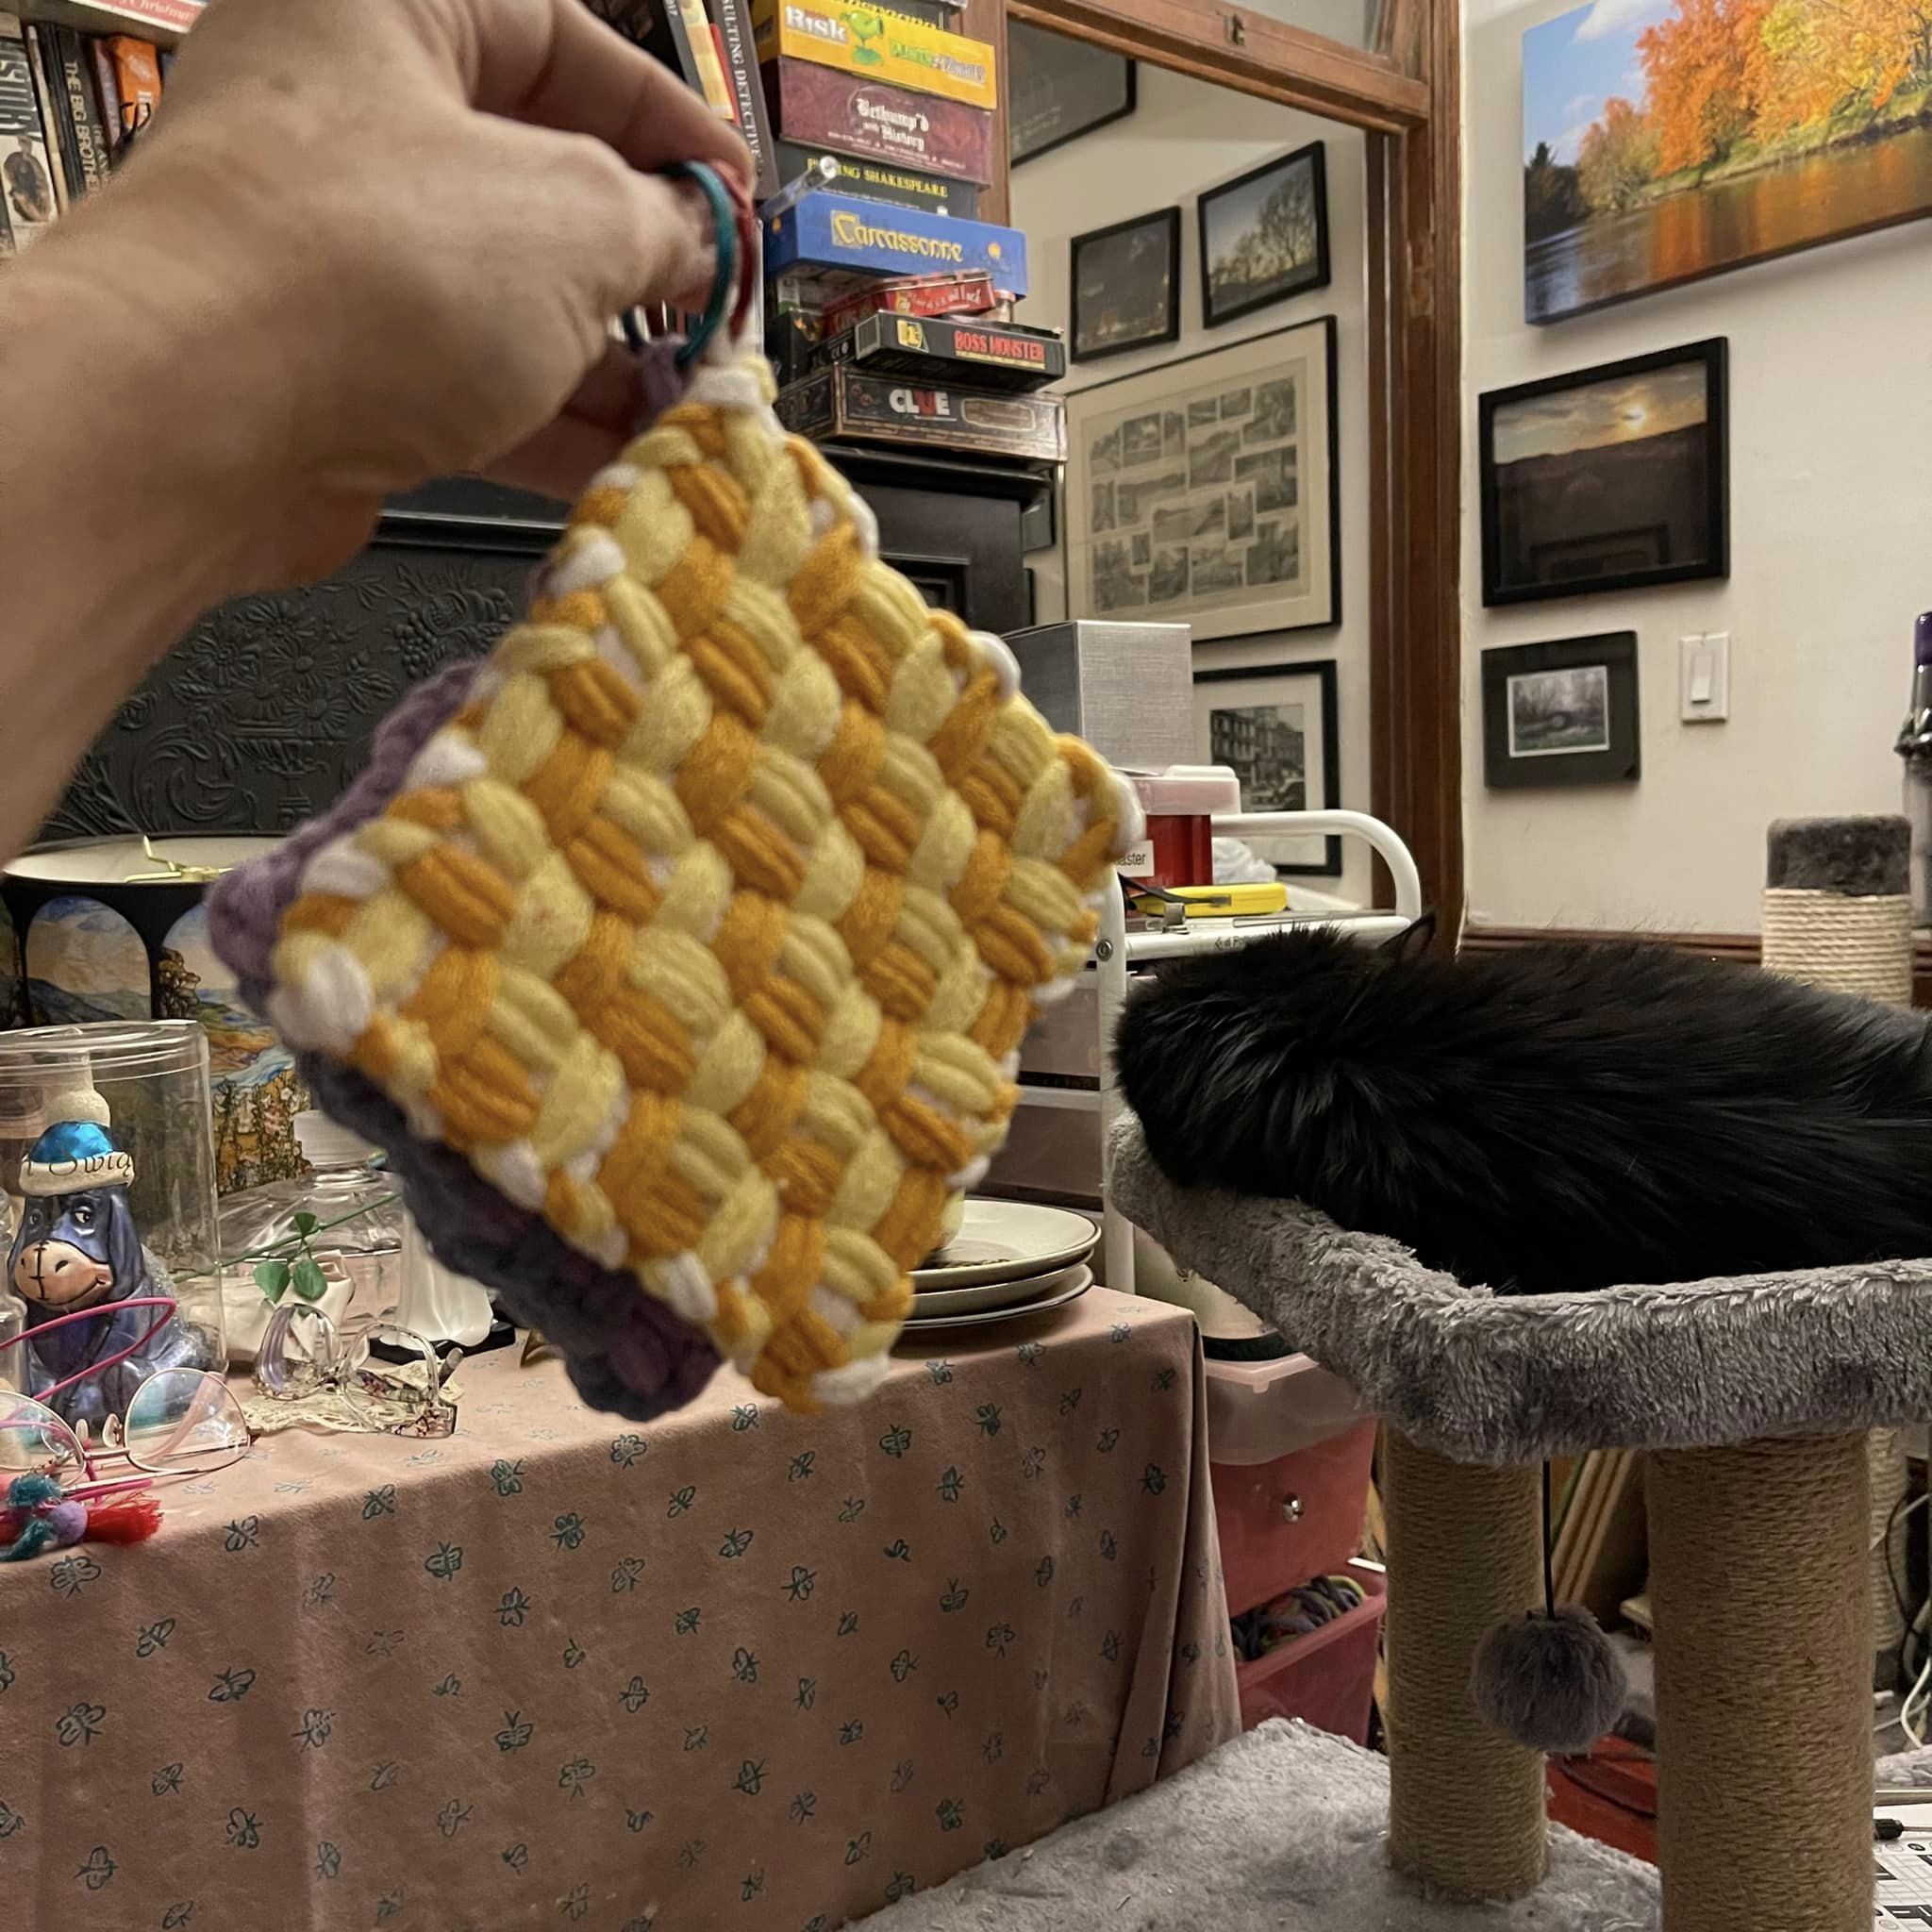
The yellow & plum potholder is the exact same weave pattern using a threading pattern alternating colors 2/2 for columns and 1/1 for rows. (That will make more sense when you look at the on-loom photo, I promise!)
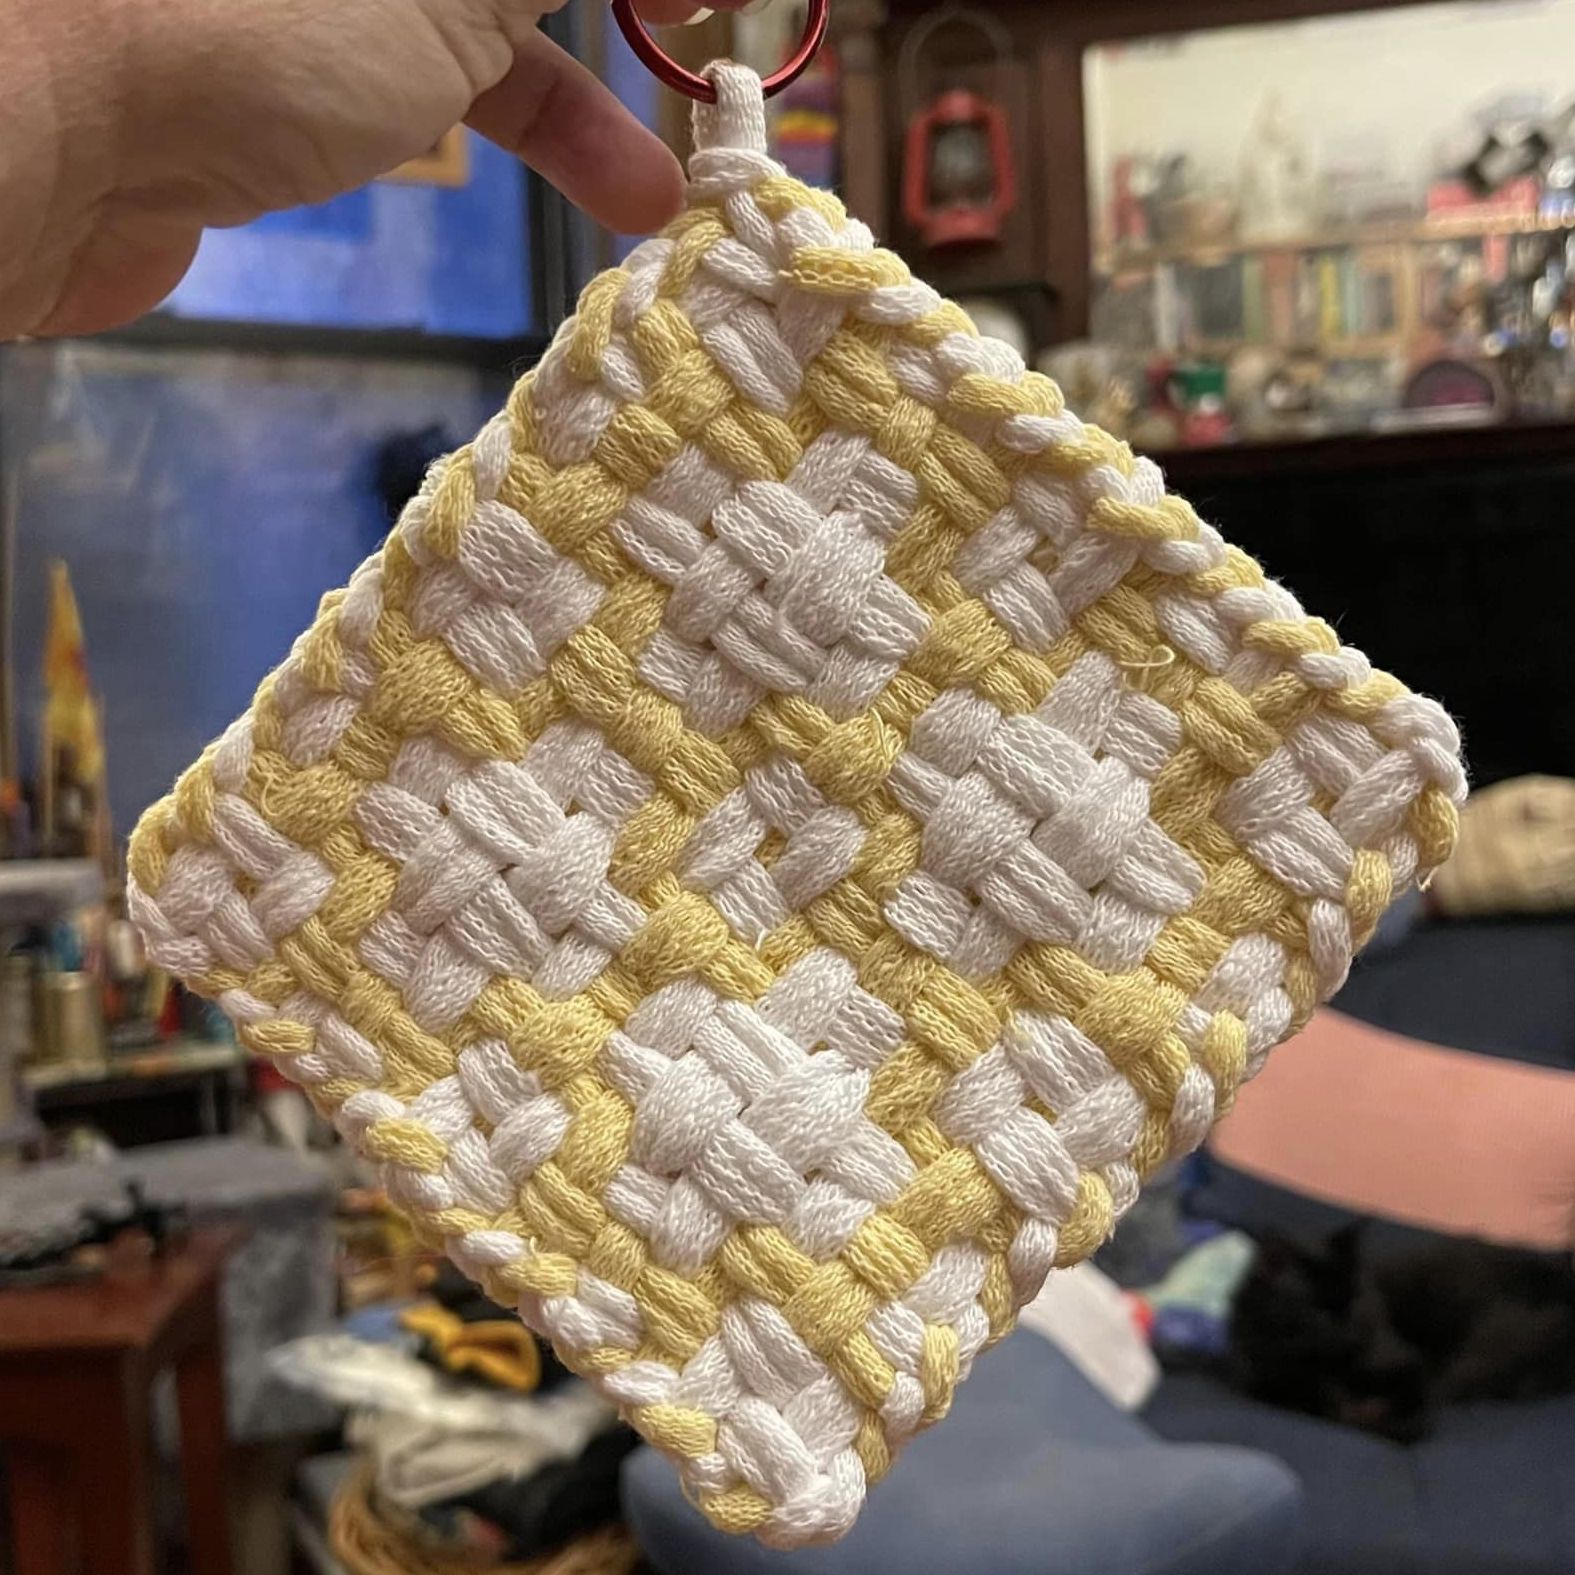
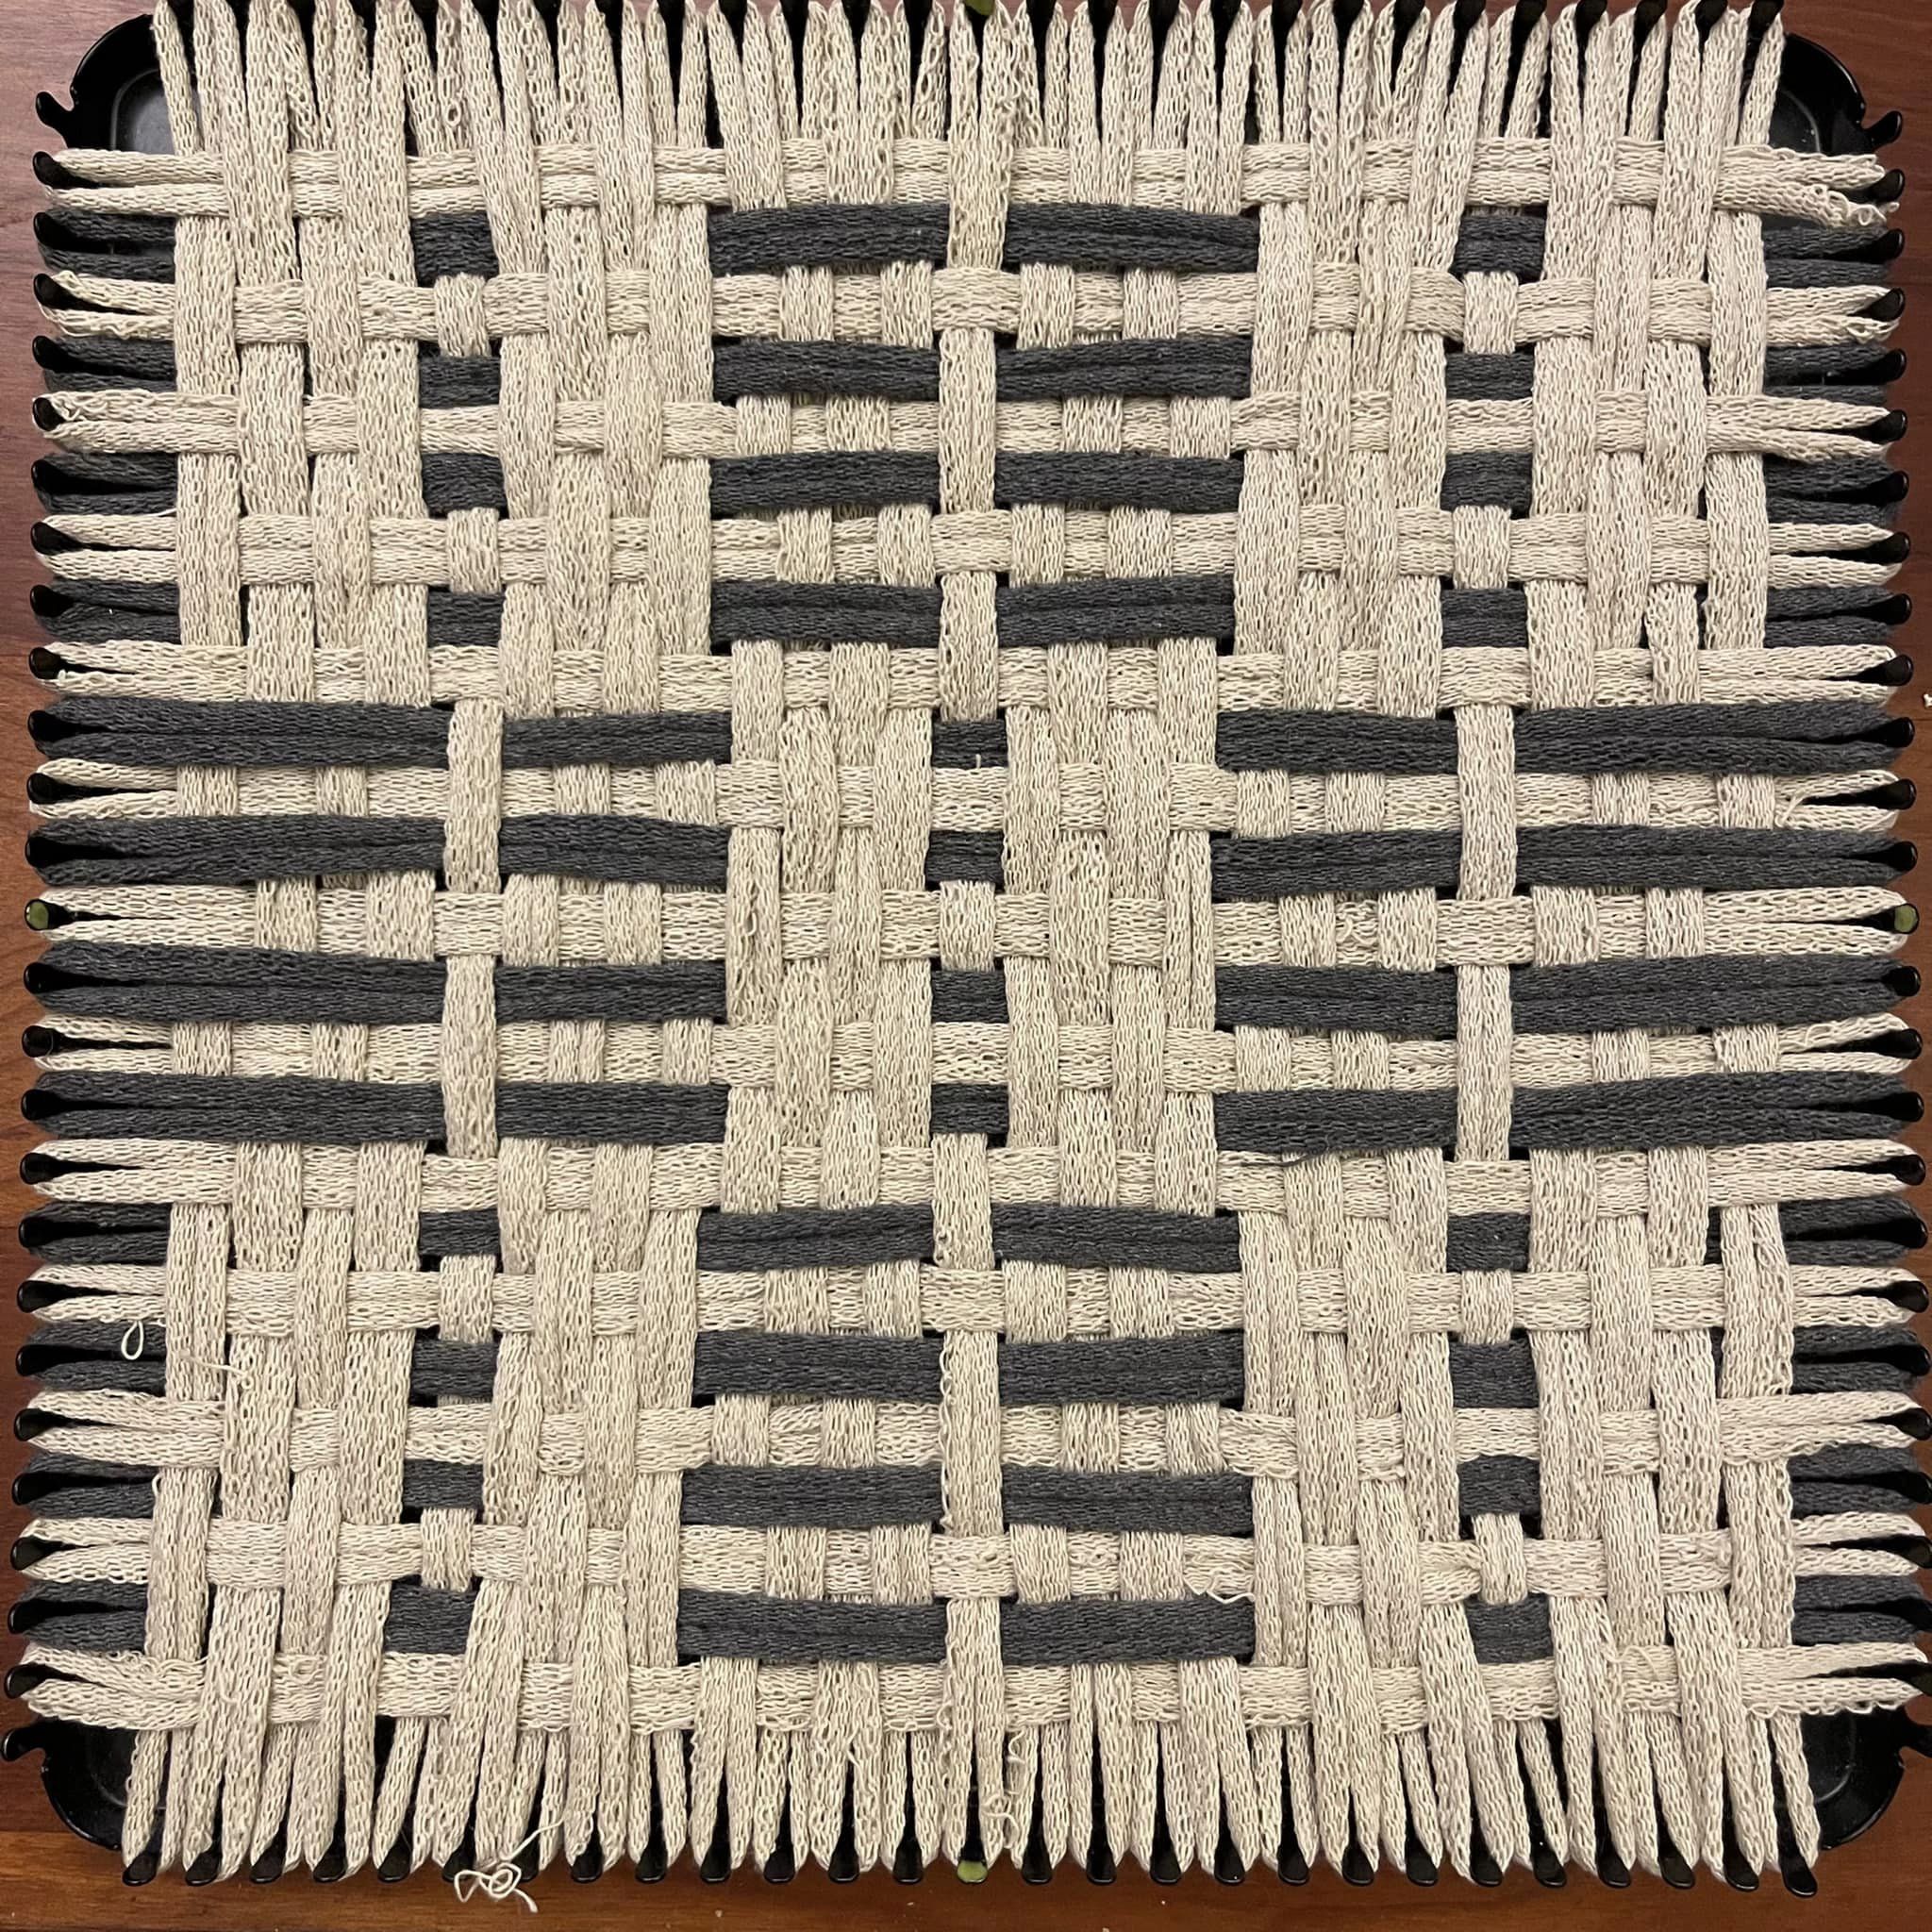
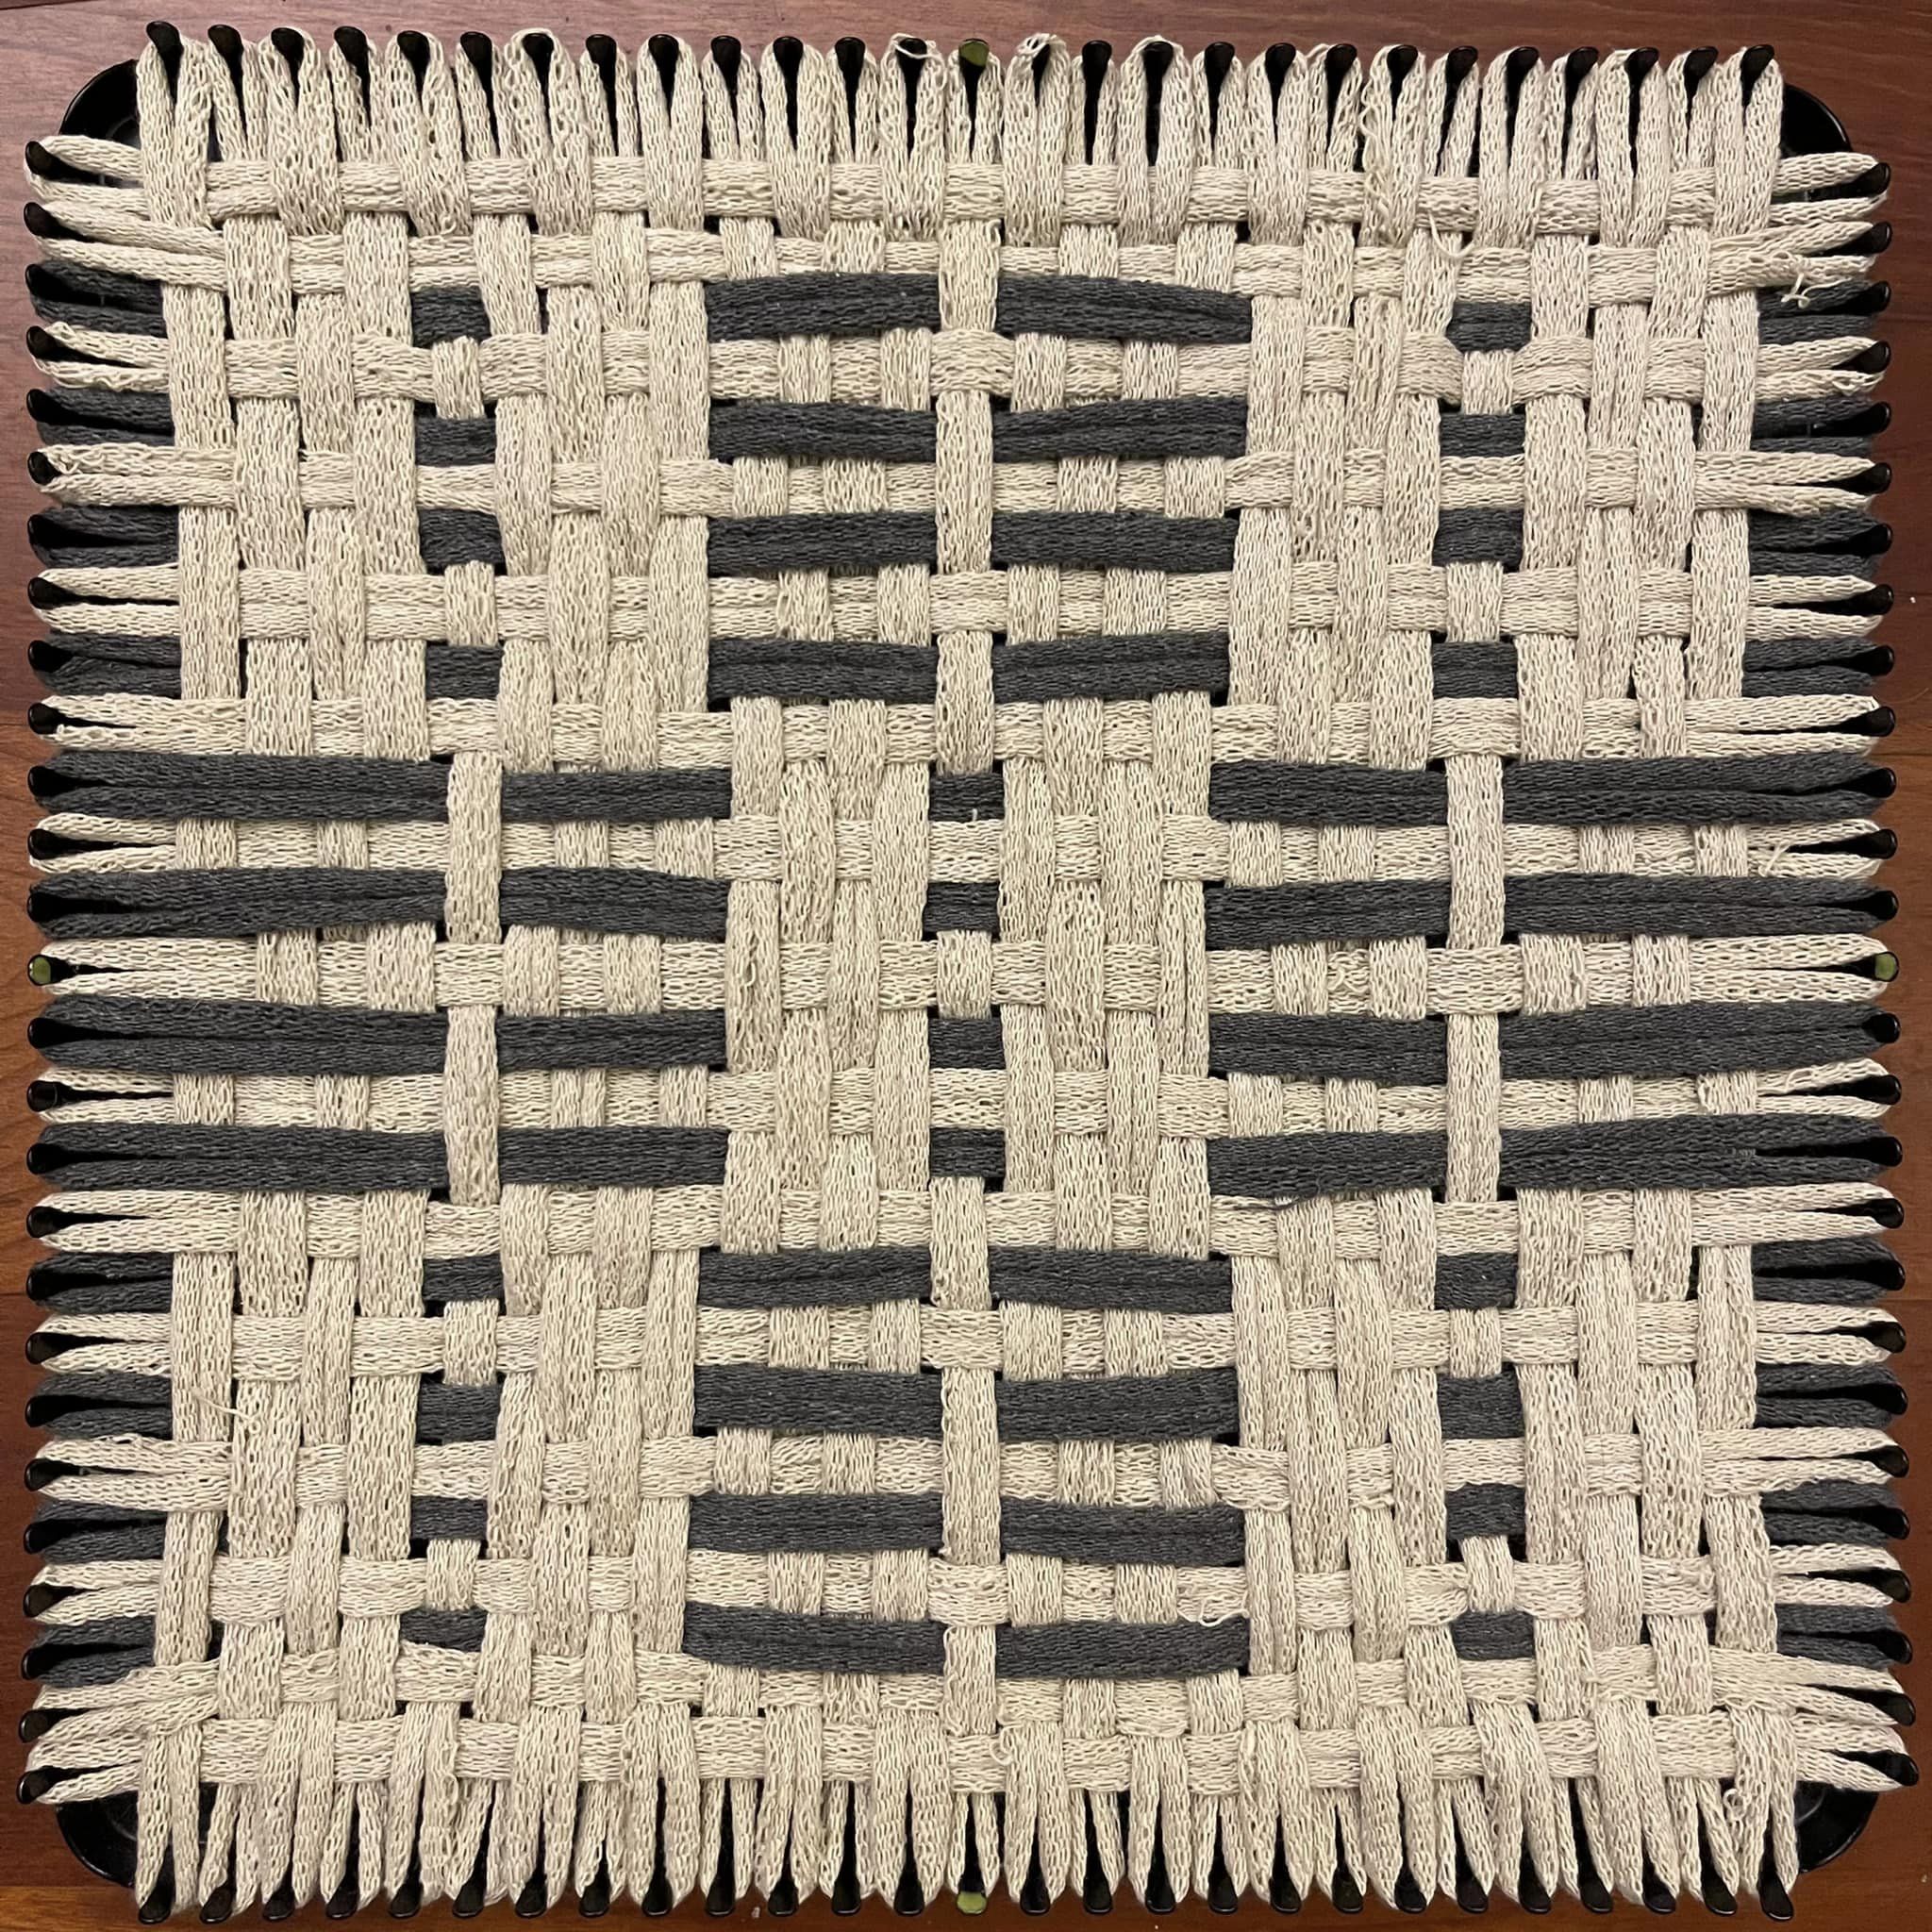
The outcome is distinctly ribbed and gently textured, but flat overall with no significant lumps. Very bendy, with little skew.
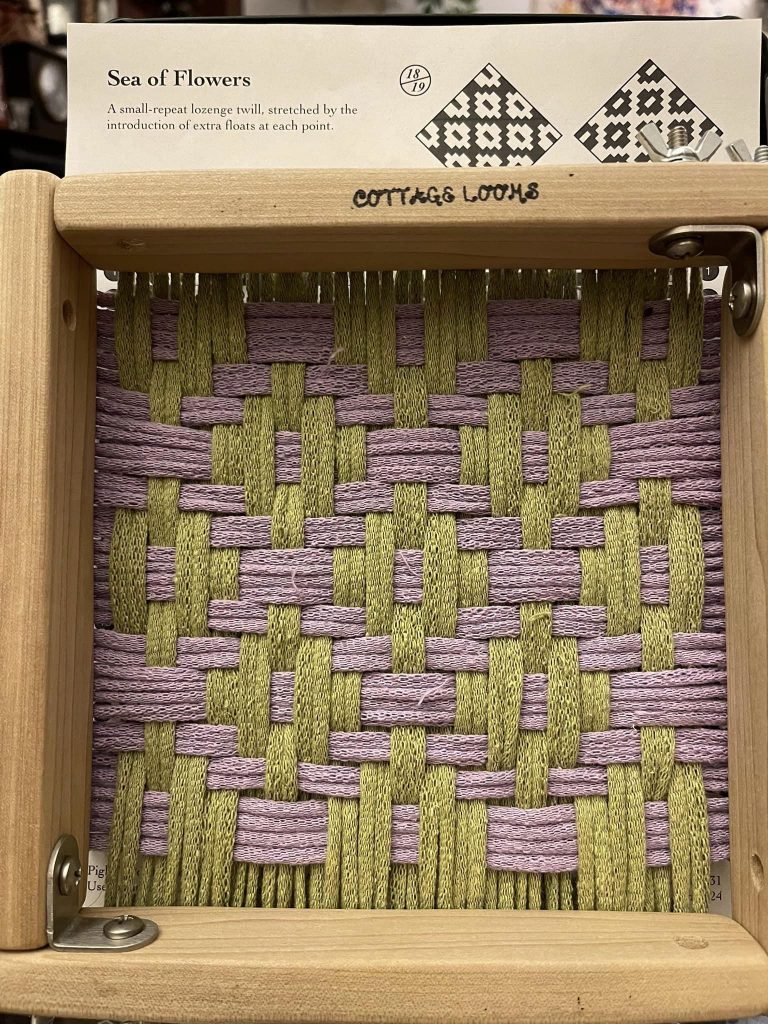
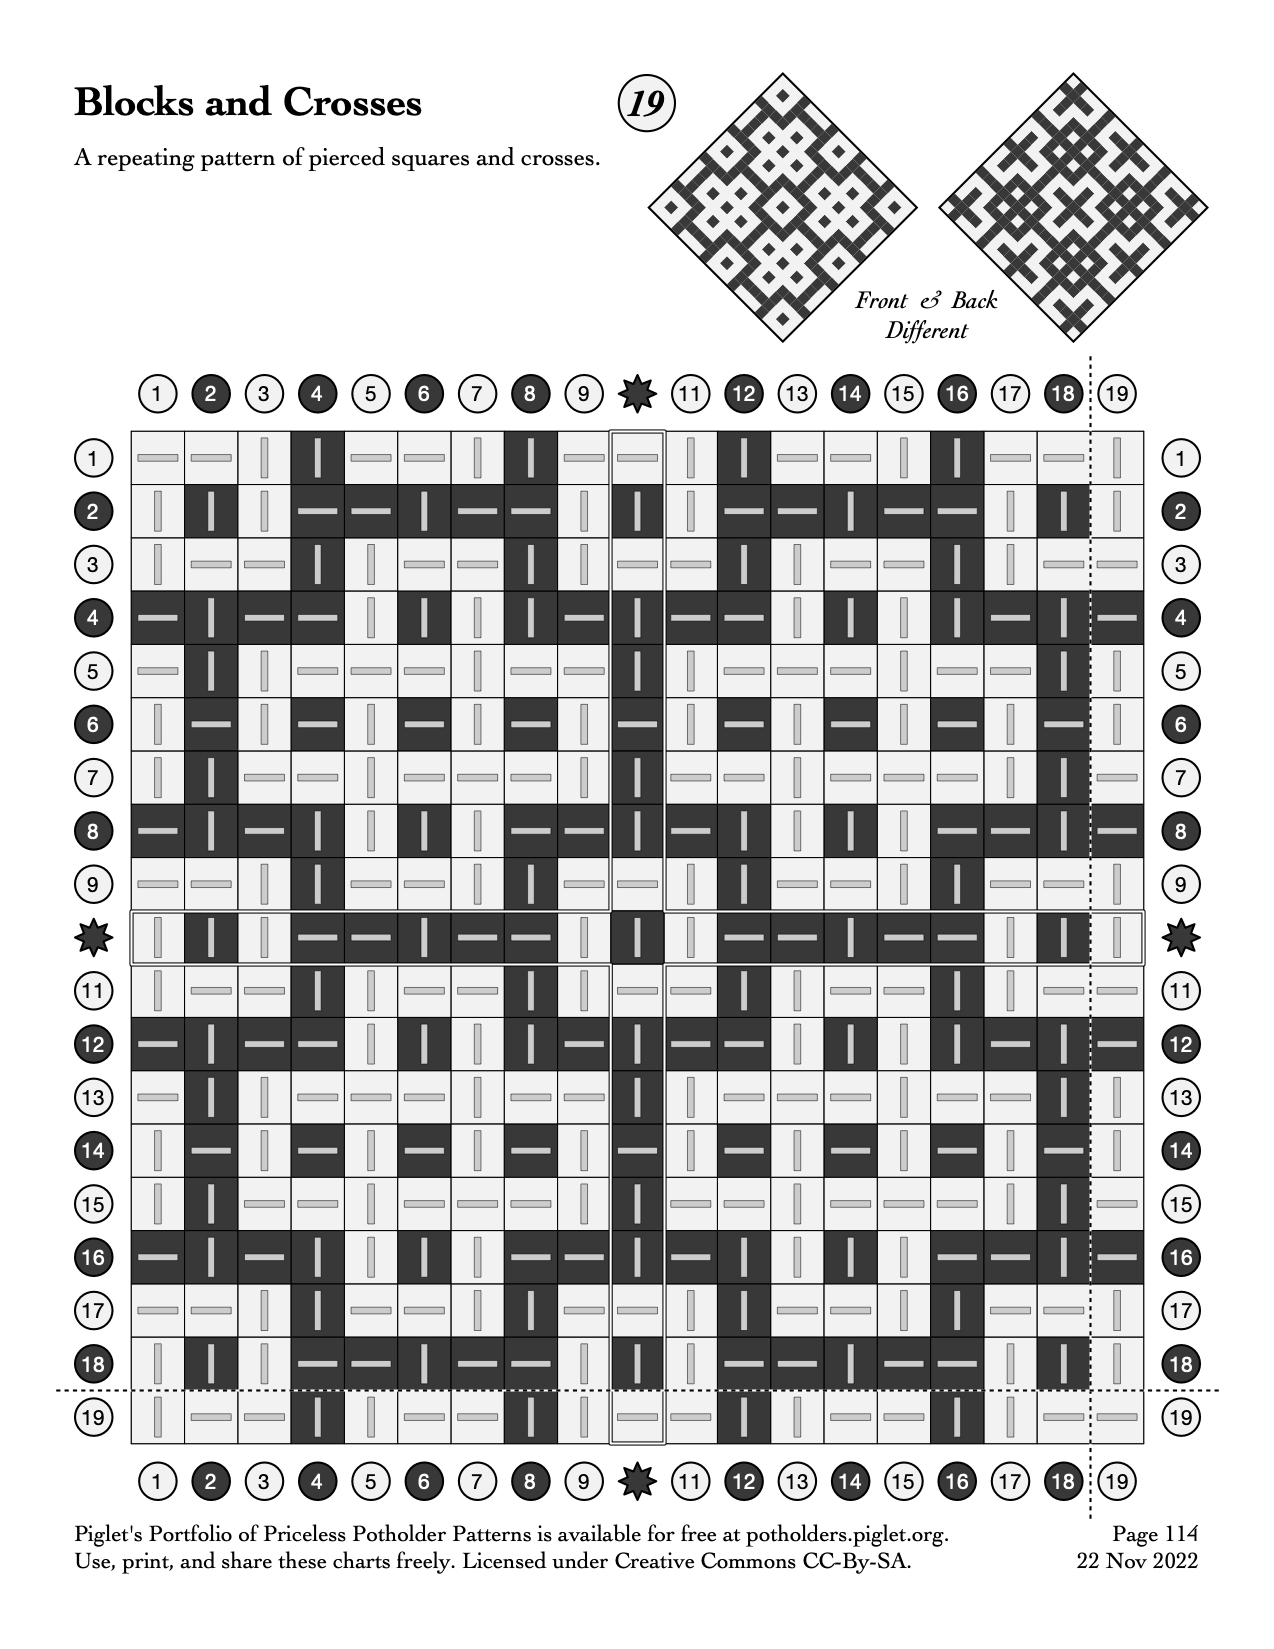
Oh wow, check out what we stumbled across! Exploring the diamond twill space, Matthew was inspired to try lengthening the cross floats, to emphasize the little flowers shapes that the smallest version makes. We got another magic fabric! This is a very striking result with a flat(ter) side and a bumpy(ier) side, one of which is very squares, and the other very diamonds.
Flower Basket, we are calling it. As charted, it is 18 columns, 19 rows, for pattern symmetry. It works up *very* quickly, with only 2 pattern rows, one of which has very few over/unders (4-floats across its length).
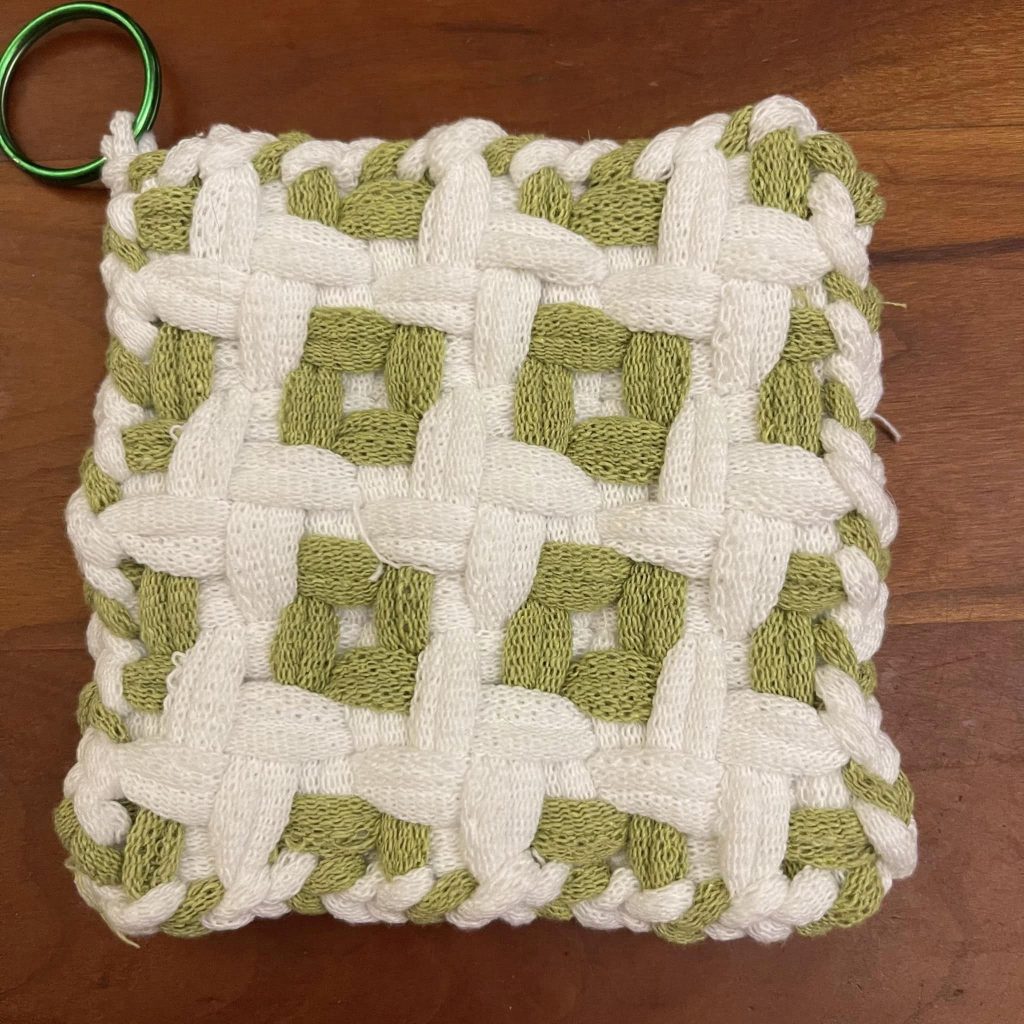
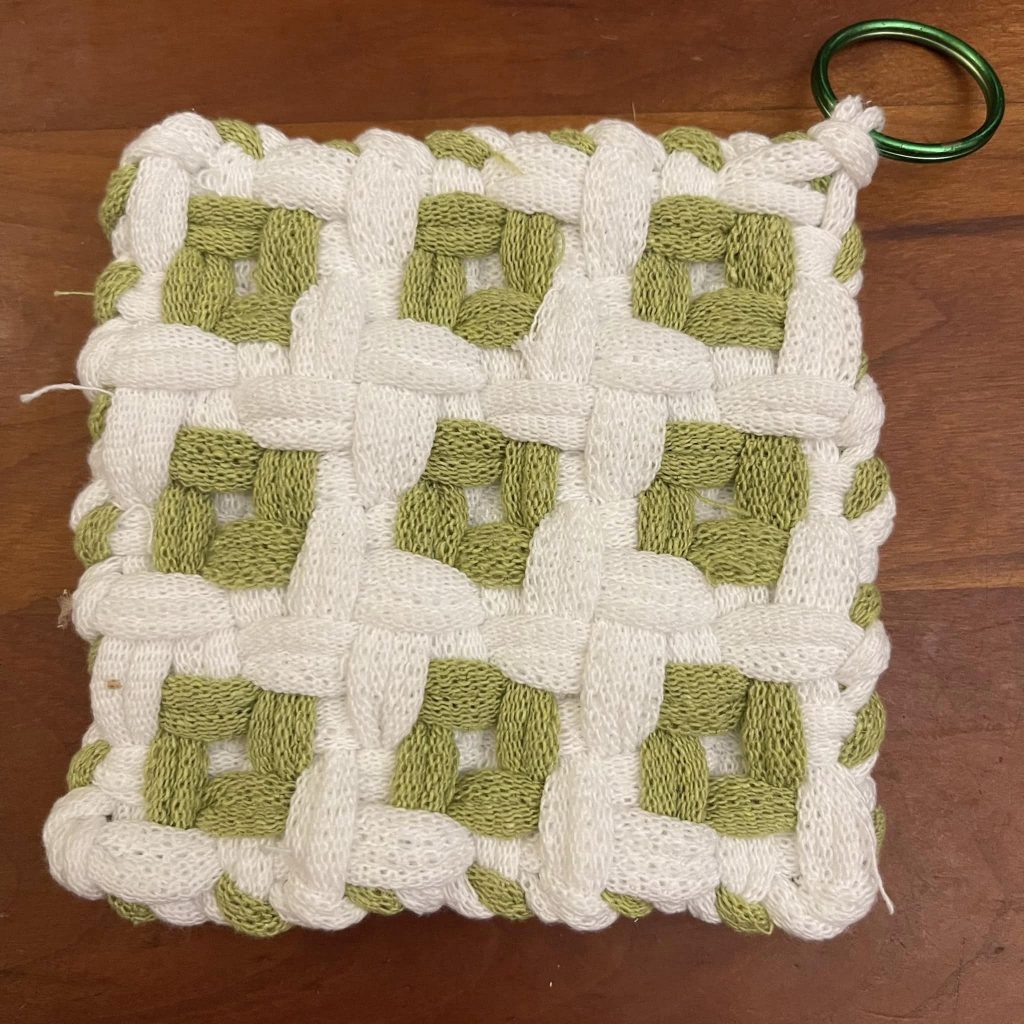
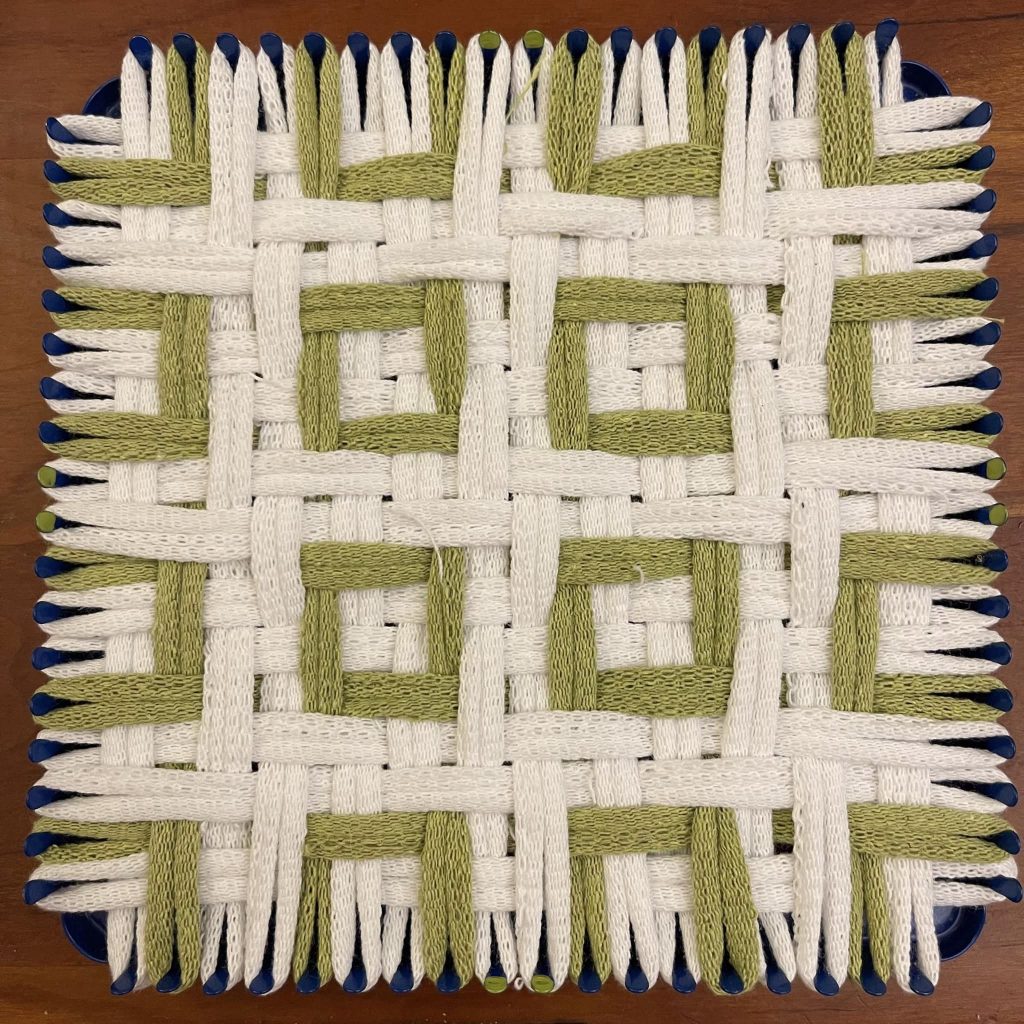
I first worked it in lavender & leaf. I was expecting the front side to draw up into flowers, so I put the lavender into the white areas — oops! The *back* side draws up into flowery diamonds, so I ended up with leaf flowers on the bottom of my work, and the basket-woven effect on the top.
Before posting the charts to our site, I flipped the back and front from the draft version Piglet wove from, so the “flowers” should now form on the front face, in the “dark” color of our chart. — Matthew
The cayenne and white combination has much better contrast, so you can see the effect more clearly. The resulting fabric is great as a potholder. It does not bias or curl in any particular direction. It lies flat, and is quite thick and protective.
What a fantastic discovery! I cannot stop chortling over and petting it.
Matthew’s Postscript, March 2:
I love the fact that there are so many fun variations to explore in this space, and so many connections to make with the work that other talented weavers have done!
Then this afternoon a stray comment brought a neat weave from Linda from January 2023 back to the top of my Facebook feed, which uses a different variation of diamond twill and orients the color variations along the warp
Looking for similar patterns led me back to a lovely four-color weave by Julie from June 2022, which turns out to use the same split-loop structure as the one I’d posted, and includes pointers back to even earlier examples on Pinterest.
It’s wonderful that these basic structural elements — so simple that they’re independently re-discovered over and over again — can support such a wide range of expression as to create endless streams of unique woven pieces of art.
I’ve added another pair of charts incorporating the striped warp shown in Julie’s example — and may a thousand flowers bloom!
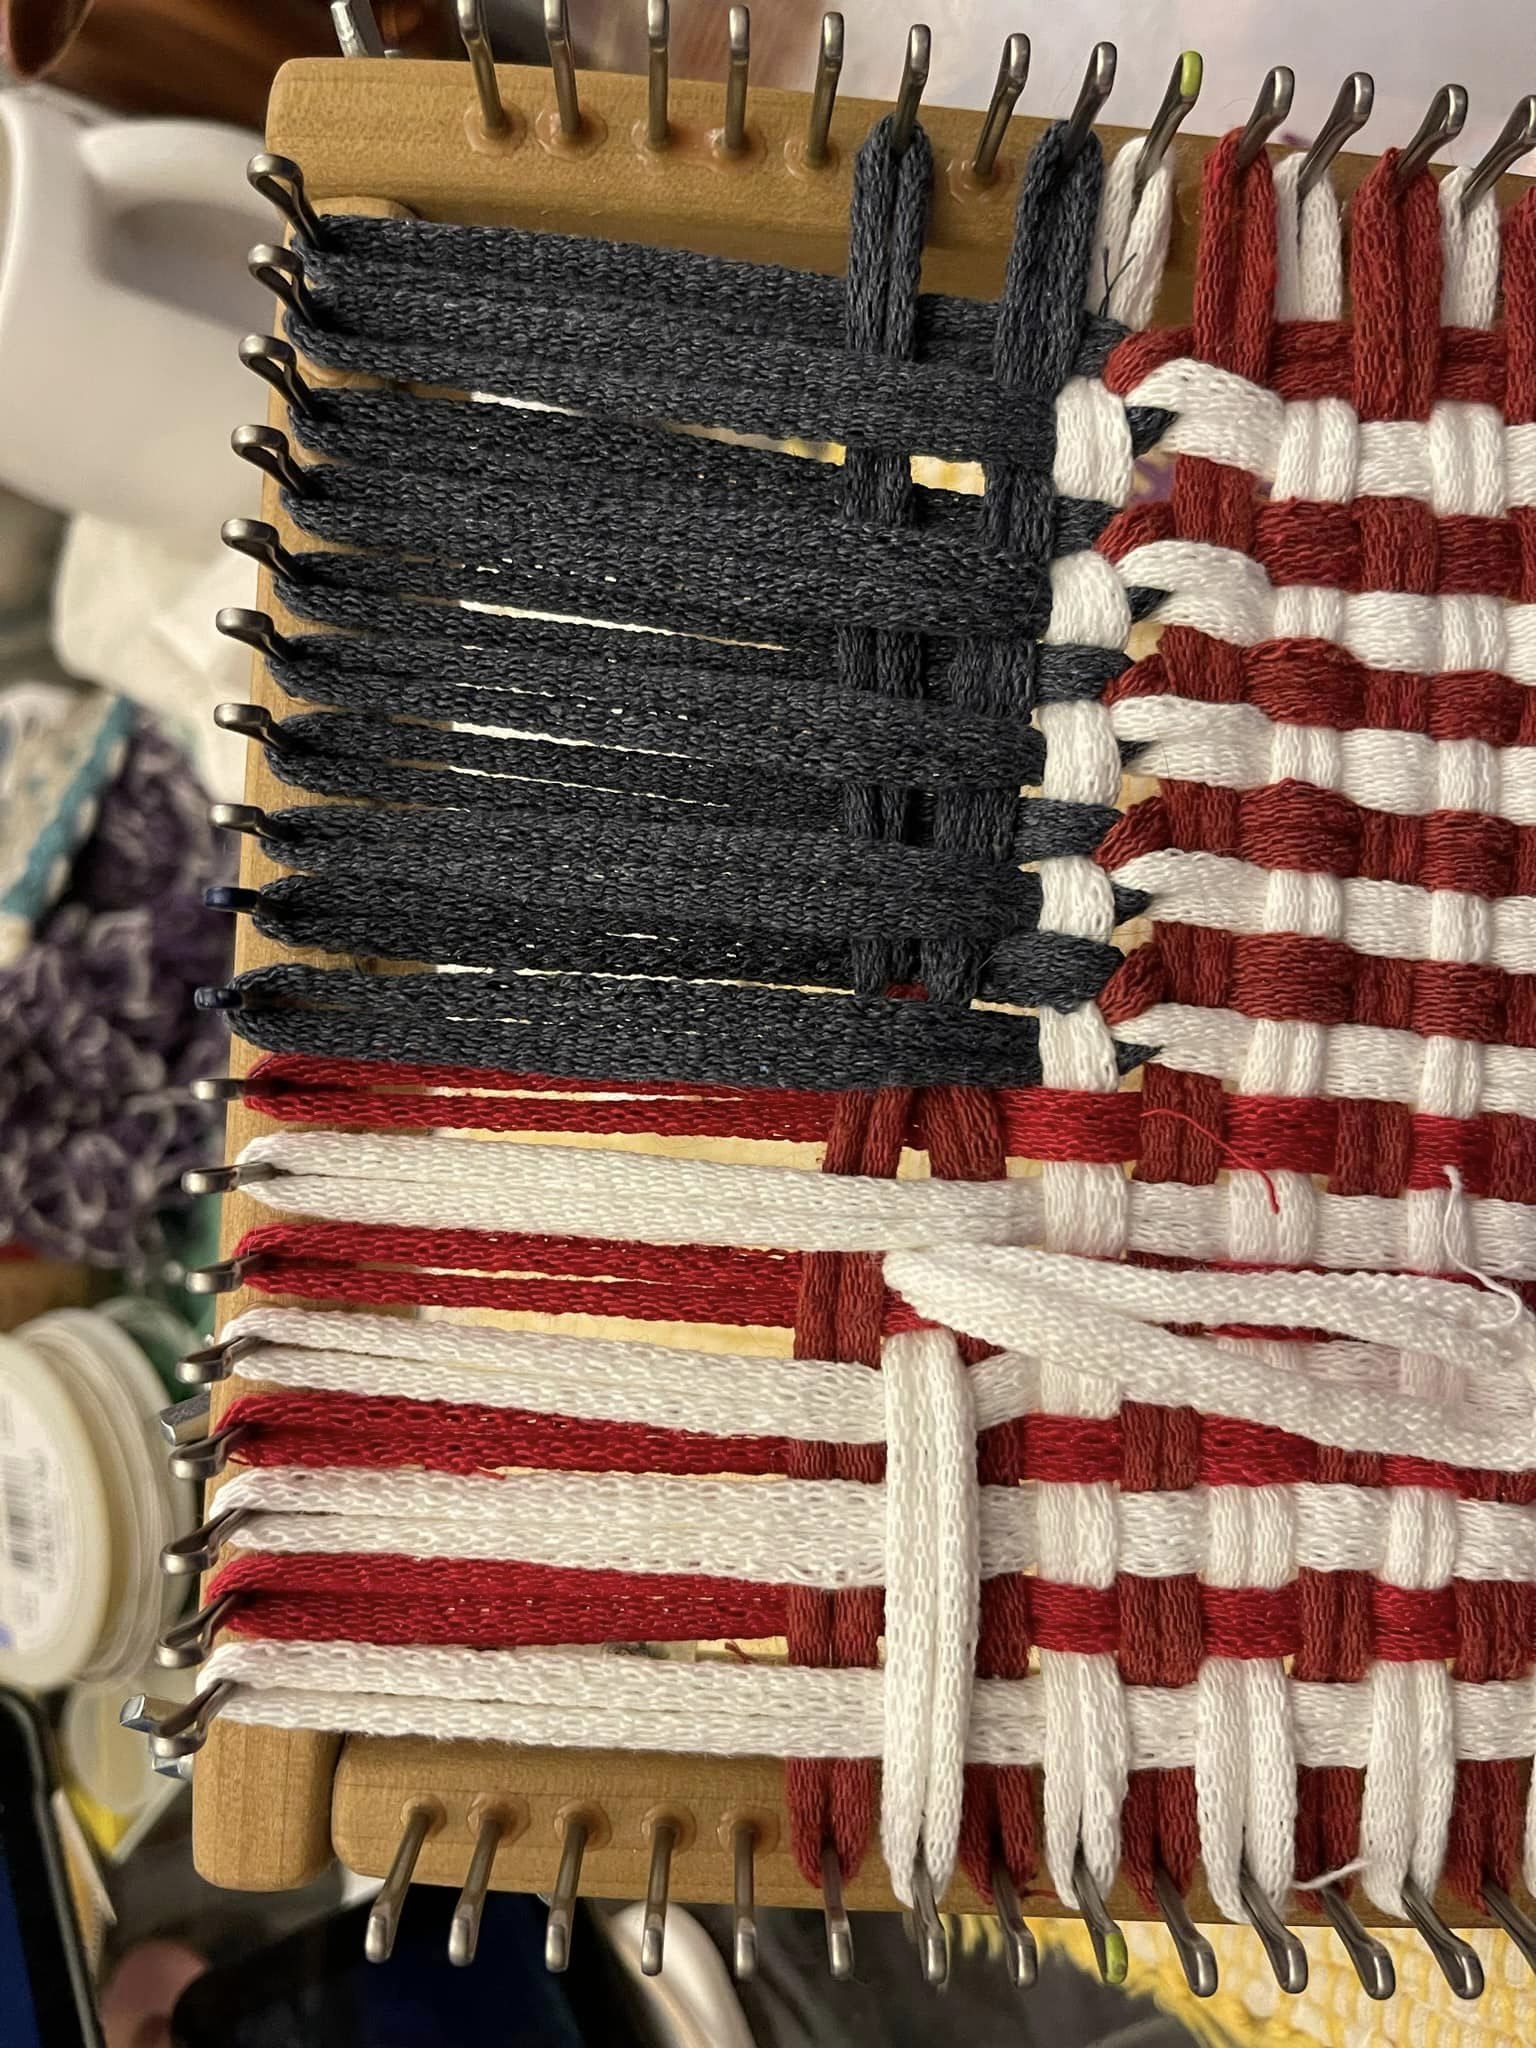
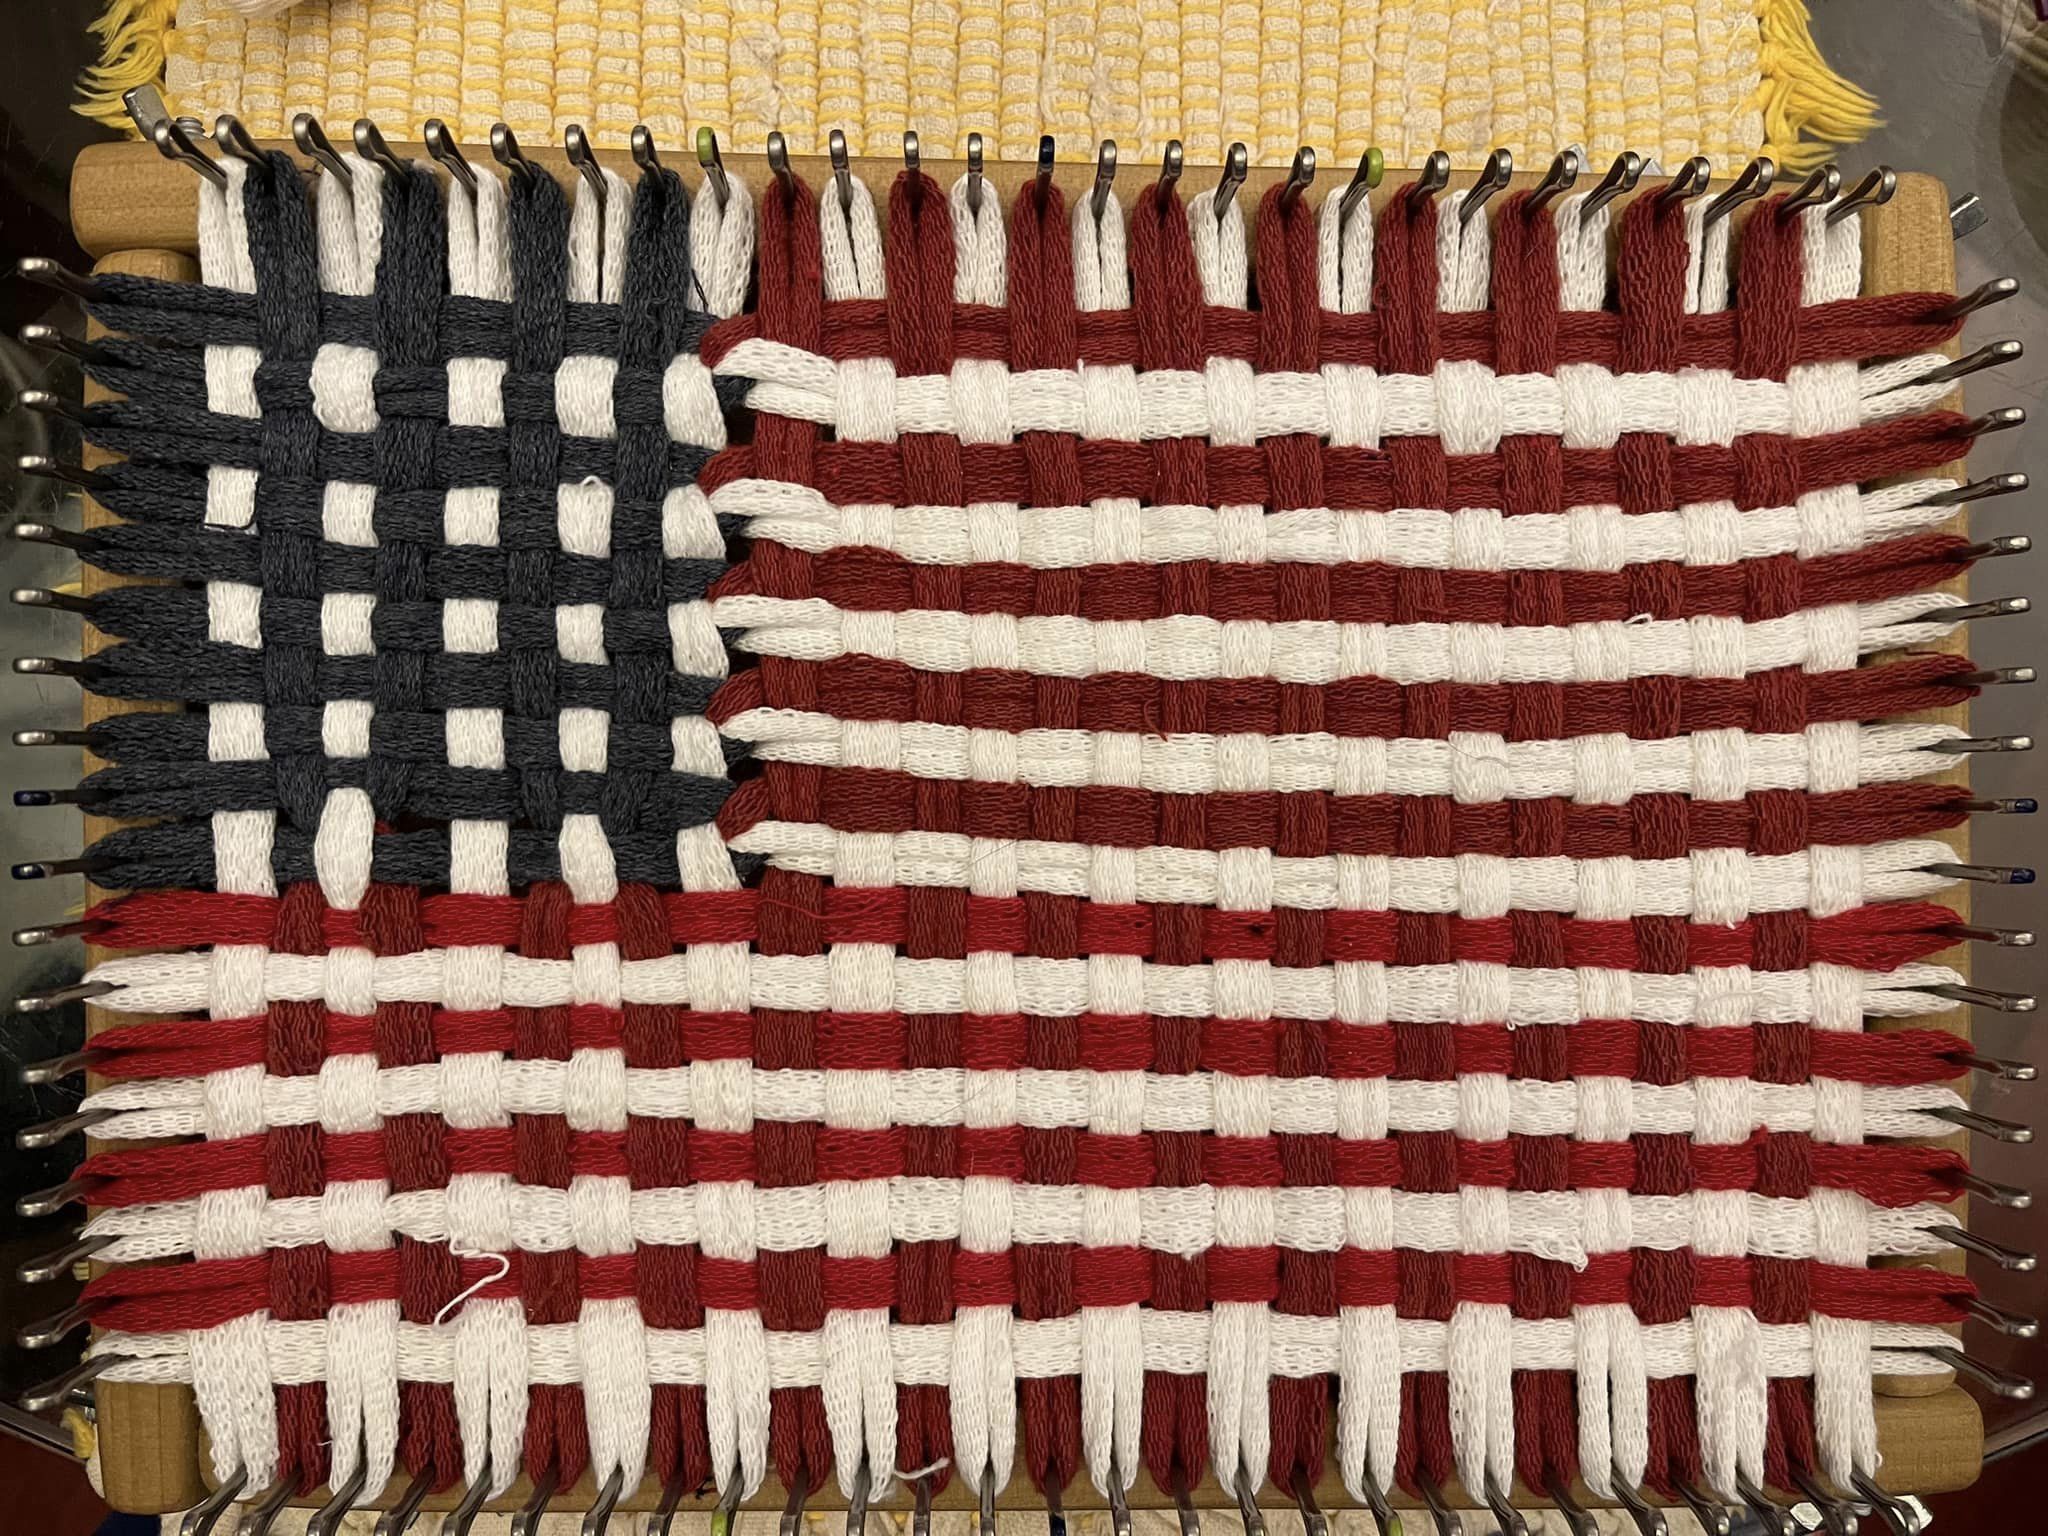
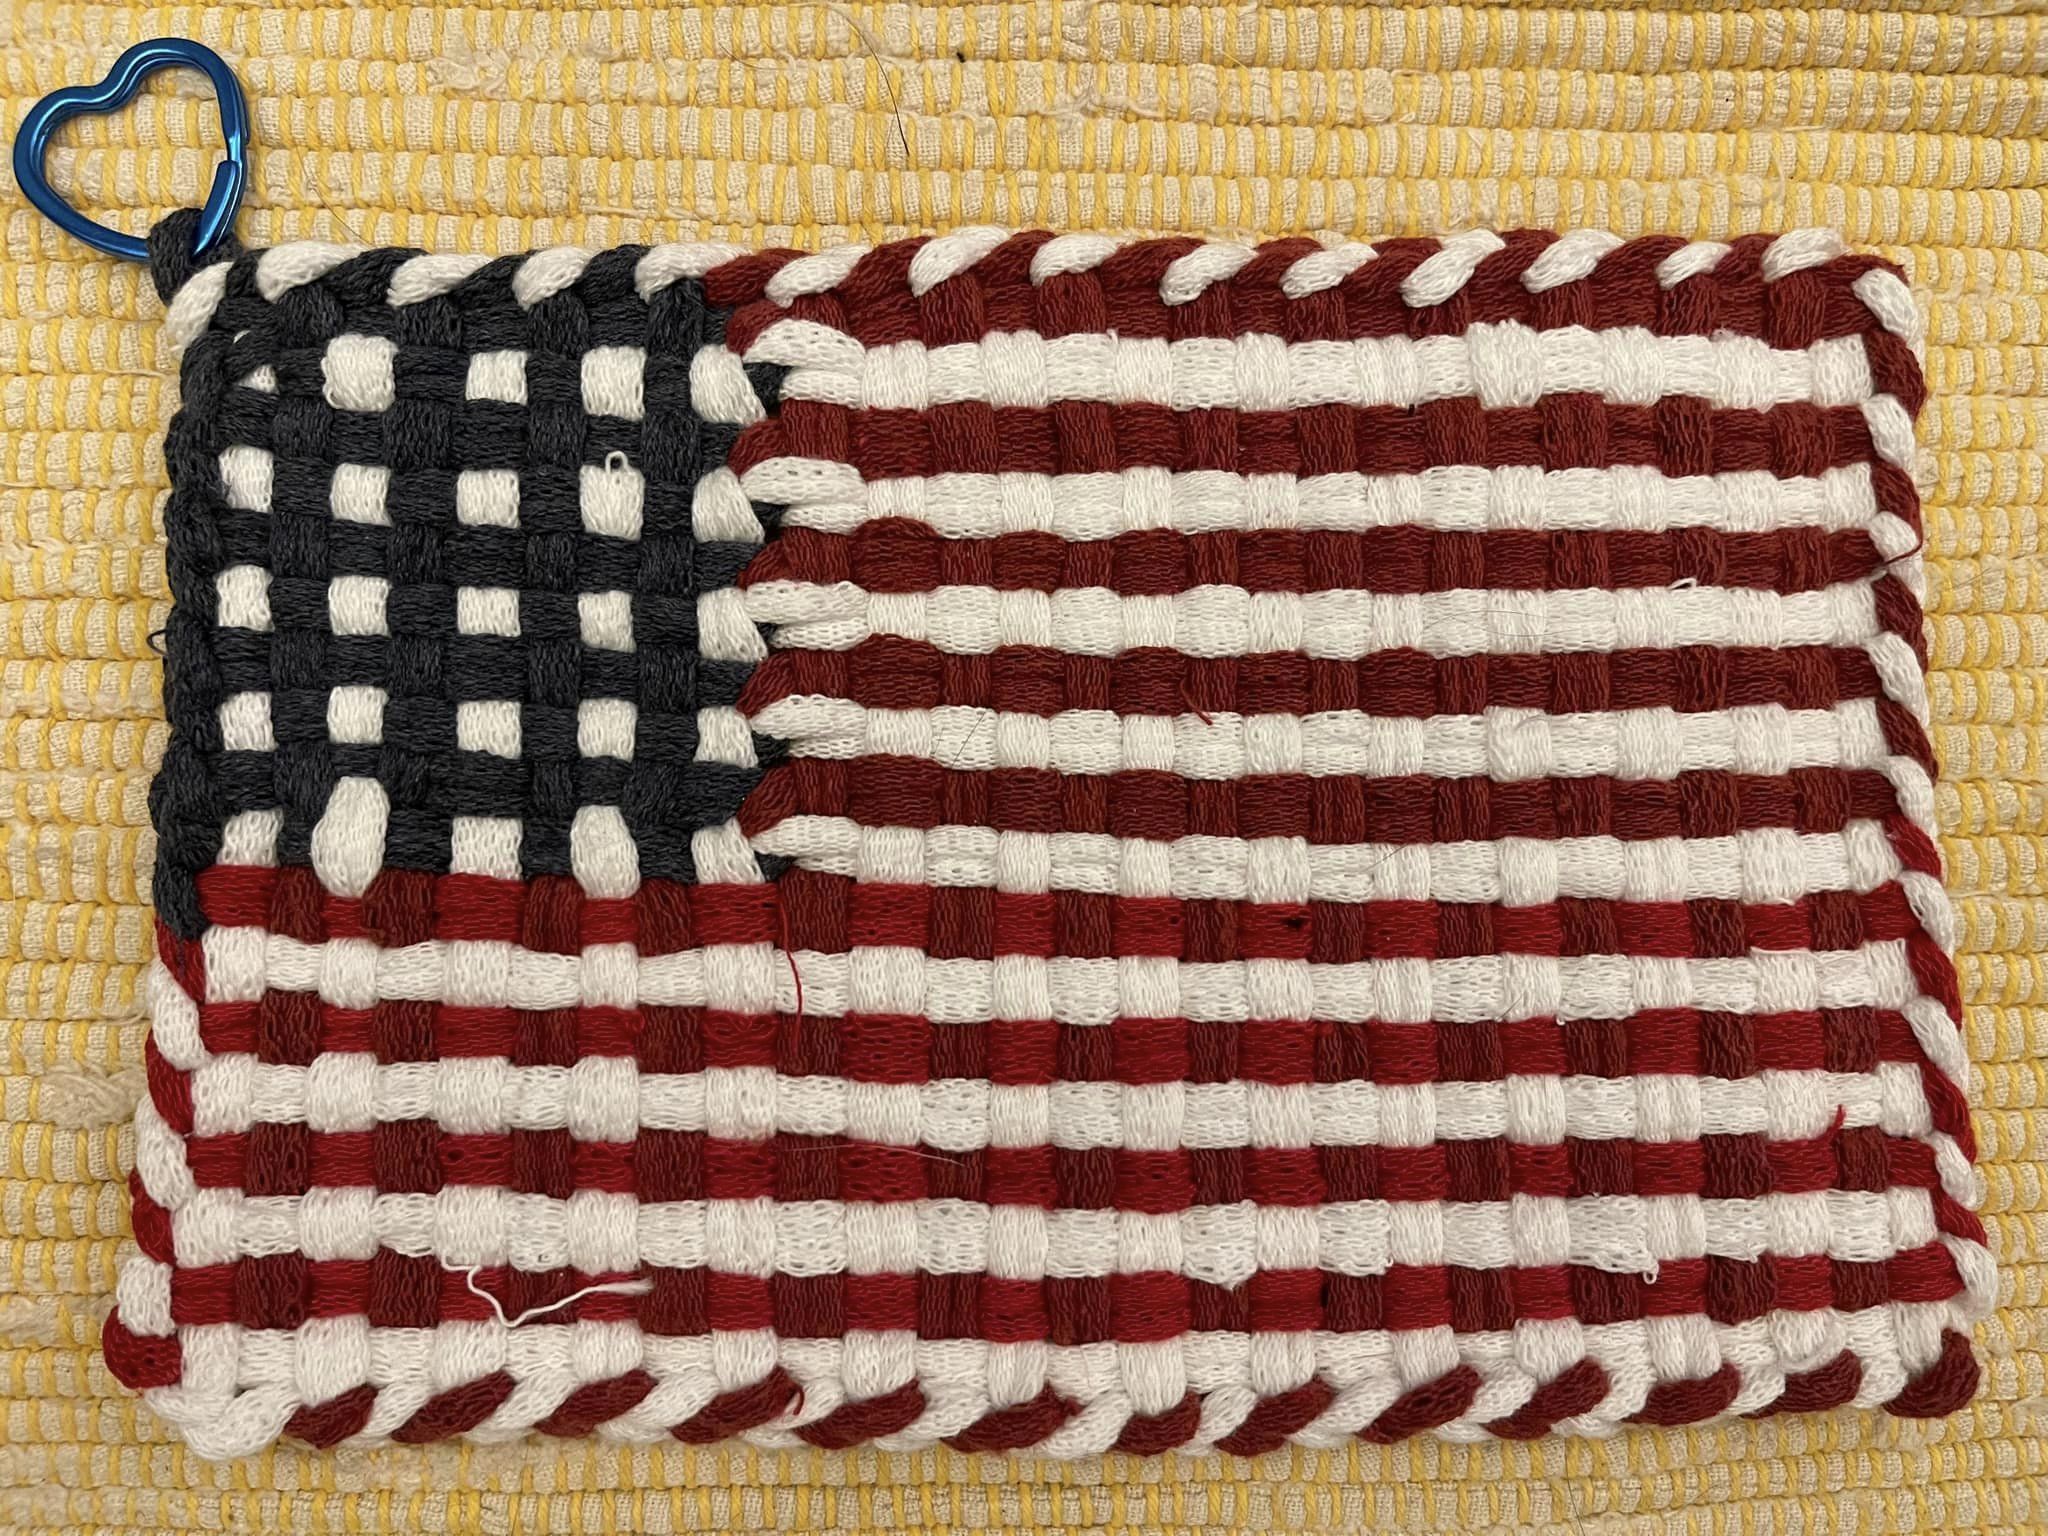
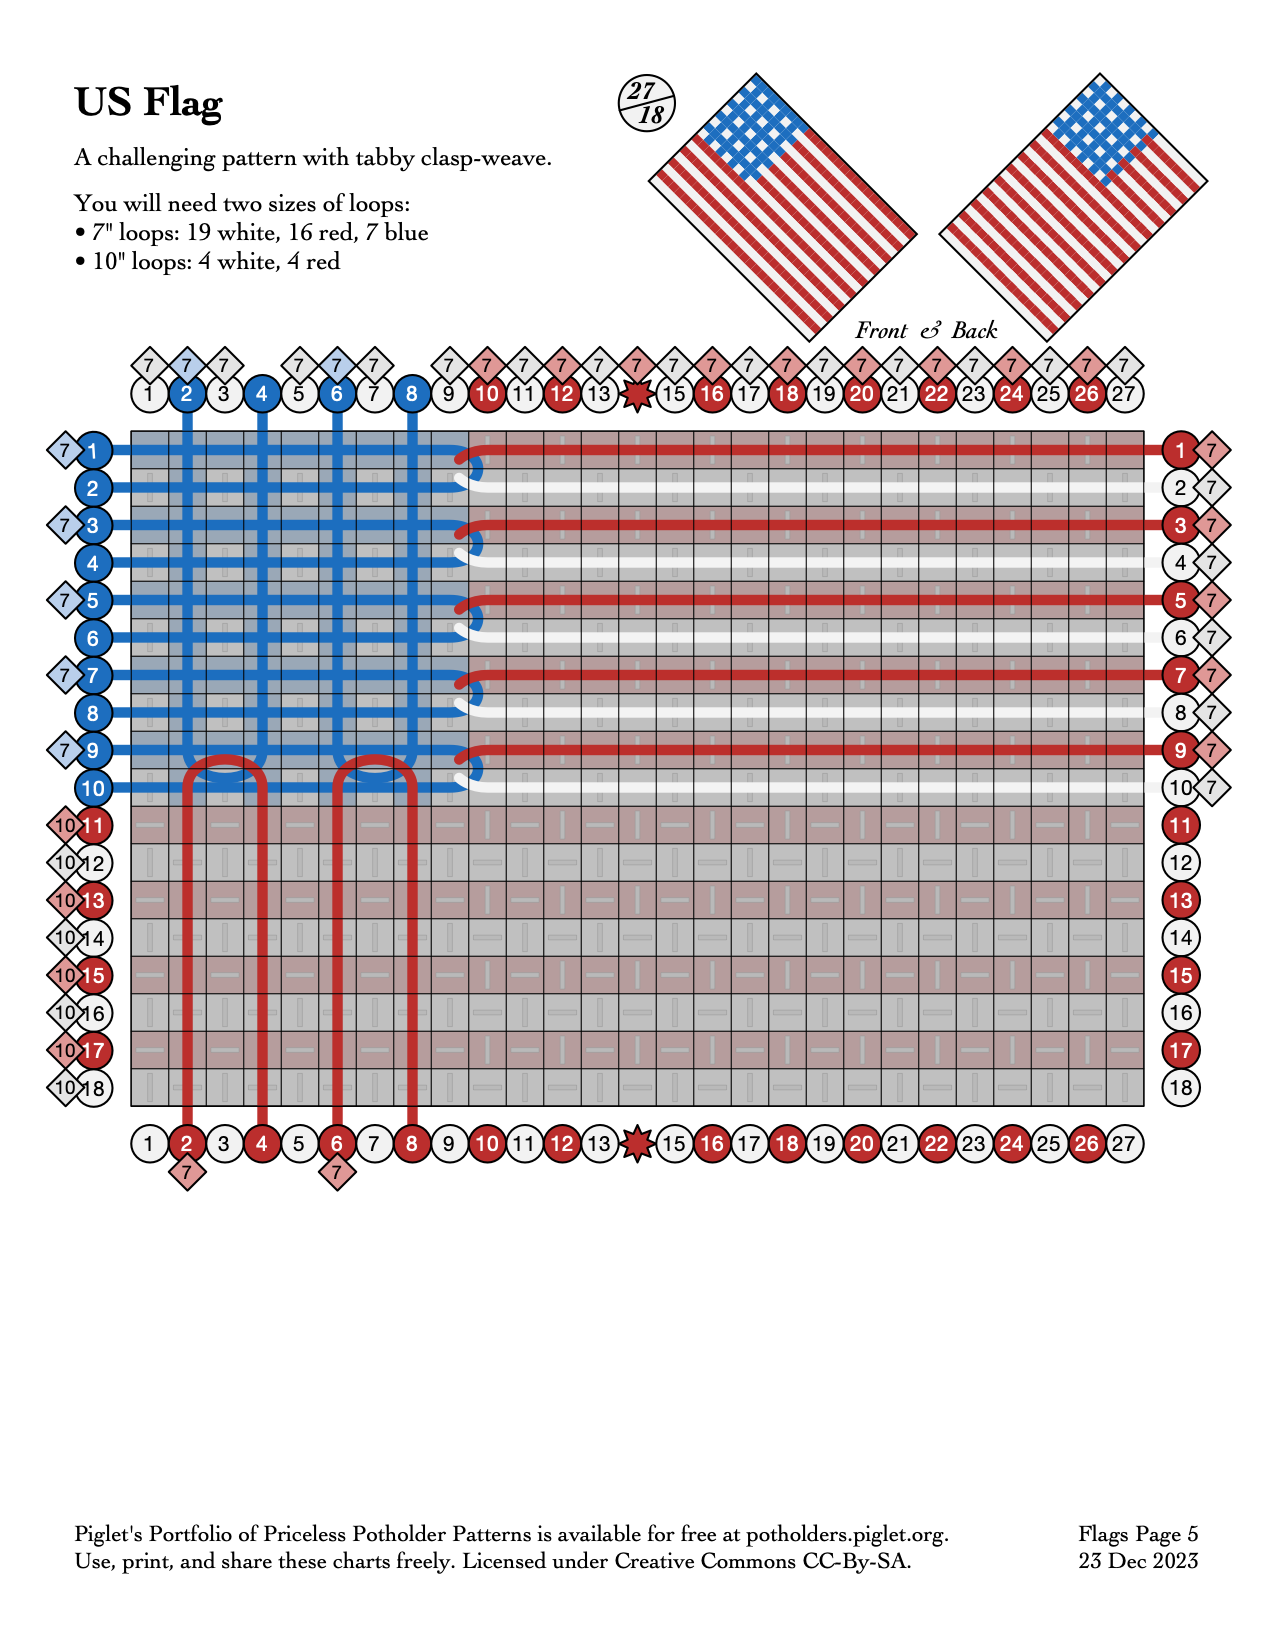
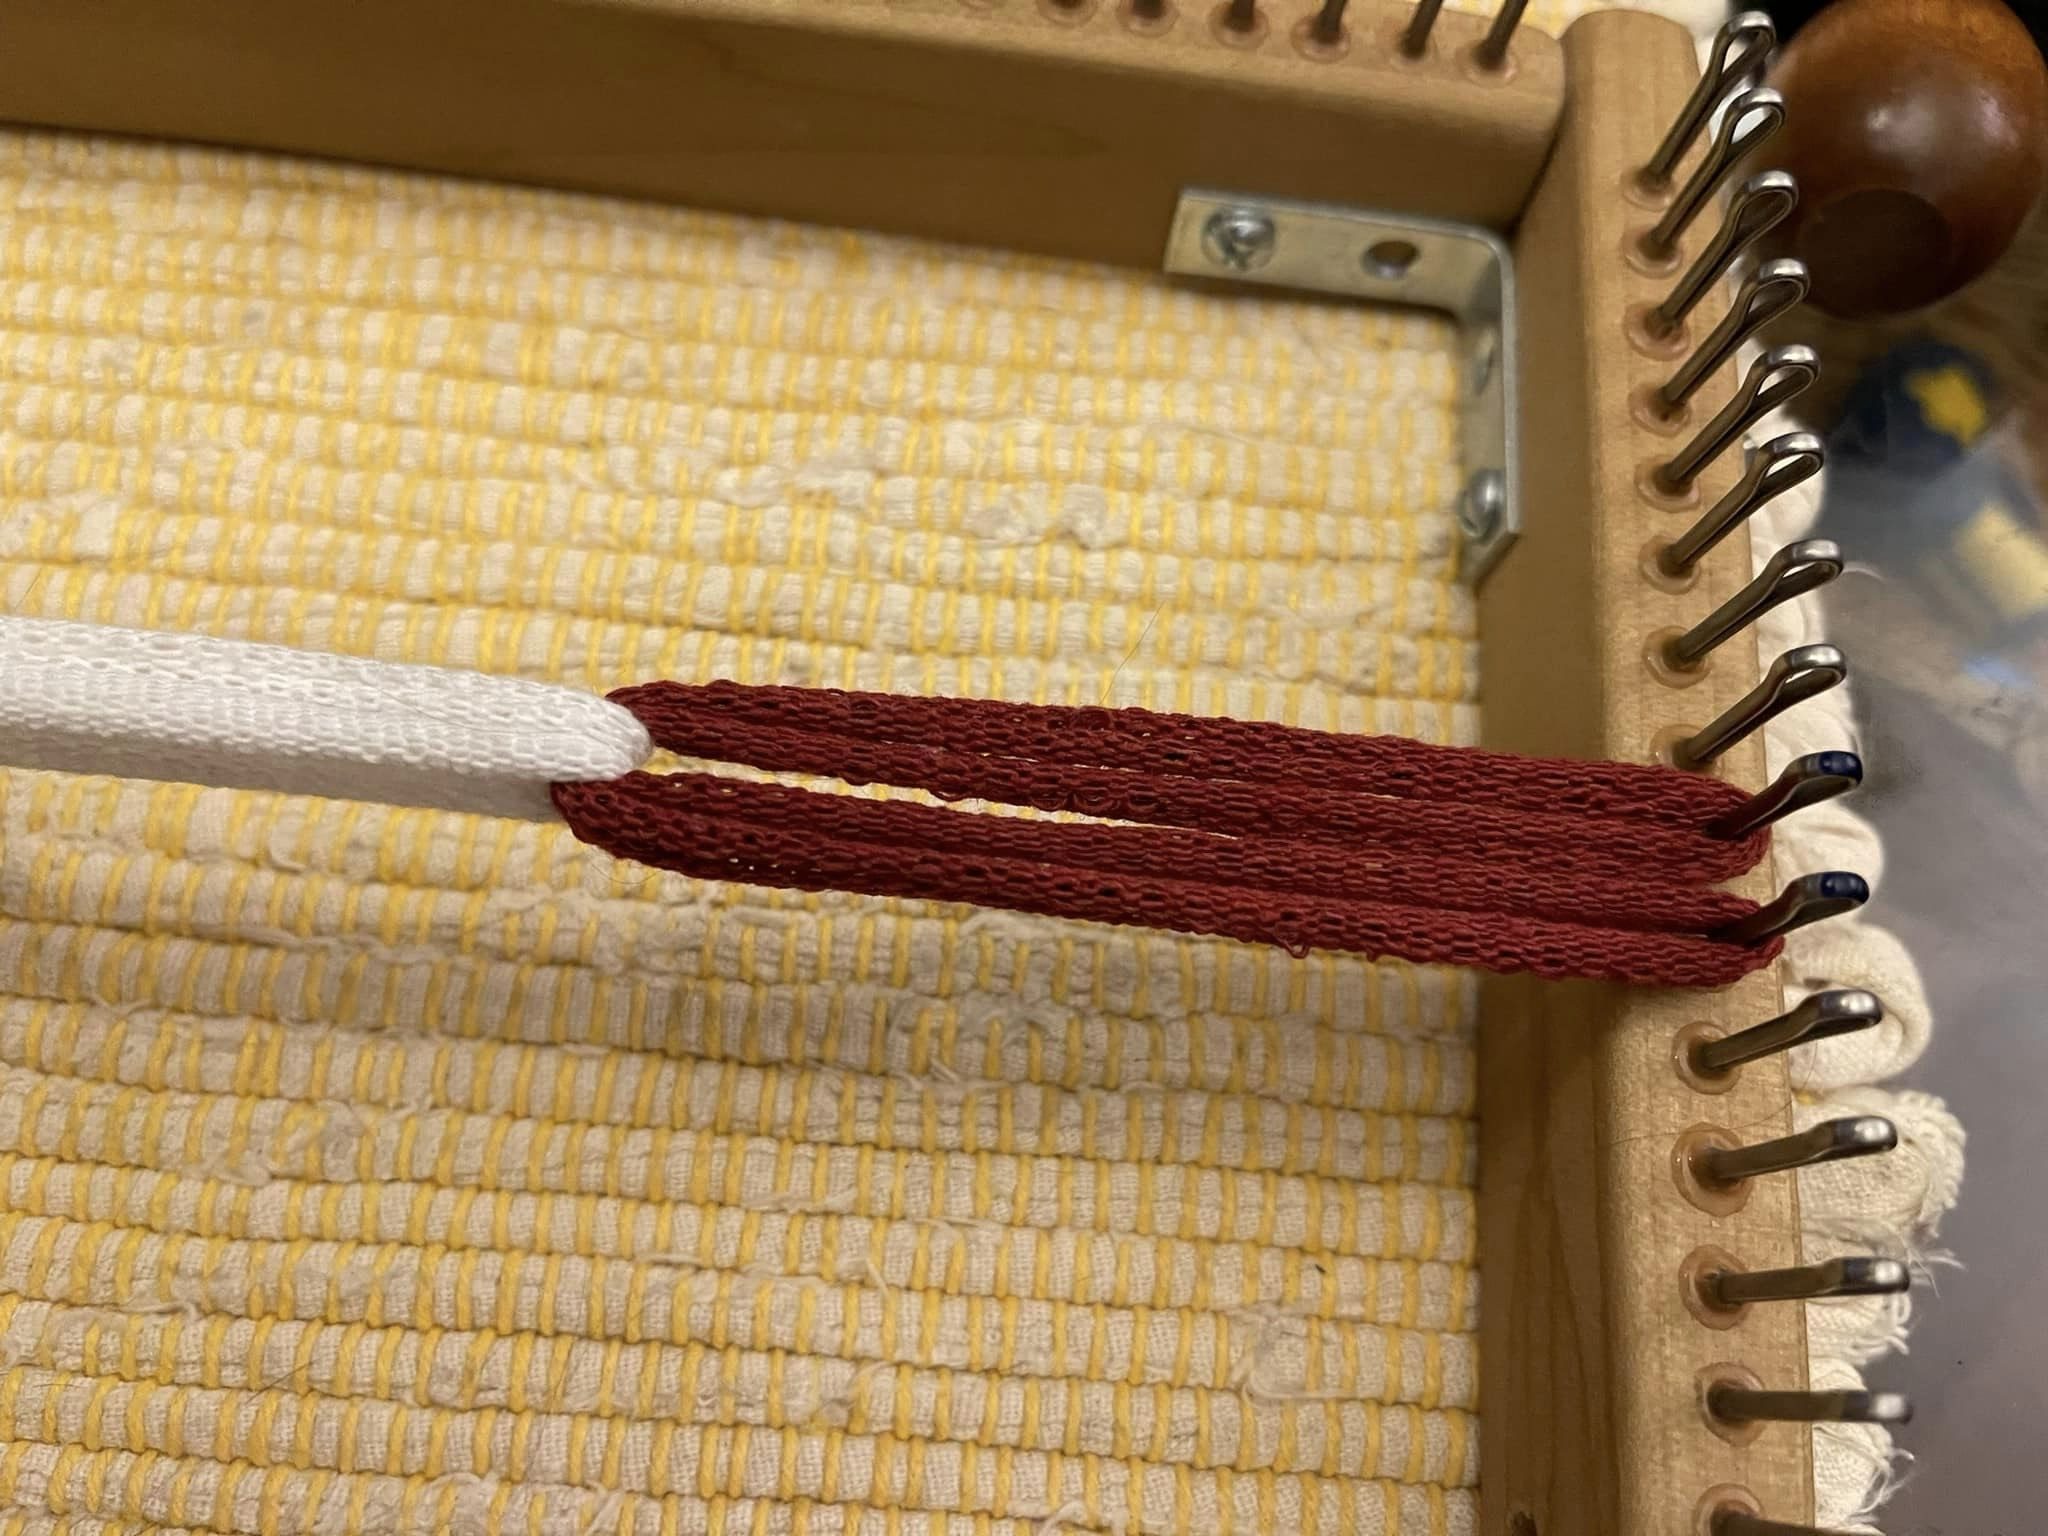
When I bound off the French flag this morning, I stared at for long enough to realize… half of a traditional loop plus one full length traditional loop *also* equals one pro loop, which means, VOILA!!! US FLAG!
[Added by Matthew:] This example is woven on an oblong (18×27) loom, but you could use the same technique to make a square pro (27×28) potholder with more stripes.
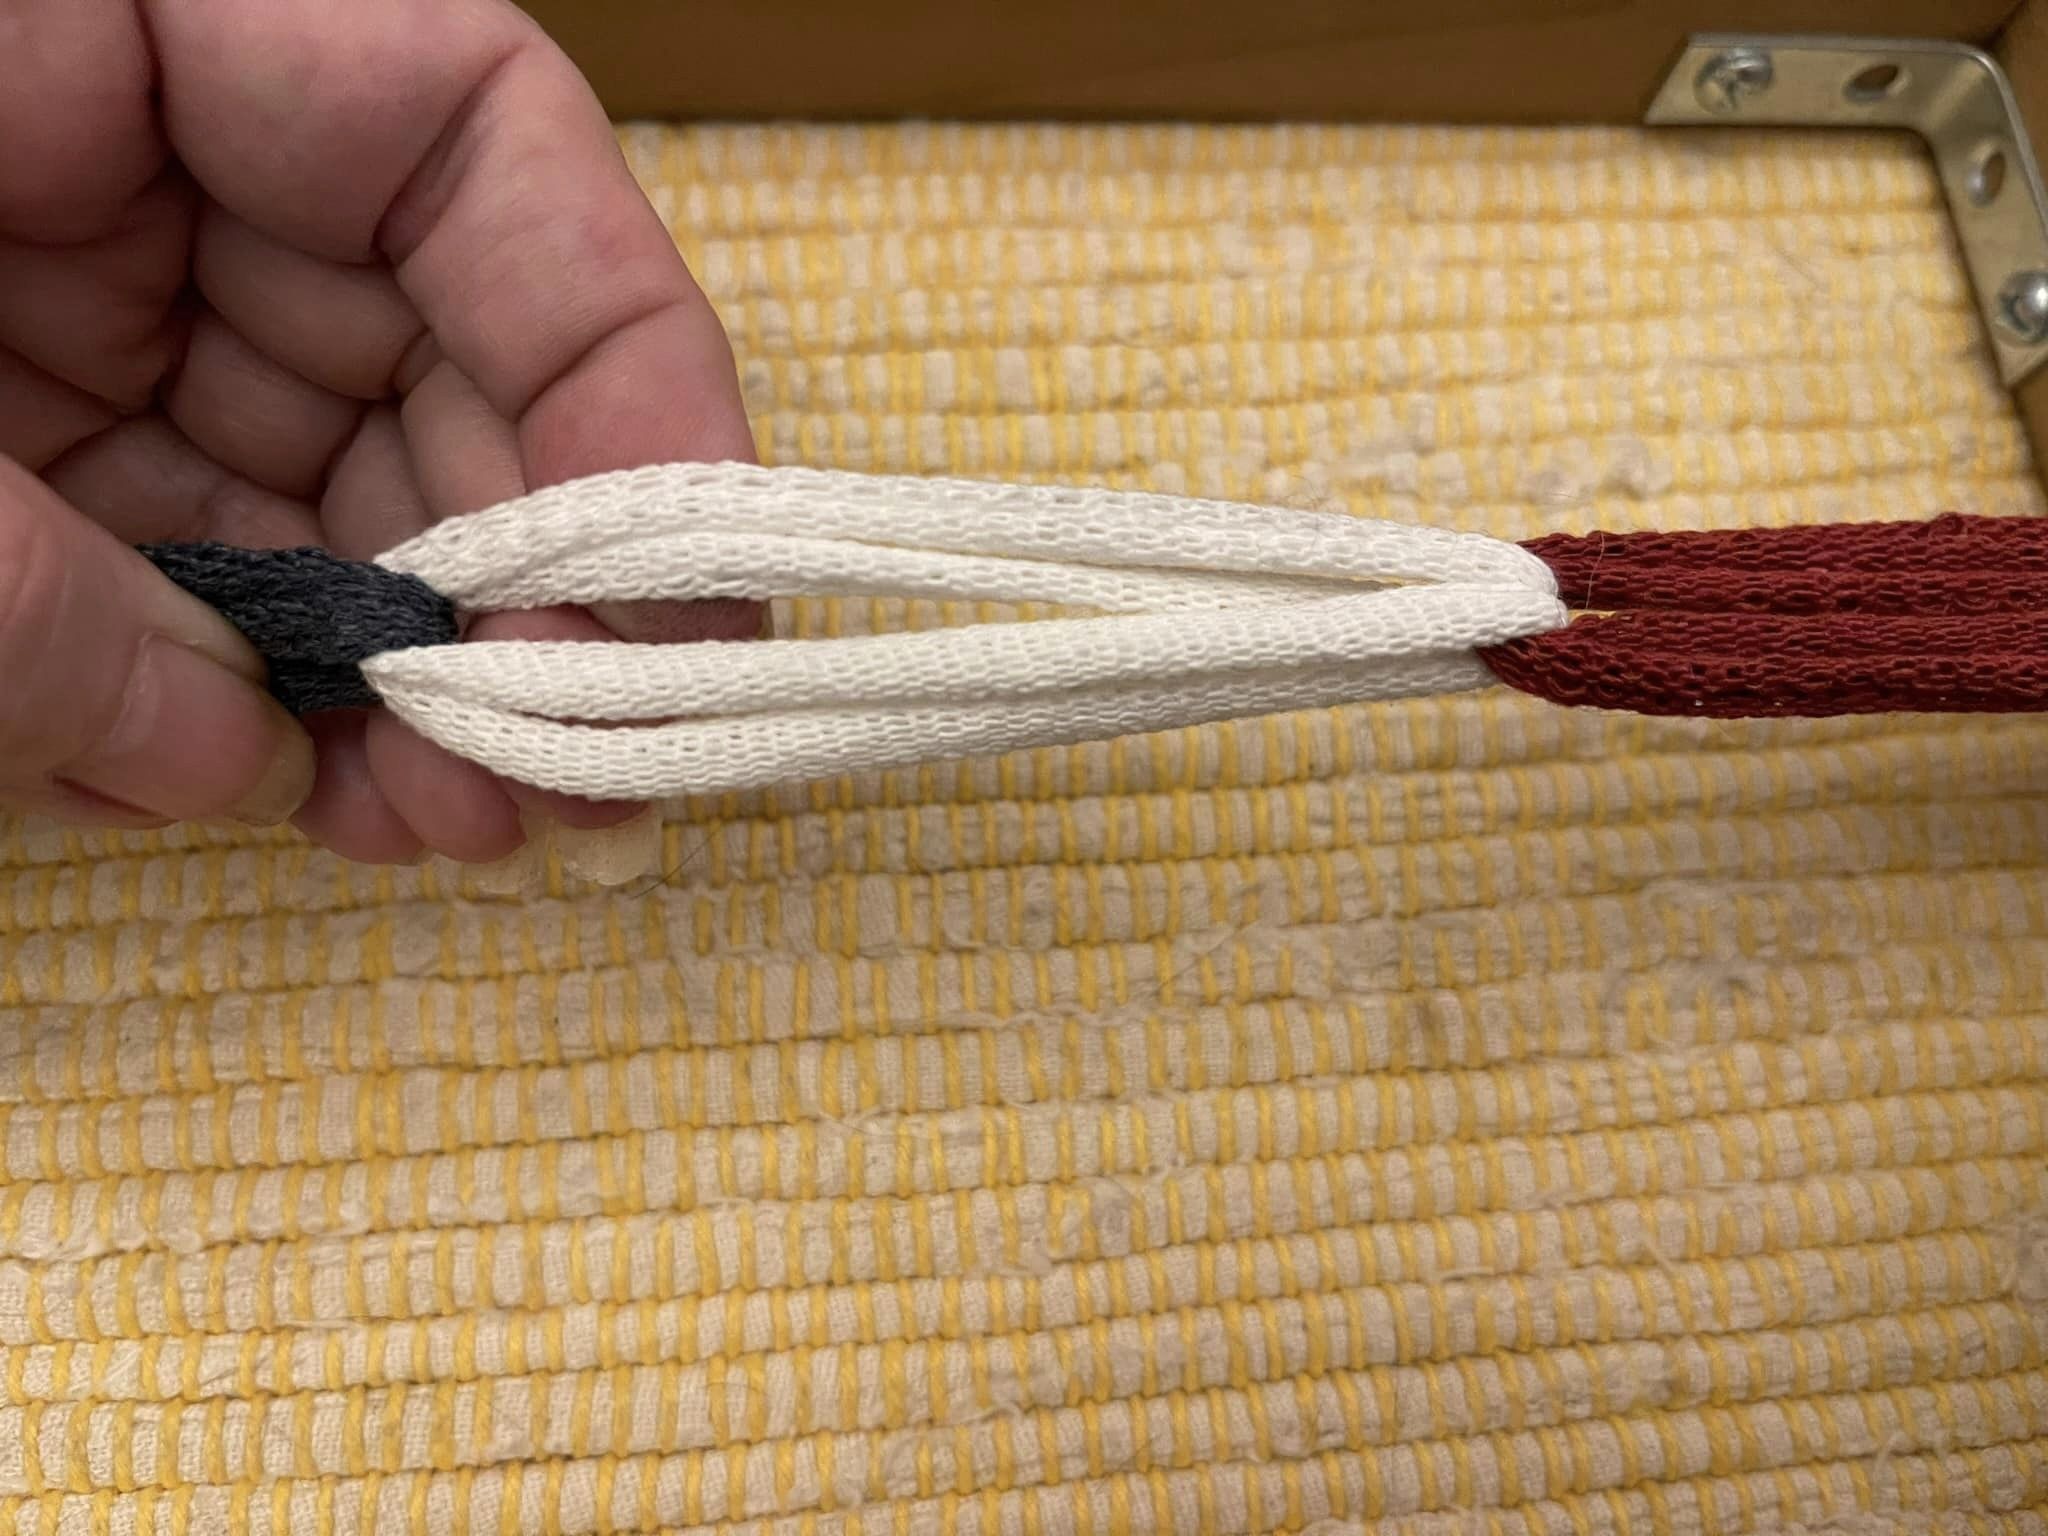
Warp the lower eight pegs with alternating red and white pro loops. Warp the upper ten pegs with alternating red and white traditional loops, using a folded-over blue traditional loop threaded through the loose ends of each pair.
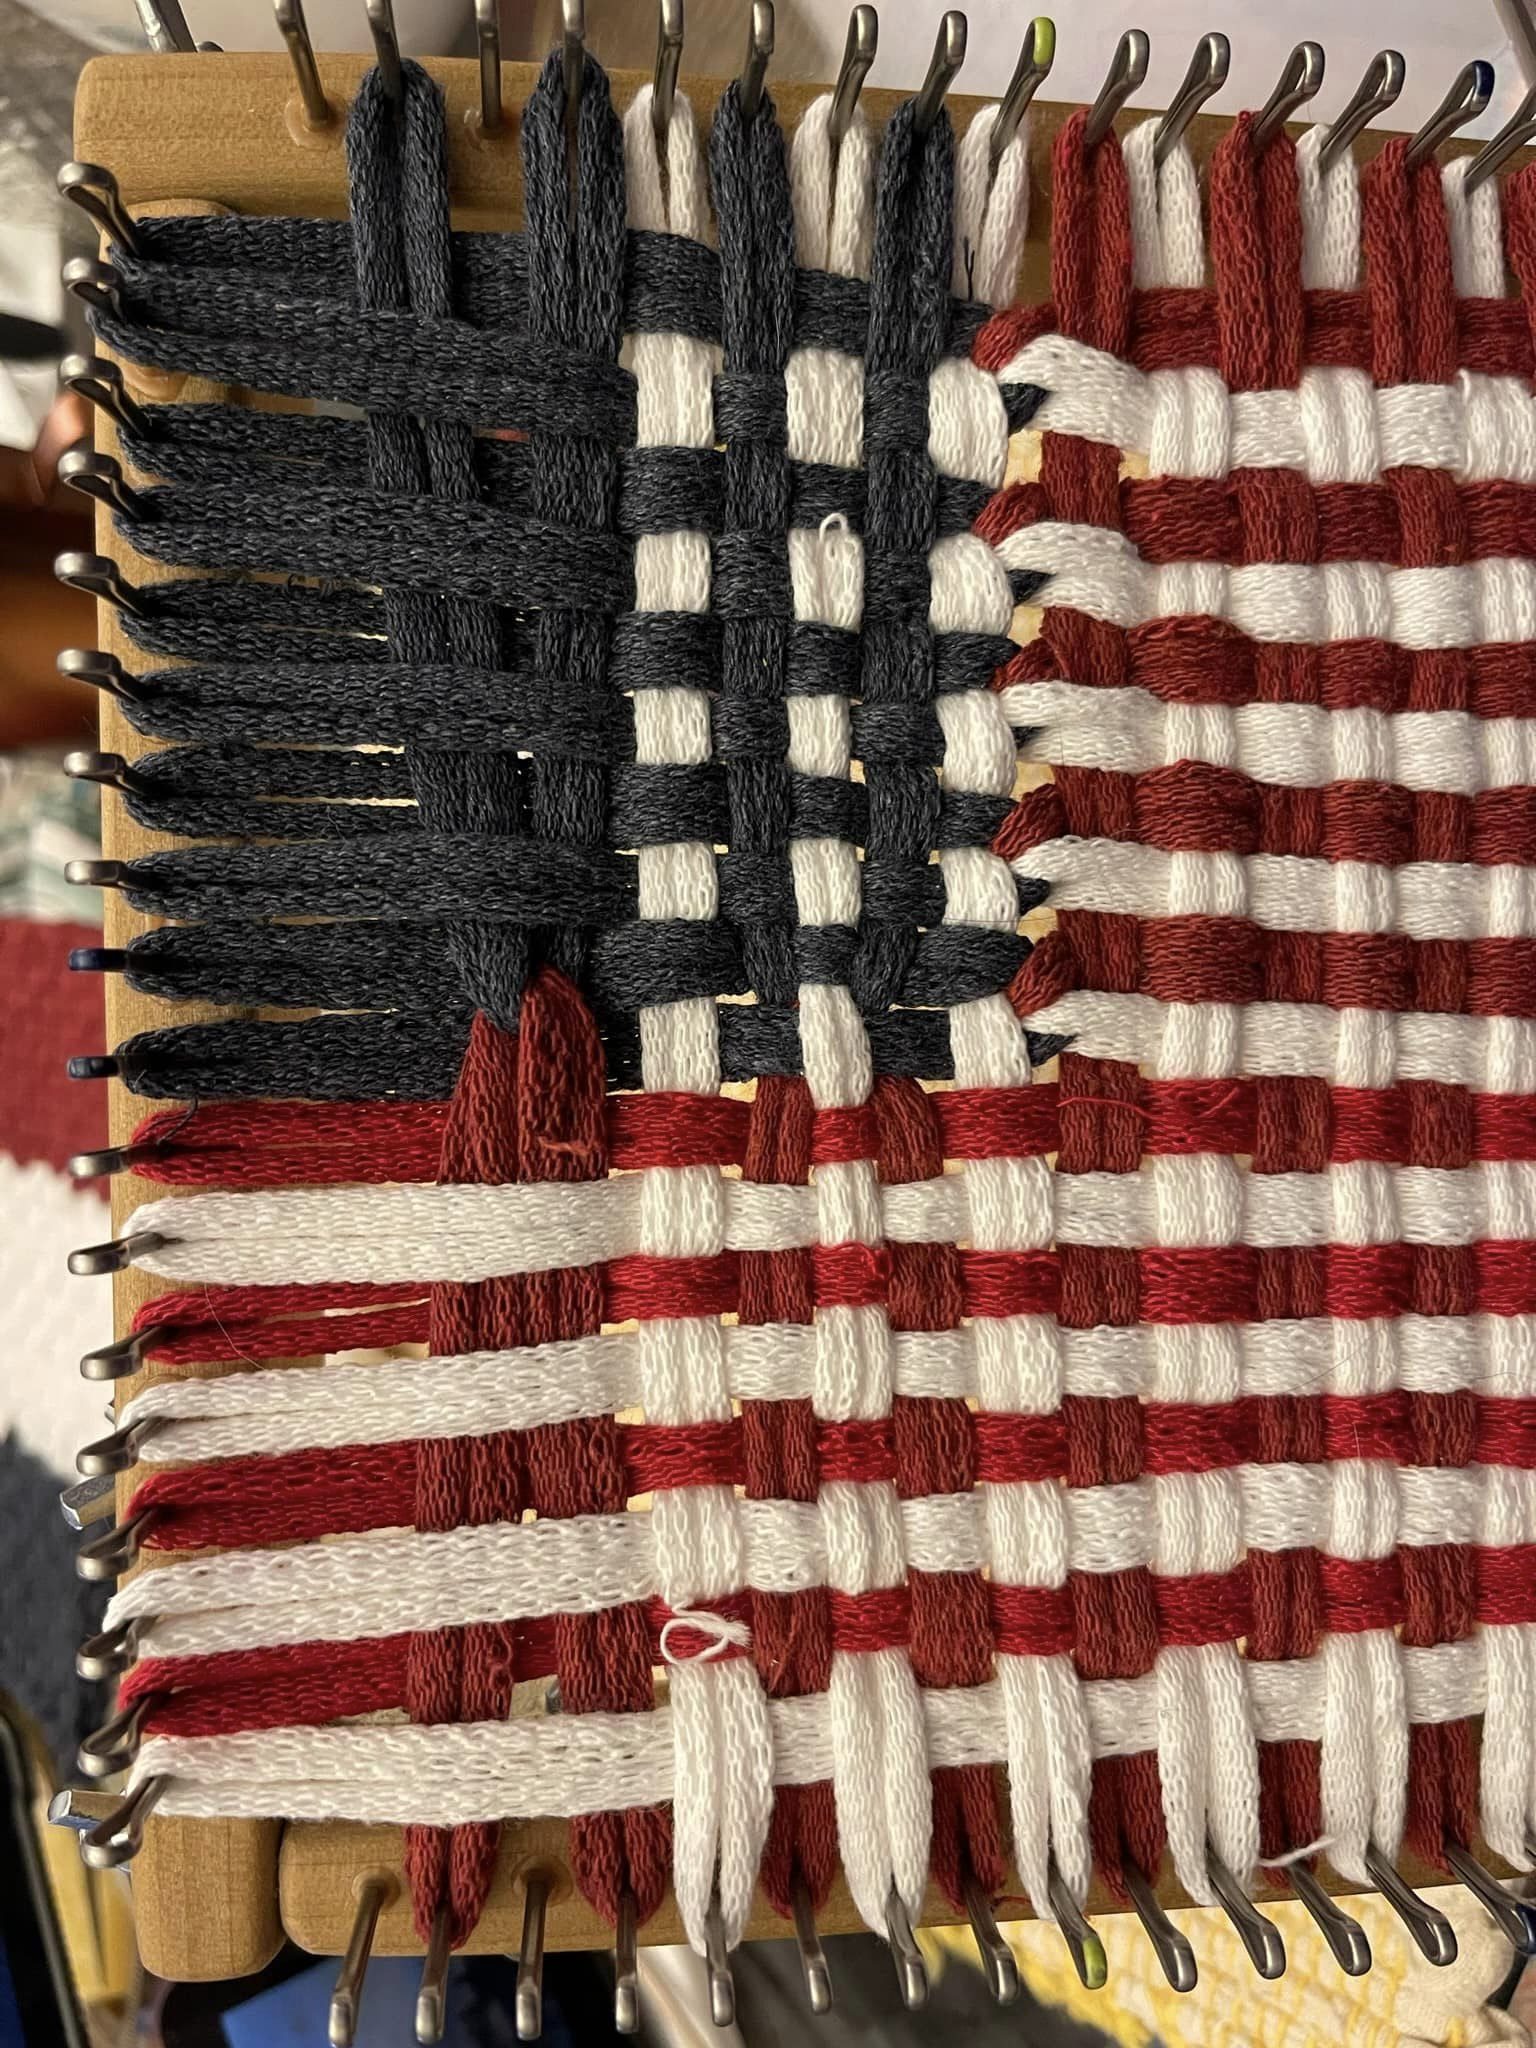
Weave the first eighteen rows with alternating red and white traditional loops woven in tabby plain weave to form stripes.
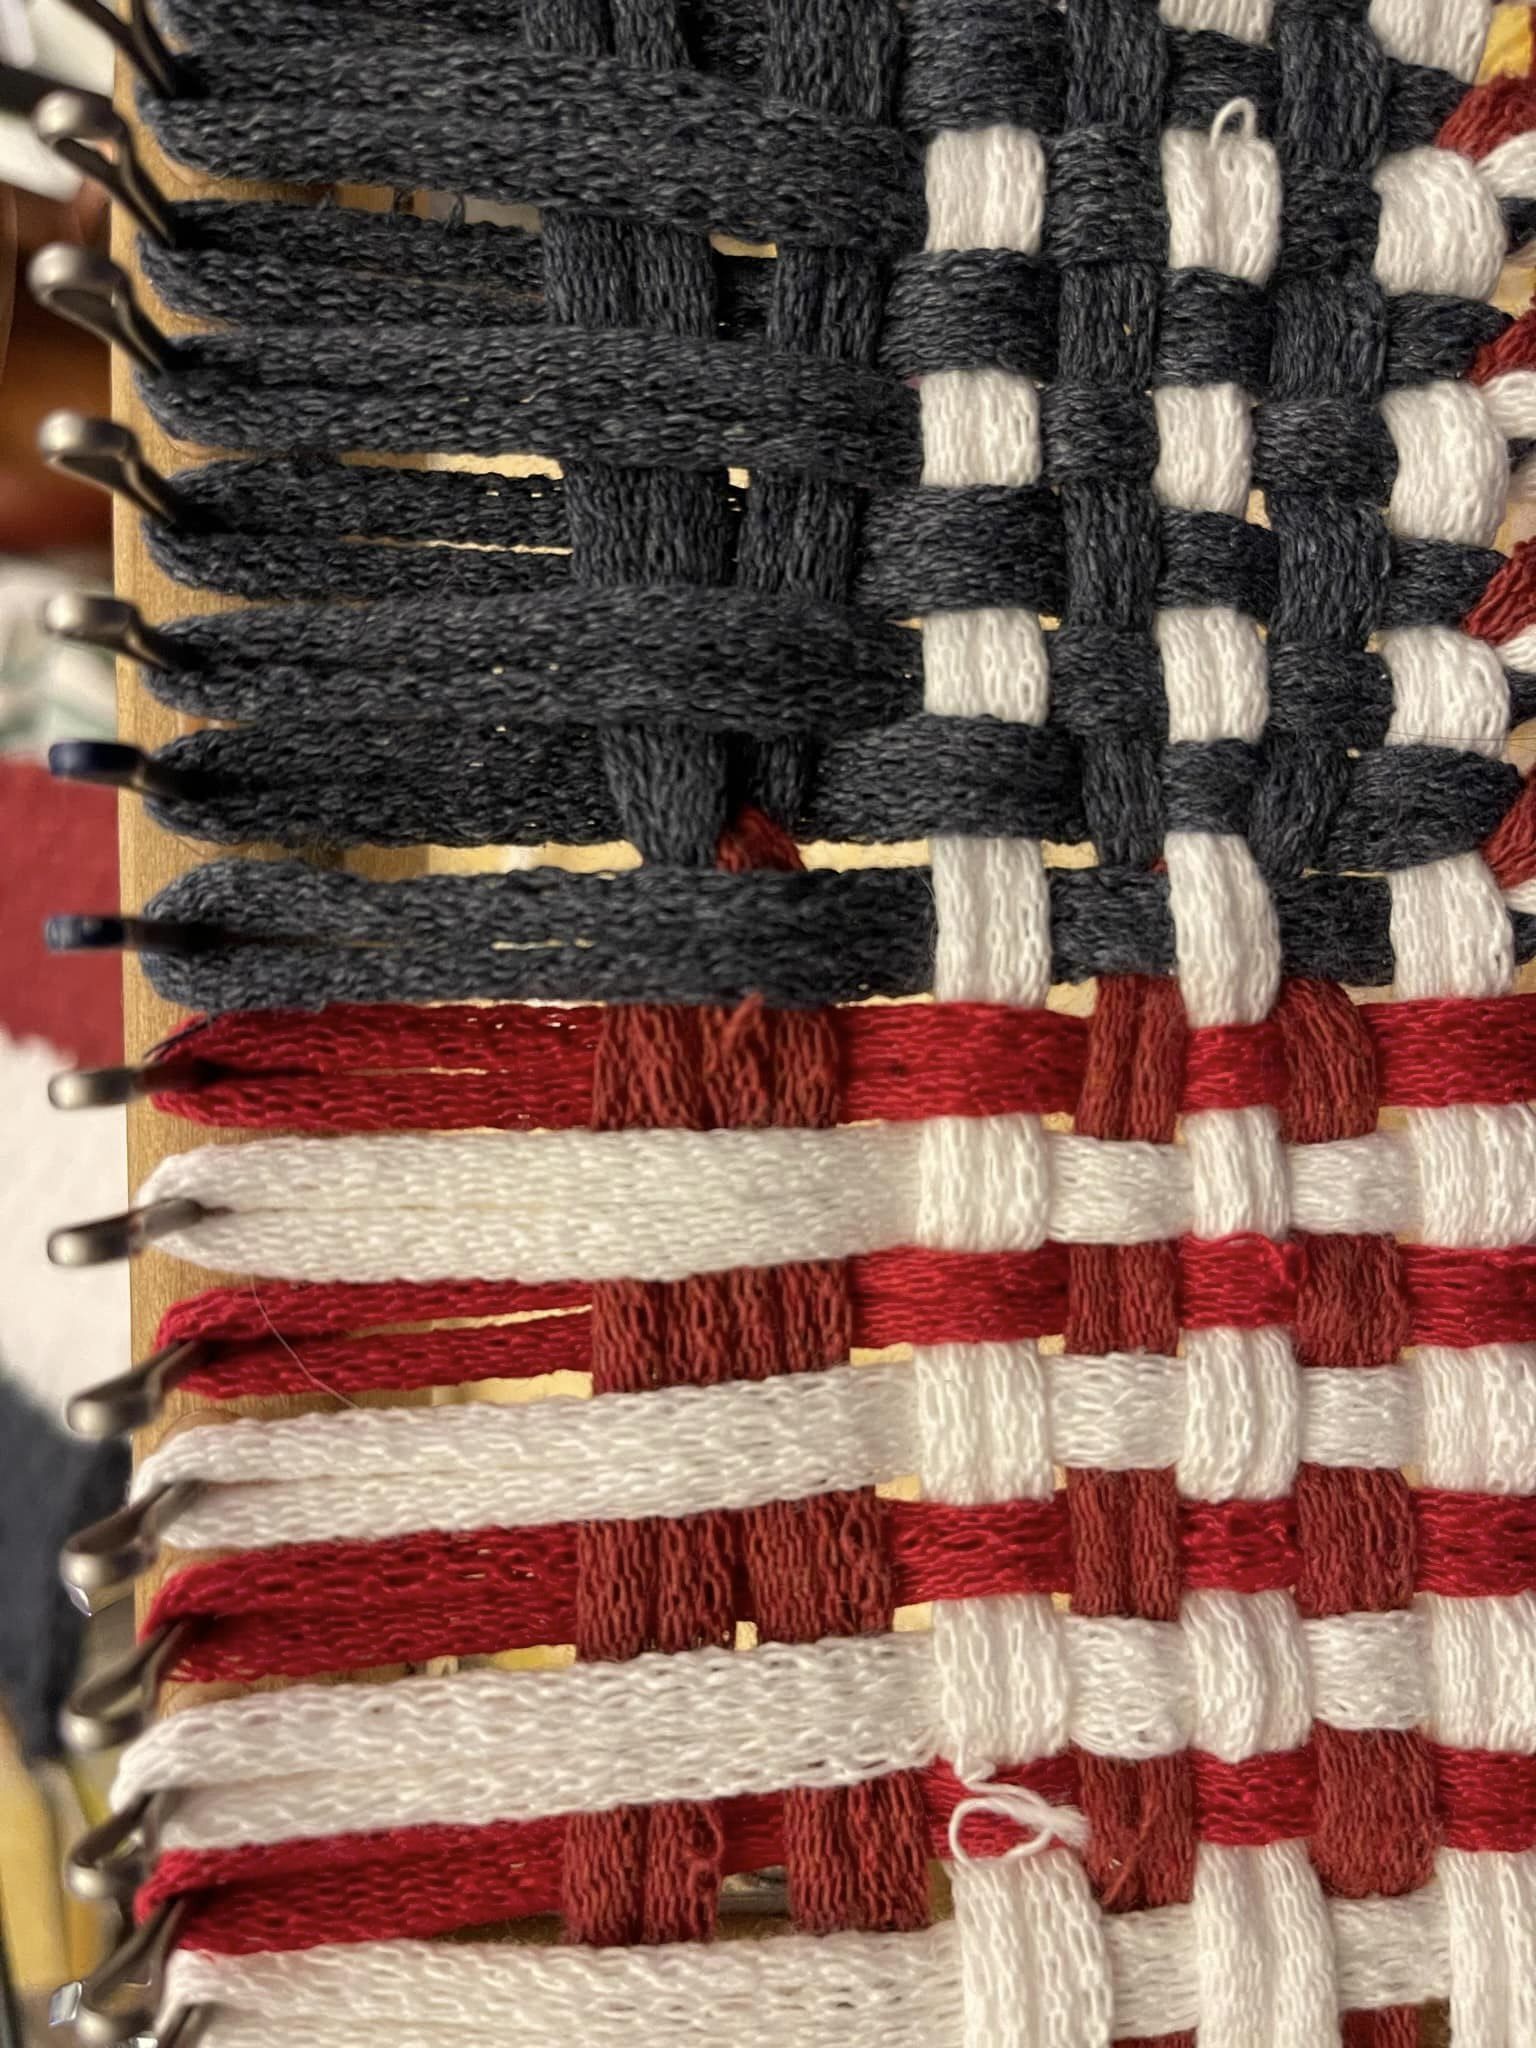
To weave the last ten rows, fold a red and blue traditional loop over each other and place them on the loom with one empty peg between them. Weave them into each side, with the blue loop weaving into the blue square and the red loop into the red and white stripes. Then place a white traditional on the empty pegs and weave it in, in between the split legs of the red and blue loops. Do the same with another white loop next to them, then repeat the process to the end of the loom.
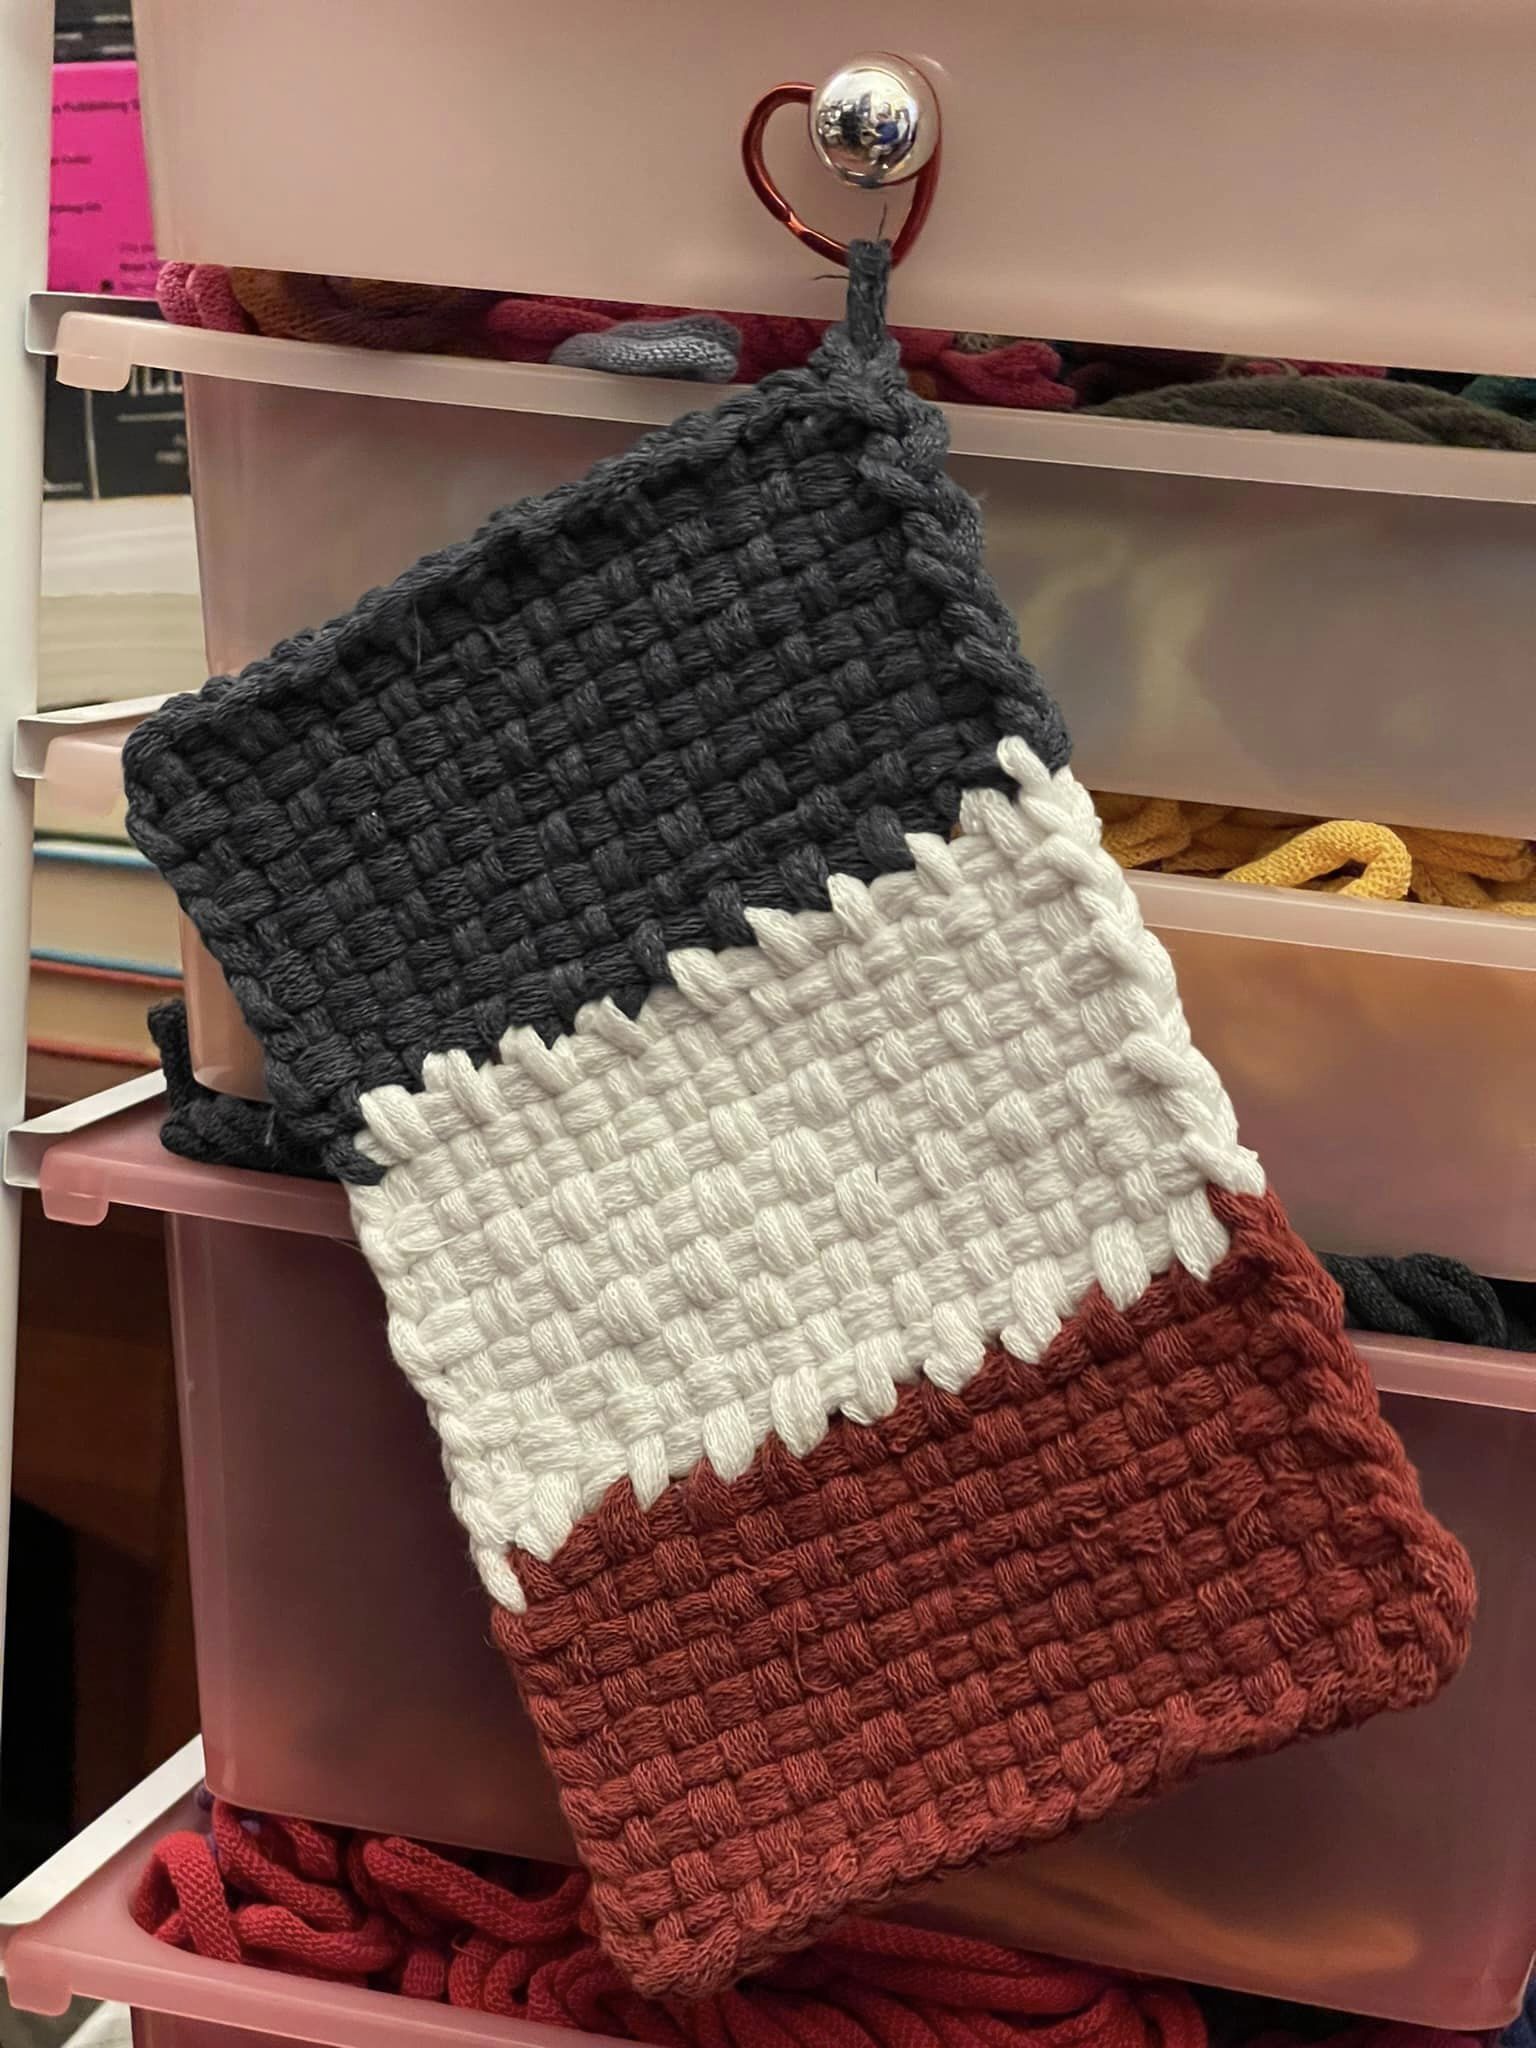
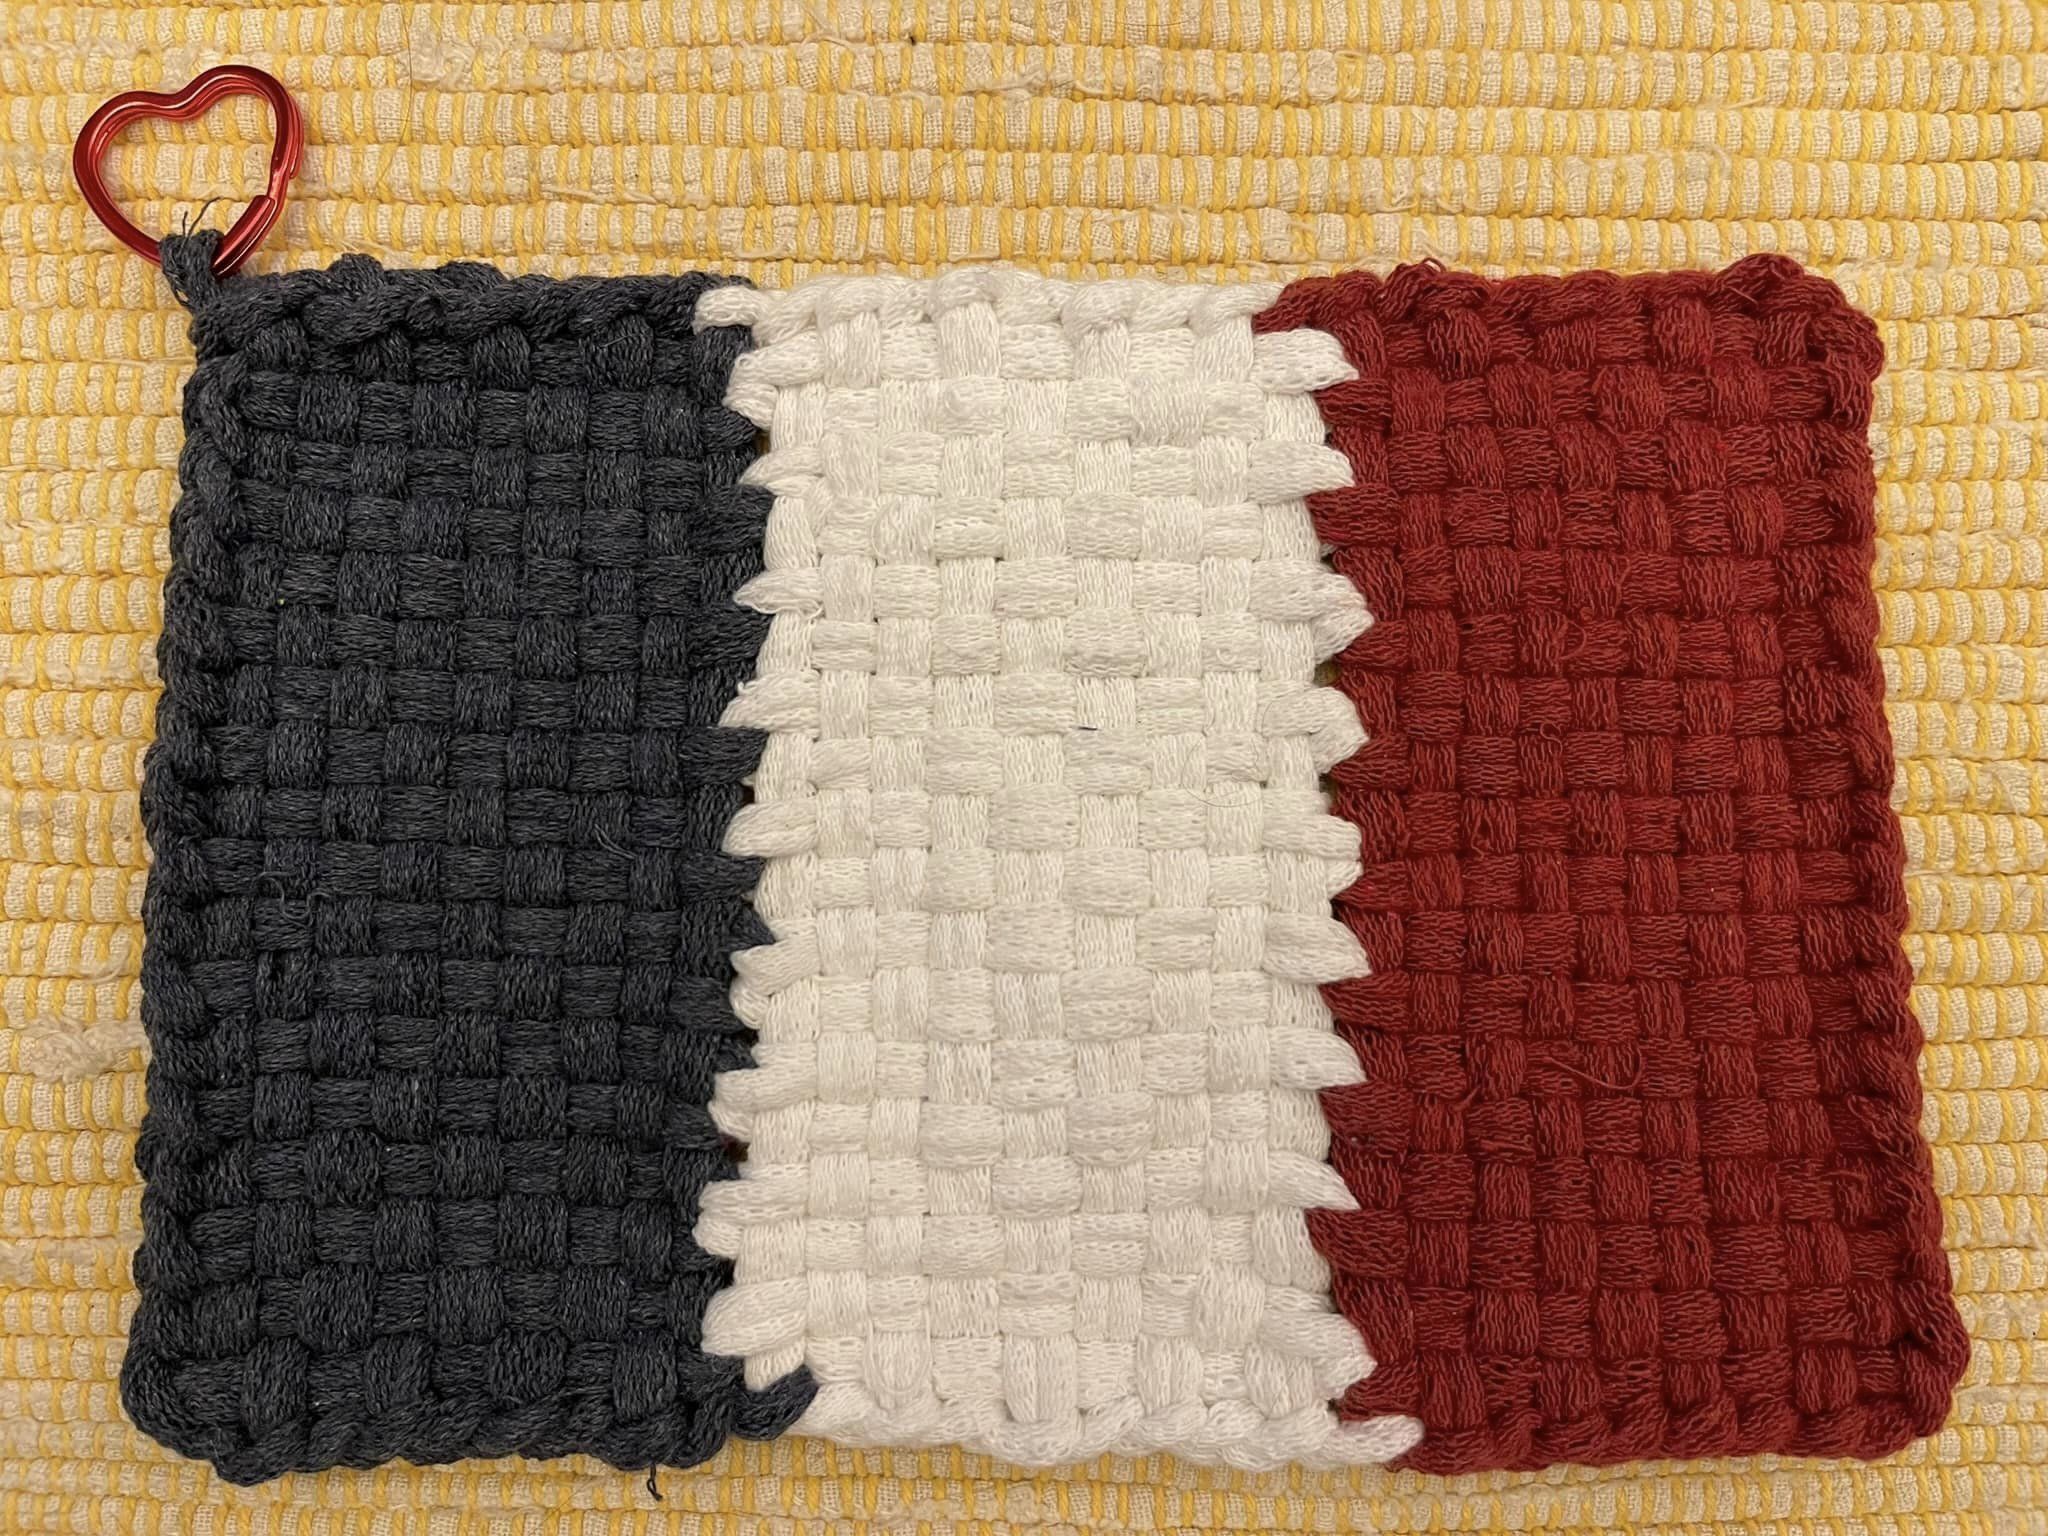
Flags, you say? *You* get a flag, and *YOU* get a flag! Everybody gets flags!
Tricolors, anyway.
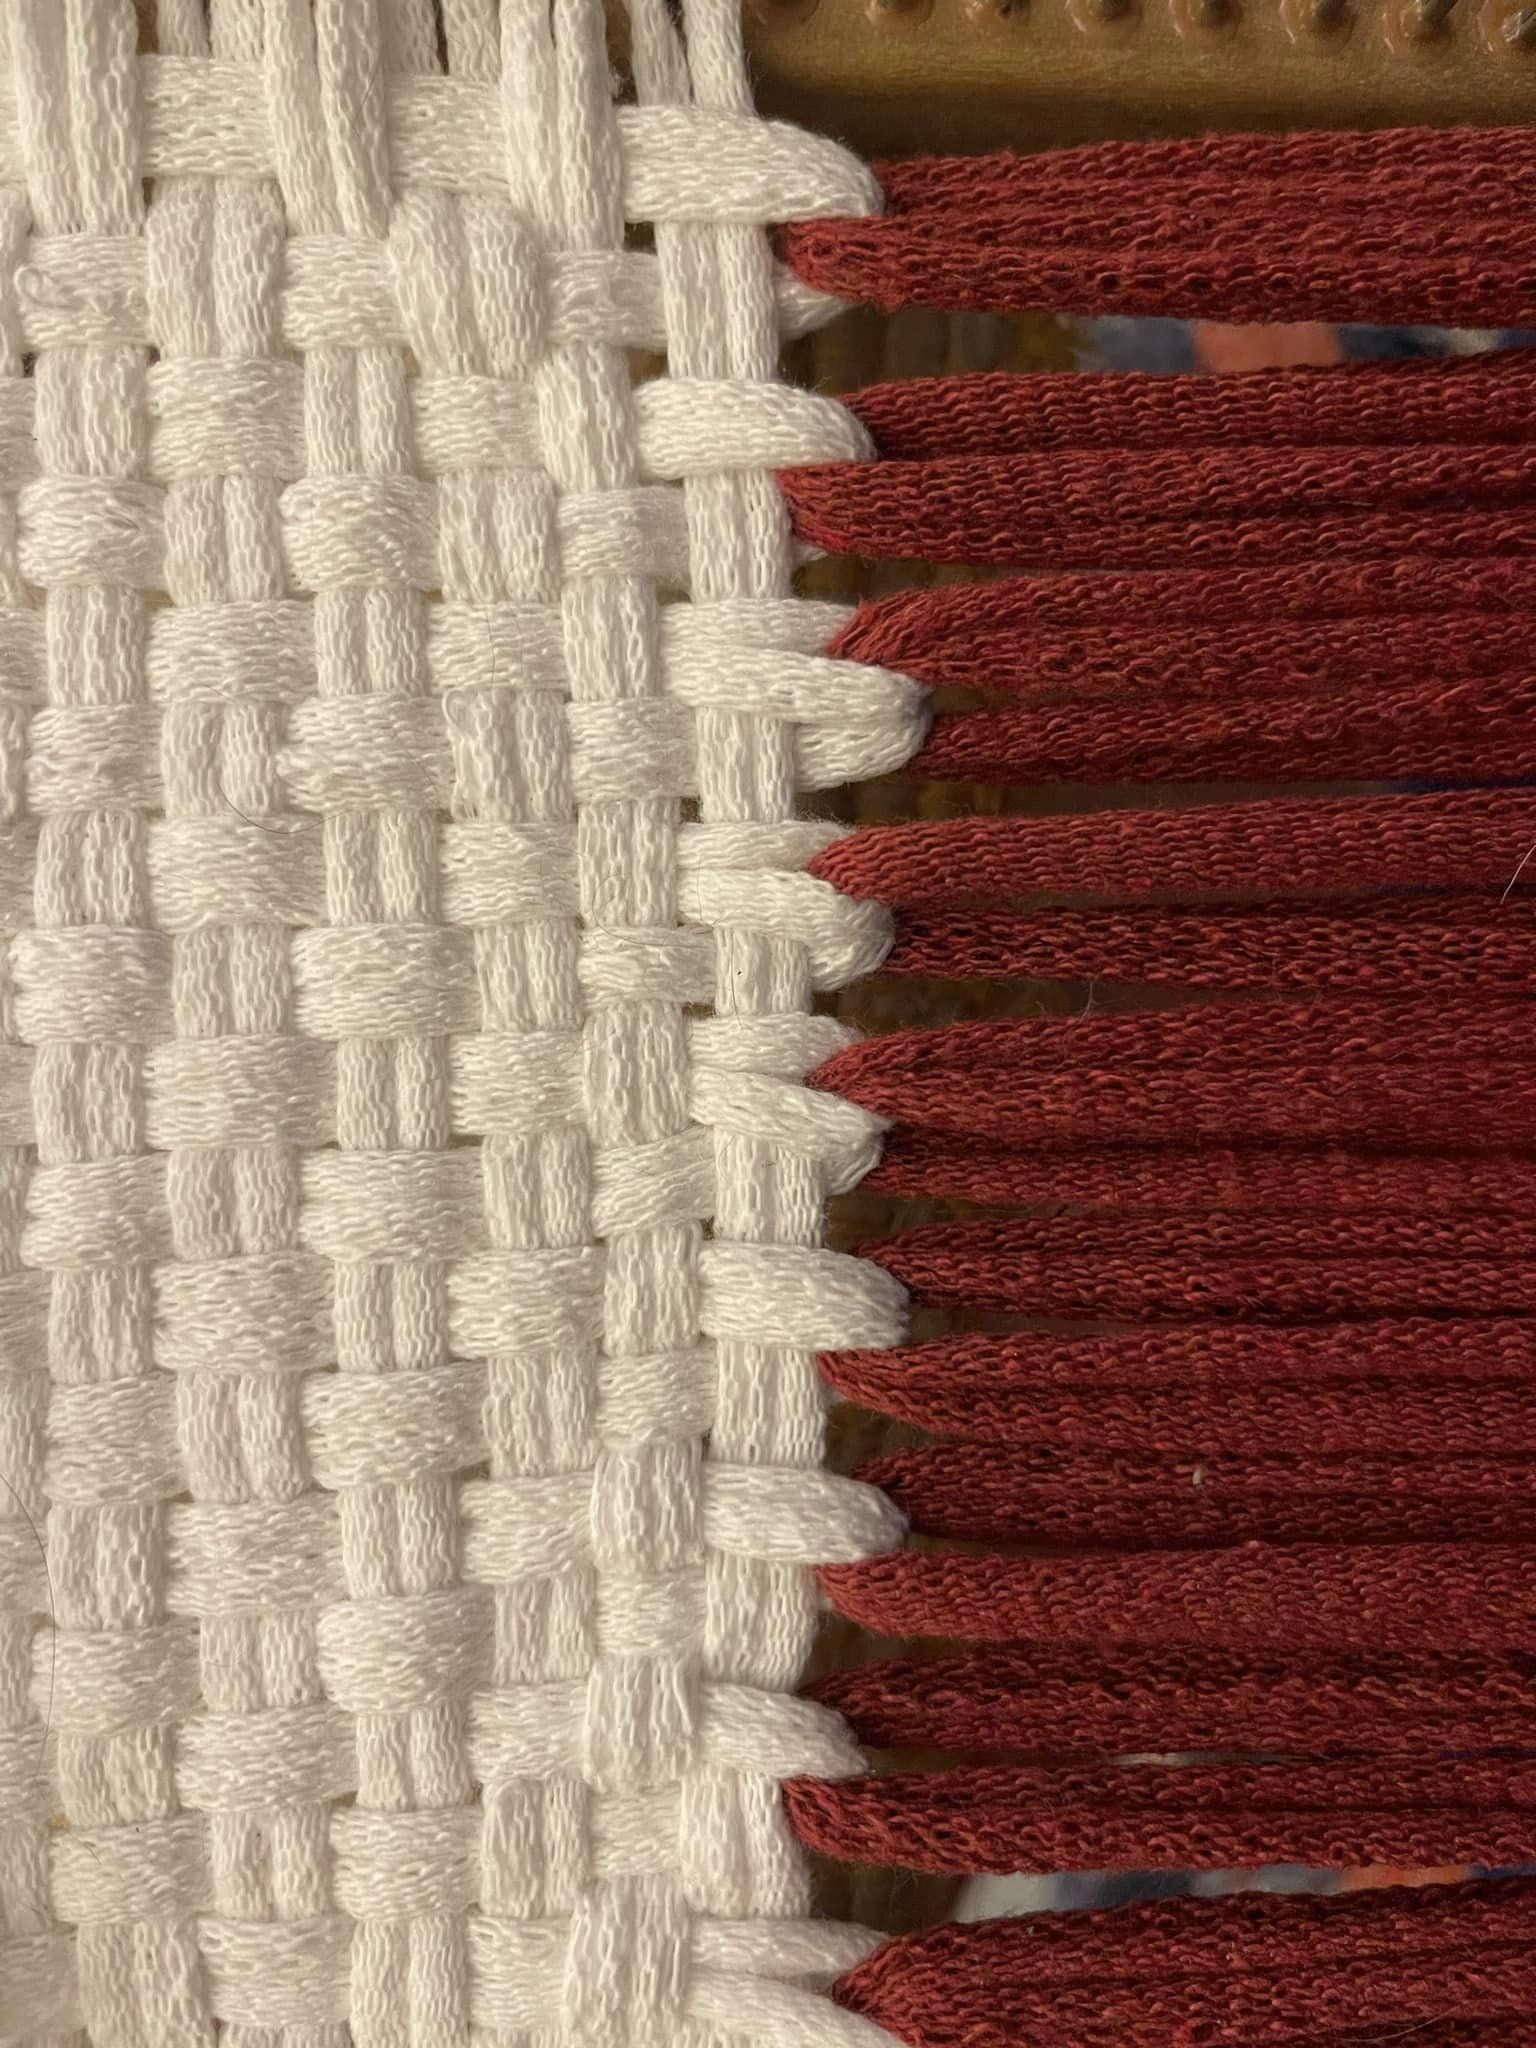
Matthew noted that the 7″ traditional loop is 2/3 the size of the 10″ pro loop. So… 3 traditional loops folded in half equal one pro loop. Therefore, we can use this ratio to create three colorblocks across the width of our potholder!
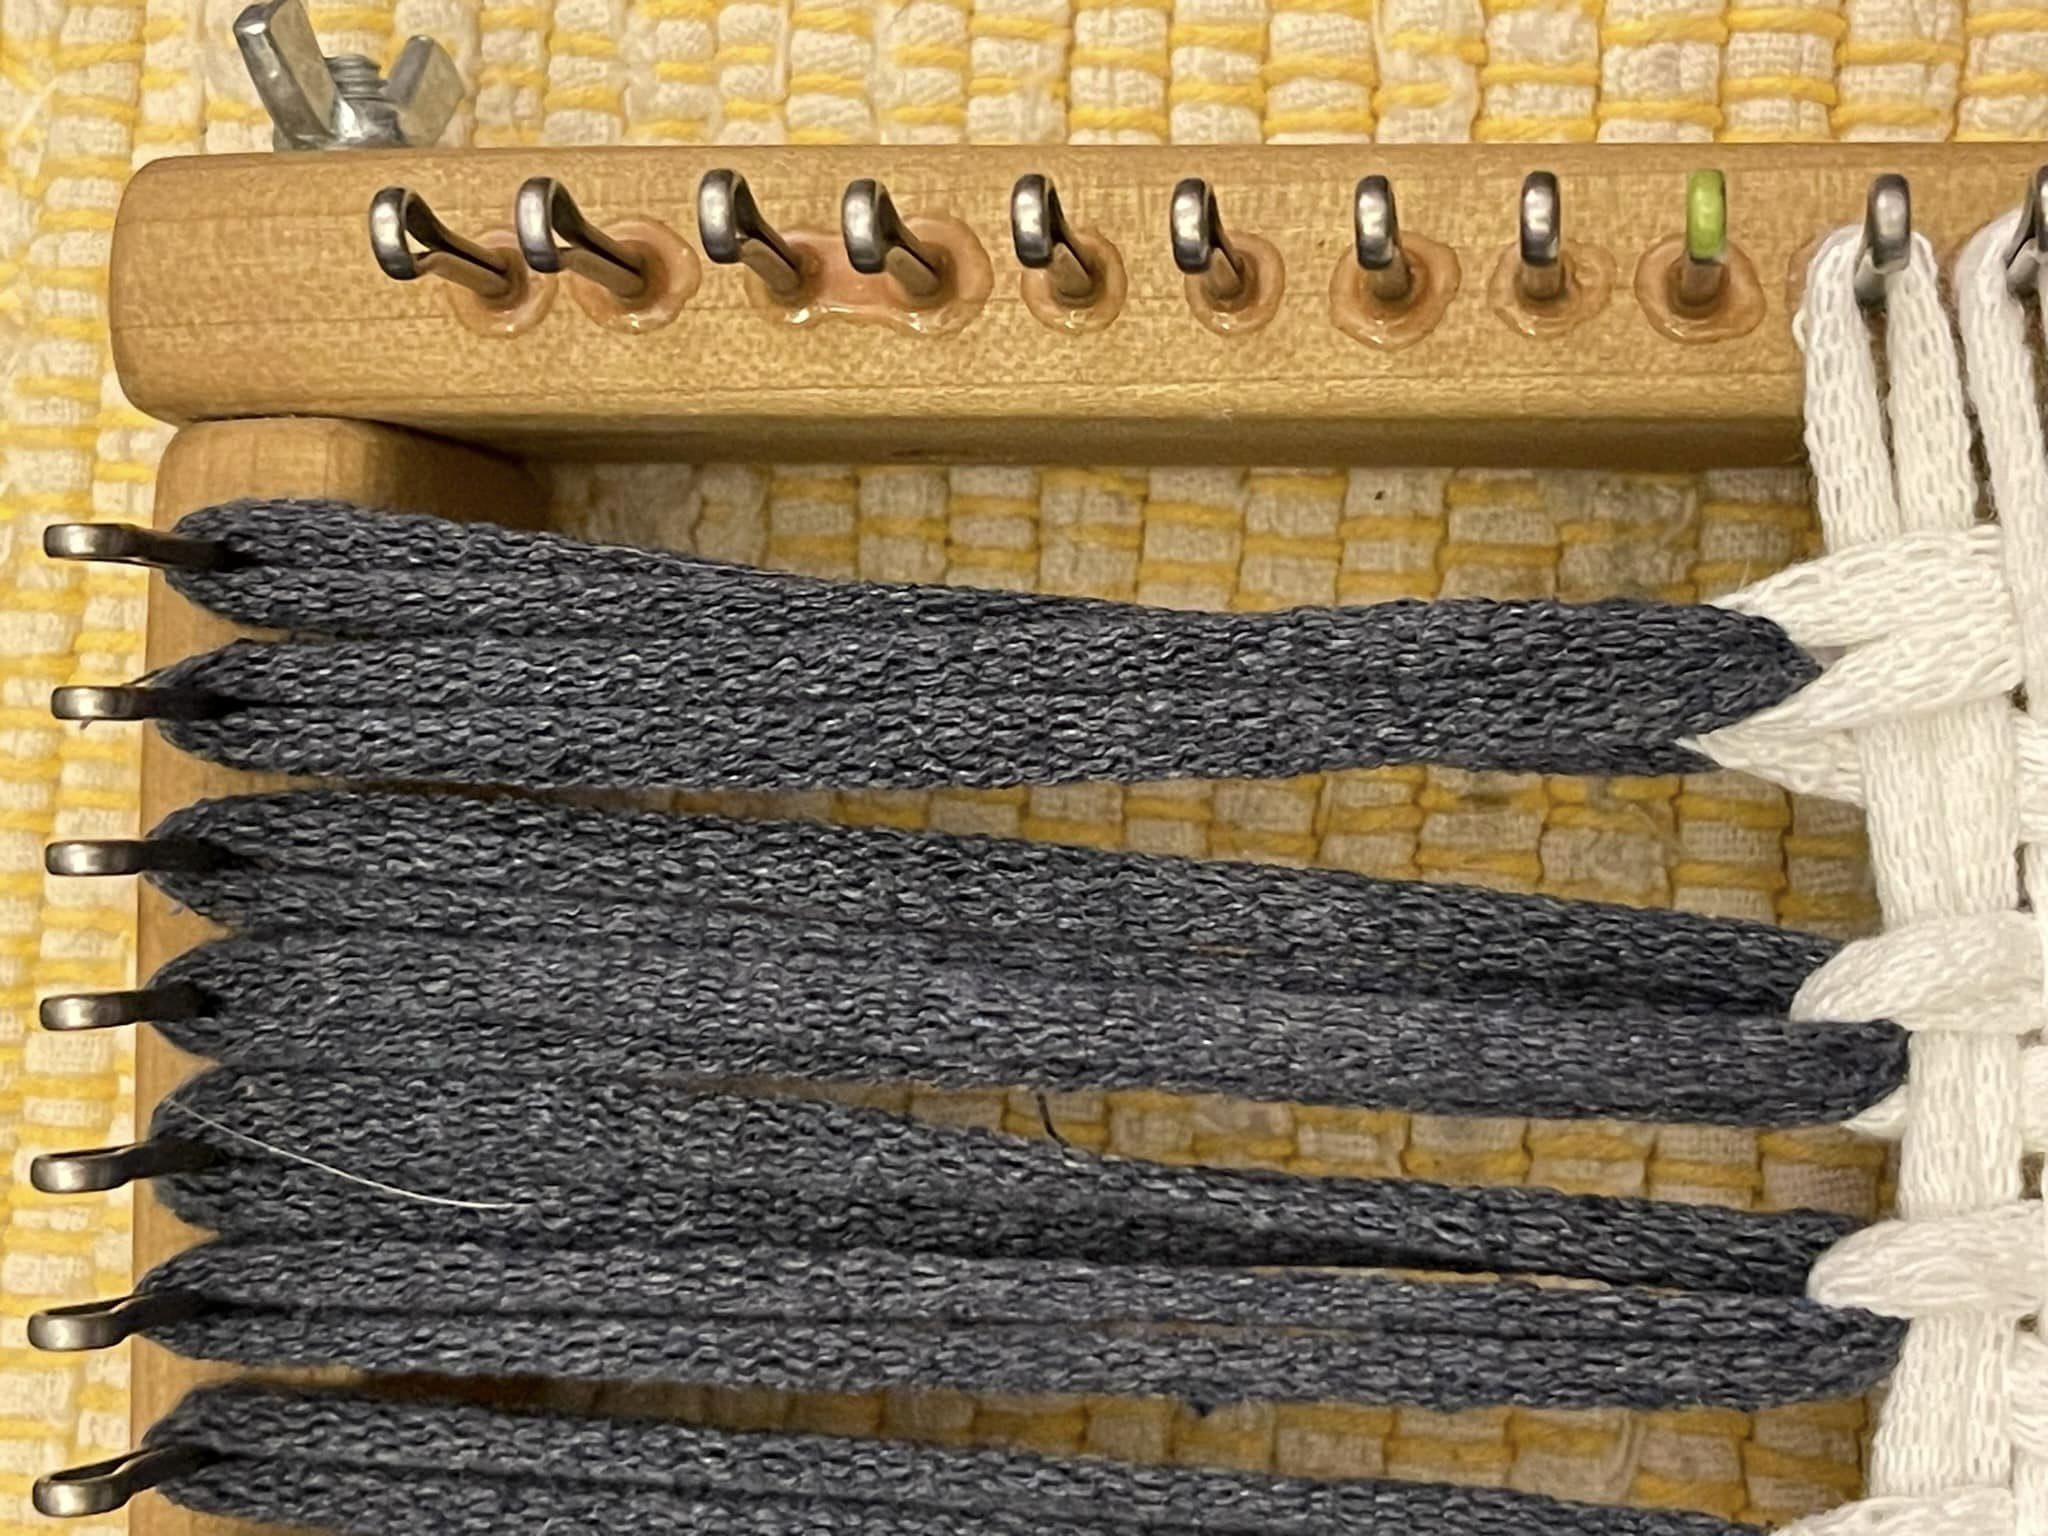
We wove the French flag with denim, white, and cayenne traditional loops.
(You could use this same technique to make a square pro-sized potholder with matching colors of traditional-size loops in one direction and pro loops in the other.)
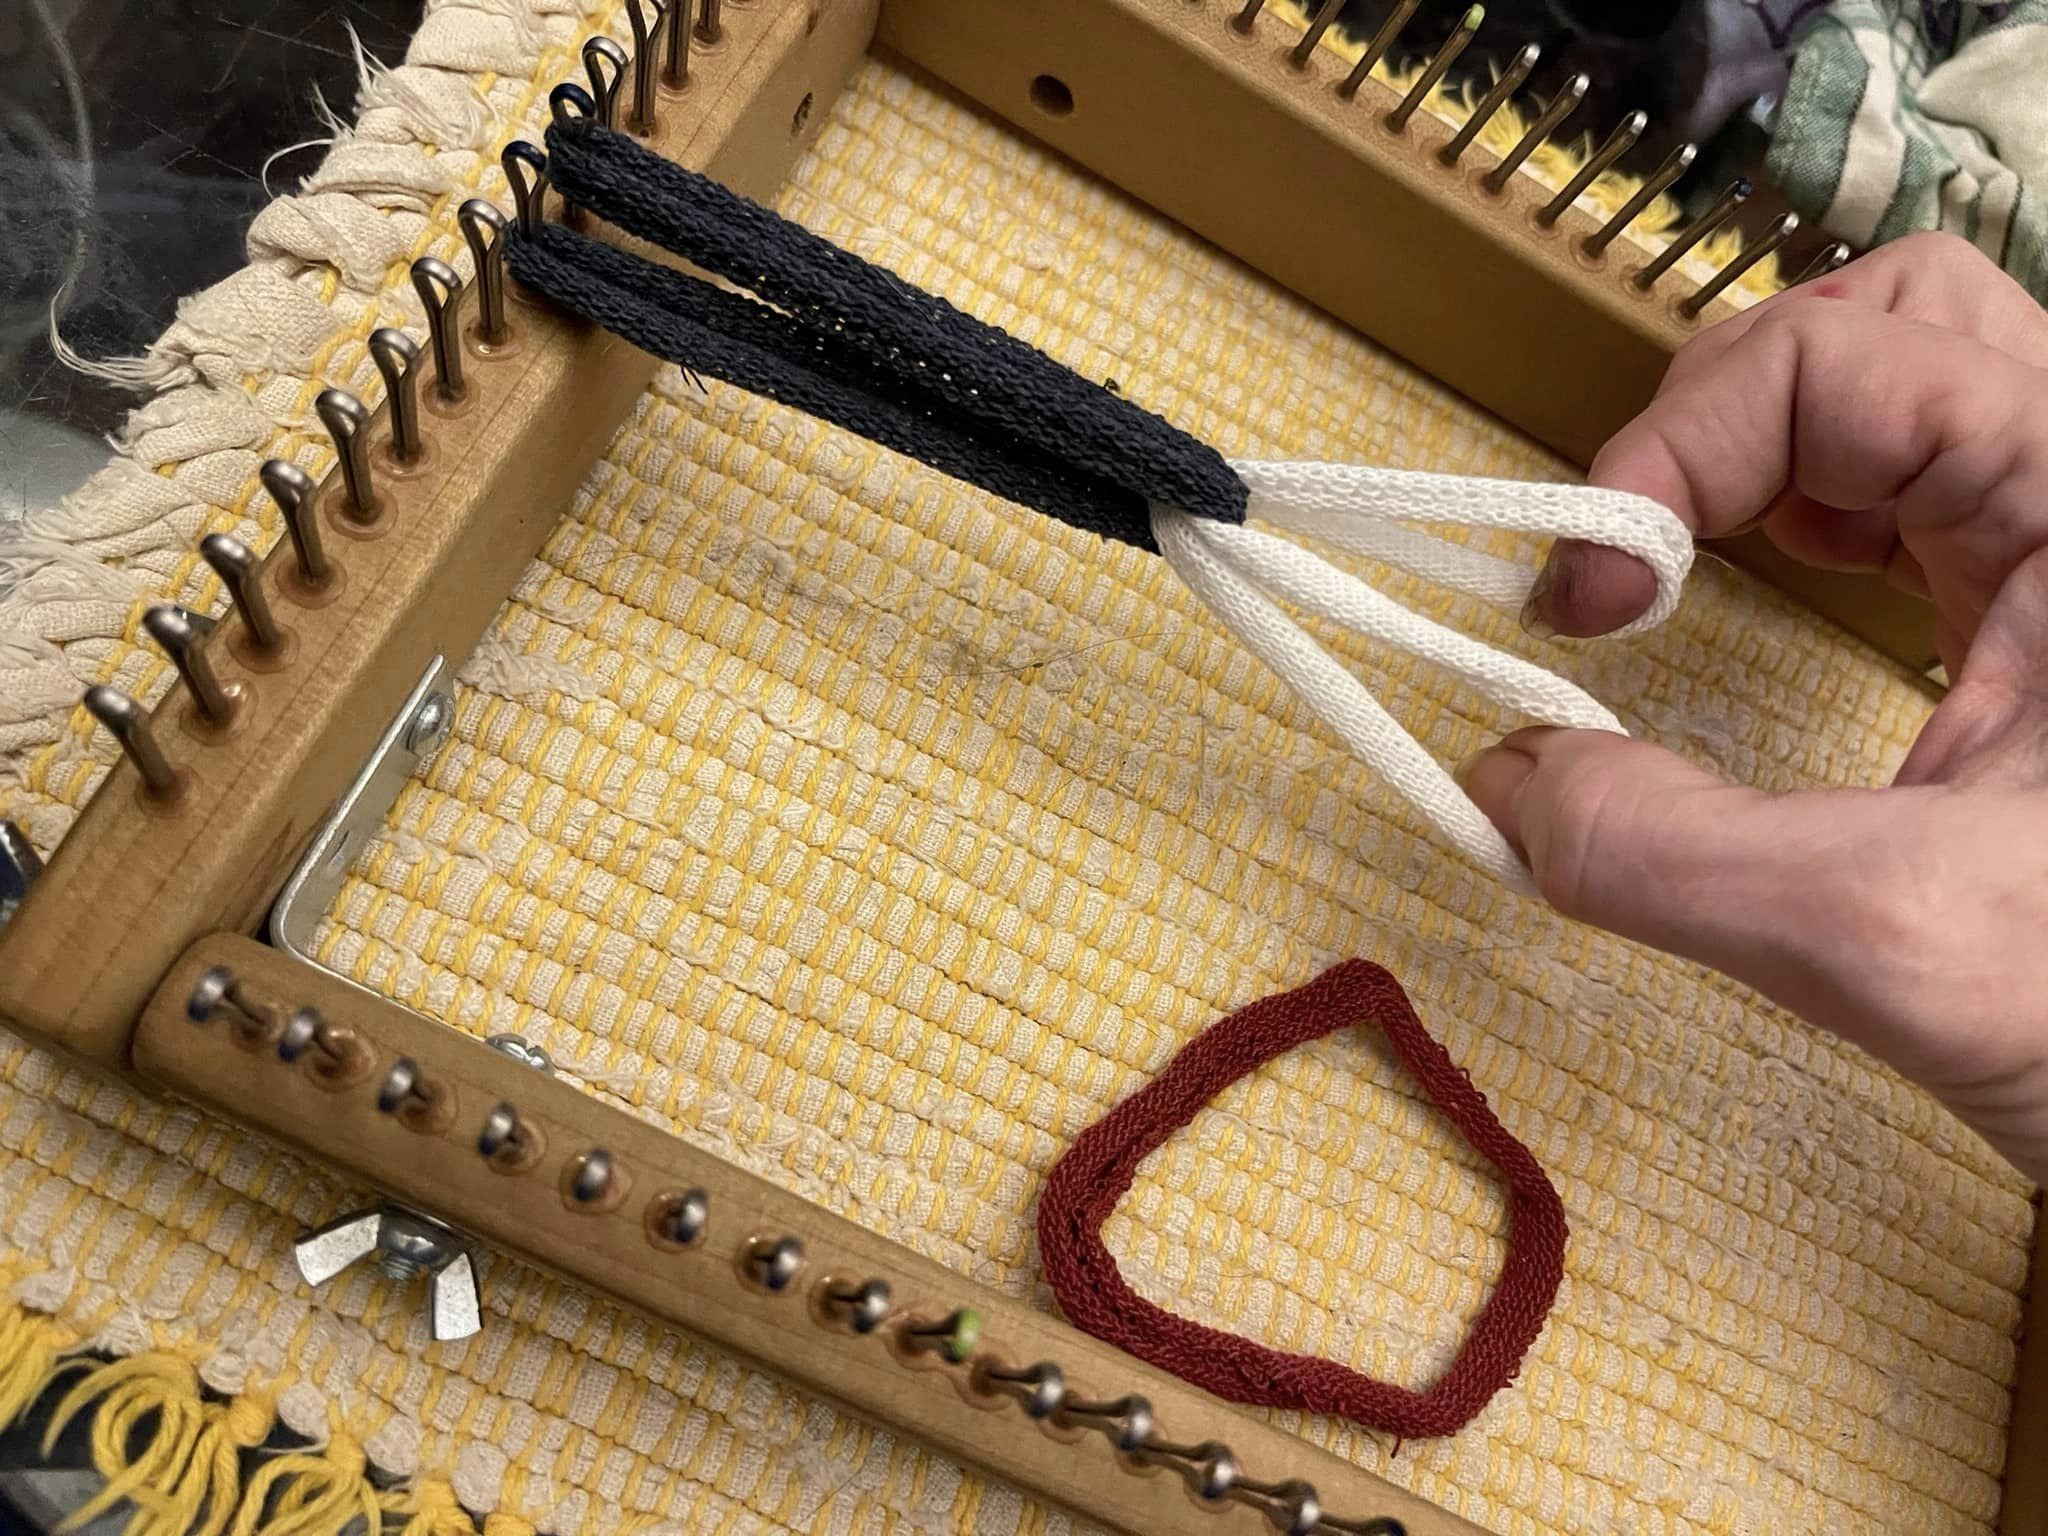
The photos below show the process, starting with warping the loom with loops folded over and threaded through each other. I wove the center section first, as I always do, but you could also start from either end. Before transitioning from one section to the next, check the next section for twisted loops and untwist them so they all line up nicely.
Sometimes, in the middle of weaving, you realize that you’ve used the wrong color of loop — here’s a simple way to make it a bit easier to swap in a different one.
When I put in my first row, I accidentally used a white loop when it should have been yellow. I only noticed after putting in the rows above and below. Working middle rows is trickier when they are forced atop each other for the 19-peg pattern. So I looped my replacement yellow into the white loop that was there, and threaded it through in its place. Best to work it through one crossing at a time, I find, because the knot is lumpy. Slower, but so much easier on a complicated pattern than taking it out and starting from scratch.
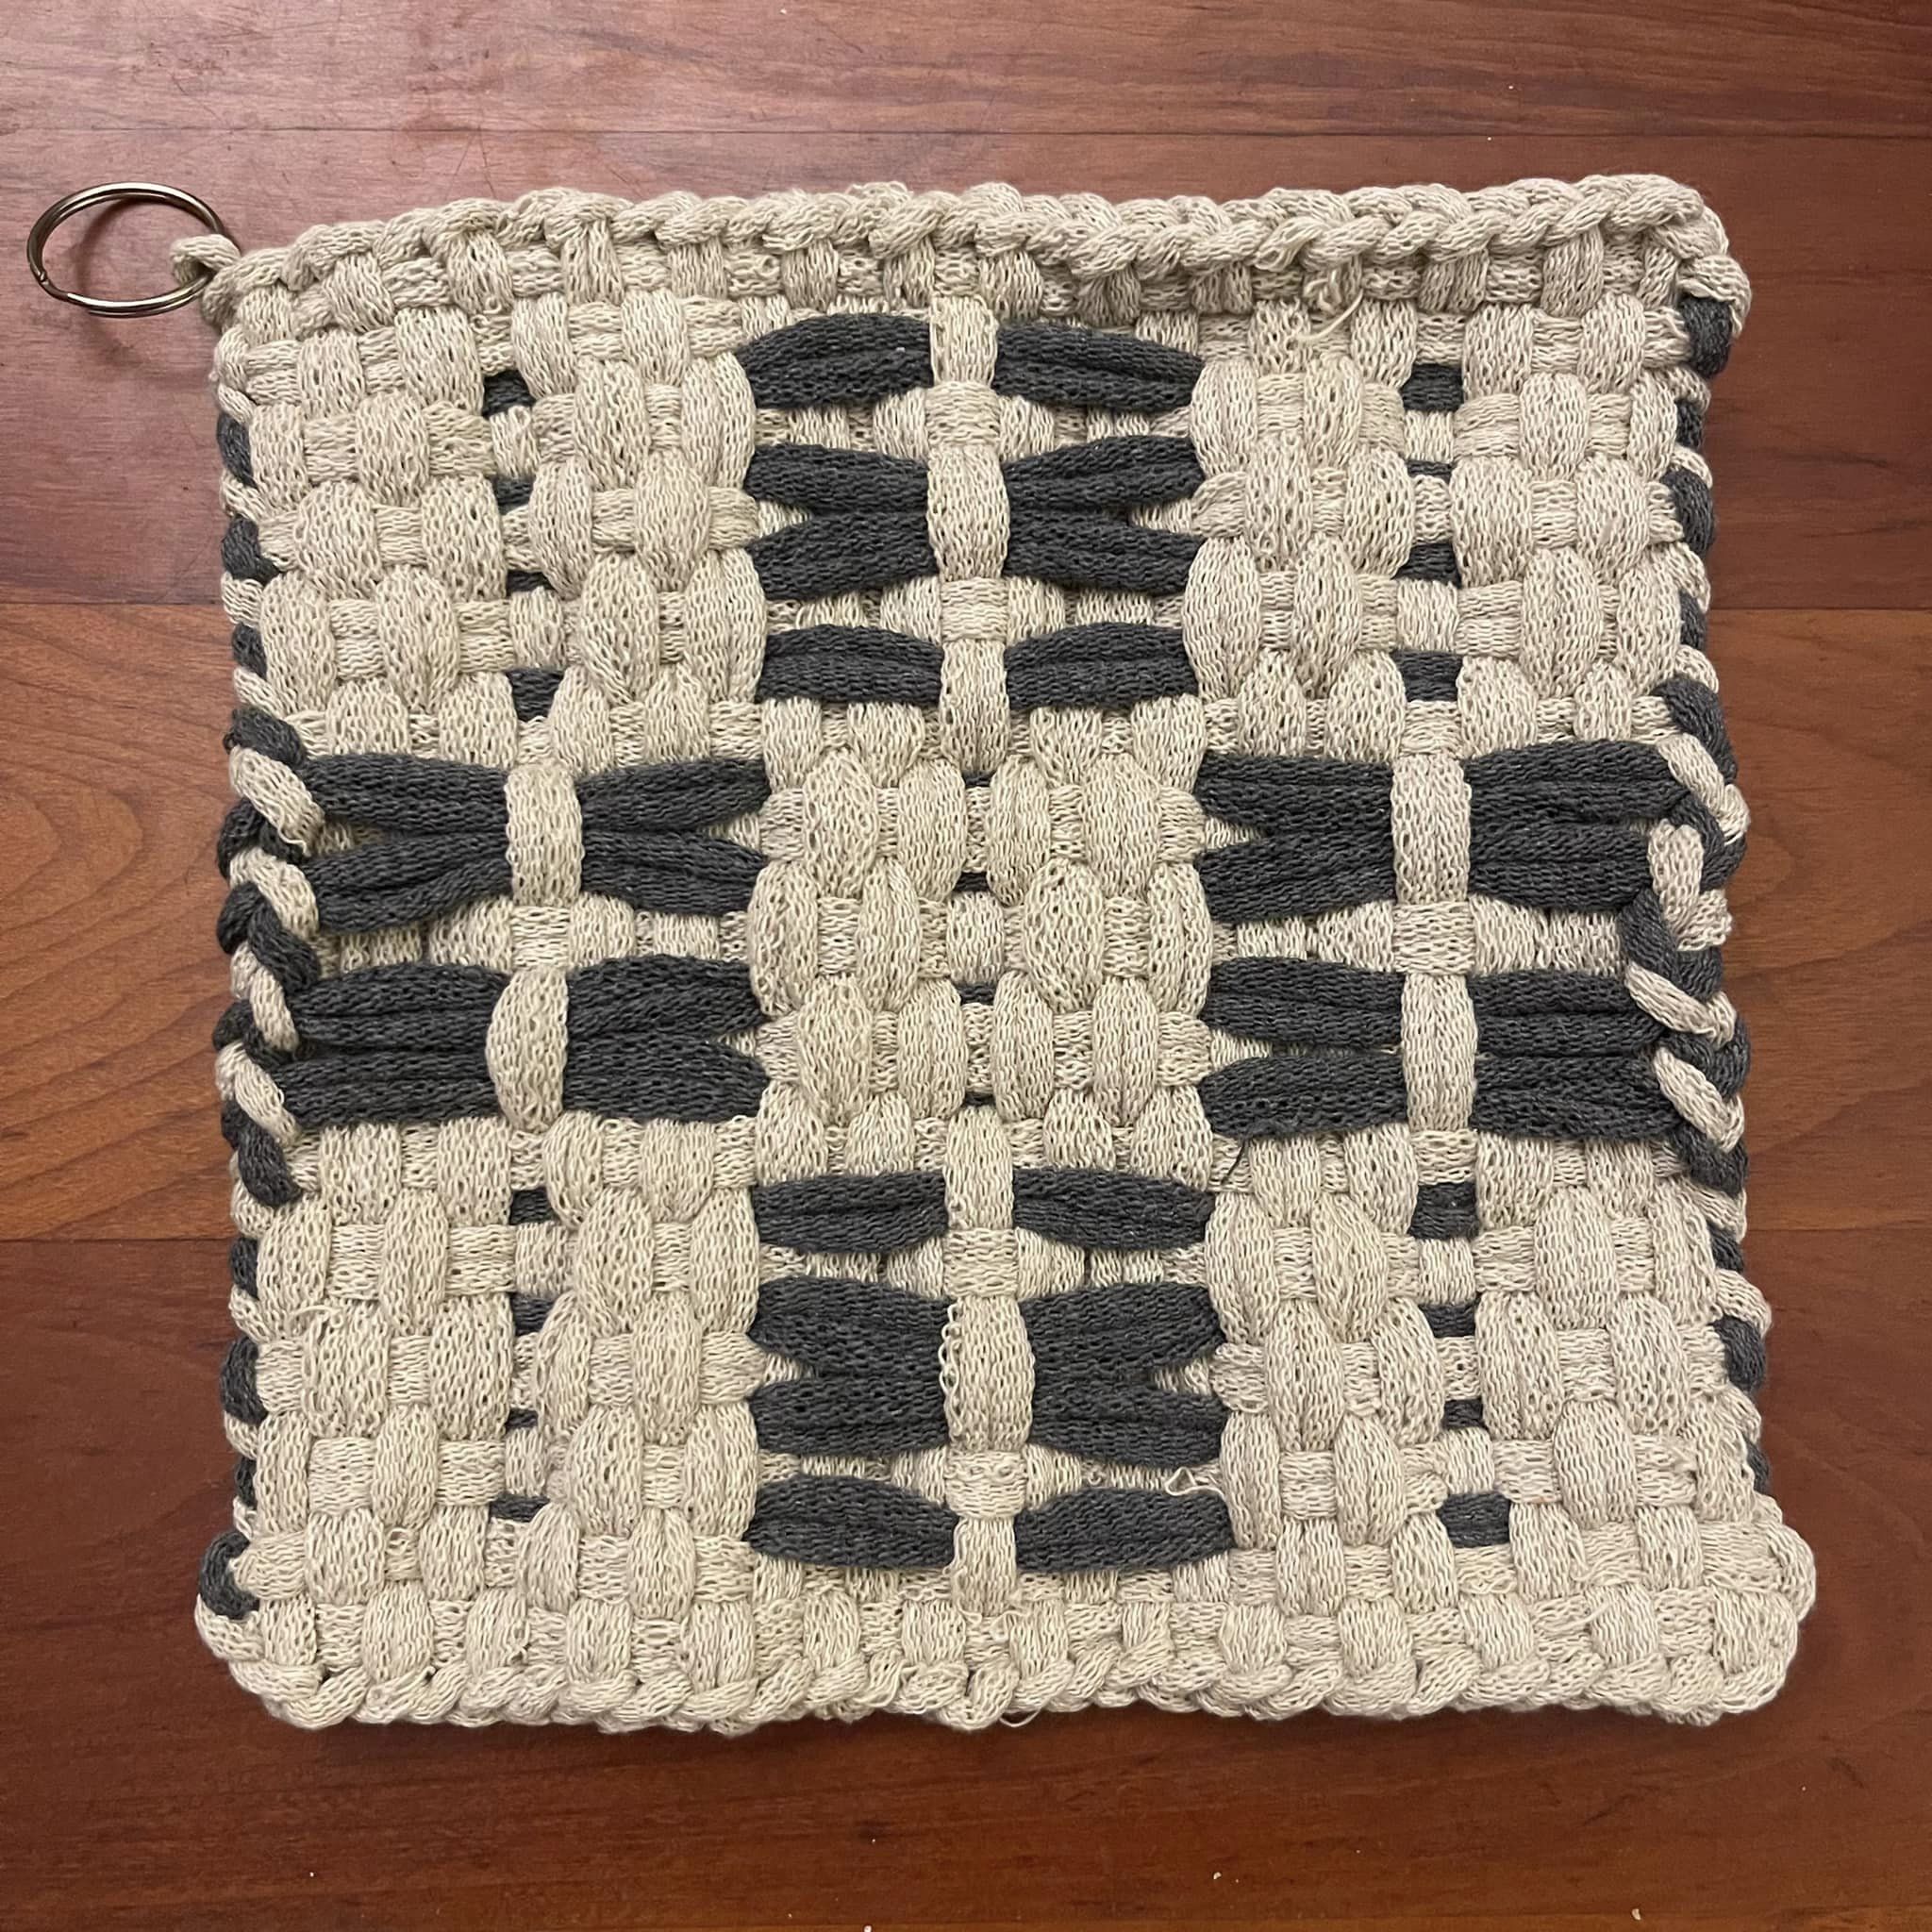
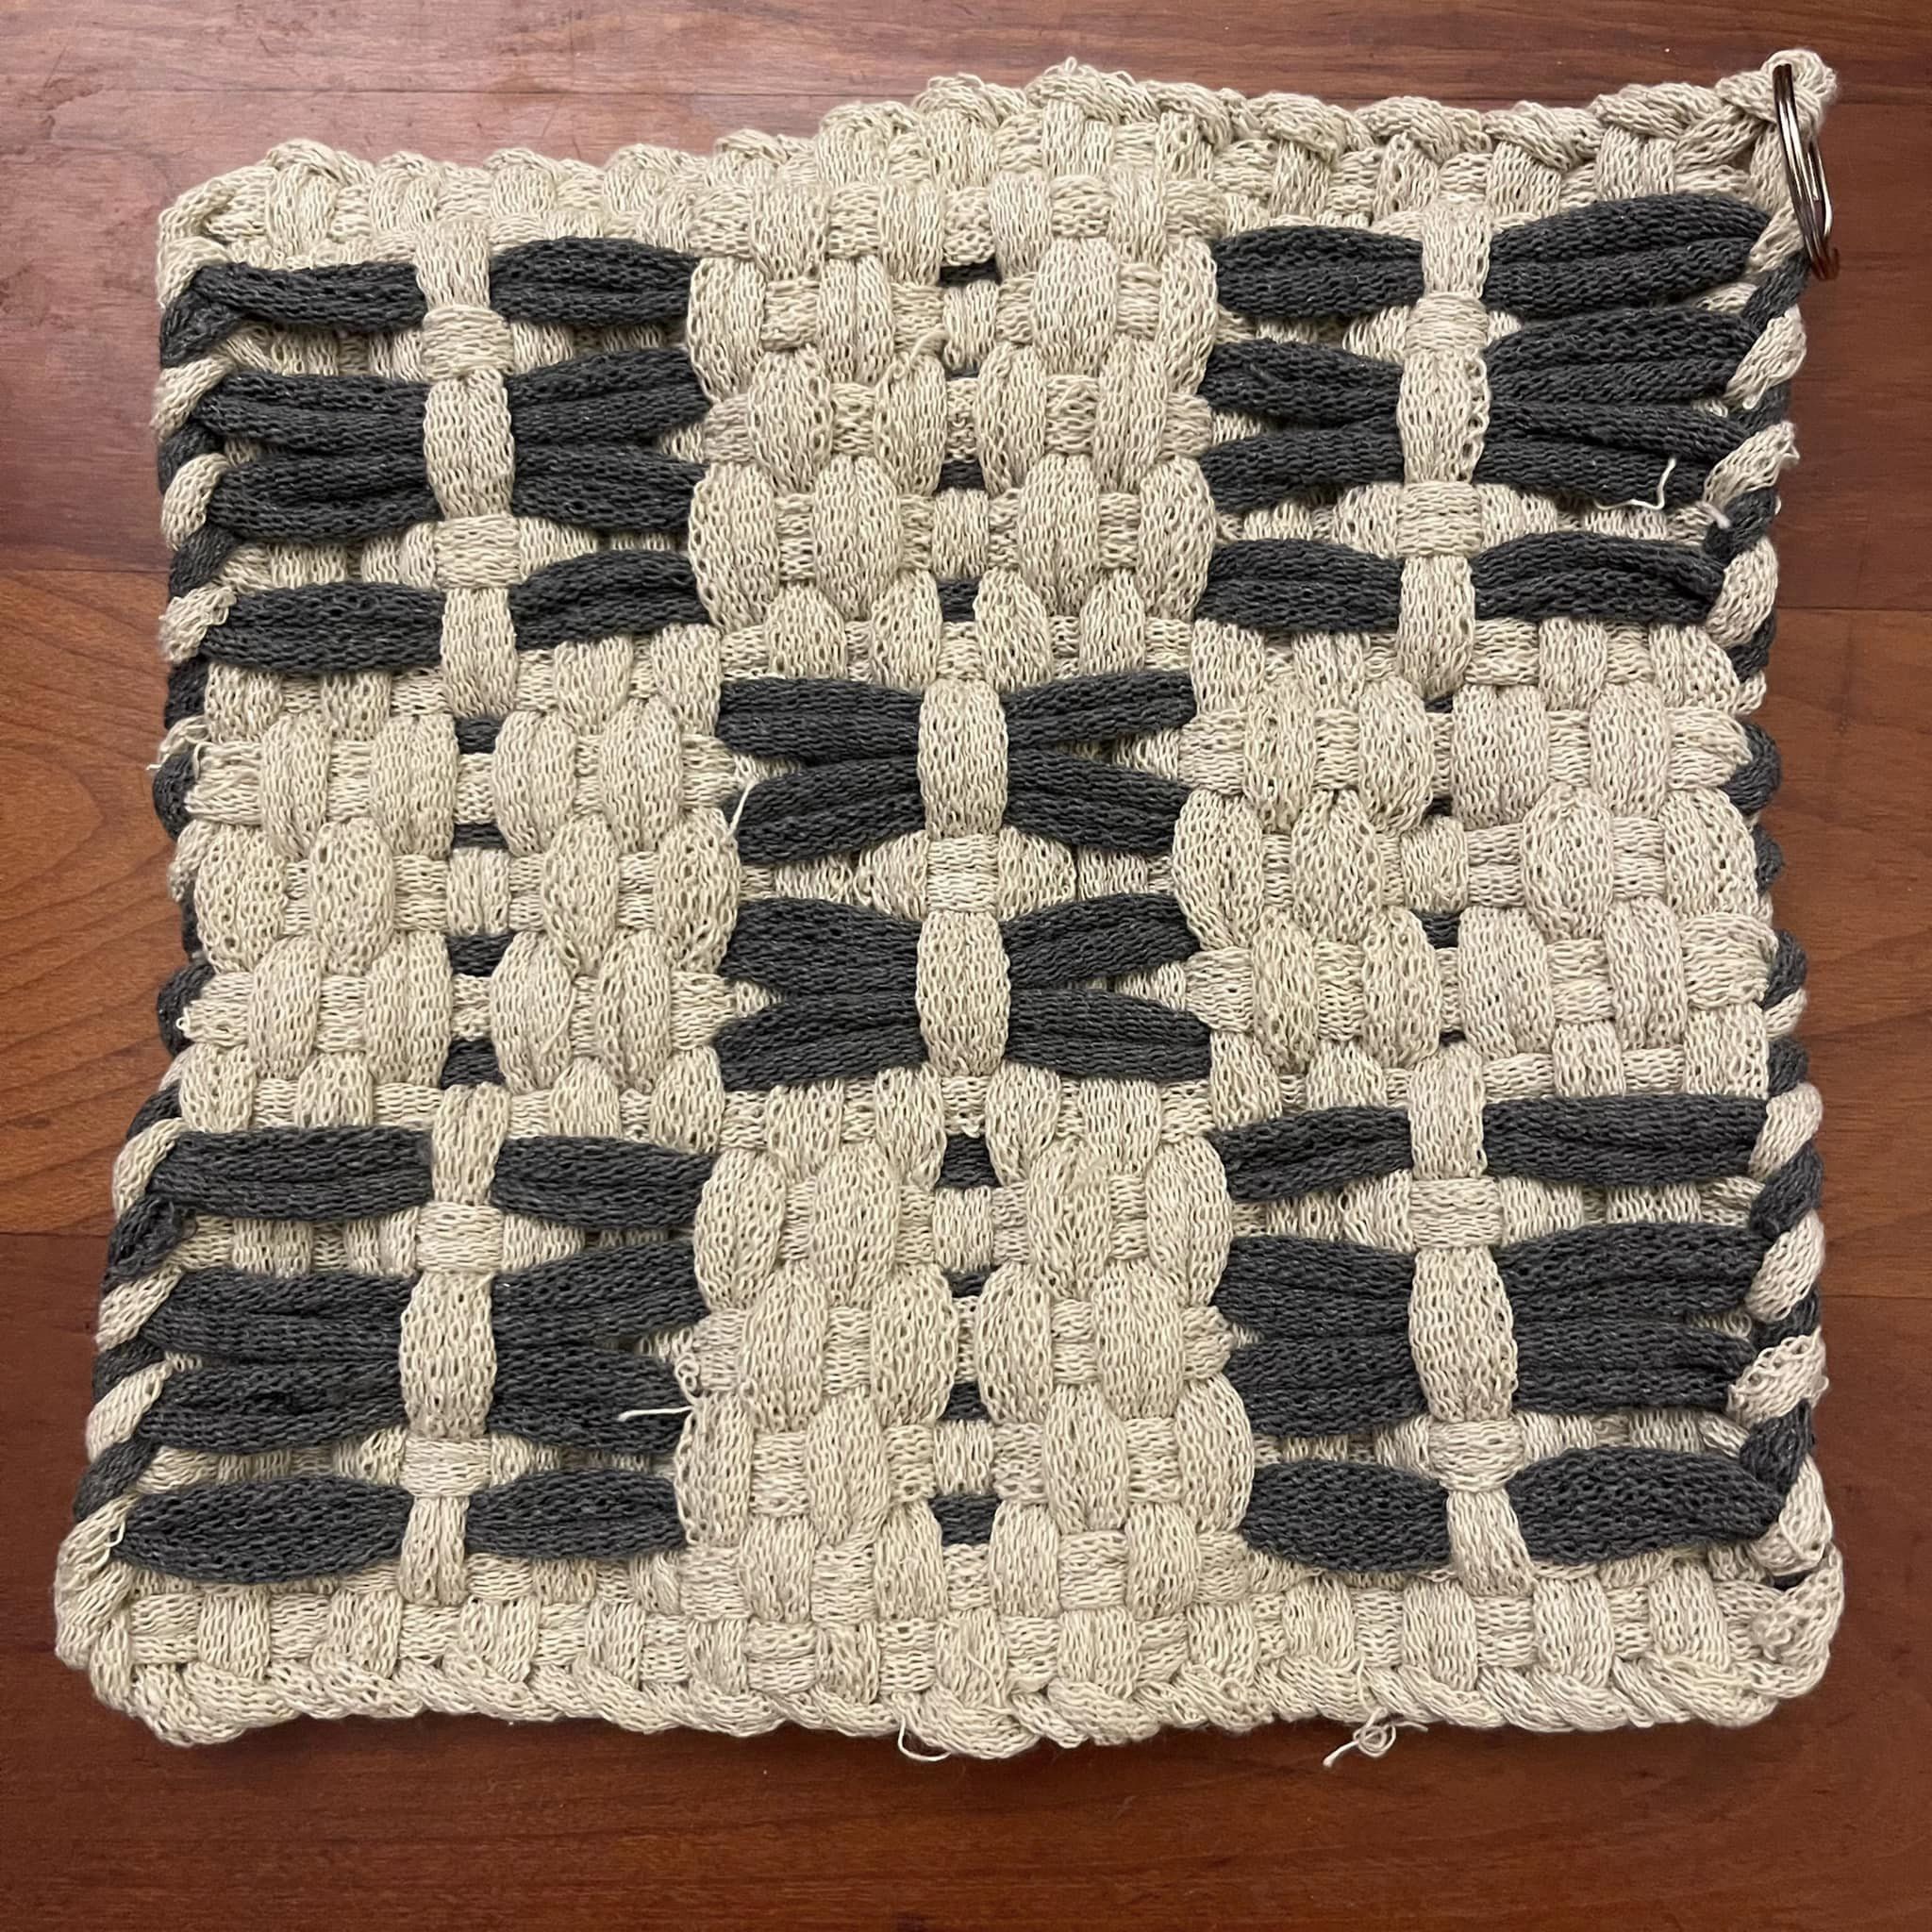
Some things come off the loom and they are so perfect you can’t stand it. This is one of those things. What a delight!
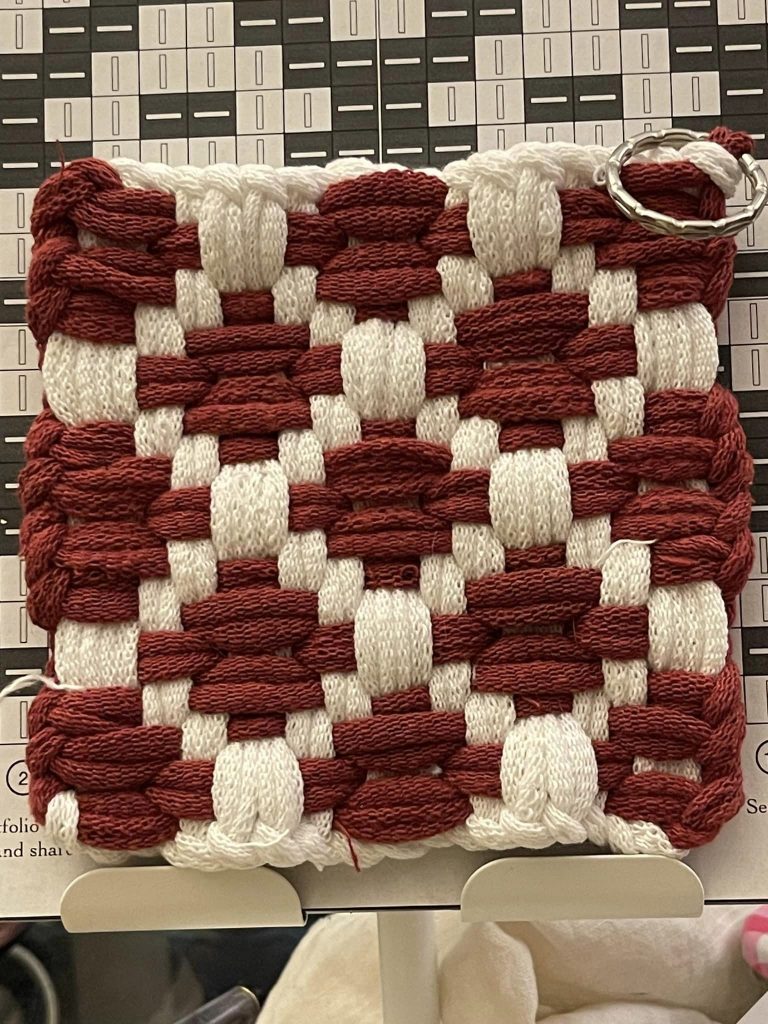
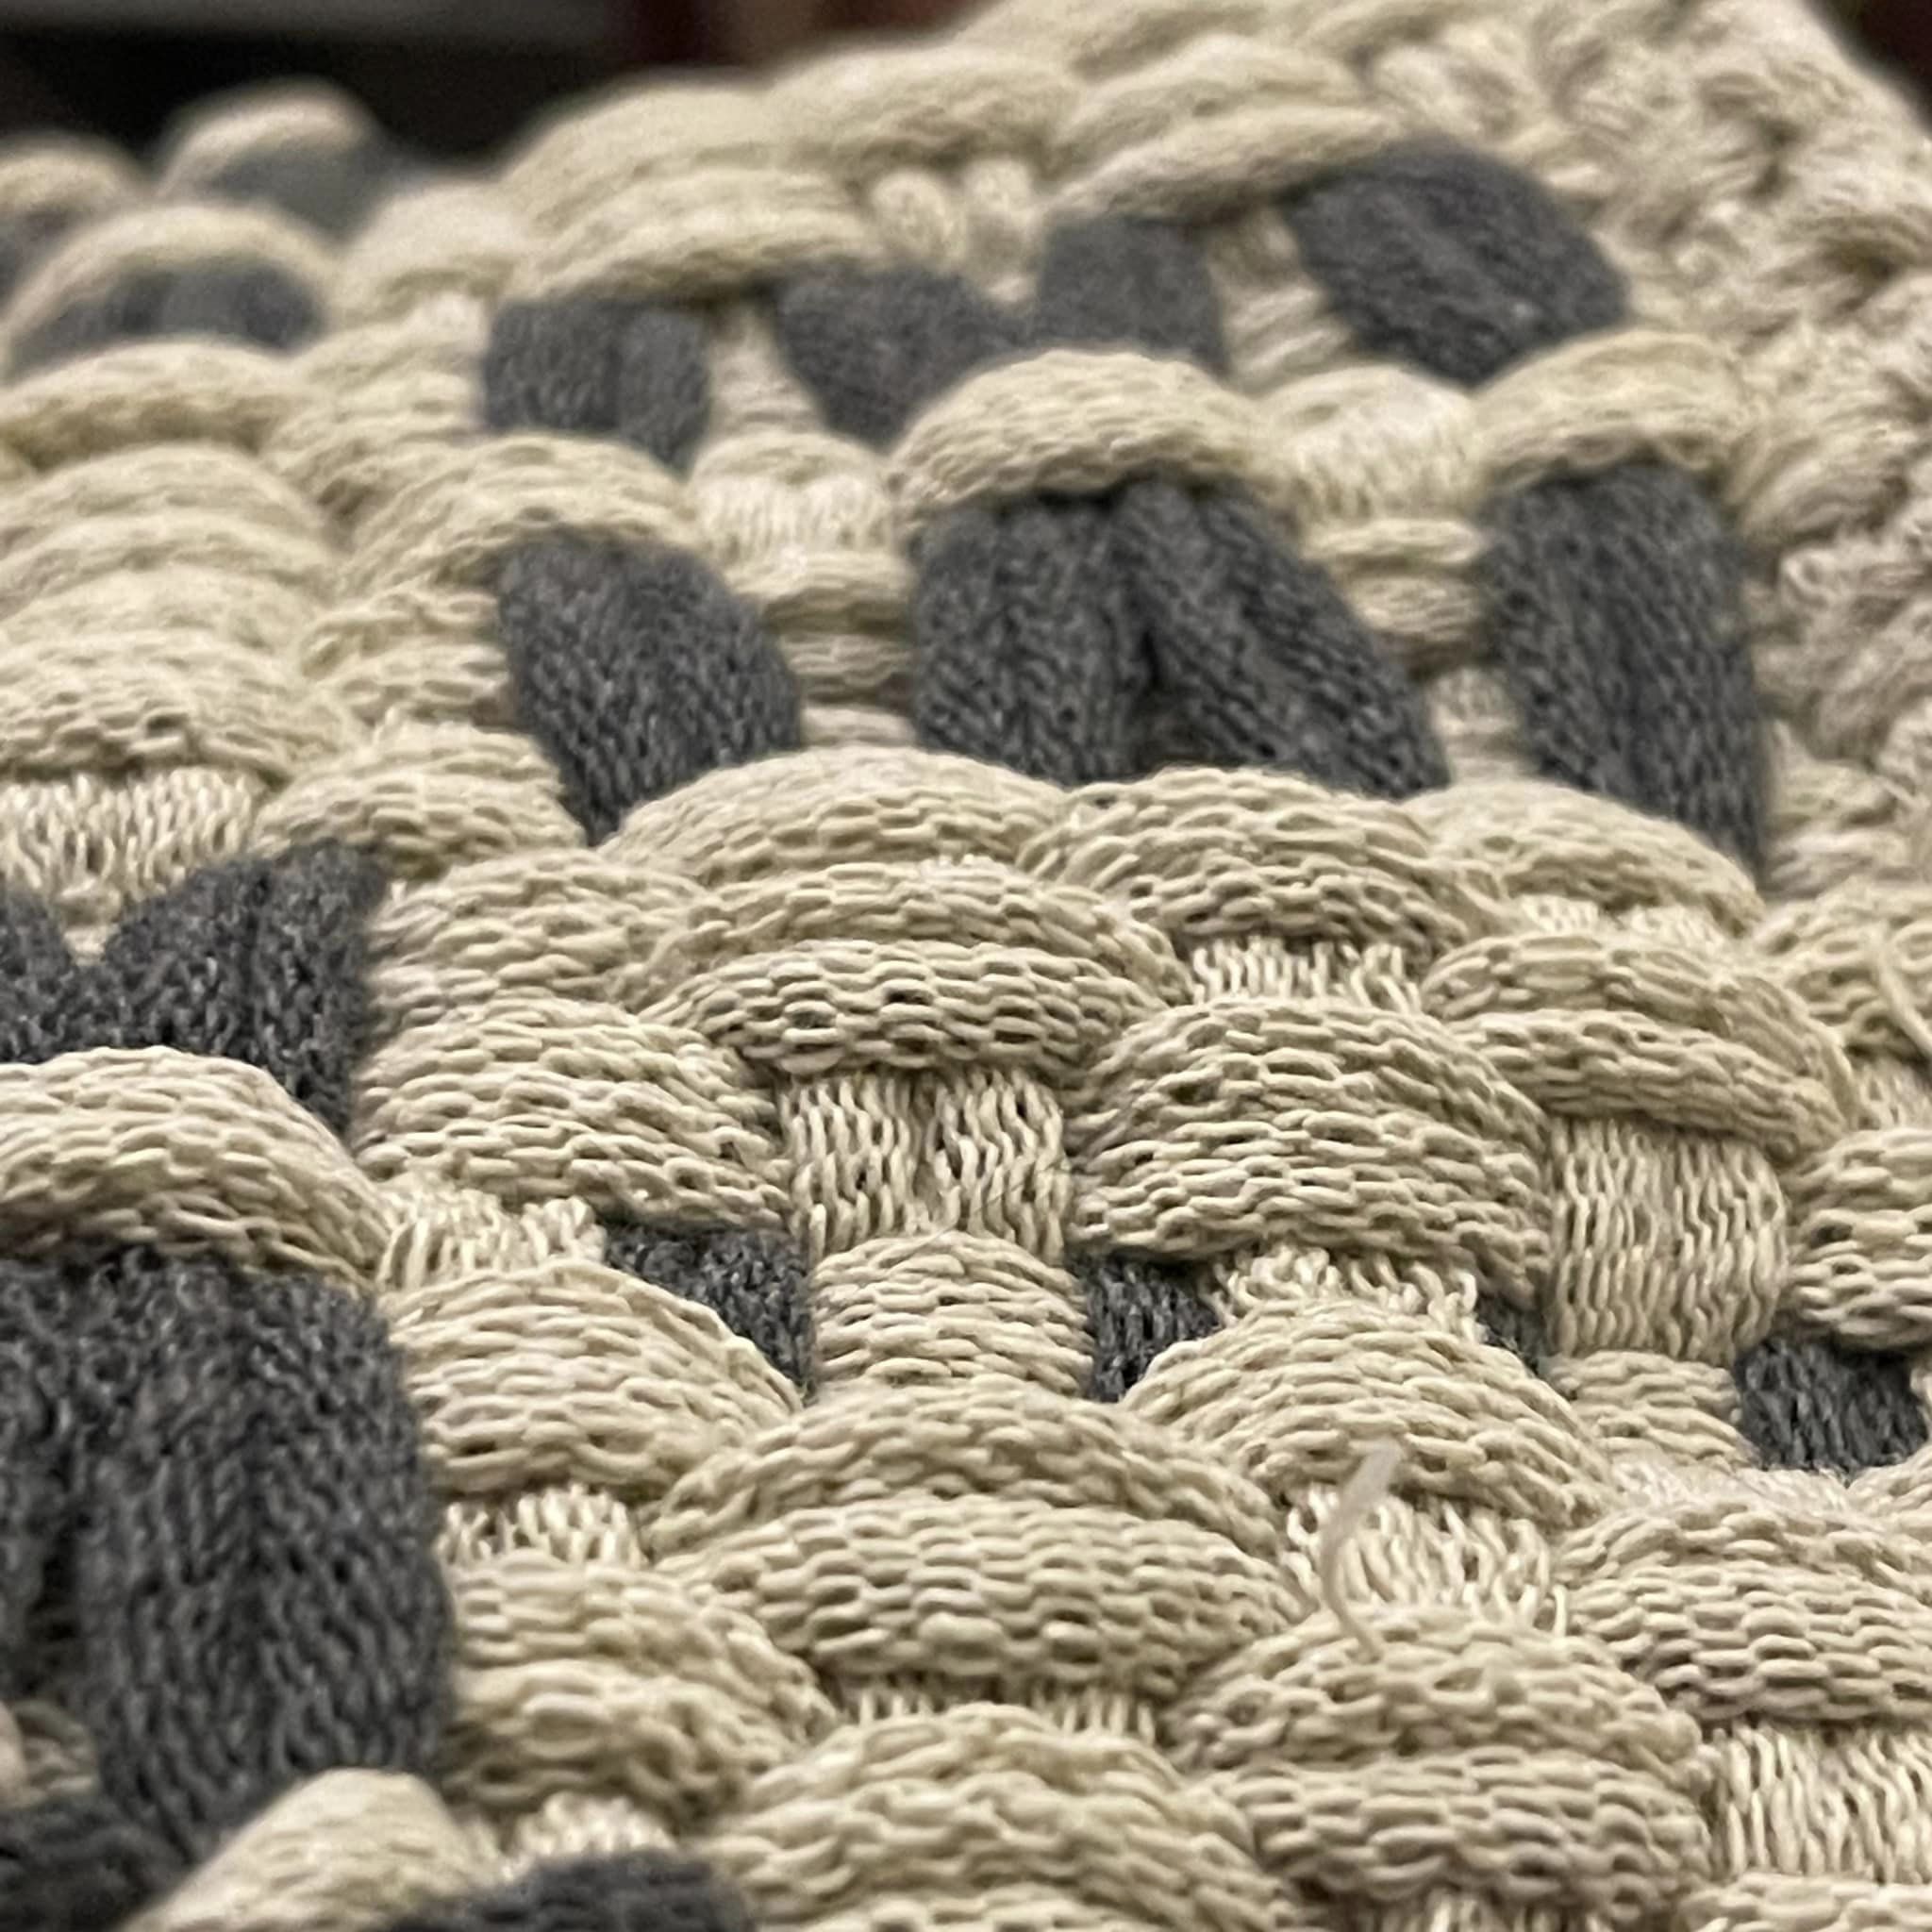
The pattern is unexpected from the chart. Rotational symmetric floats form boxes that draw up on themselves. The front has four interlocking knots; the rear four connected boxes. The knots and boxes stack atop each other, so the fabric is extra thick at those four points. The result is soft and thick, yet still drapey and flexible. A marvelous pattern!
Tensioned on the loom, you see the exploded version of the front knots.
On the front, you can see 4 interlocking knots, like textile frogs.
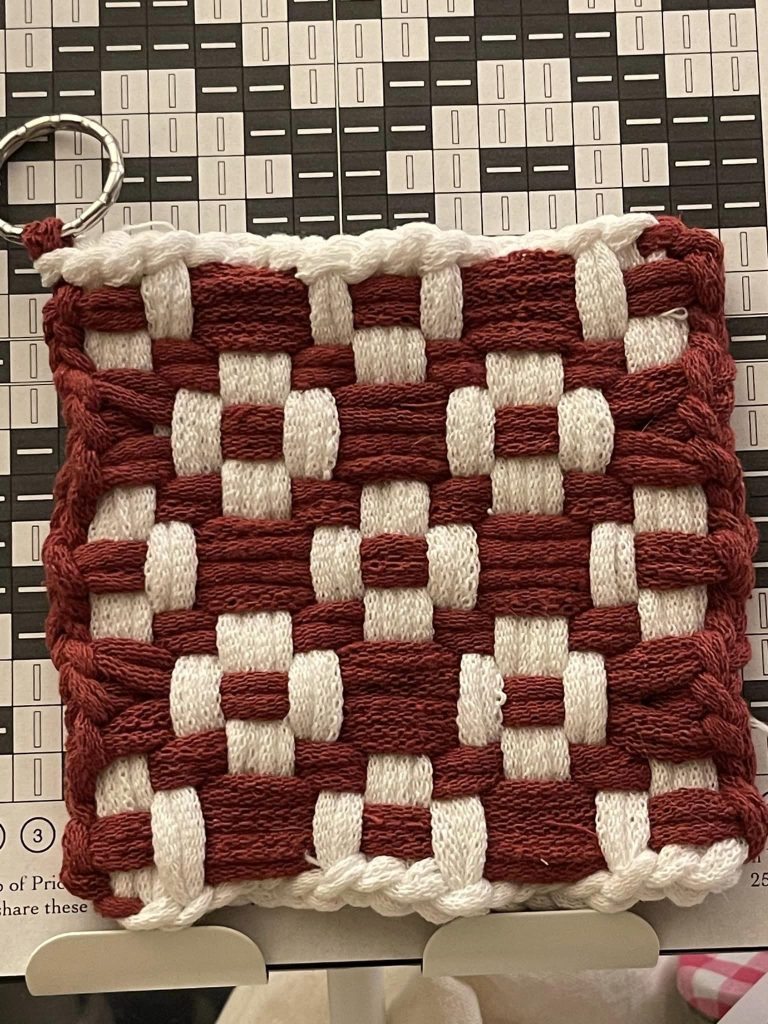
Similarly, on the rear view, the boxes have drawn up to obscure 4 white dots you see on the chart preview (upper right corner).
The thickness is more apparent in the hanging view, here of the boxes on the back.
And here on the front view, the knots stand out from the fabric physically as well as visually. The boxes on the back line up, so the result is not distorted or wavy.
A delightful box-y, waffle-y pattern that needs naming! This one forms boxes on both sides, skews them off-kilter, and has little puffy bottoms for each box. Great texture with lots of flexible bias. Charts in both sizes, traditional and pro.
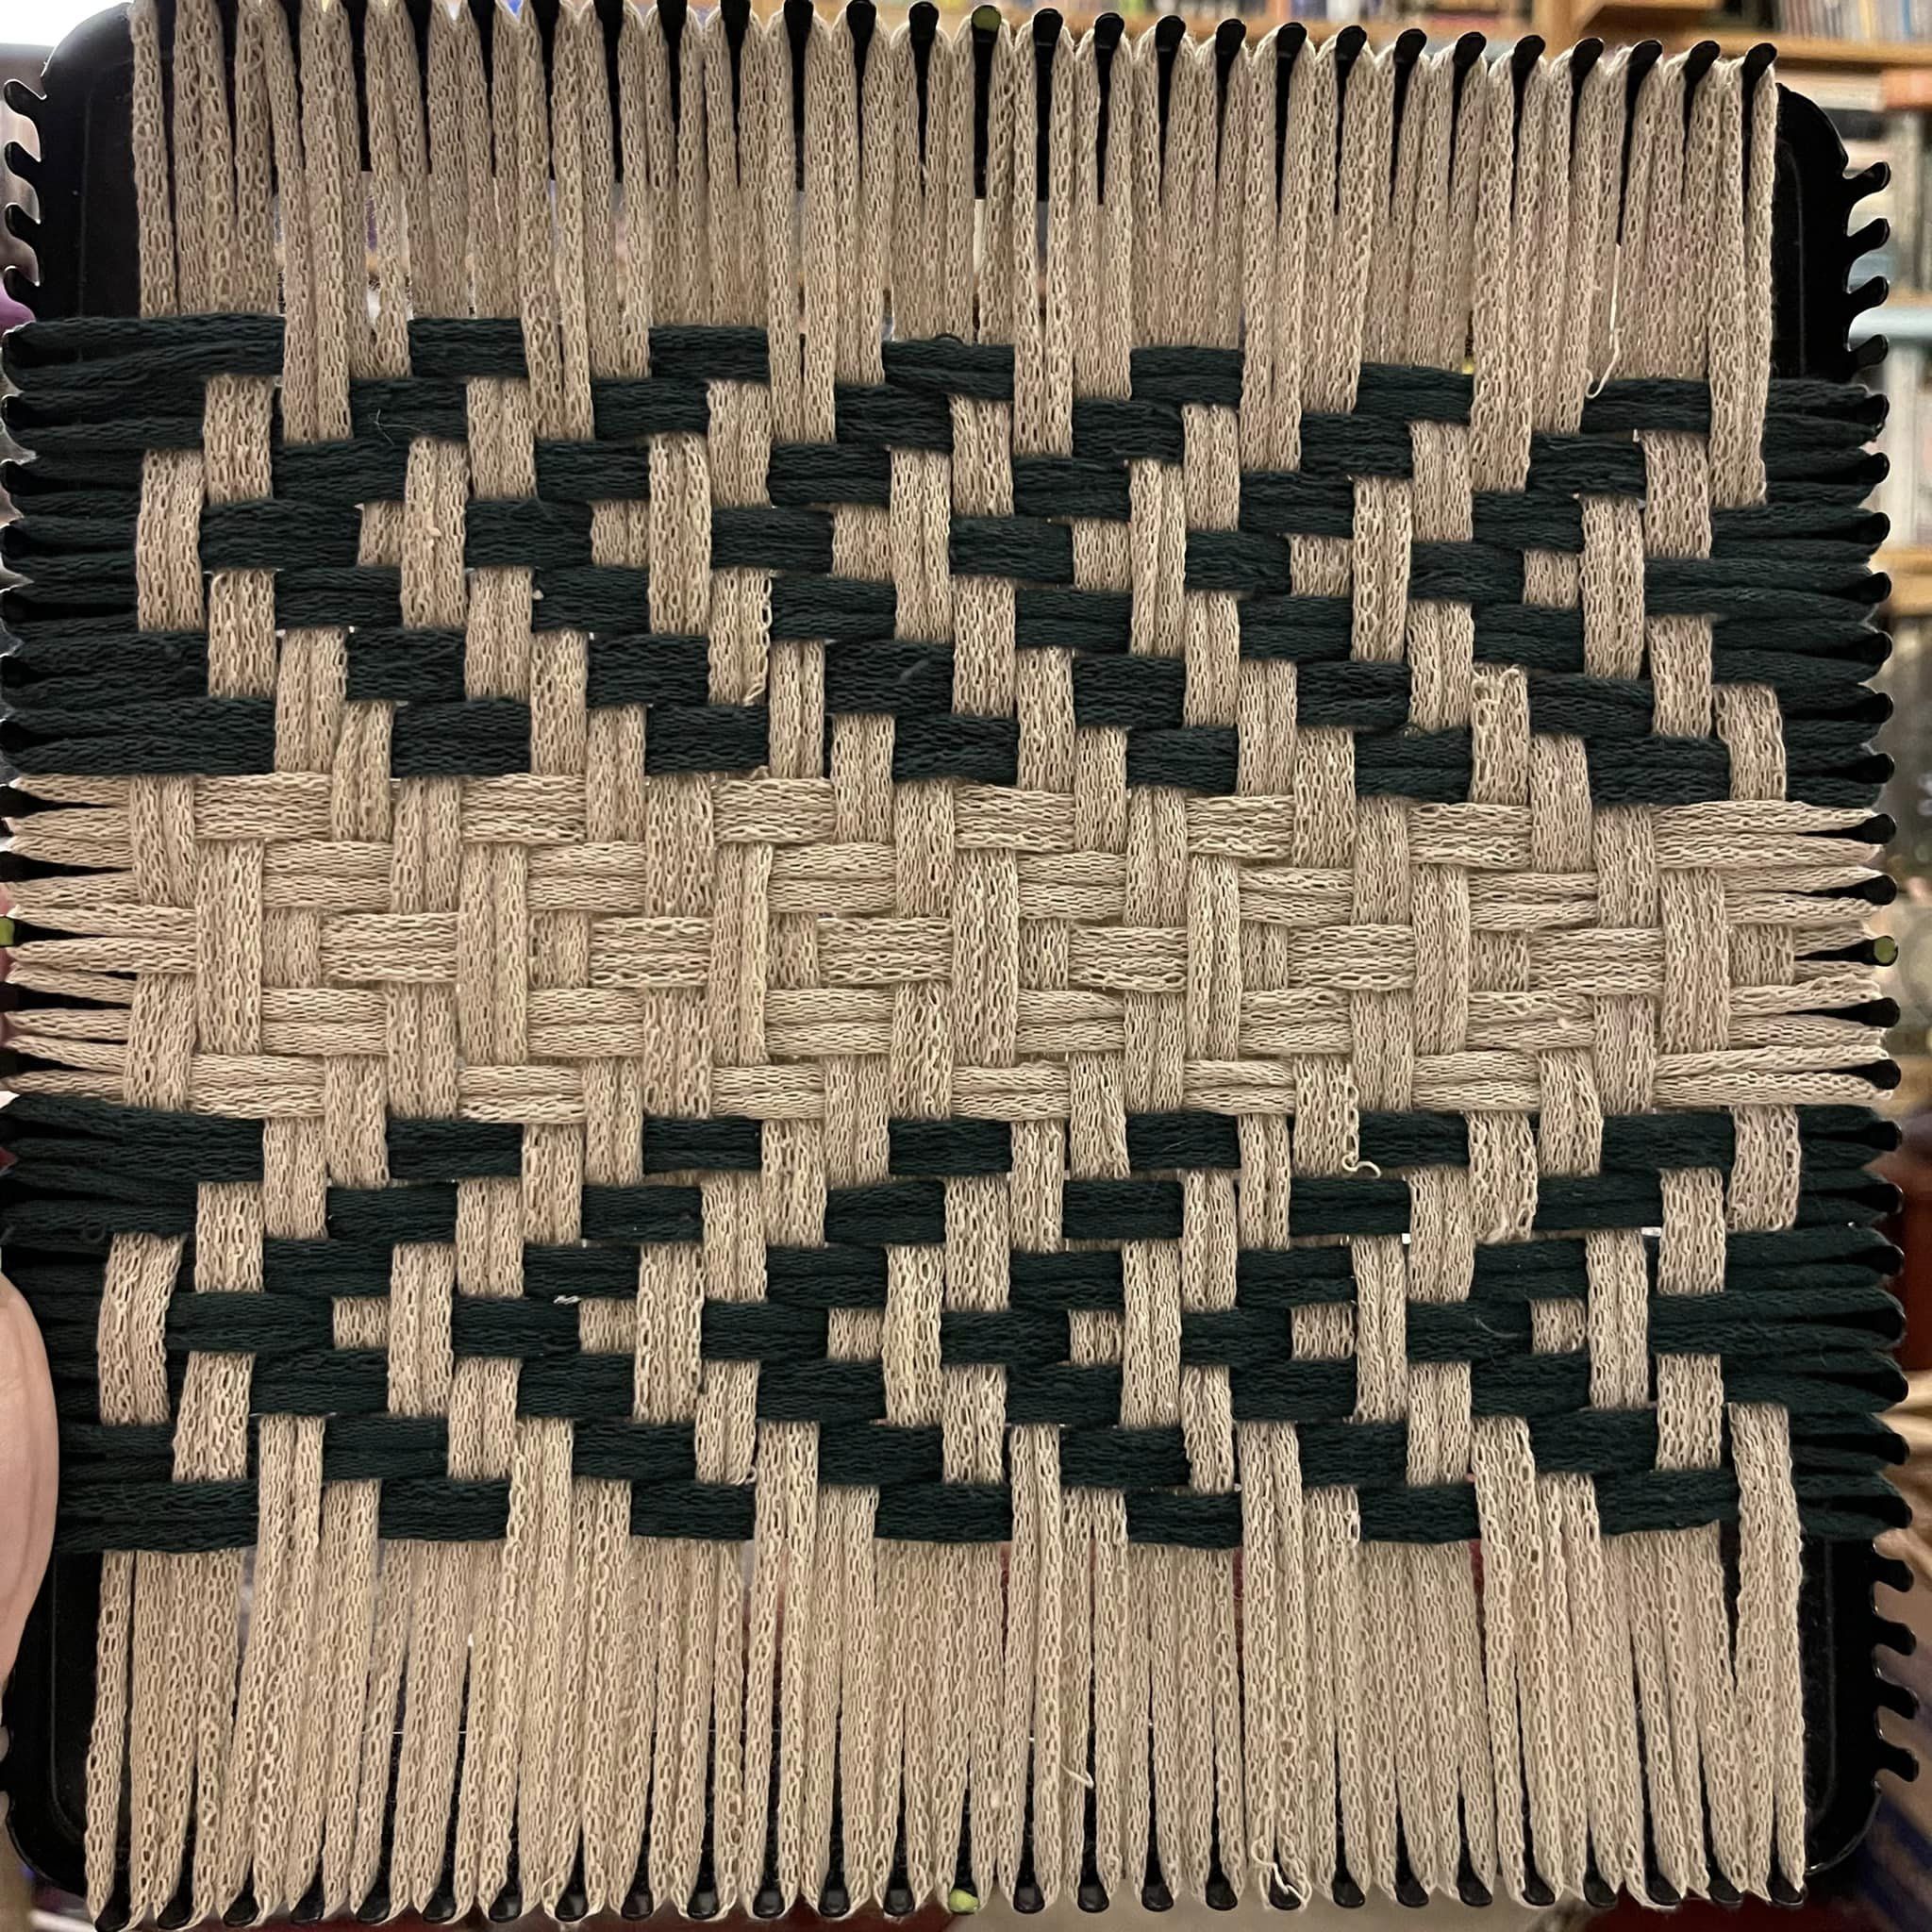
Inspired by a 2,700 year old (late Iron Age) textile fragment from a salt mine in Hallstatt, Austria, we have a lovely 2/2 twill with 3 direction changes, generating a regular fabric with 3-floats spread among the columns. The outcome is flexible and drapey, with very little bias, so it does not skew. In honor of the Iron Age culture, I chose flax for the background, and willow (which could be produced by woad overdyed with weld.)
I happened to have 7 loops in an older dye lot of willow. This is a perfect place to use them. The stripes are separated enough that the contrast is not obvious. The pattern change seems deliberate. They will fade in use to be closer in color. And the variation honors natural dying (as you might expect, overdying woad with weld can produce *many* shades).
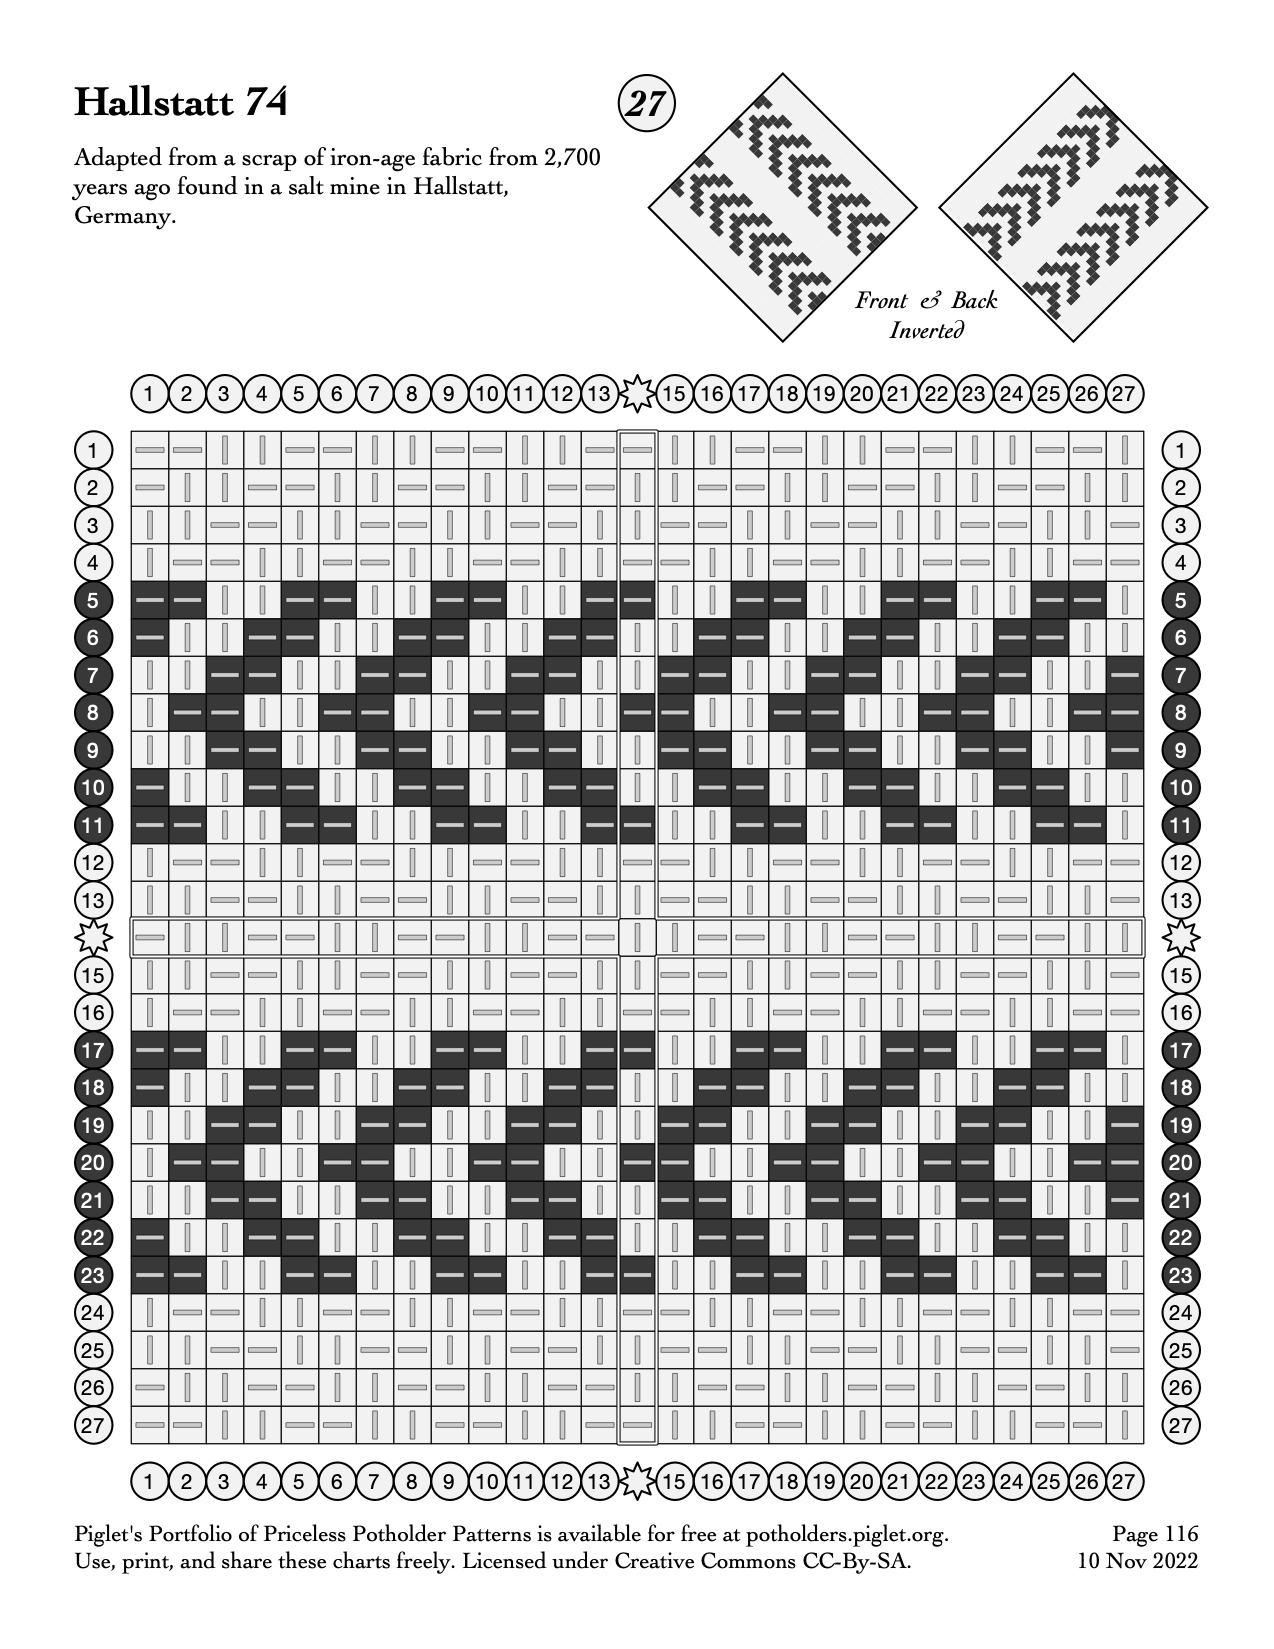
Hallstatt, an elegant two over two twill that changes direction in three places to produce, in combination with the threading pattern, two rows of chevrons in the same direction.
Hallstatt back, identical.
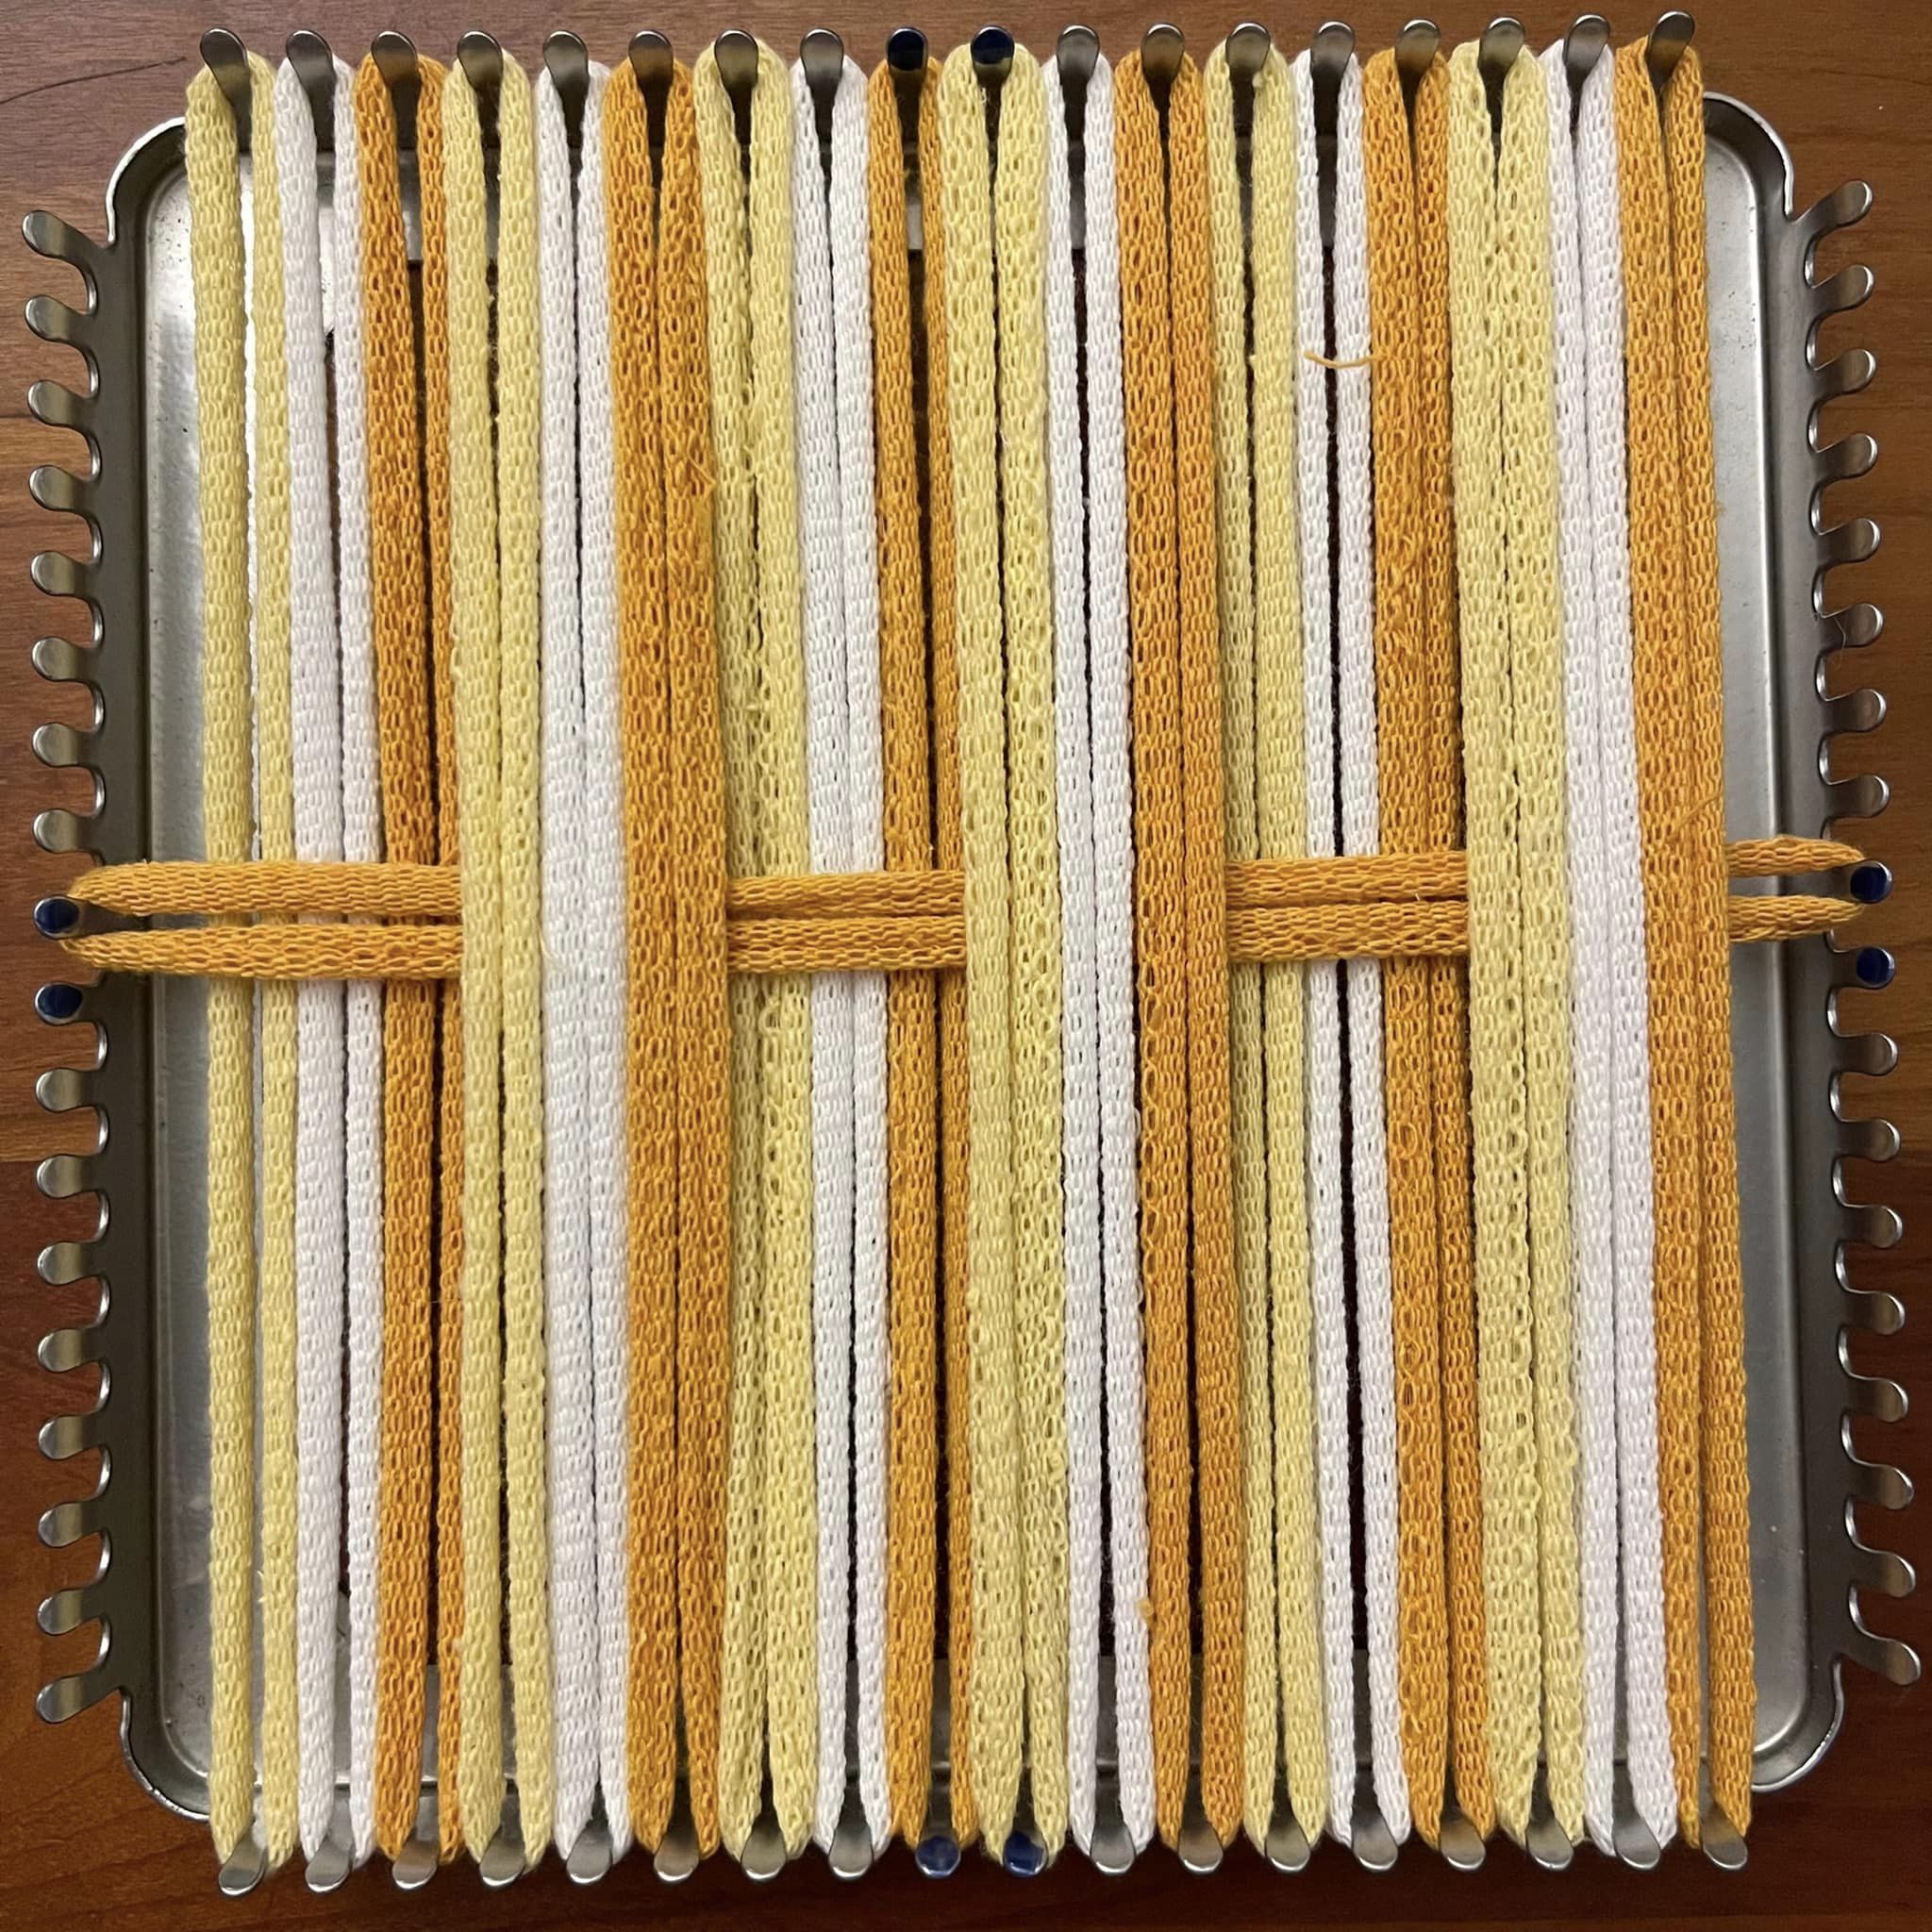
Changing direction in the 2/2 twill rows creates 3-floats in the columns. Don’t panic when you see loose columns at the points! Front view…
…and rear view, showing the 3-floats on the back columns. The adjacent rows will tie those down.
With the 5 center rows in place, all columns are locked down.
Our color pattern begins, with no change in the weaving pattern.
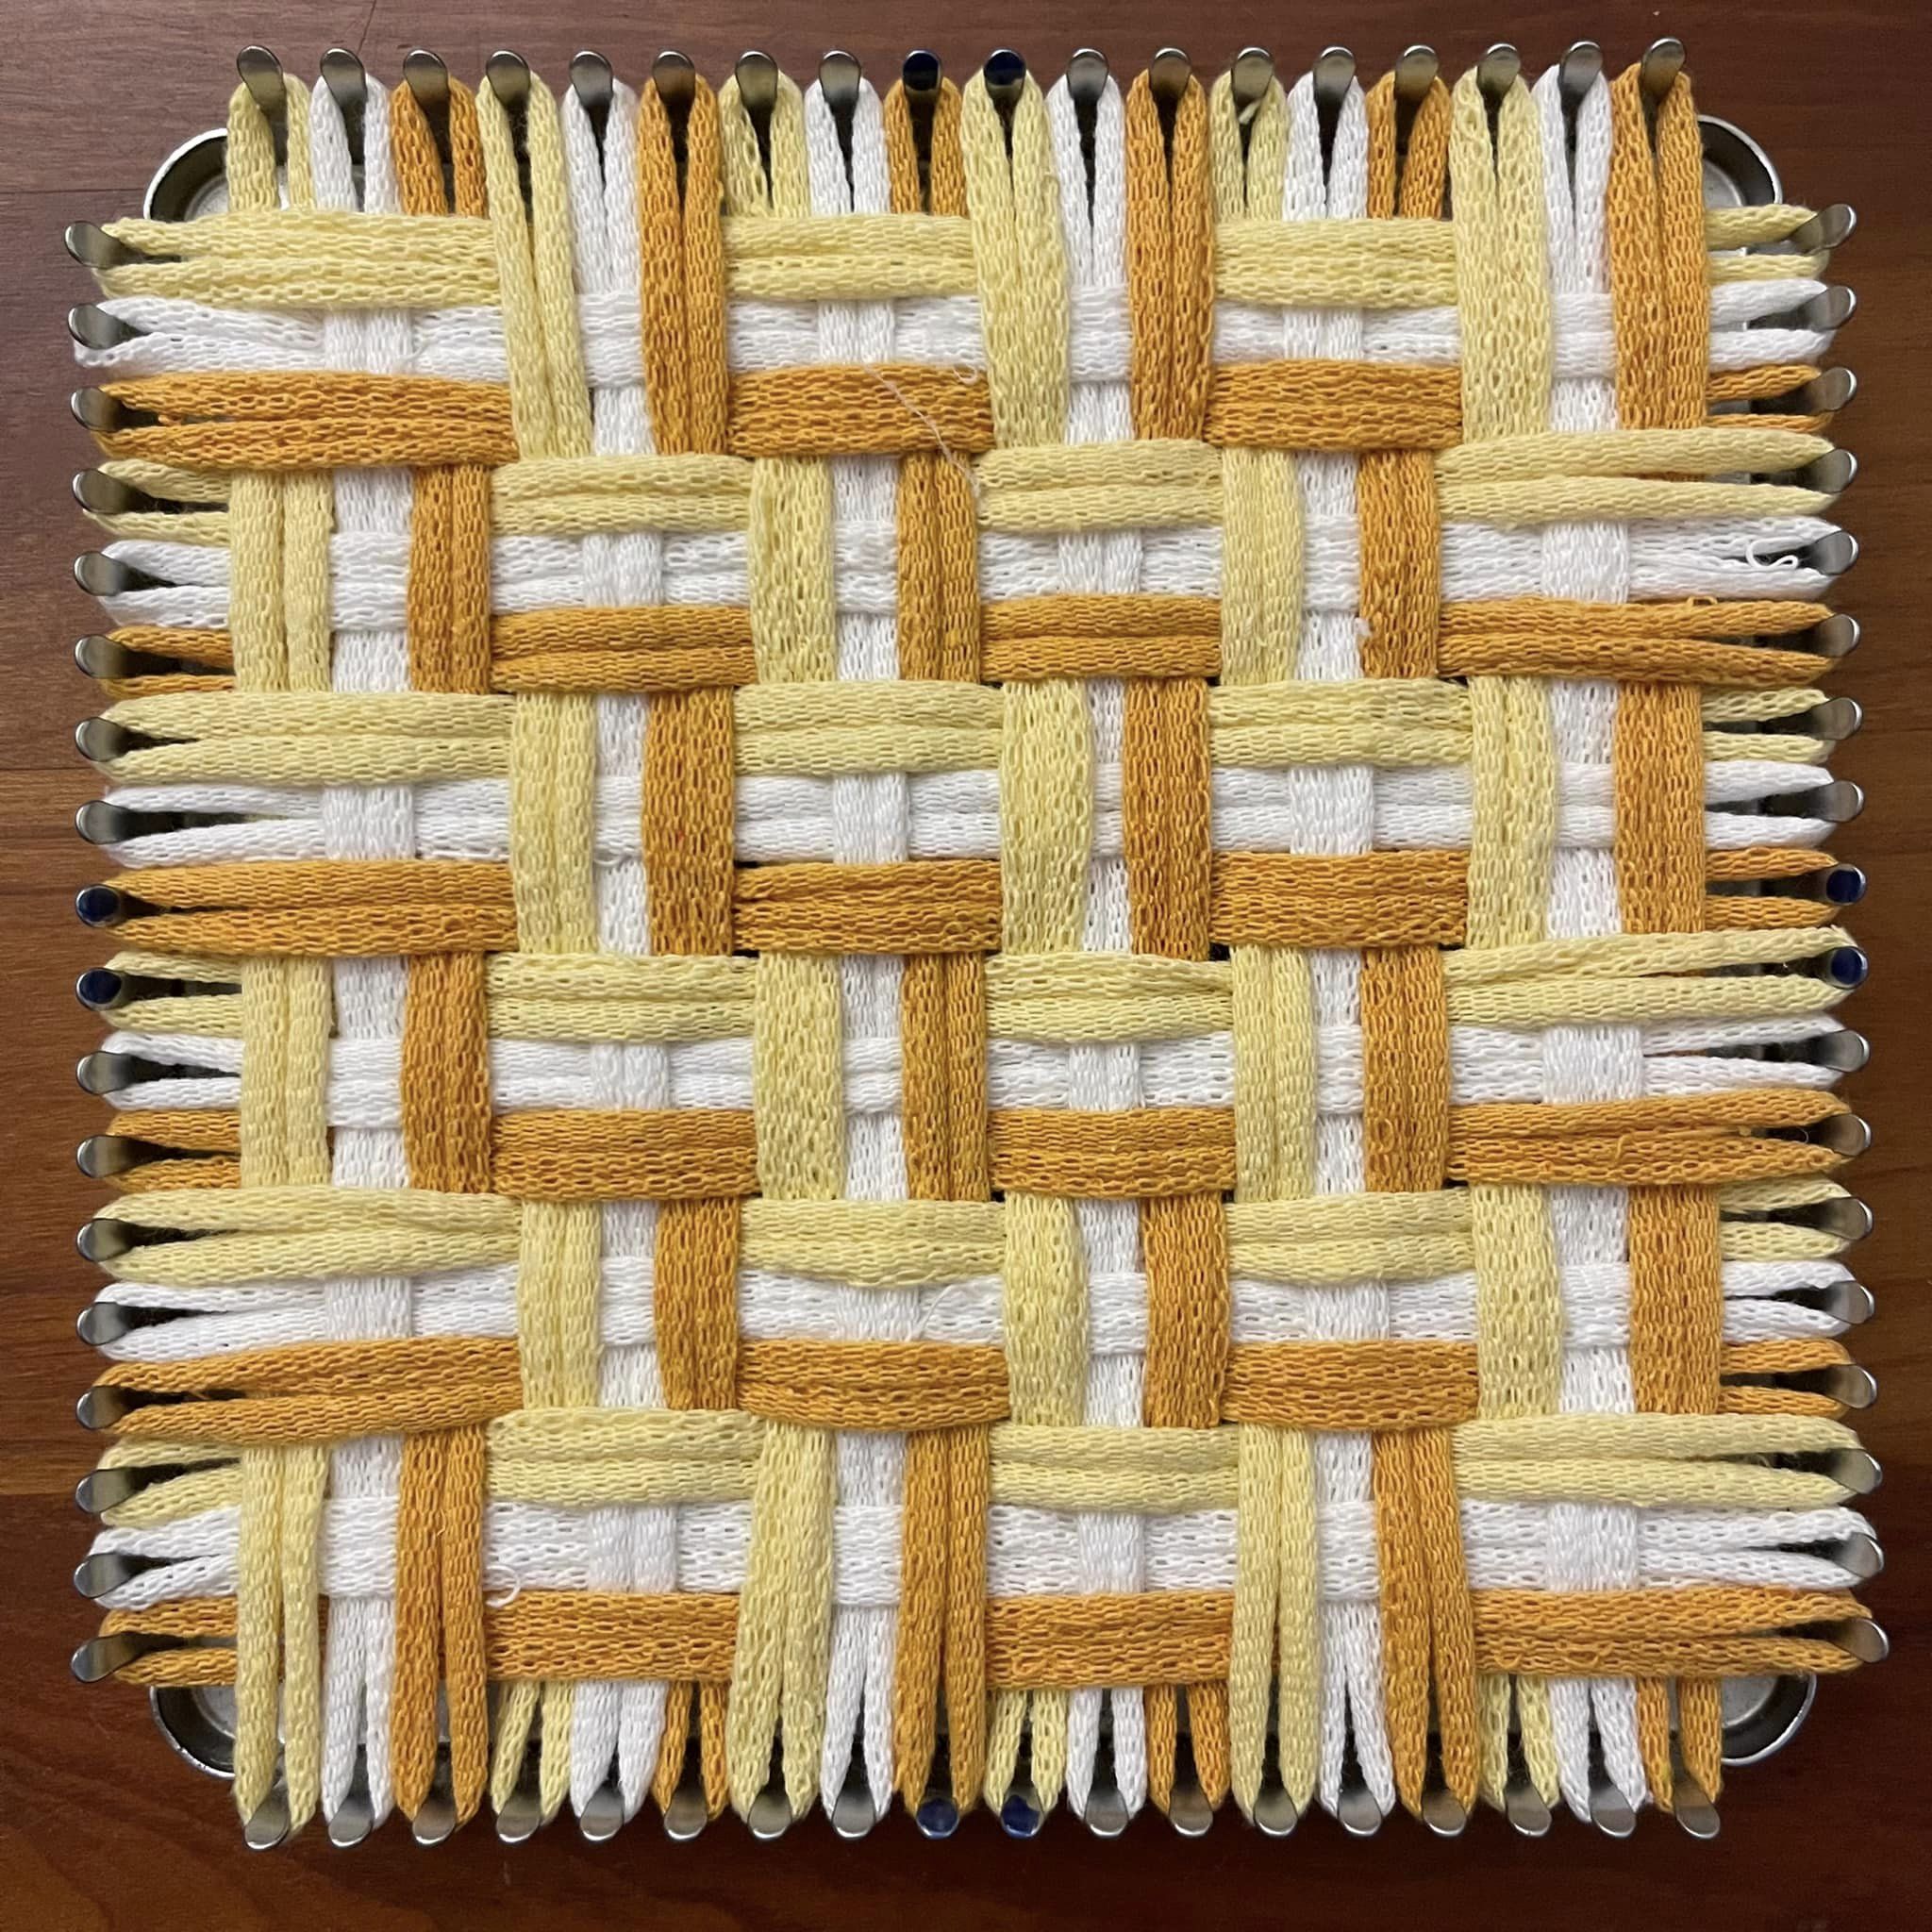
Here we have reached the mid-point of the chevrons, and are about to reverse our direction.
Shifting our 2/2 twill into reverse, we have again generated 3-floats in our columns, which we will lock down on adjacent rows…
Here are the full stripes in place. From here we continue in the same direction we were going, finishing out the background color.
Here is the chart for this iteration. It is doable in a traditional version, with some design modification. I would not recommend plucking a subset of rows and columns directly from this 27-peg chart.
Let’s get ready to weeeeeeeeeave!!!! Today’s new fabric is a solid winner, with lots of color work potential. Inspired by the recent 2-float twill tumbling boxes, this pattern combines 3-floats over tabby squishy boxes, that create an amazing 3-layer fabric, thick, flat and bendy, with little bias. It draws up very small and evenly. The surface is flat, making this great for coasters and trivets. It would be great on cast iron, as it is thick yet not stiff.
I wove the first version in lavender and hydrangea alternating boxes. The color potential became clear after taking it off the loom, when the tabby-like section formed by the box centers was covered by the floats on the surface, forming a basketweave illusion.
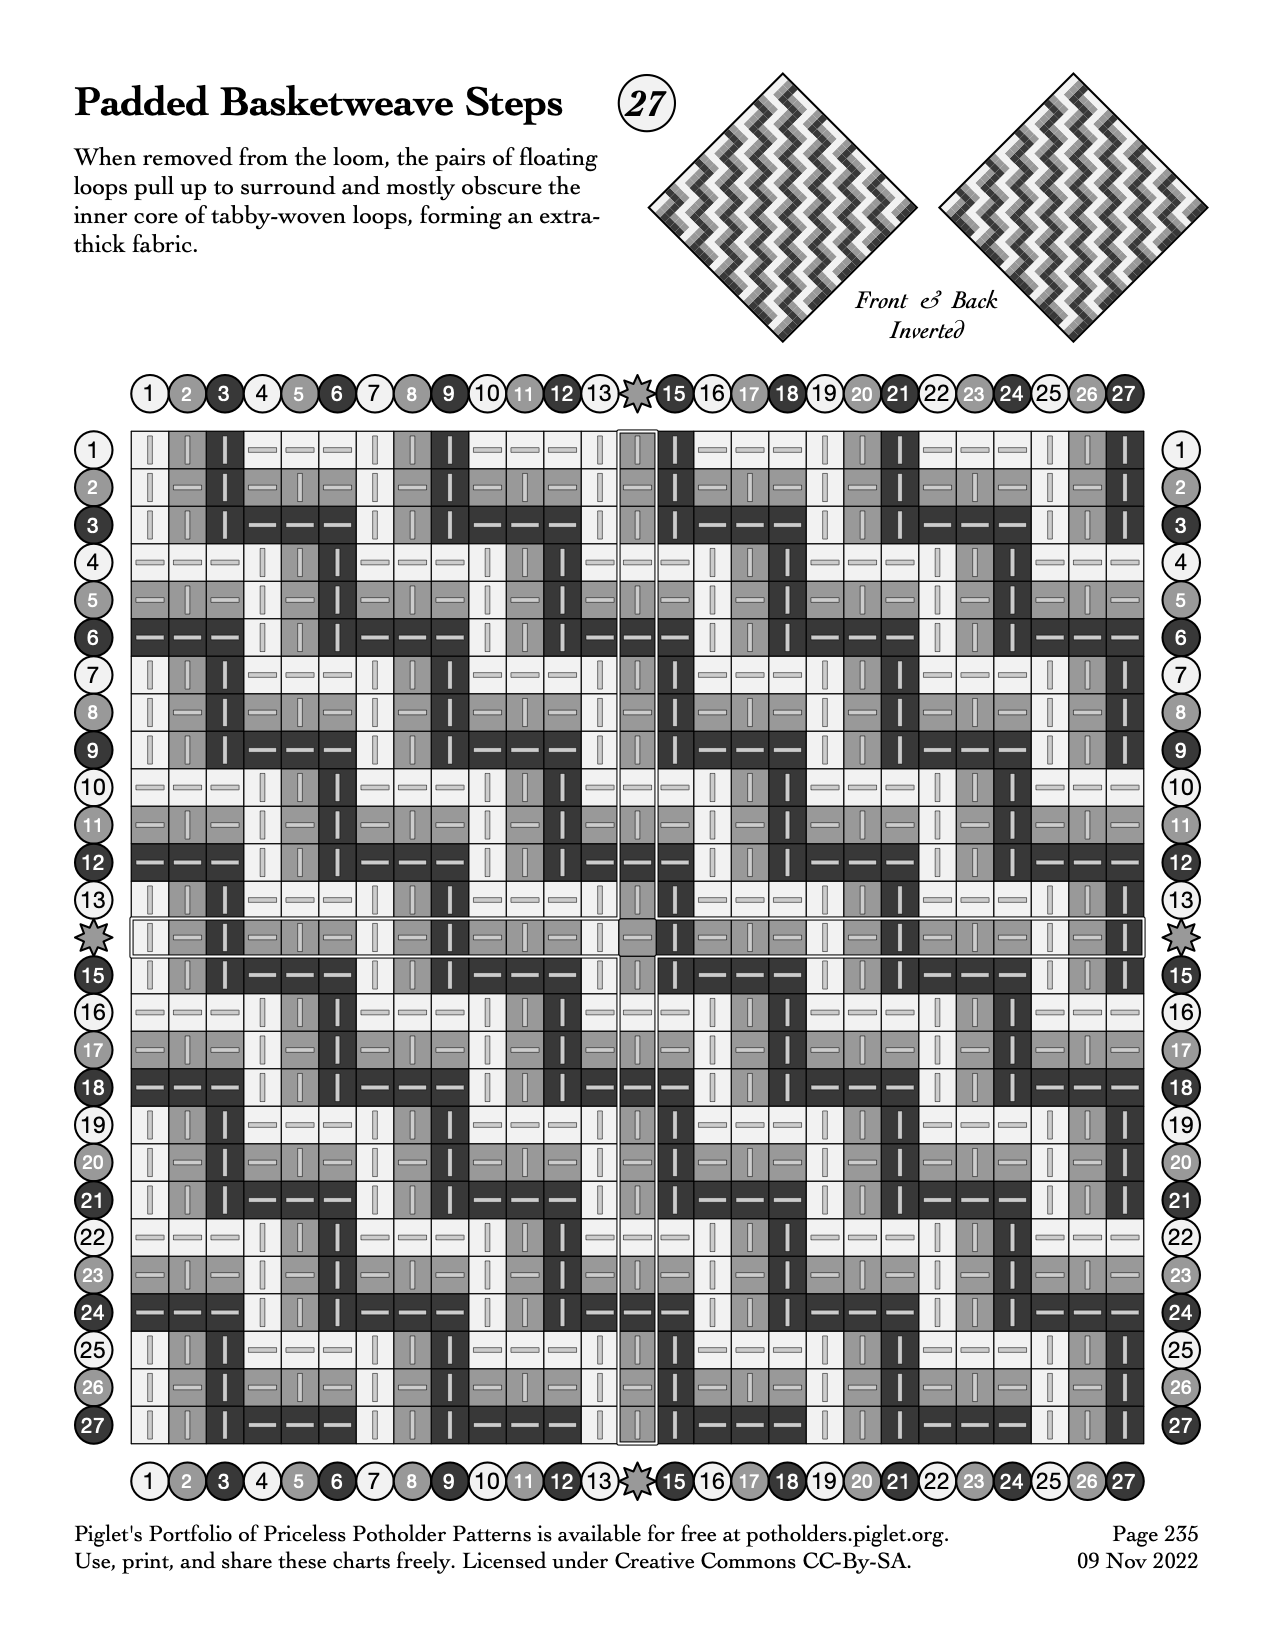
For the second version, I highlighted the color-hiding and surface display by making a stairstep of alternating daffodil and tigerlily on the surface, with hidden white centers. It uses the same weaving pattern, with a different color threading.
Experiments in classical weave structures continue with Overshot!
This fabric has a base plainweave (tabby / over-under across each row), with a design pattern overlaid on it, created by rows with long floats. The design pattern appears to float on the surface.
This one is adapted from the Swedish Halvdräll style, in honor of which I chose flax and willow Harrisville loops. The result is textured, cushy, with tabby sections drawn up into pillow layers by the alternating longer floats on their surface.
To highlight the structure for my (and your, since I remembered to take photos!) understanding, I wove starting with the base tabby layer, using all the column pegs, and every other (even) row peg.
Having established that plainweave fabric, I then took my dozen willow loops, and wove them into the base fabric according to the pattern. You may observe that adding the new loops forced floats where there had previously been simple over/unders in the columns. Those smaller floats help pinch the longer floats in the rows into patterns on the surface, and pull the fabric along their length.
For the last 2 rows (top and bottom), instead of the design pattern as charted, I decided to plainweave (tabby / over-under across the row) both rows, to flatten the edge for a more attractive bindoff and function a bit like a selvage. (Chart update pending.)
I am curious if I could shift the plainweave rows now at the top & bottom of the entire chart (1 and 27) to be in between color row changes (new rows 9 and 19, respectively), so the surface floats could be pinched towards each other in 2×2 bundles (like the center section), instead of the 1x2x1 pinch we are getting in the top and bottom sections right now…