Three-Color Fish Scales

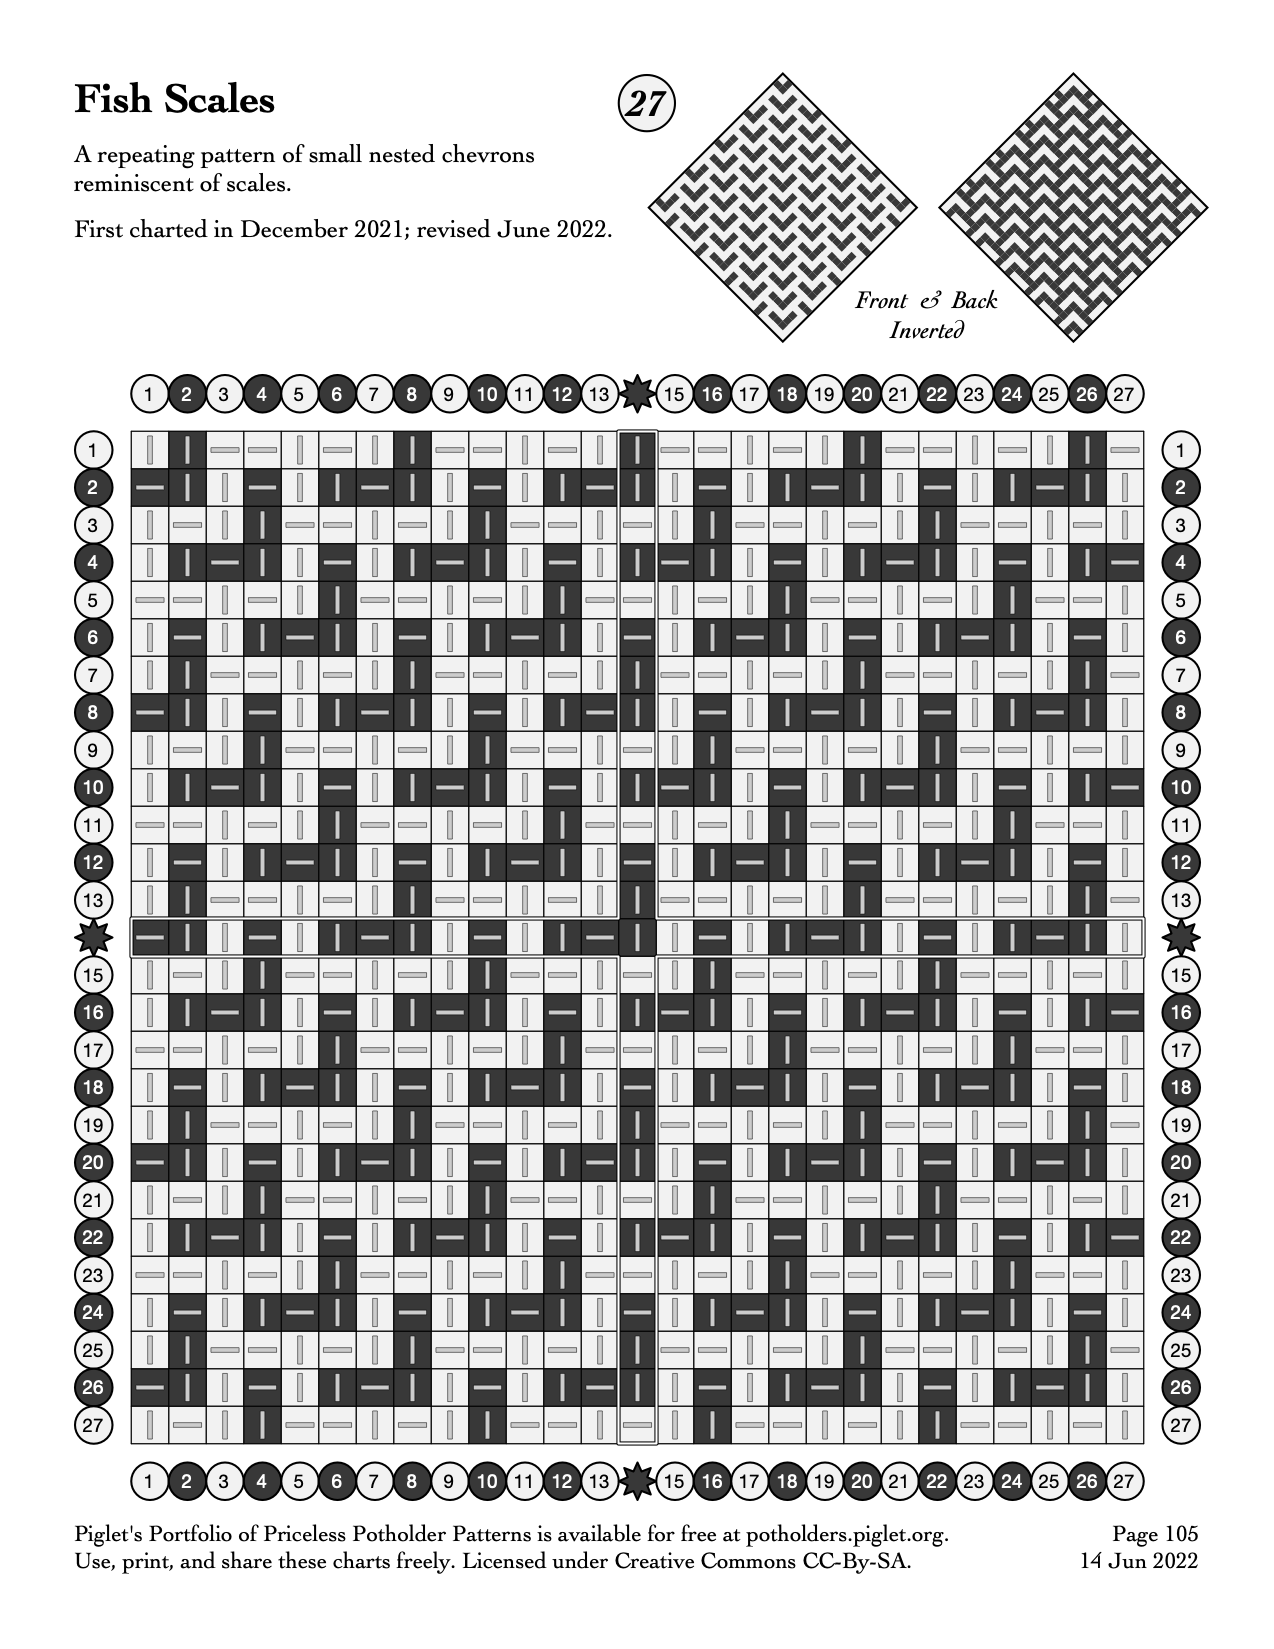
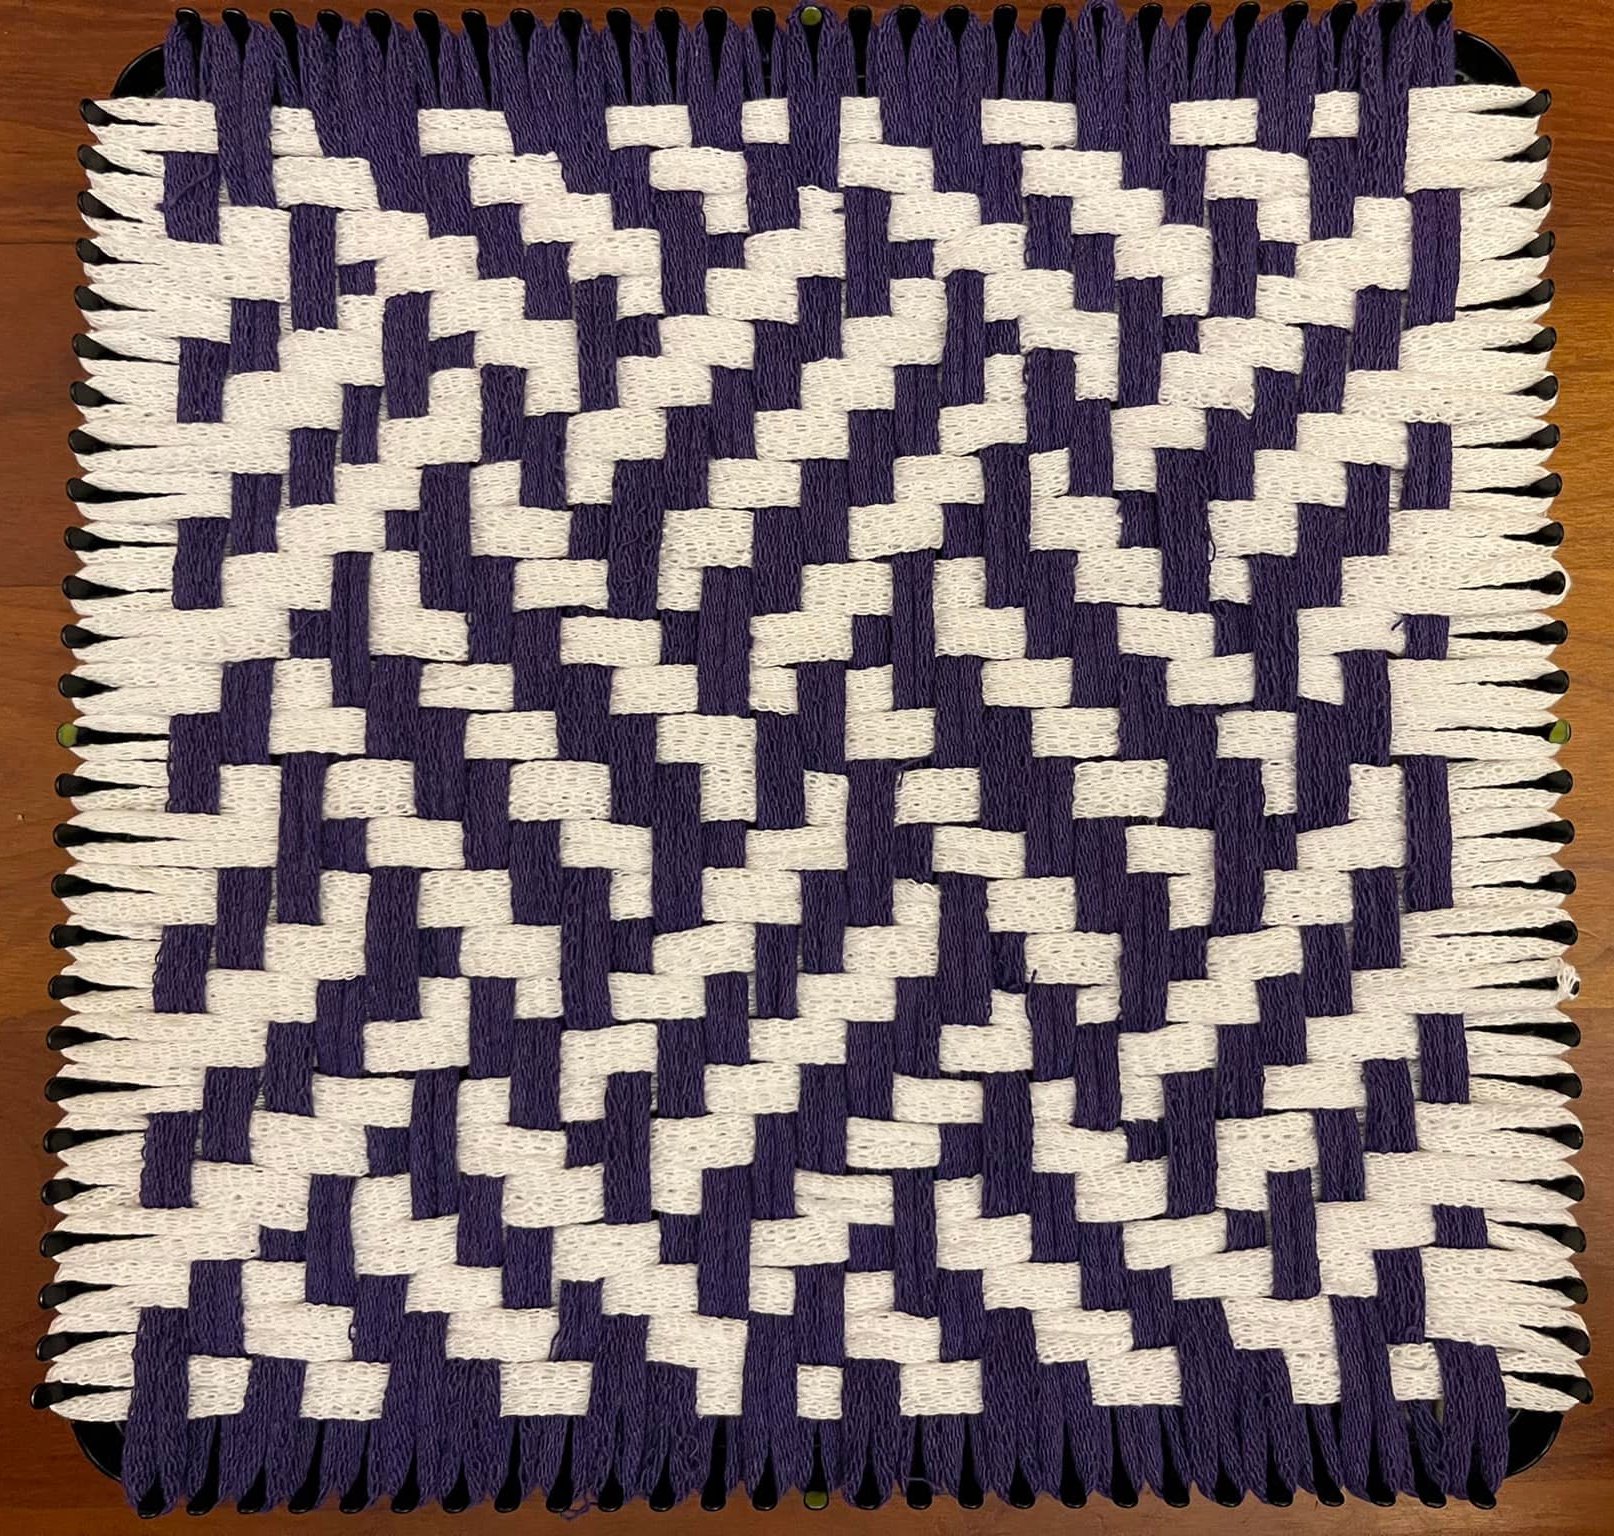
Okay, remember the other day, when I said “when is a potholder not a potholder” and showed you a pretty fabric that looked like fish scales but was *not* a heavy-duty potholder?

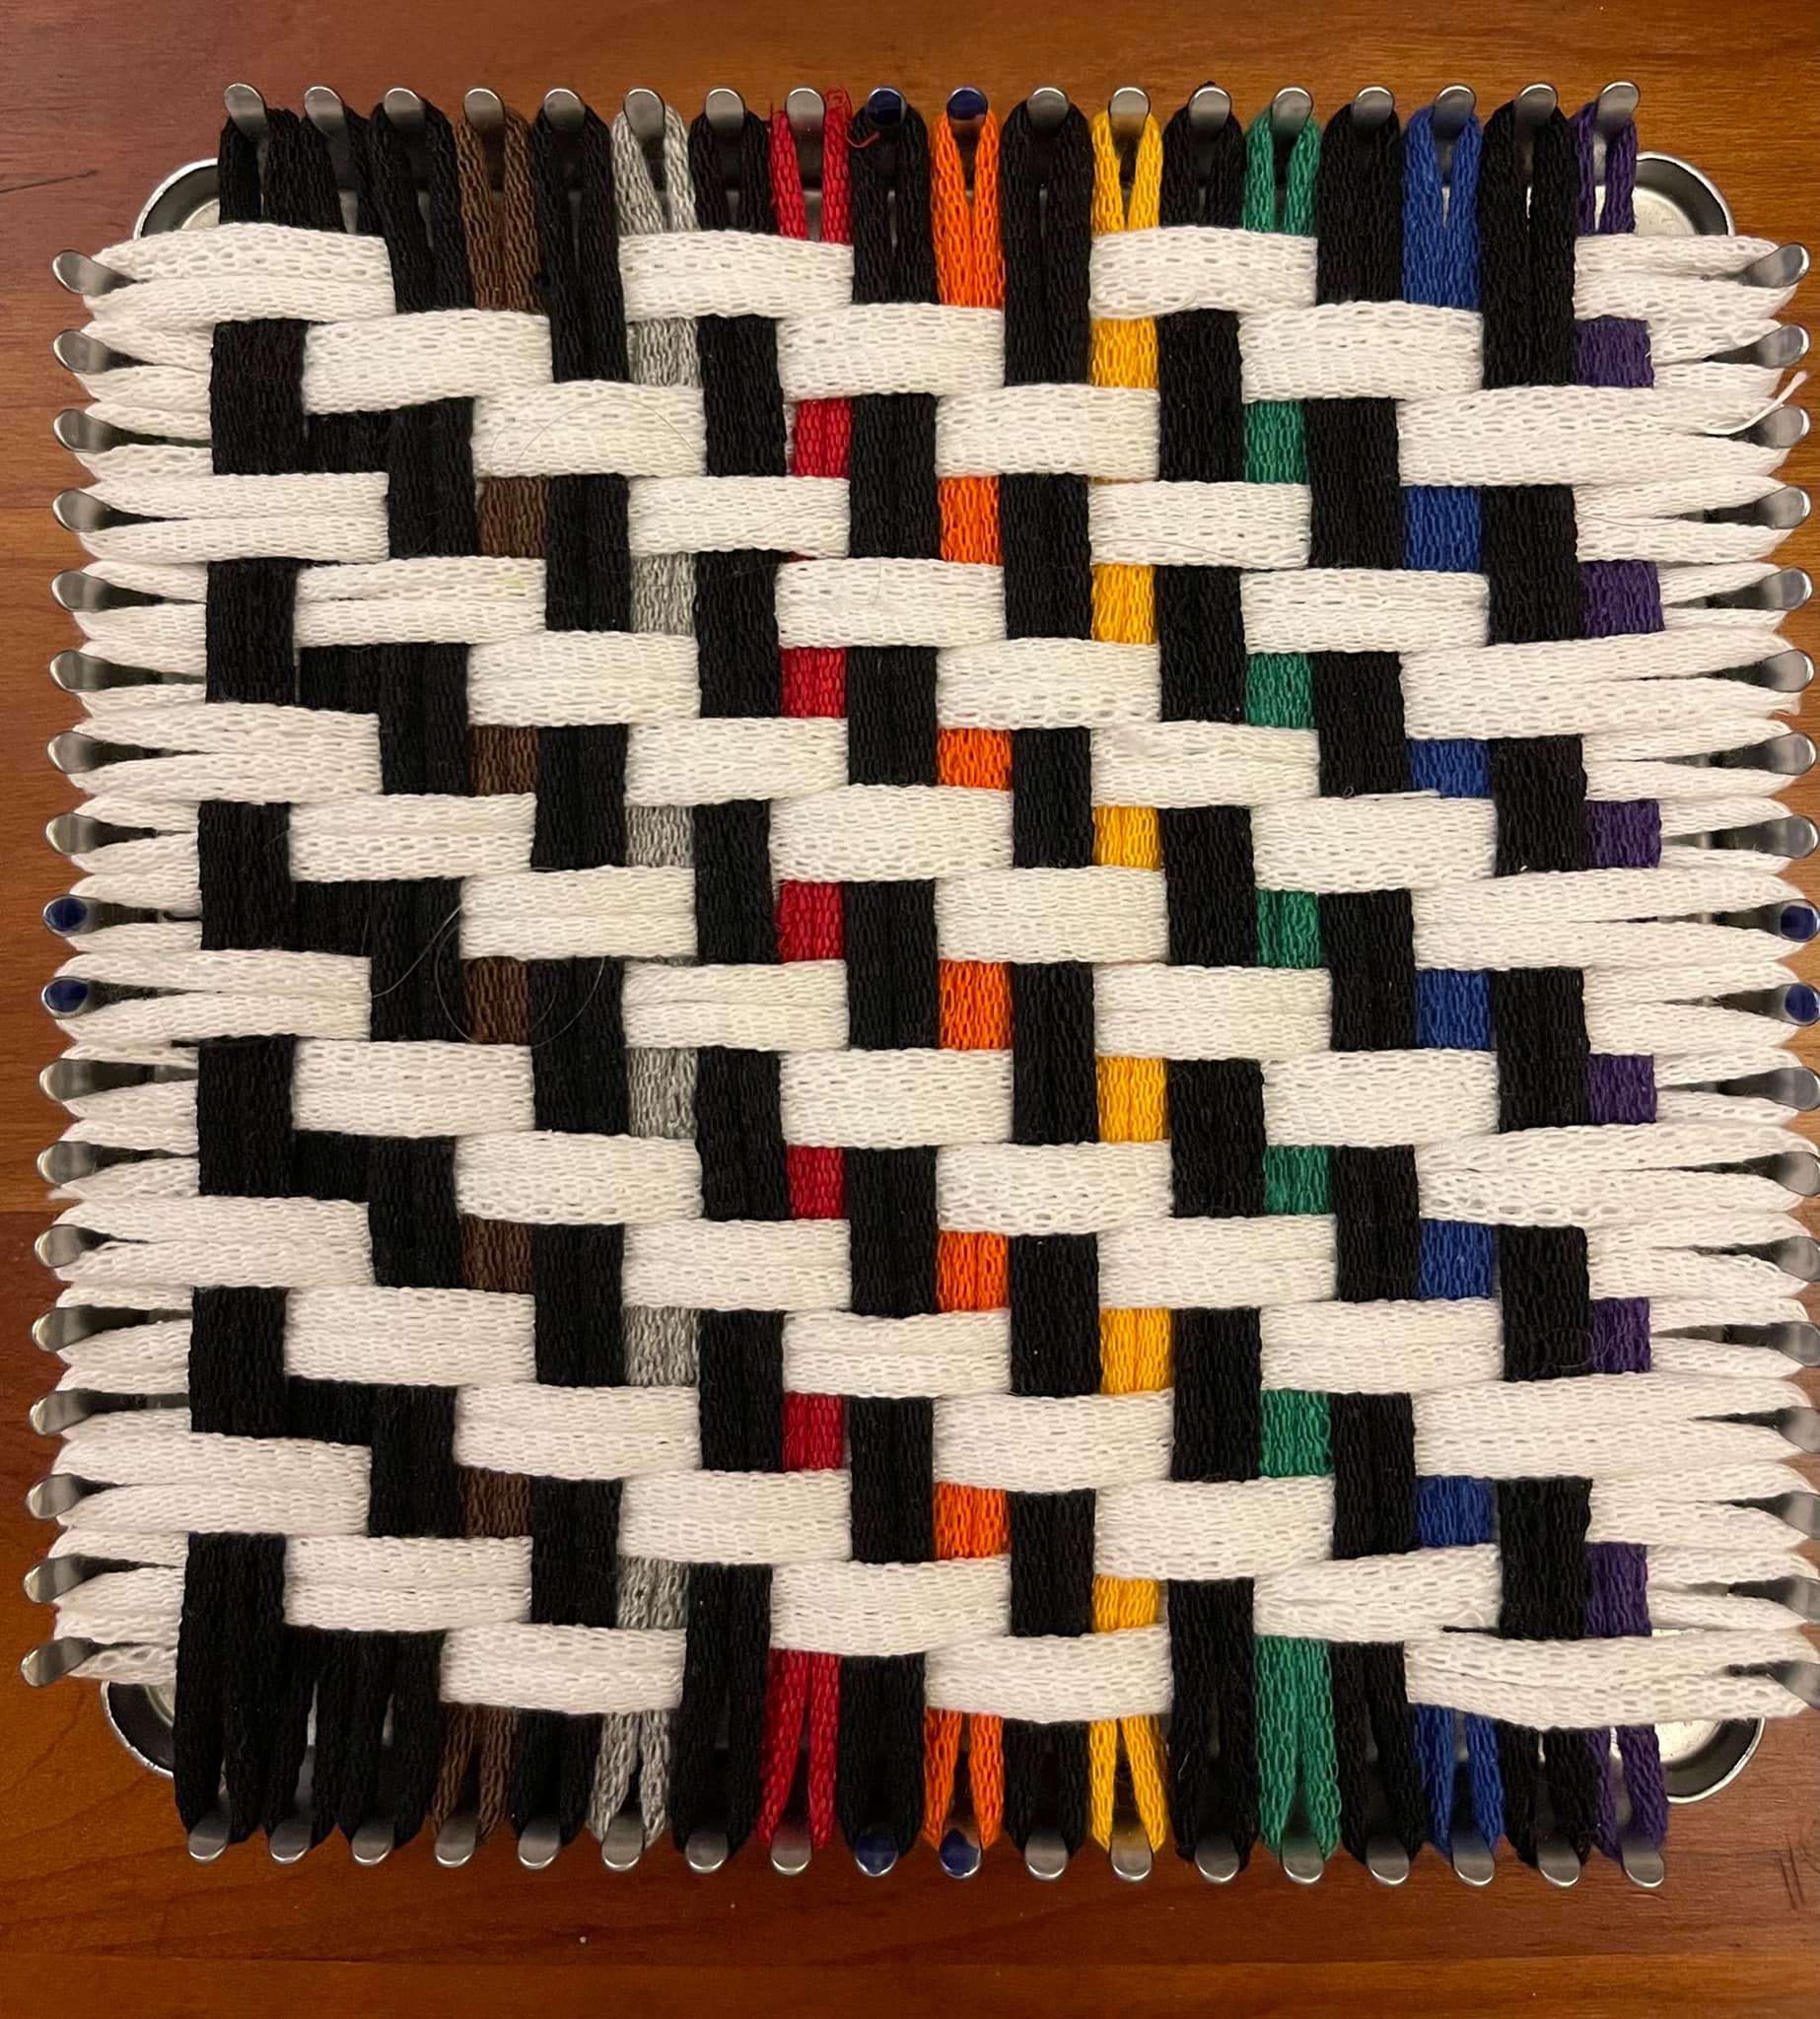
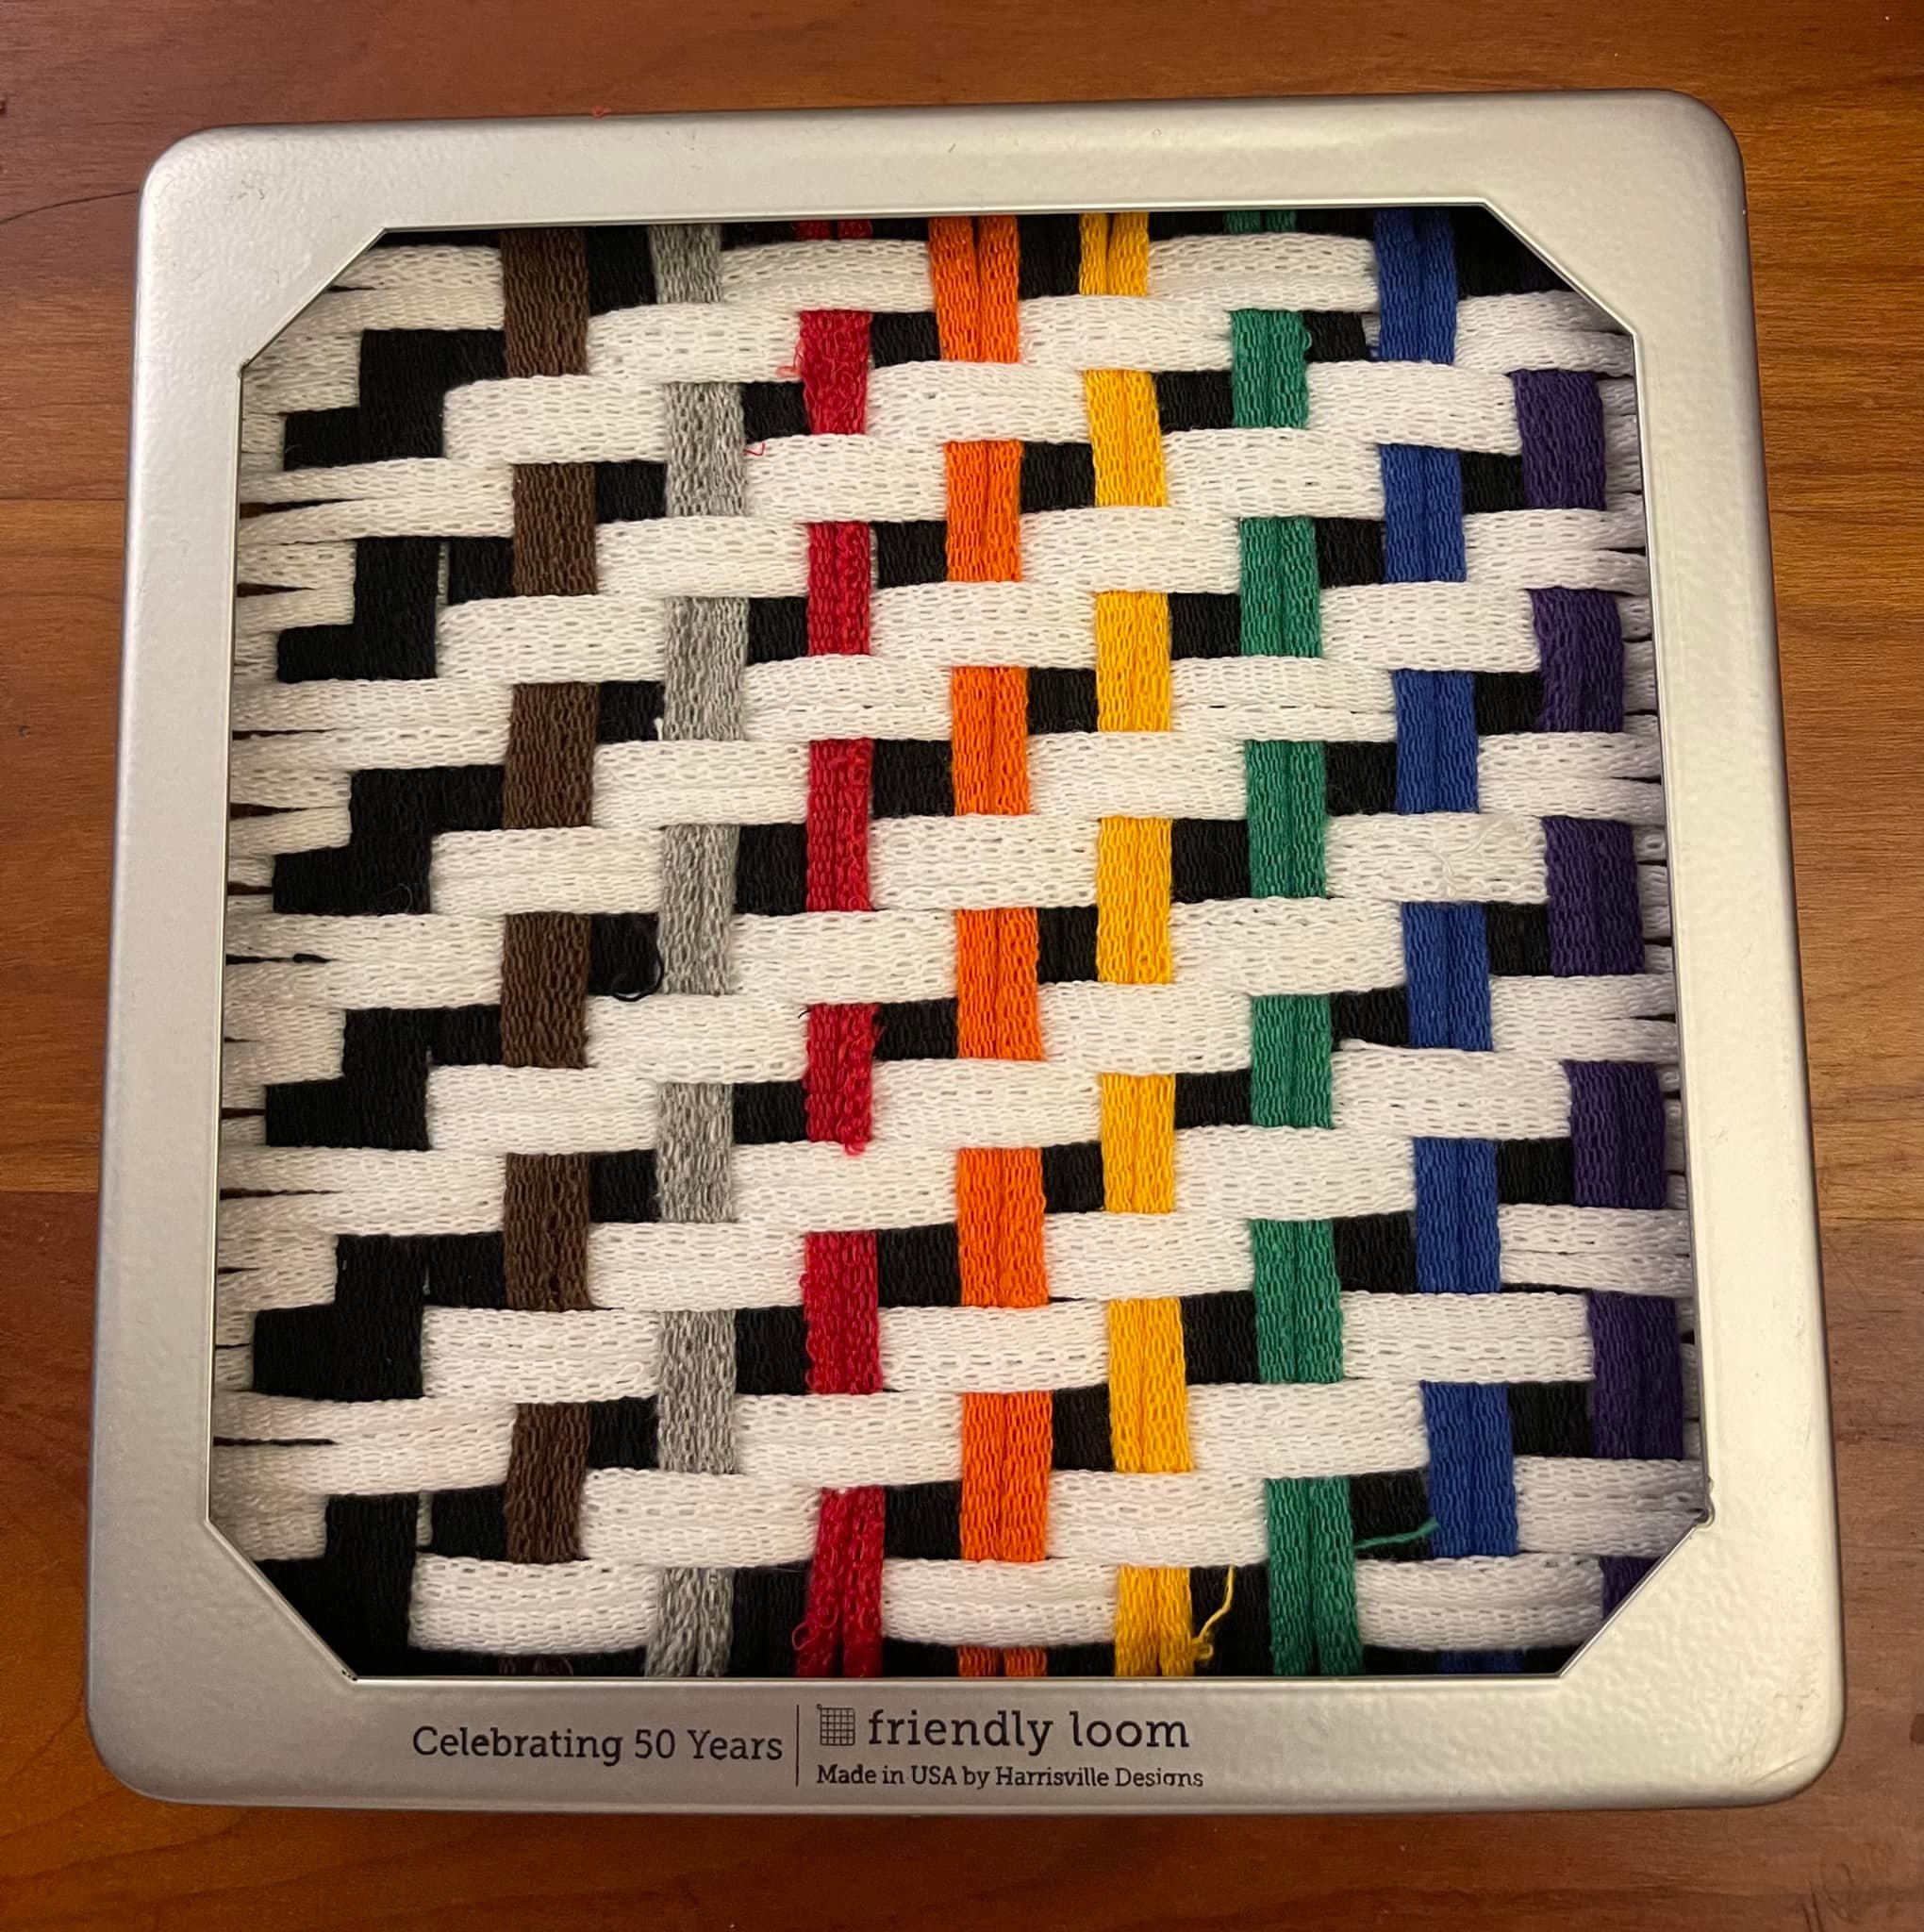
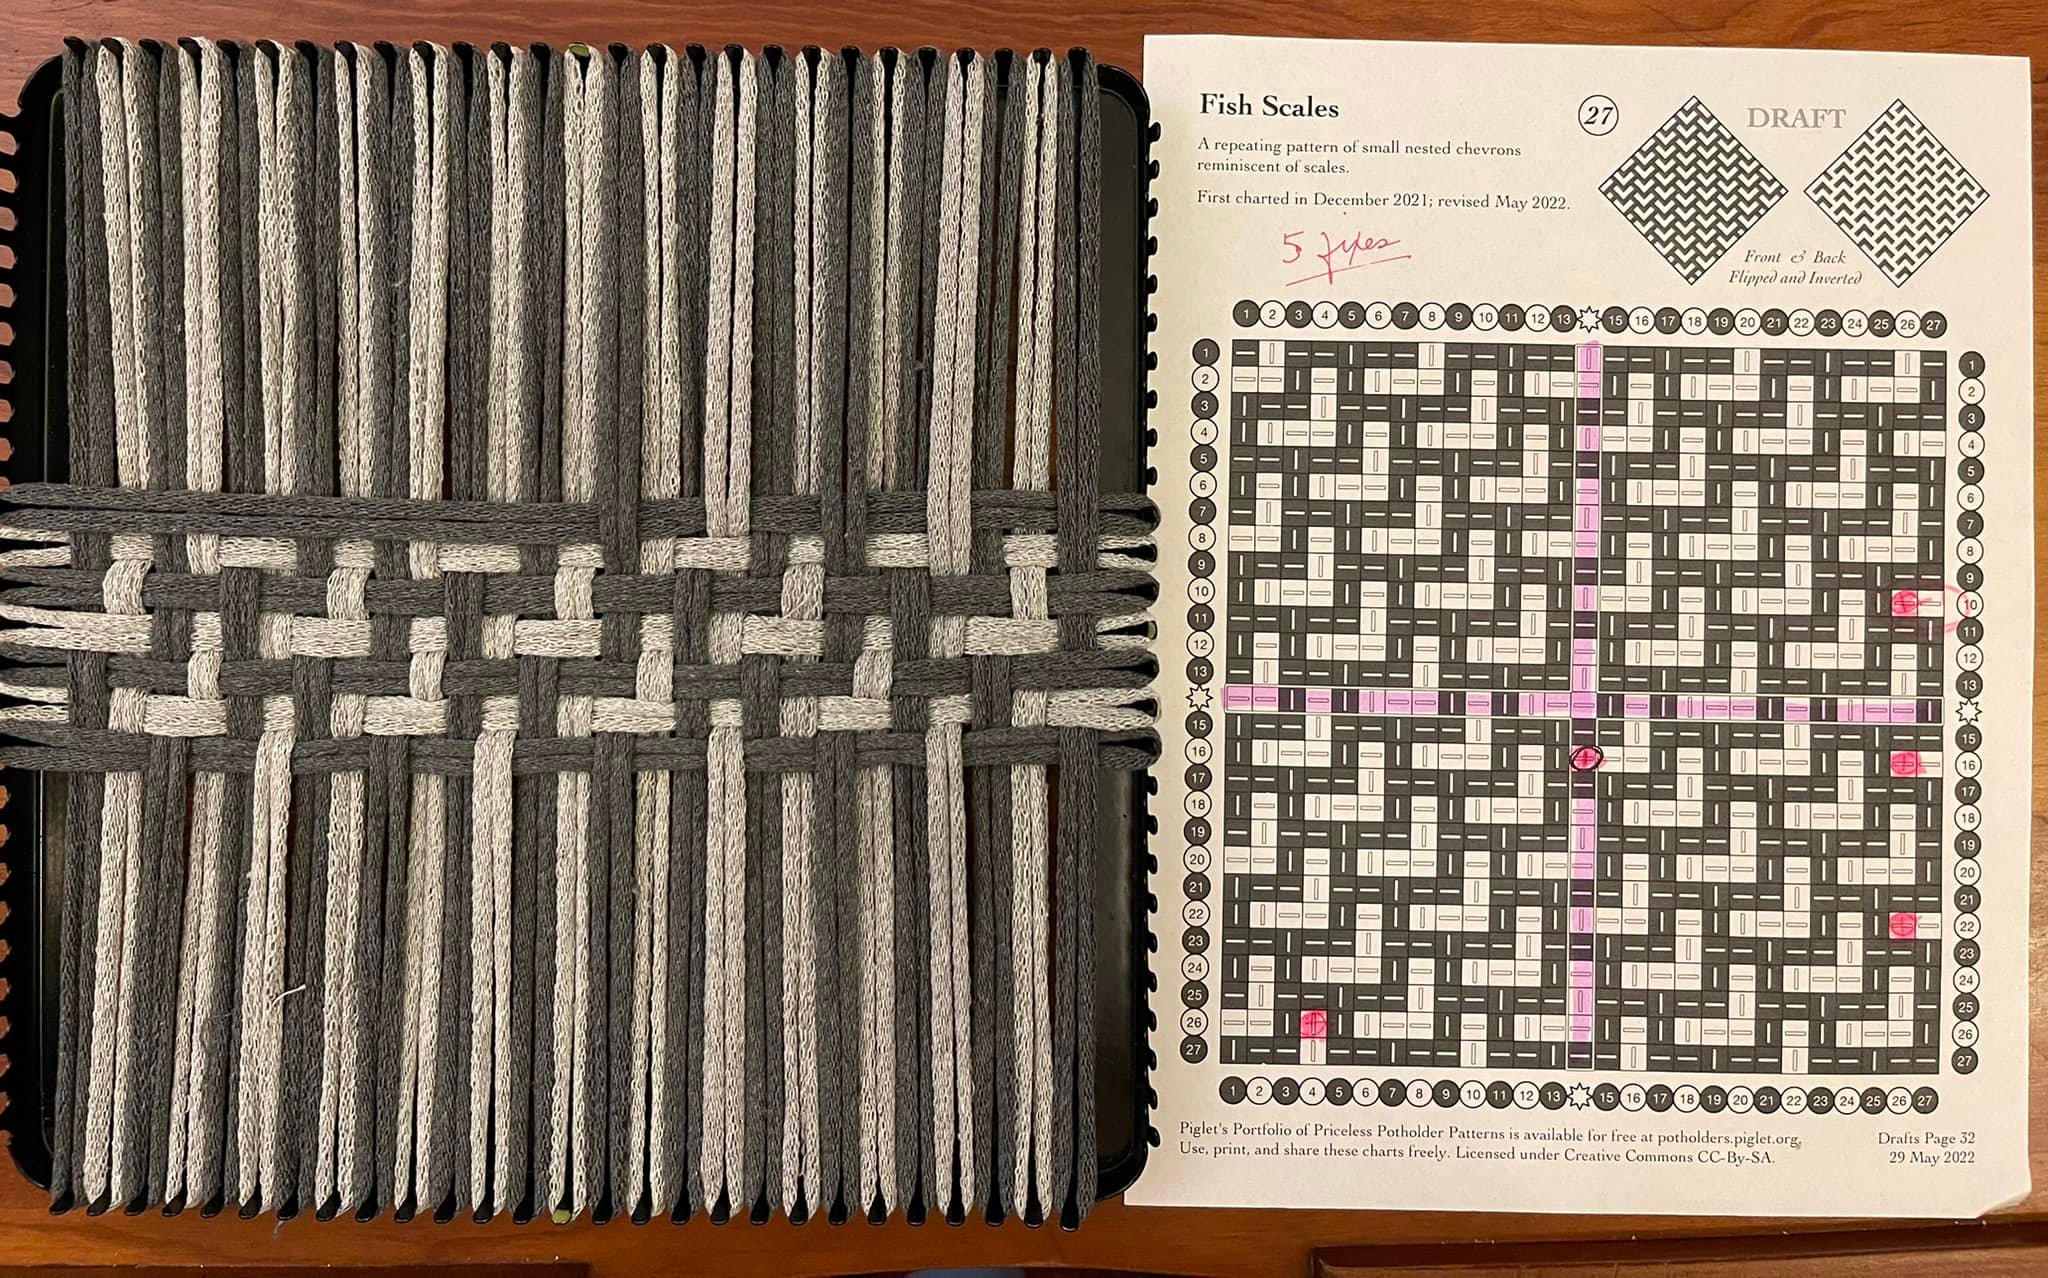
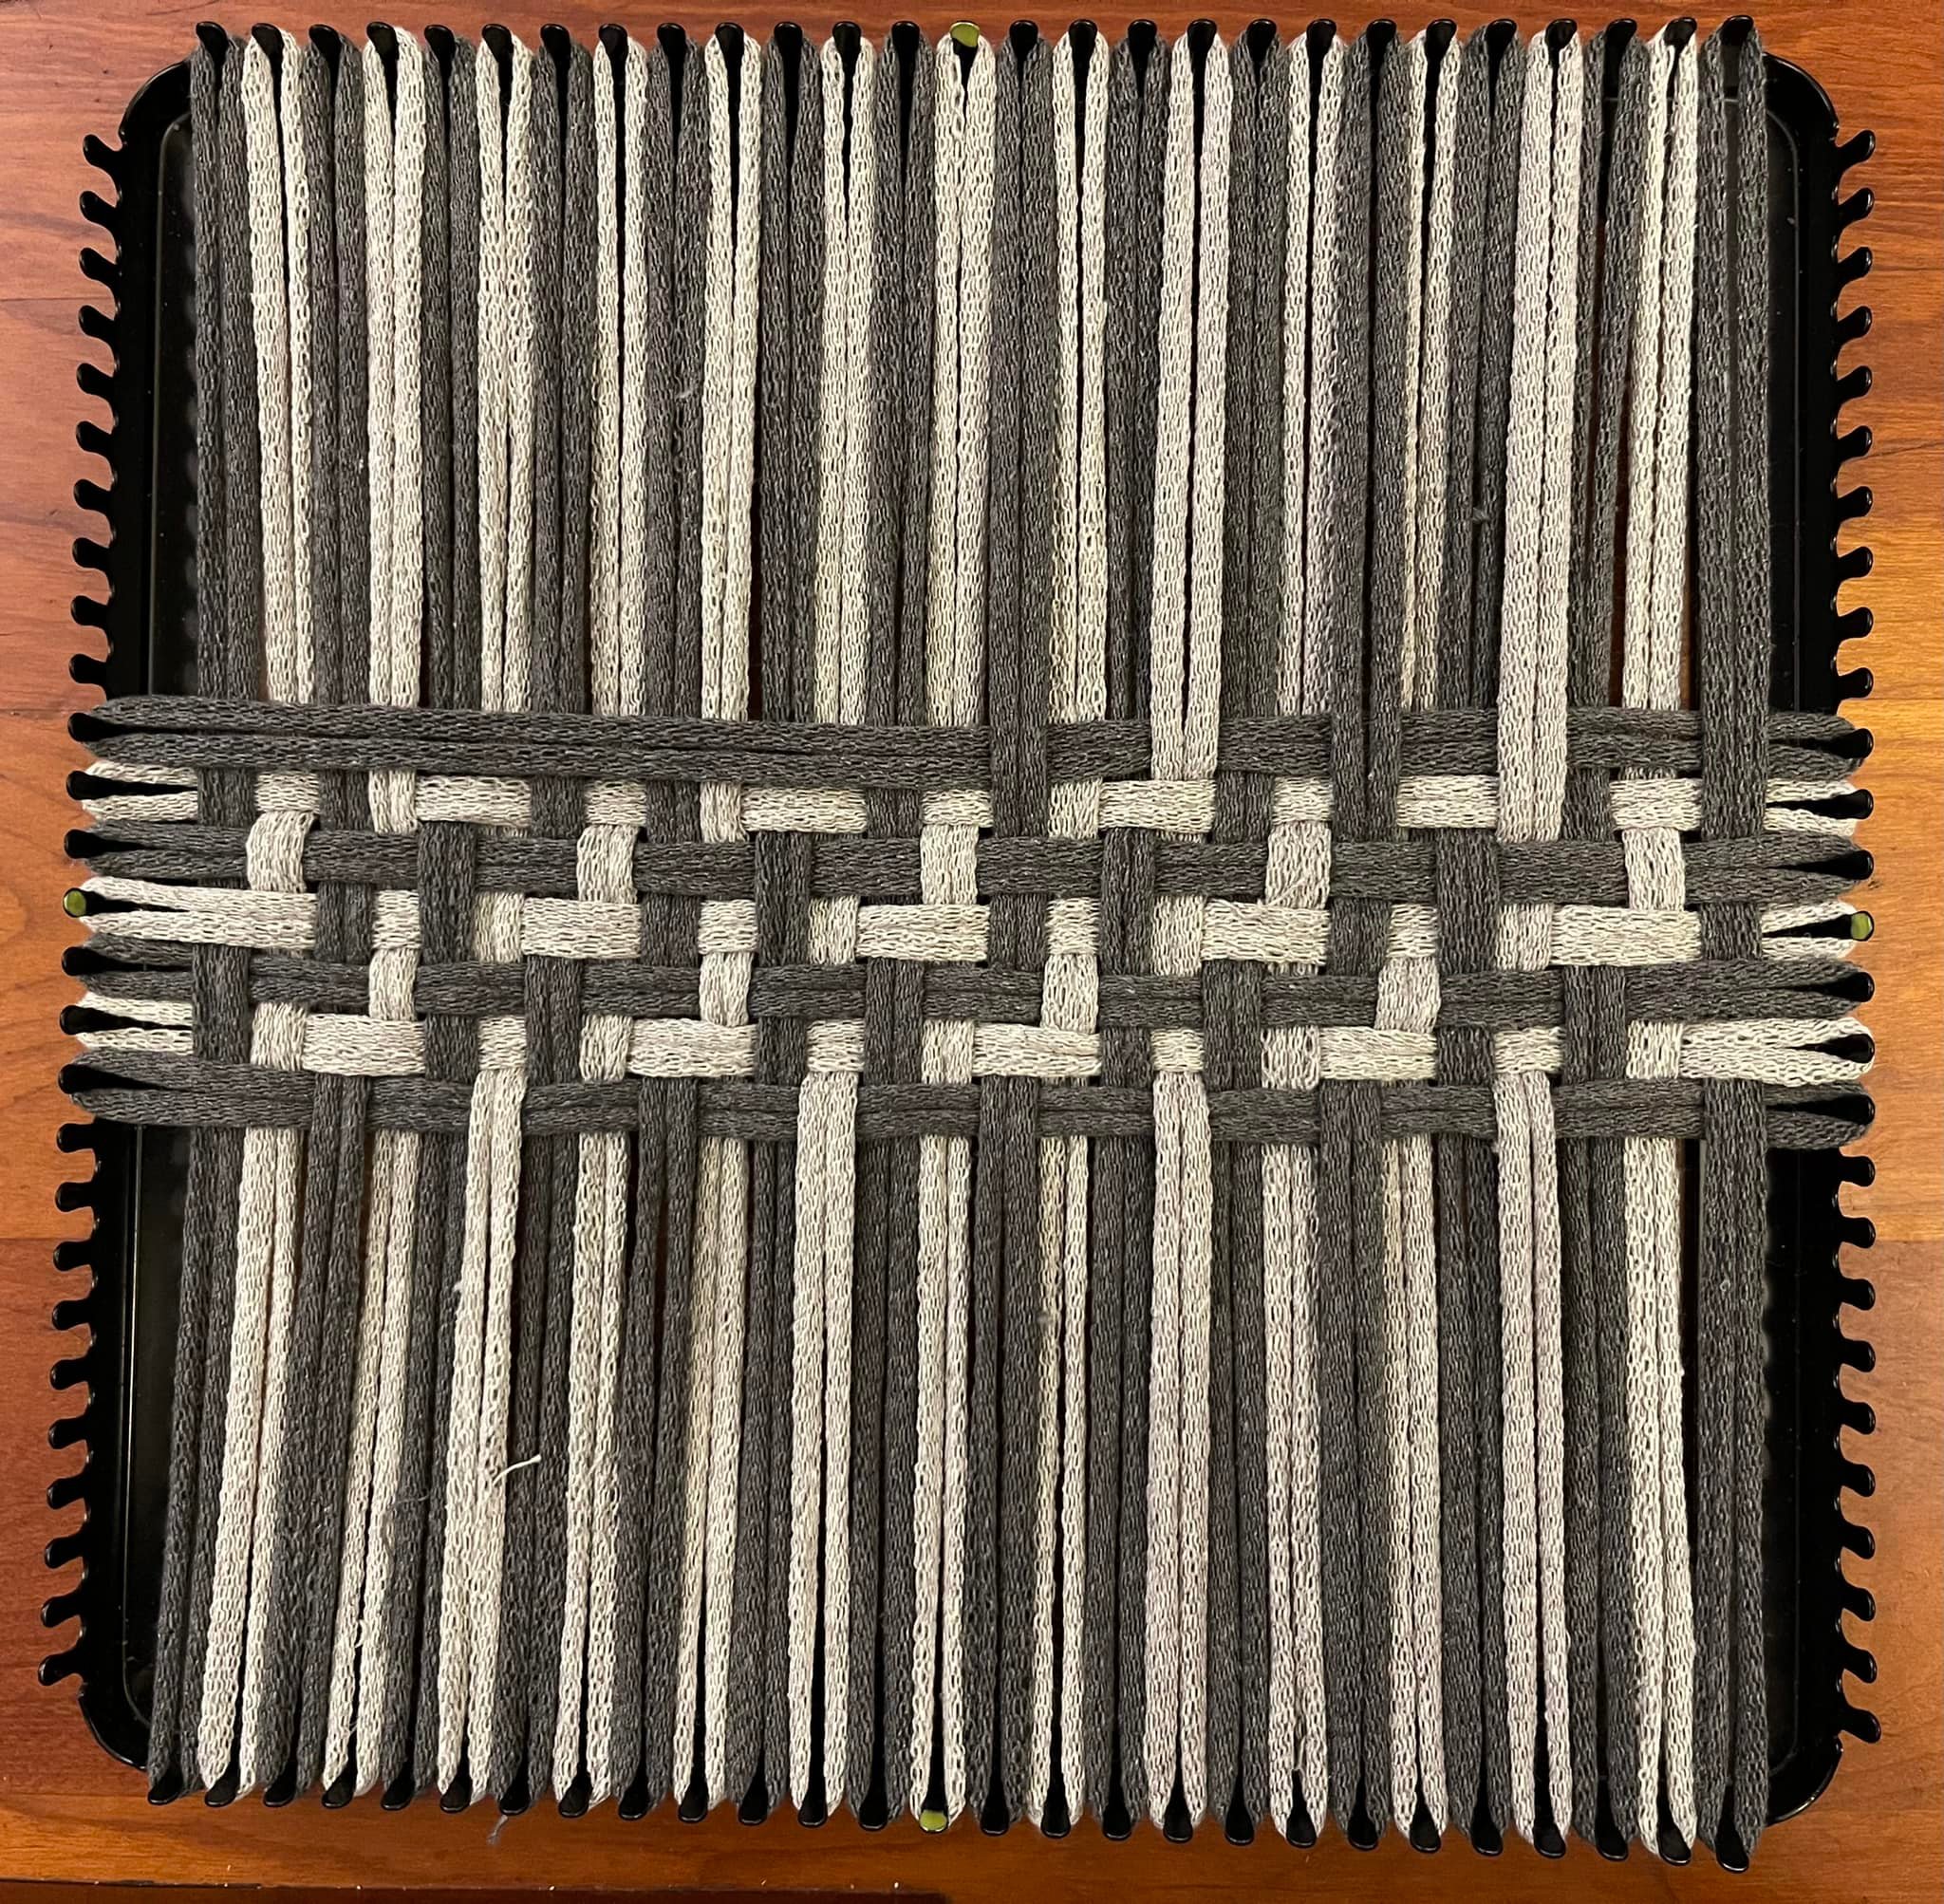
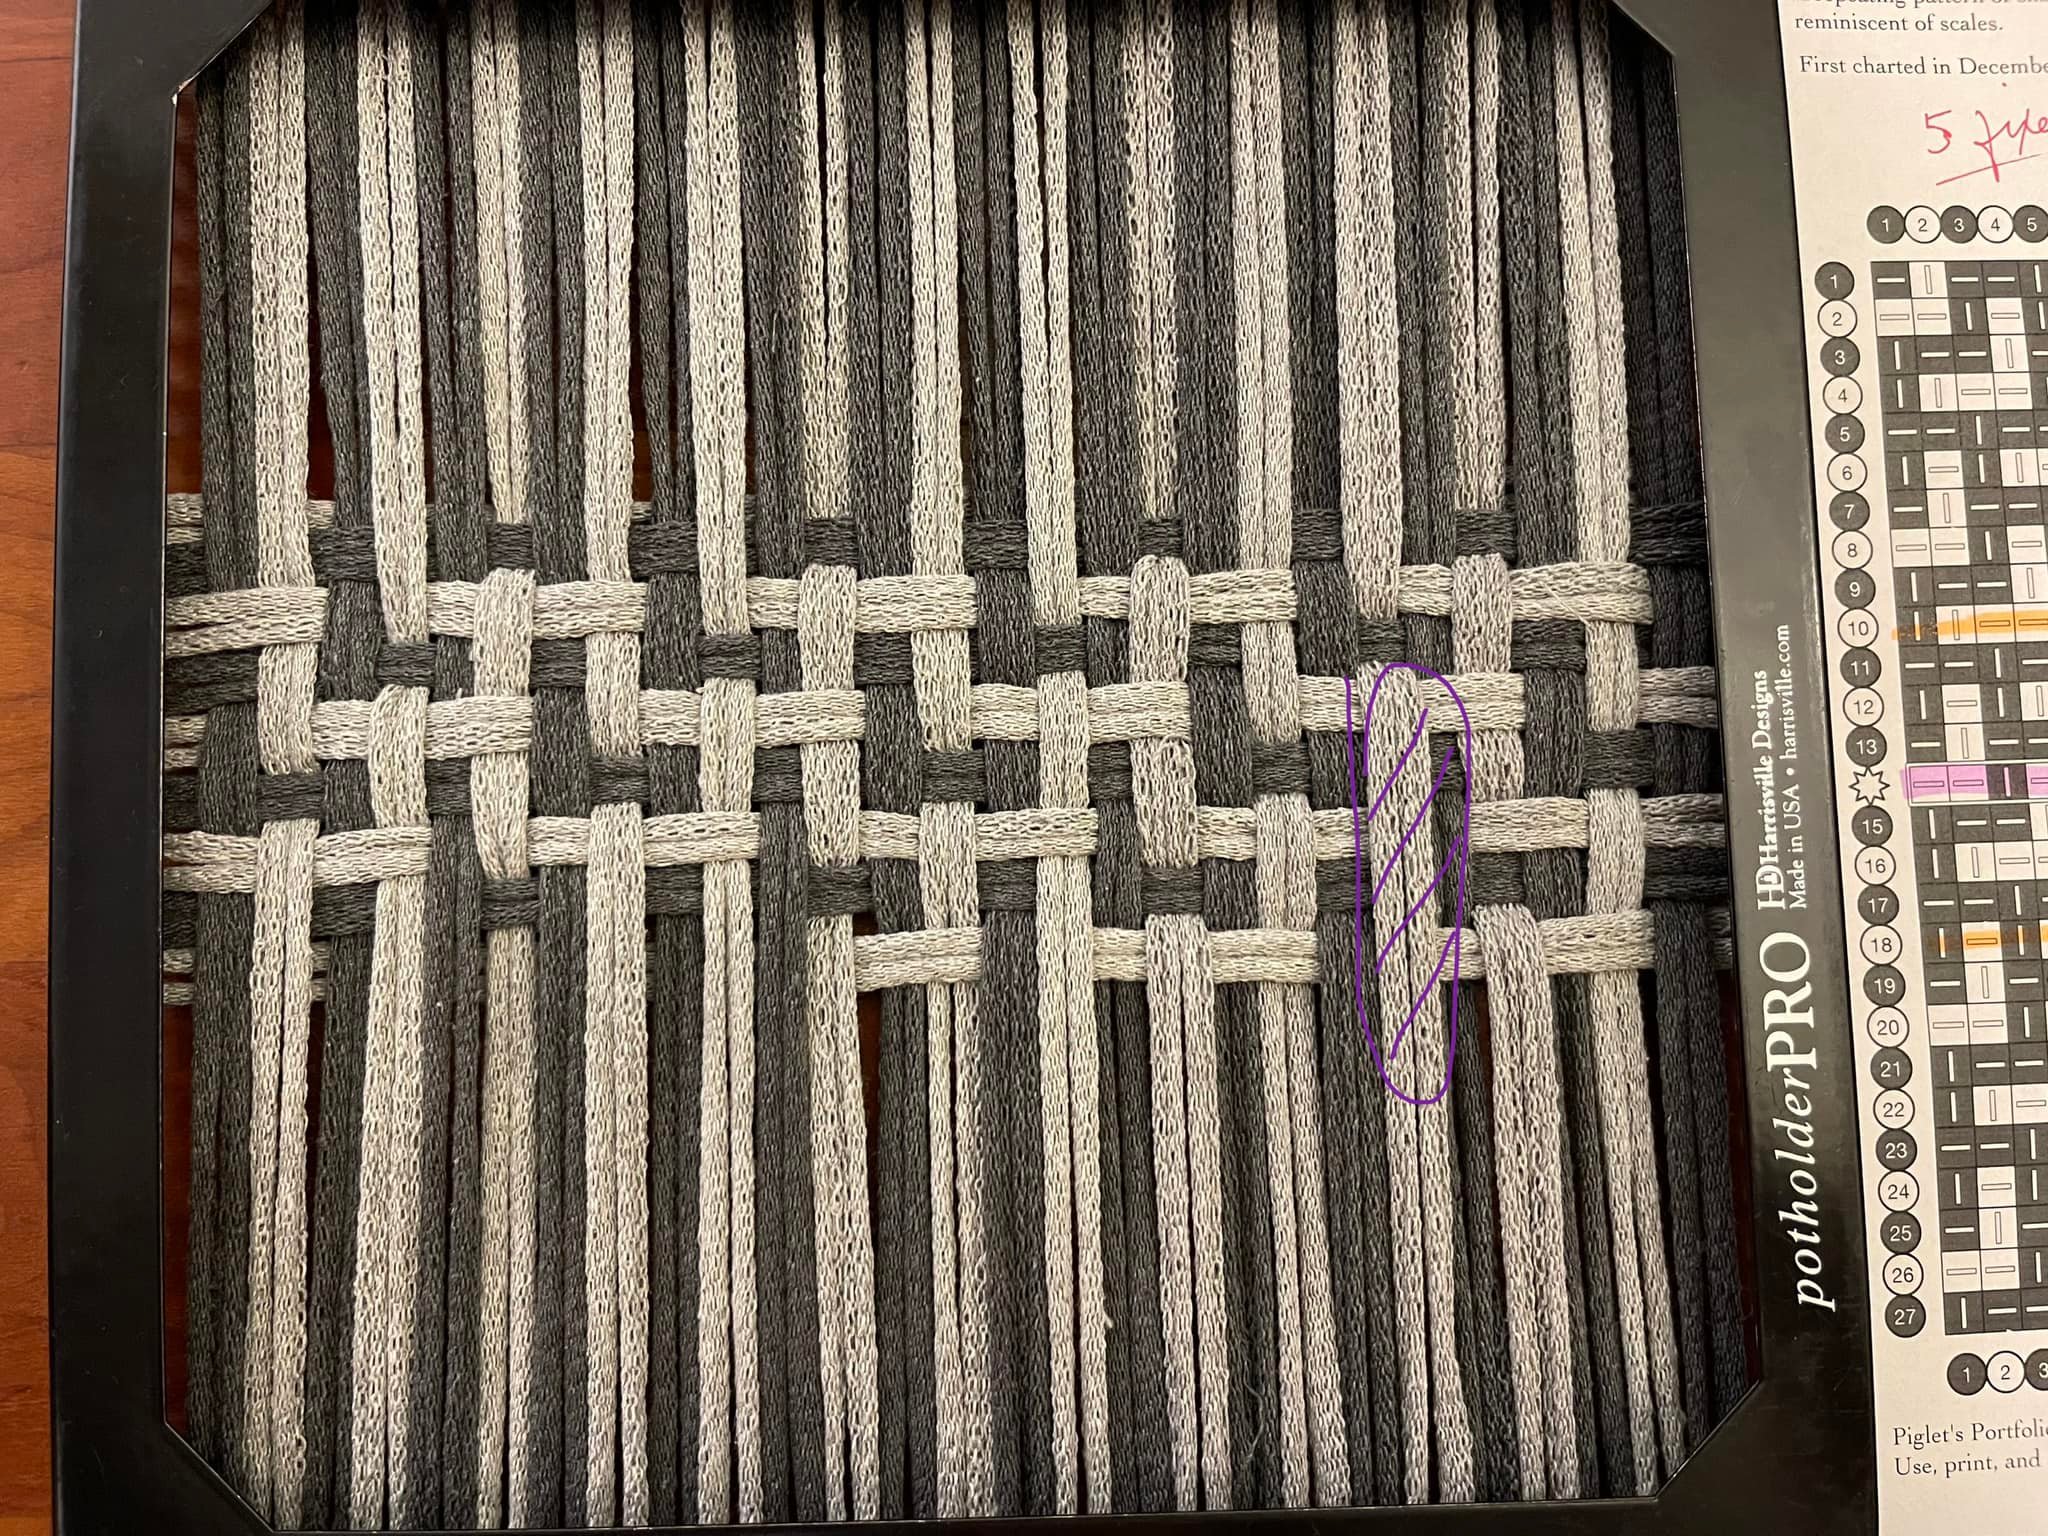
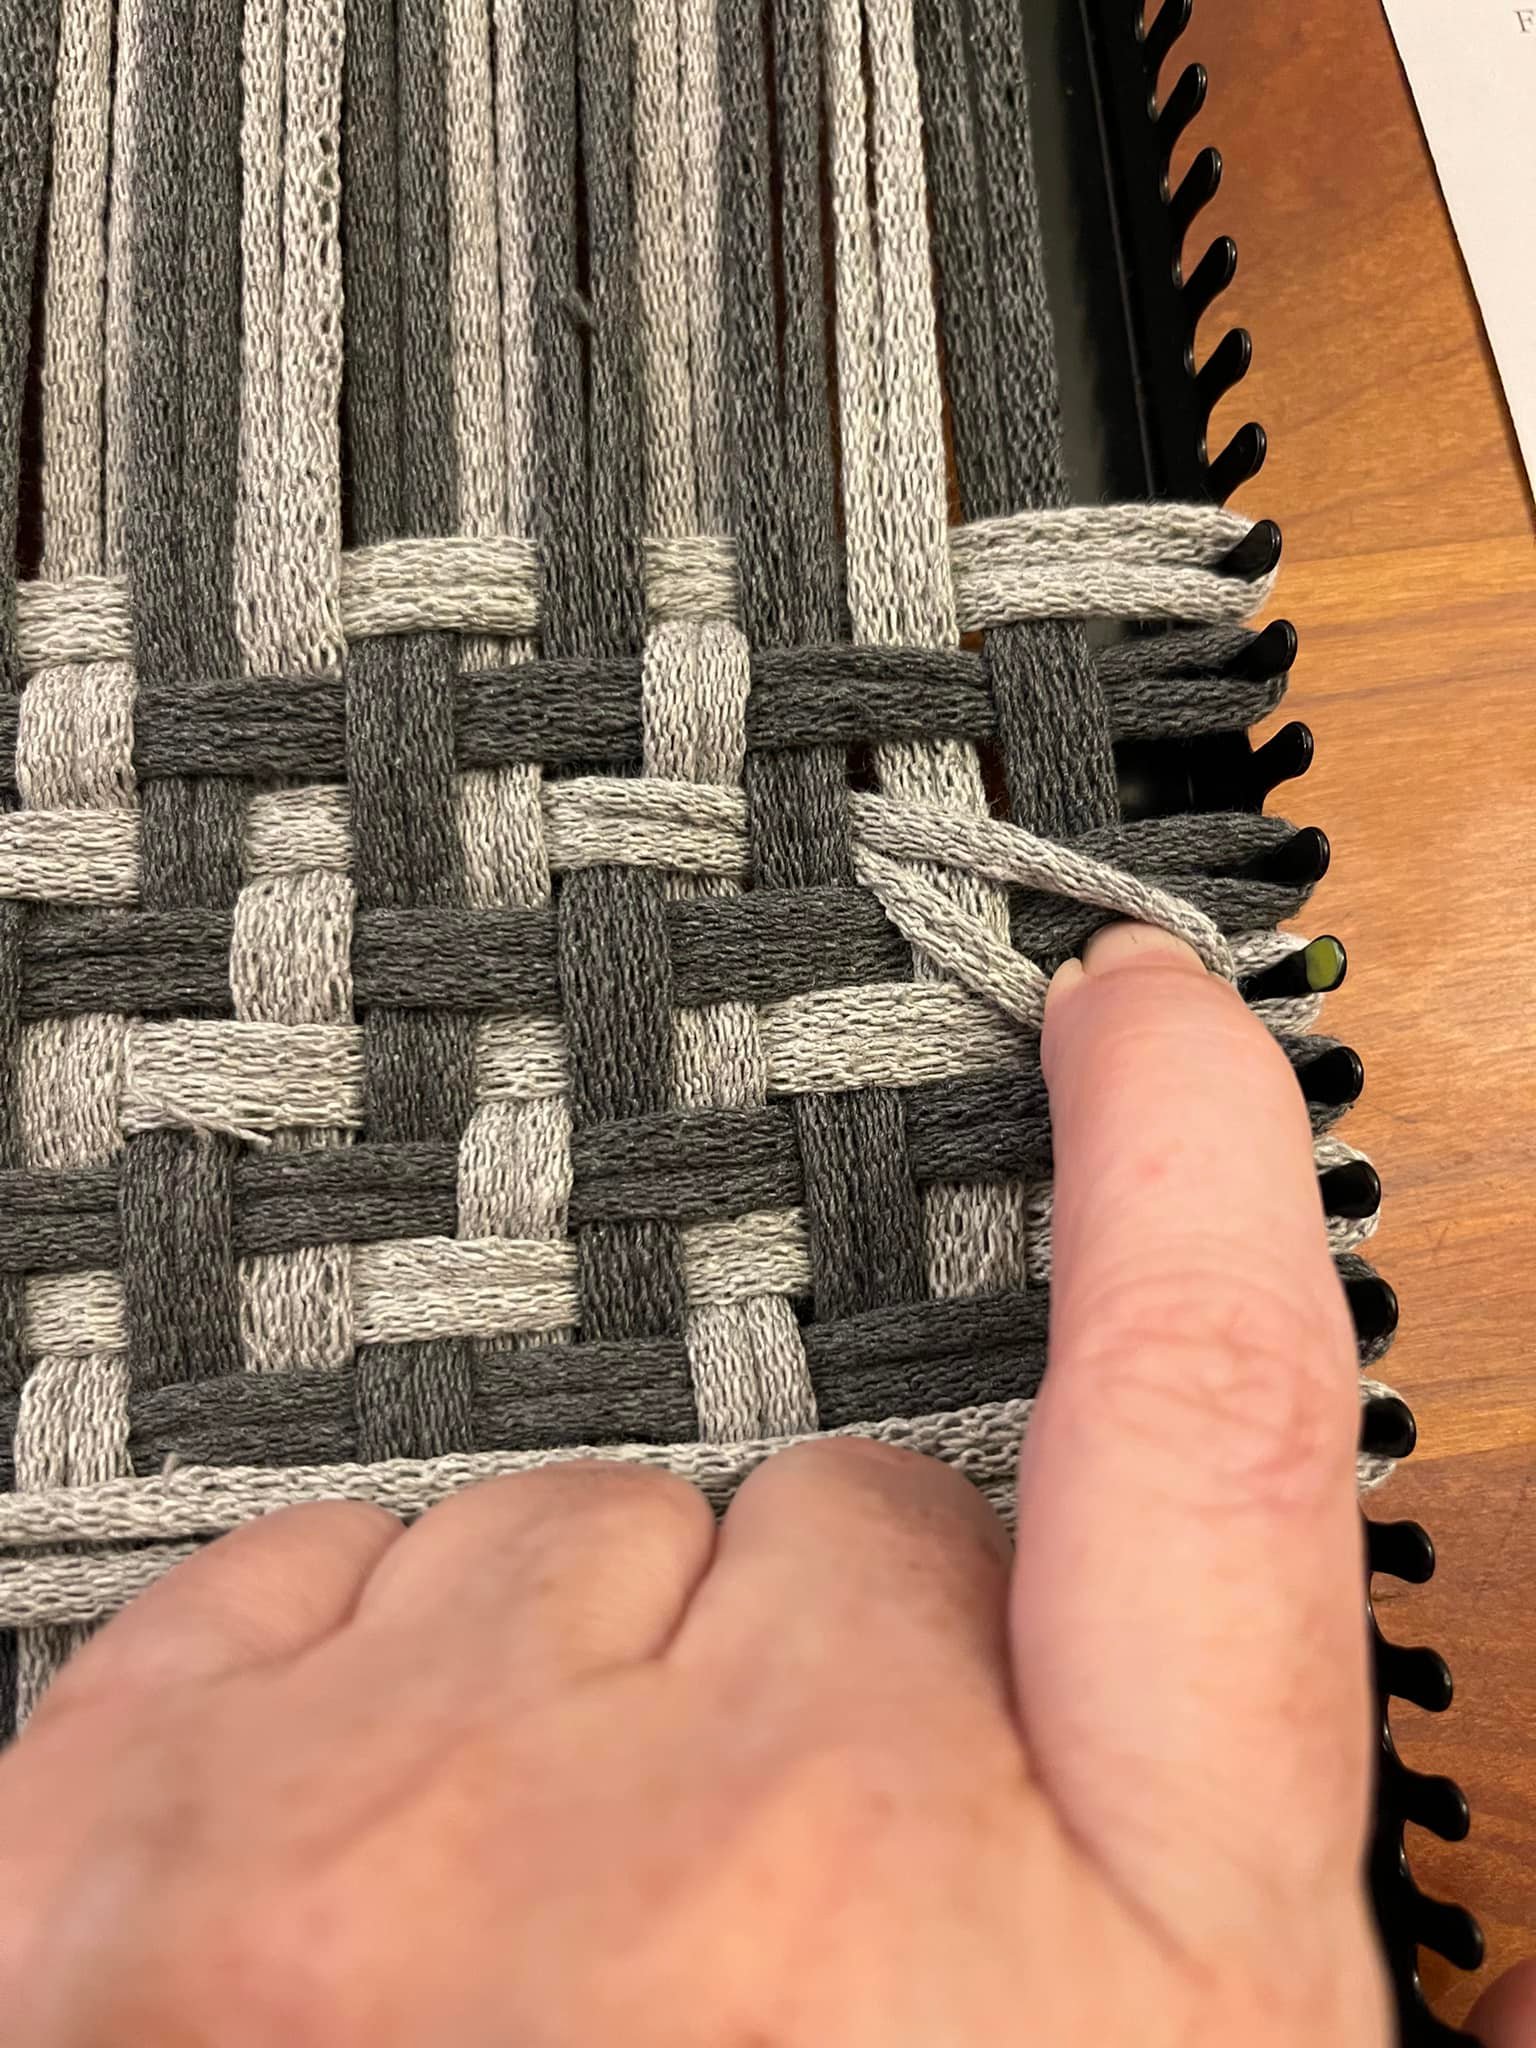
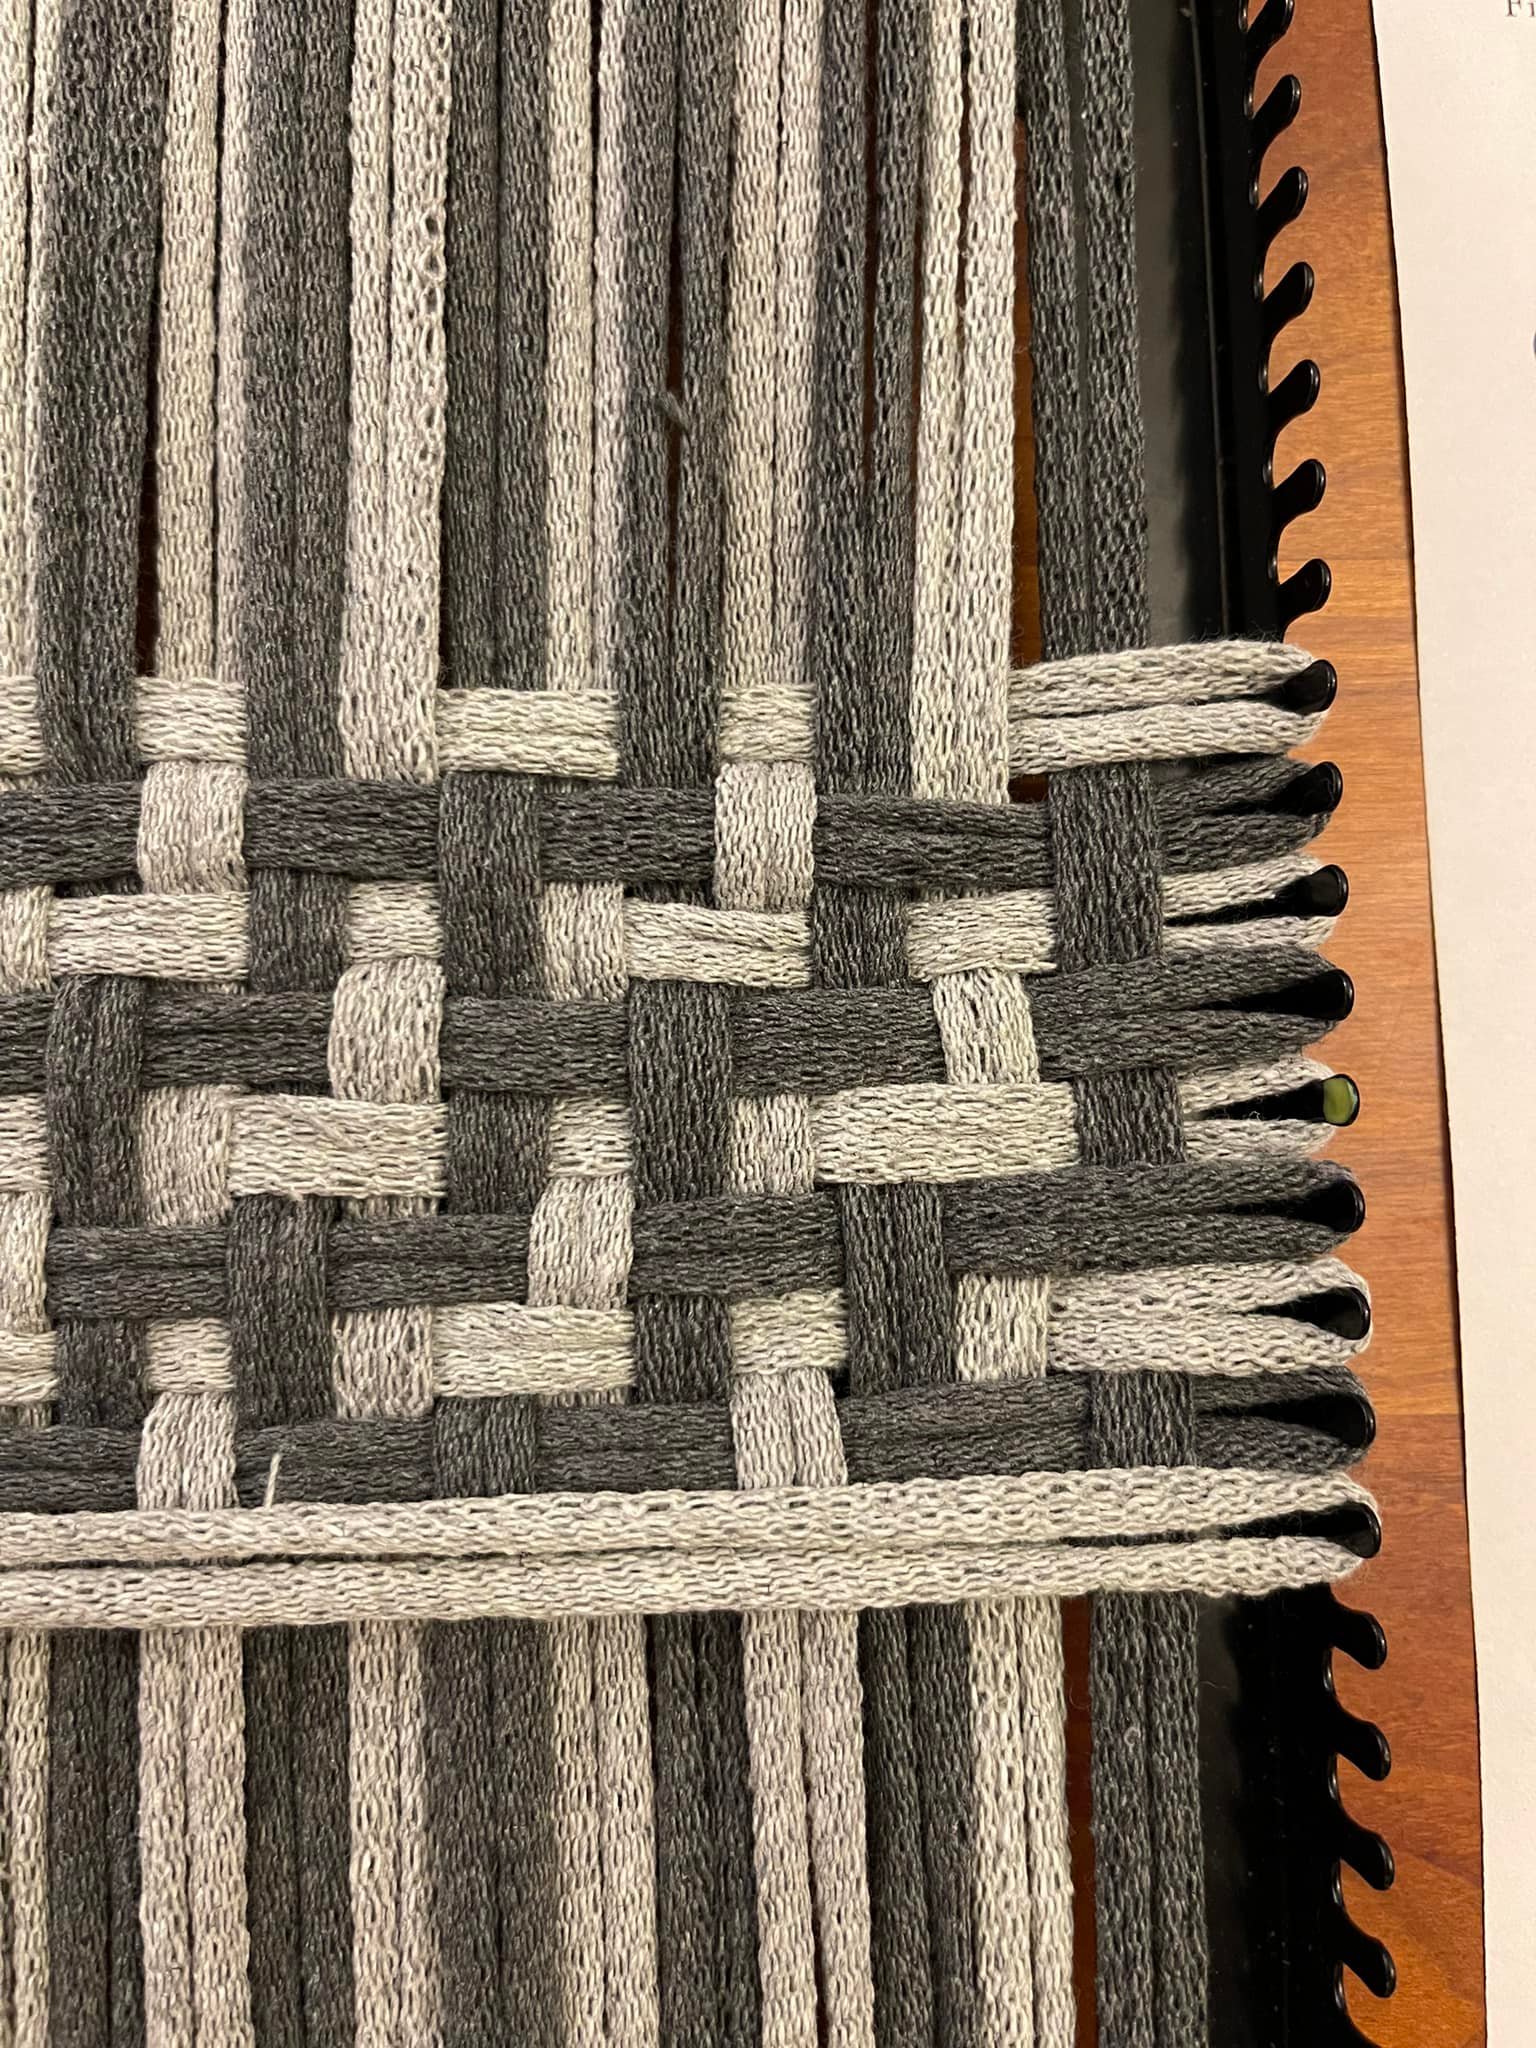
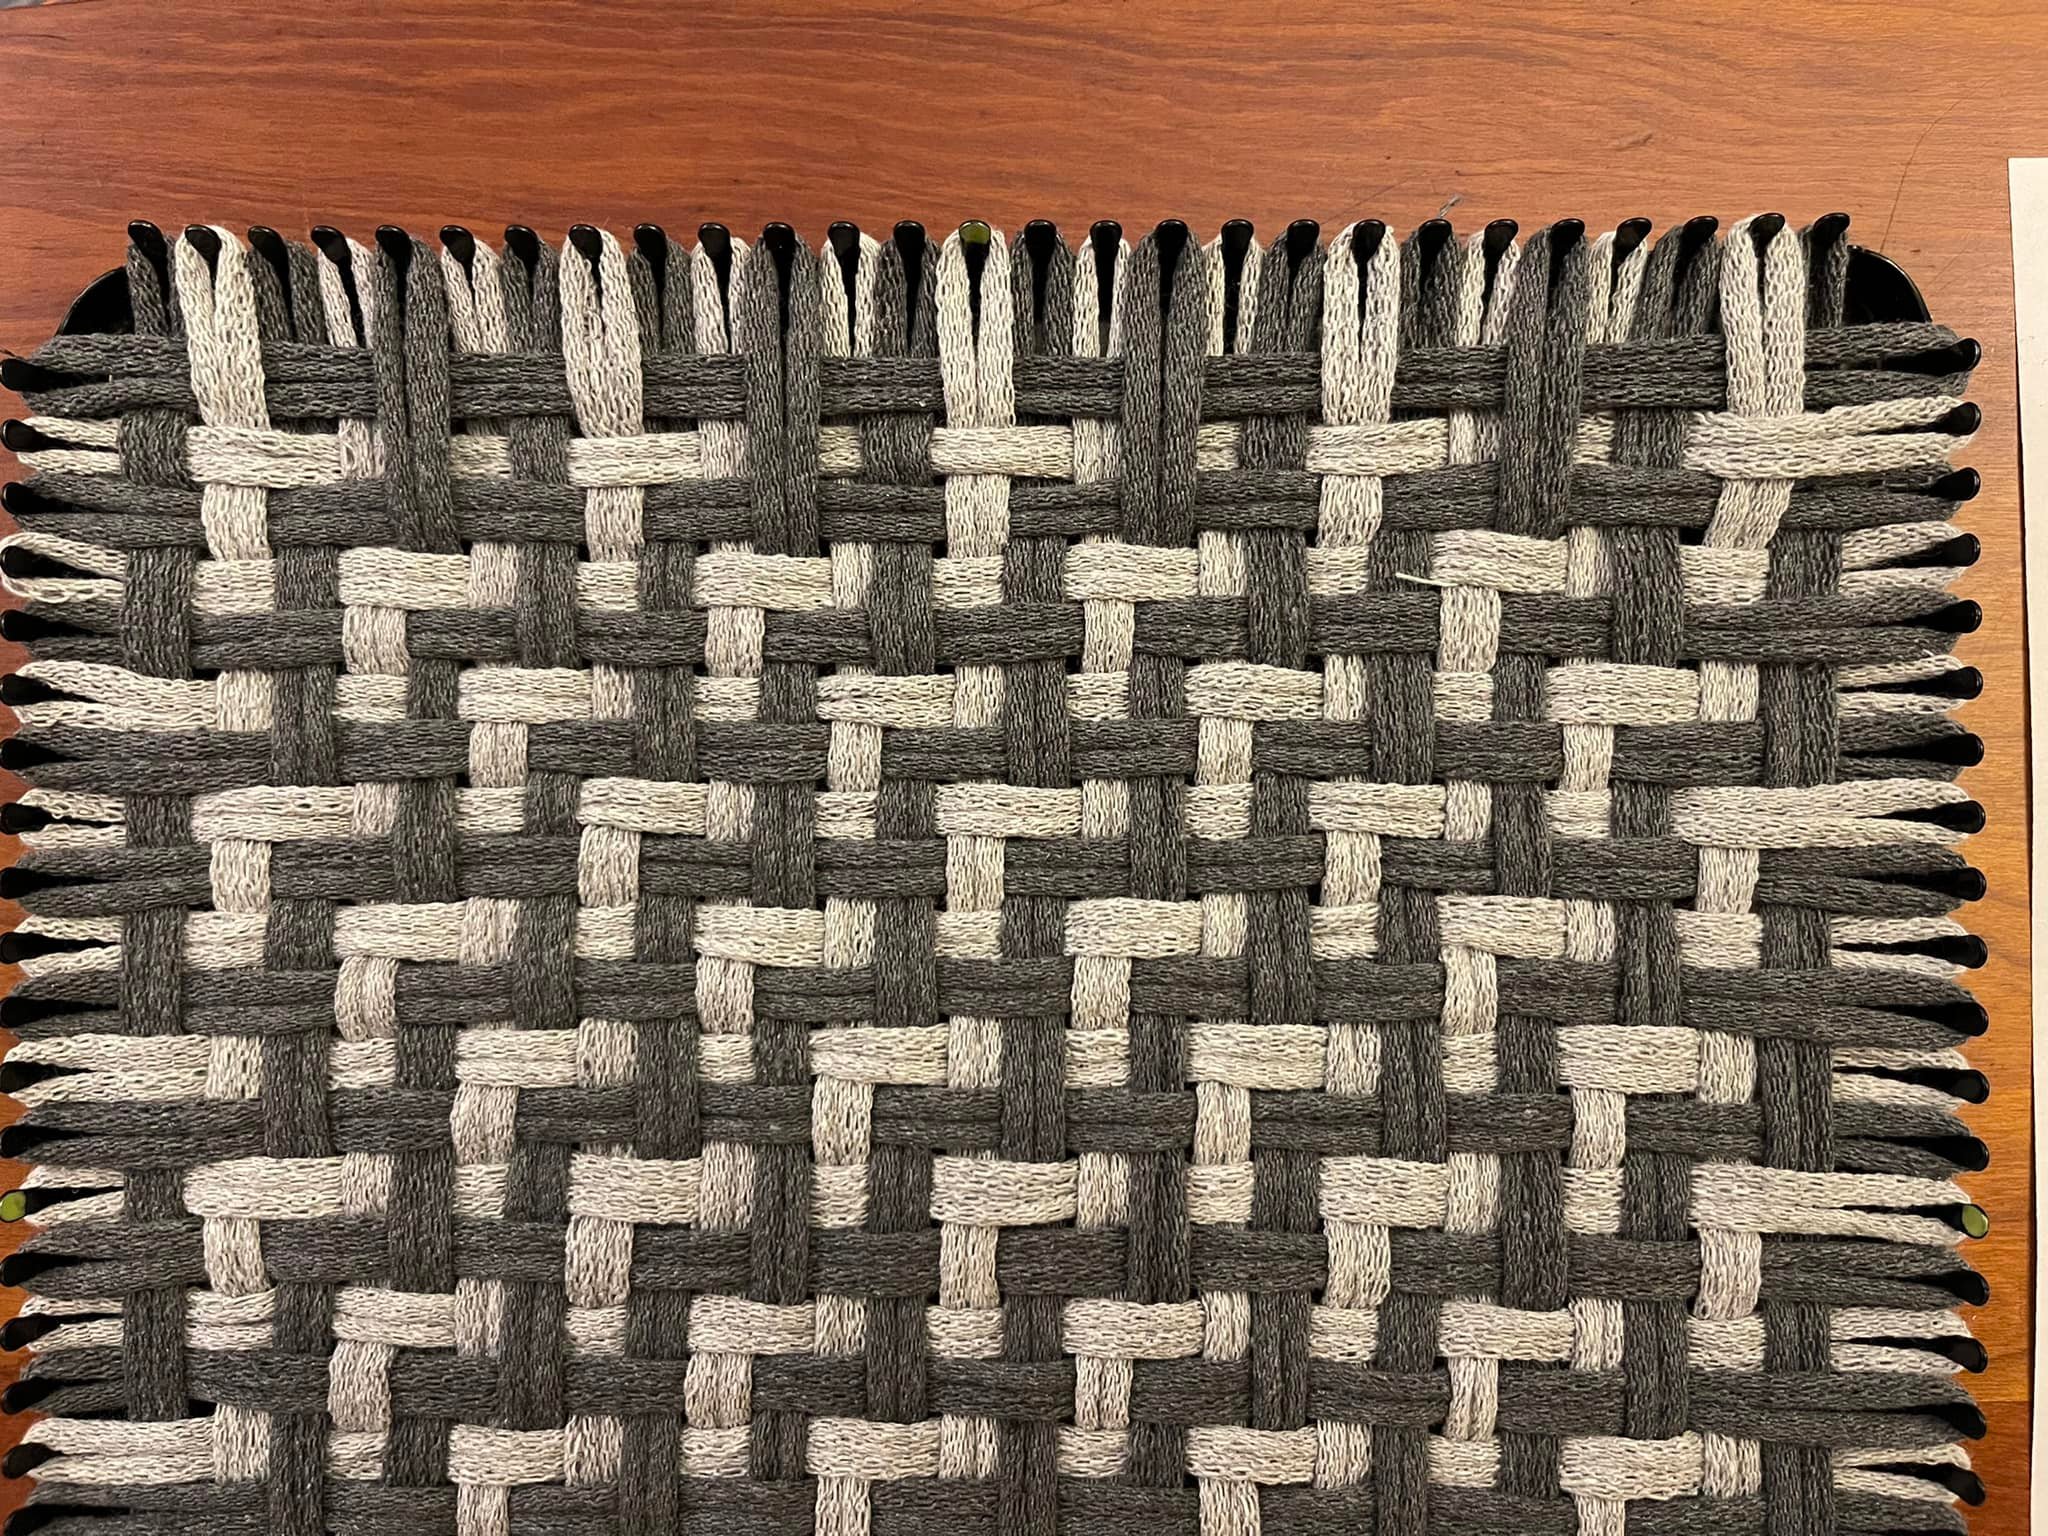
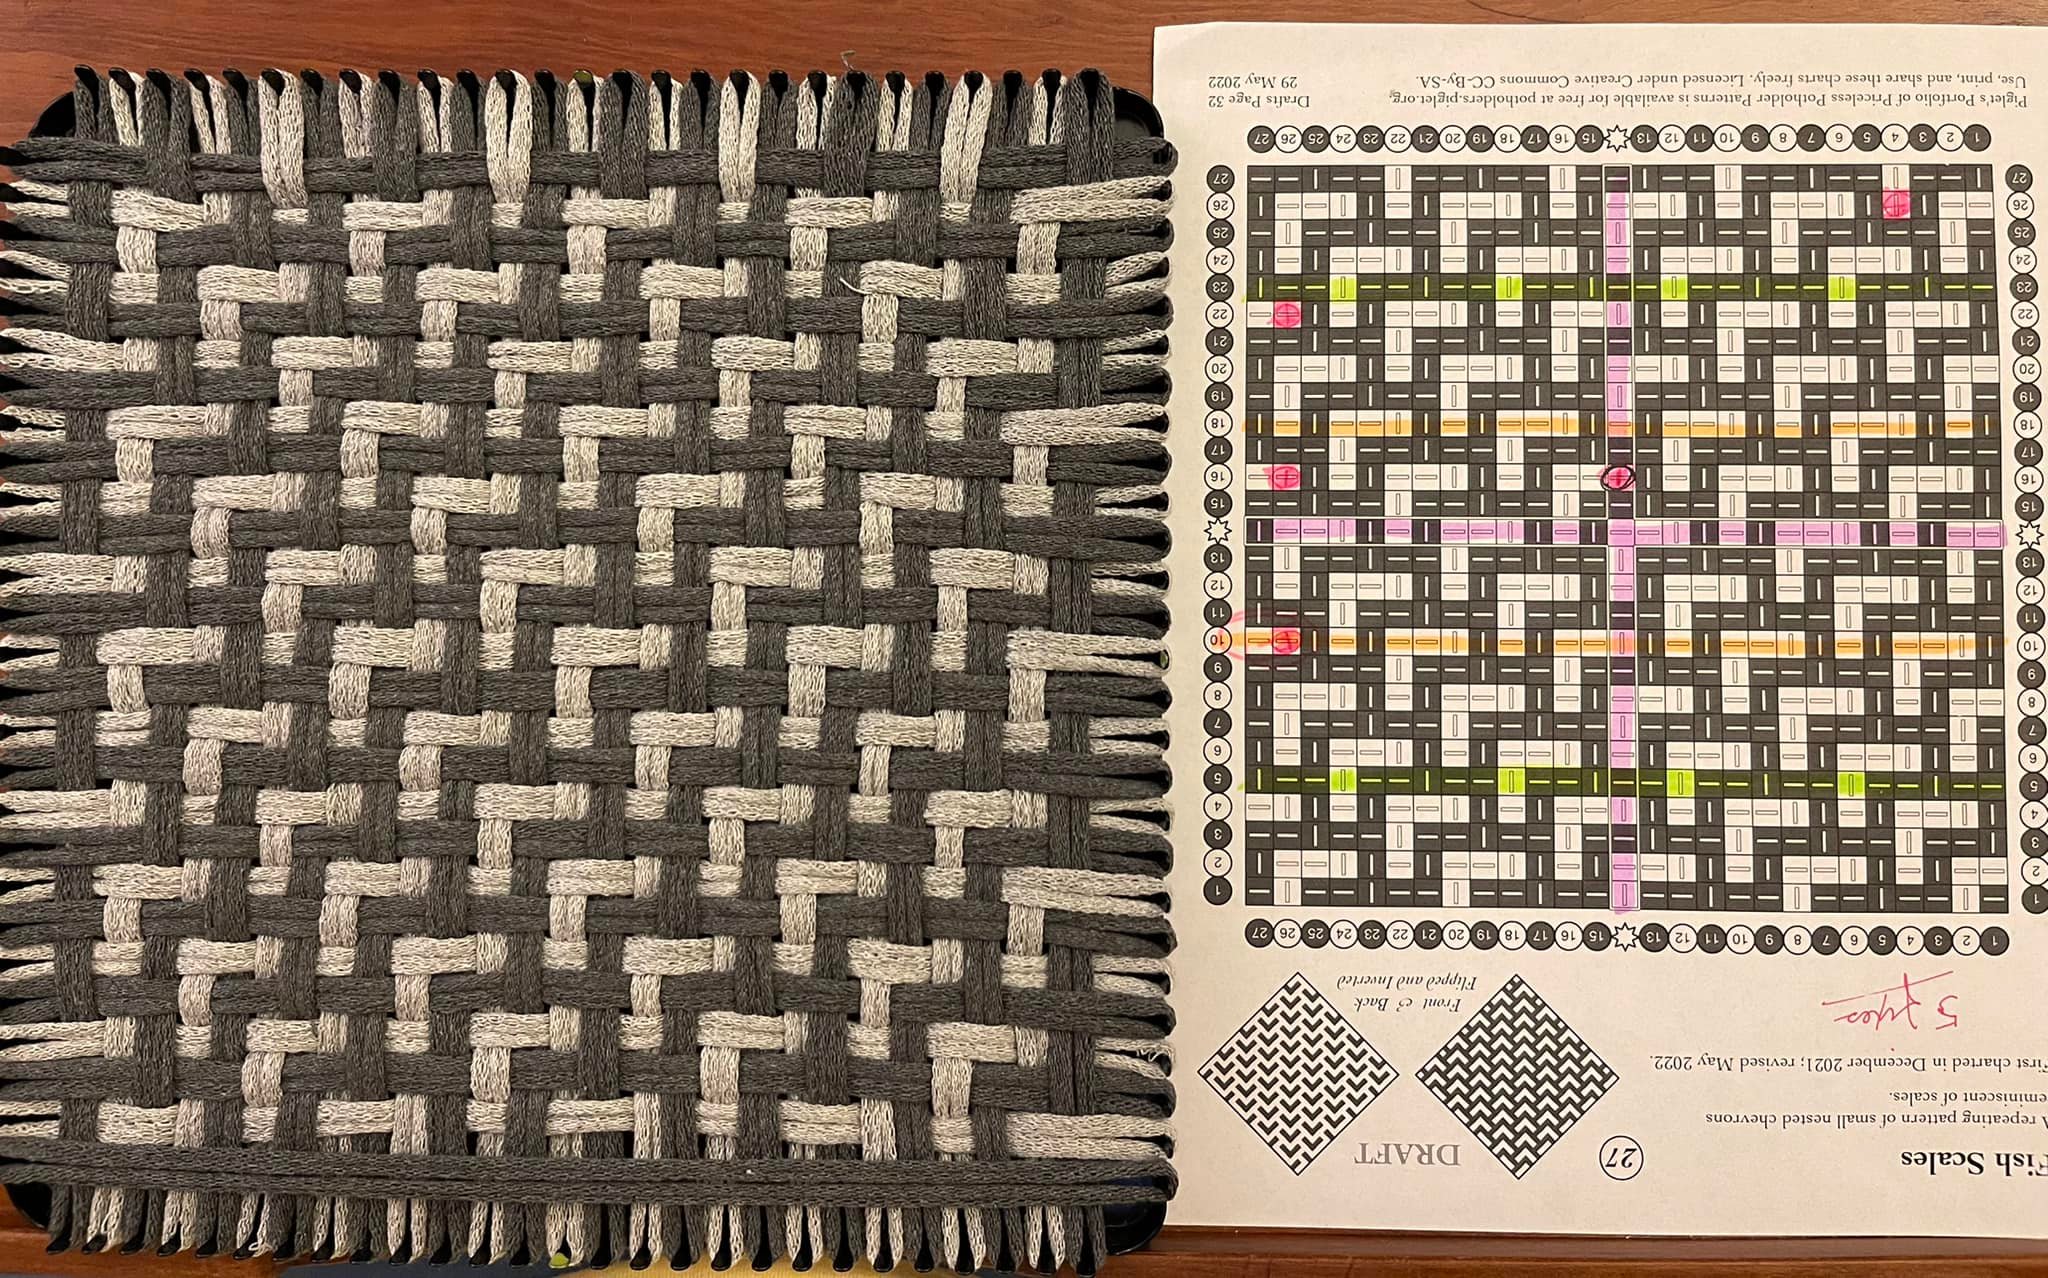
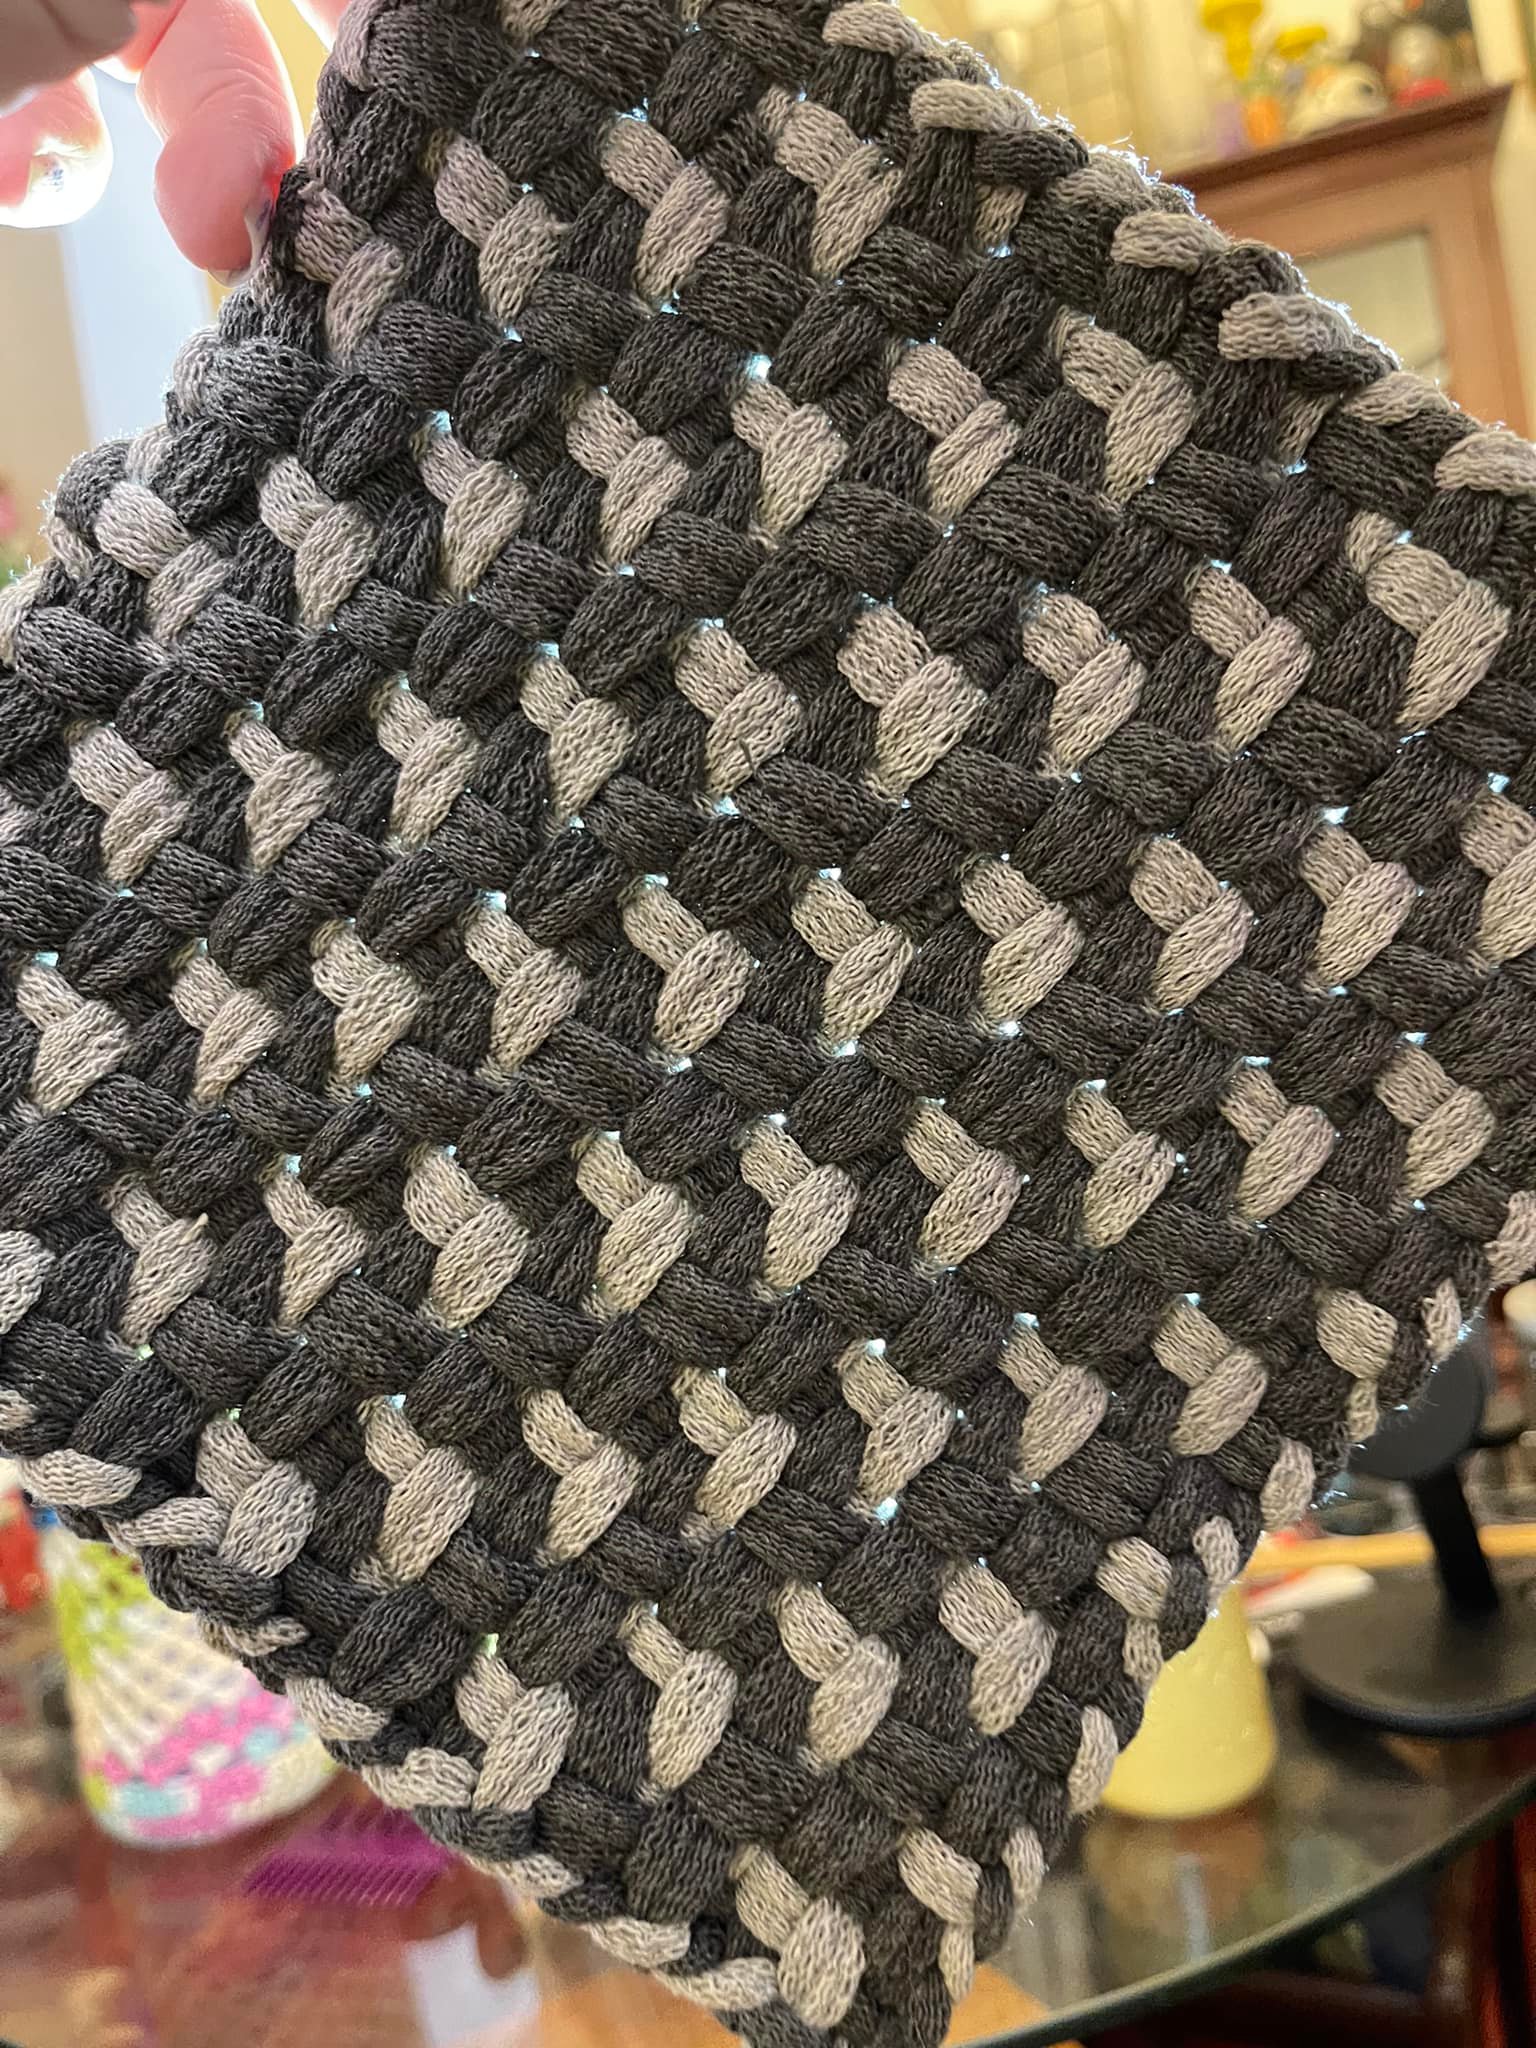
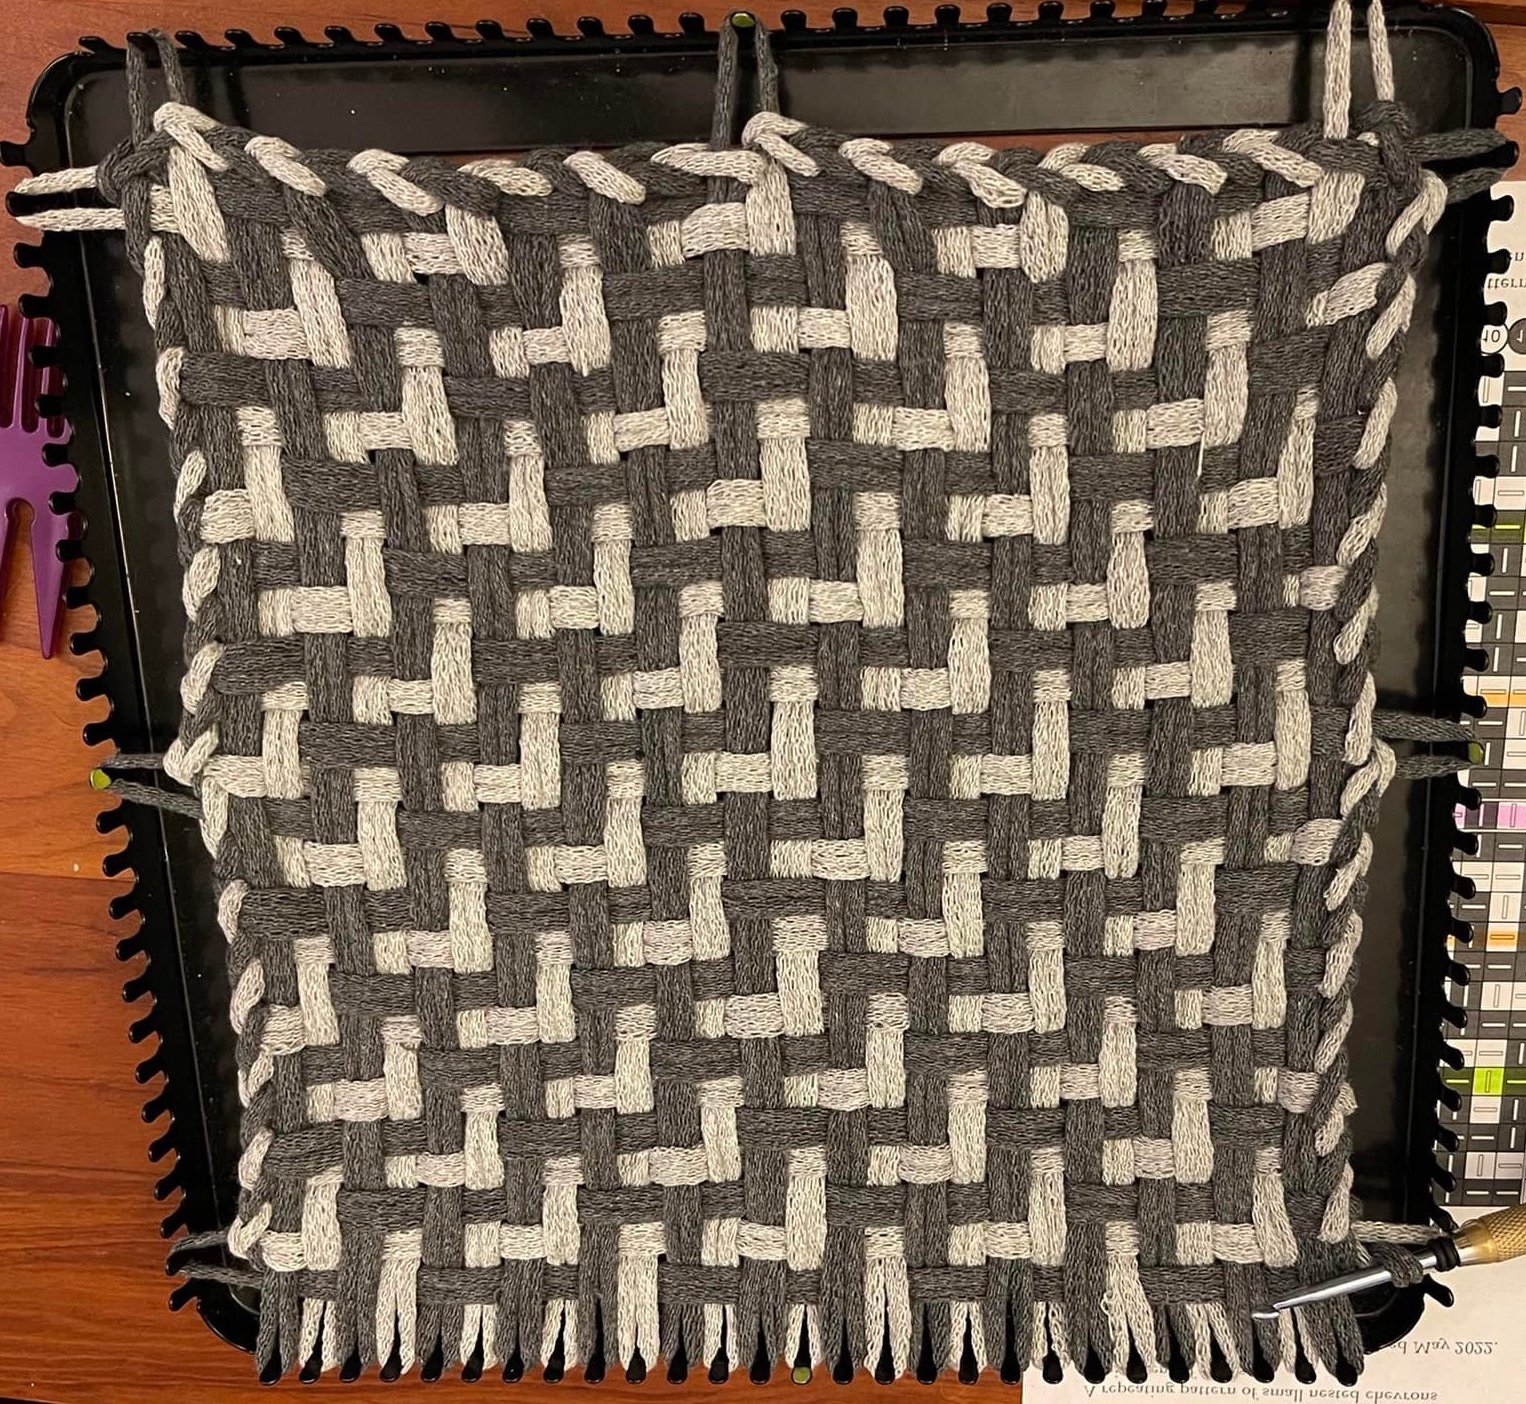
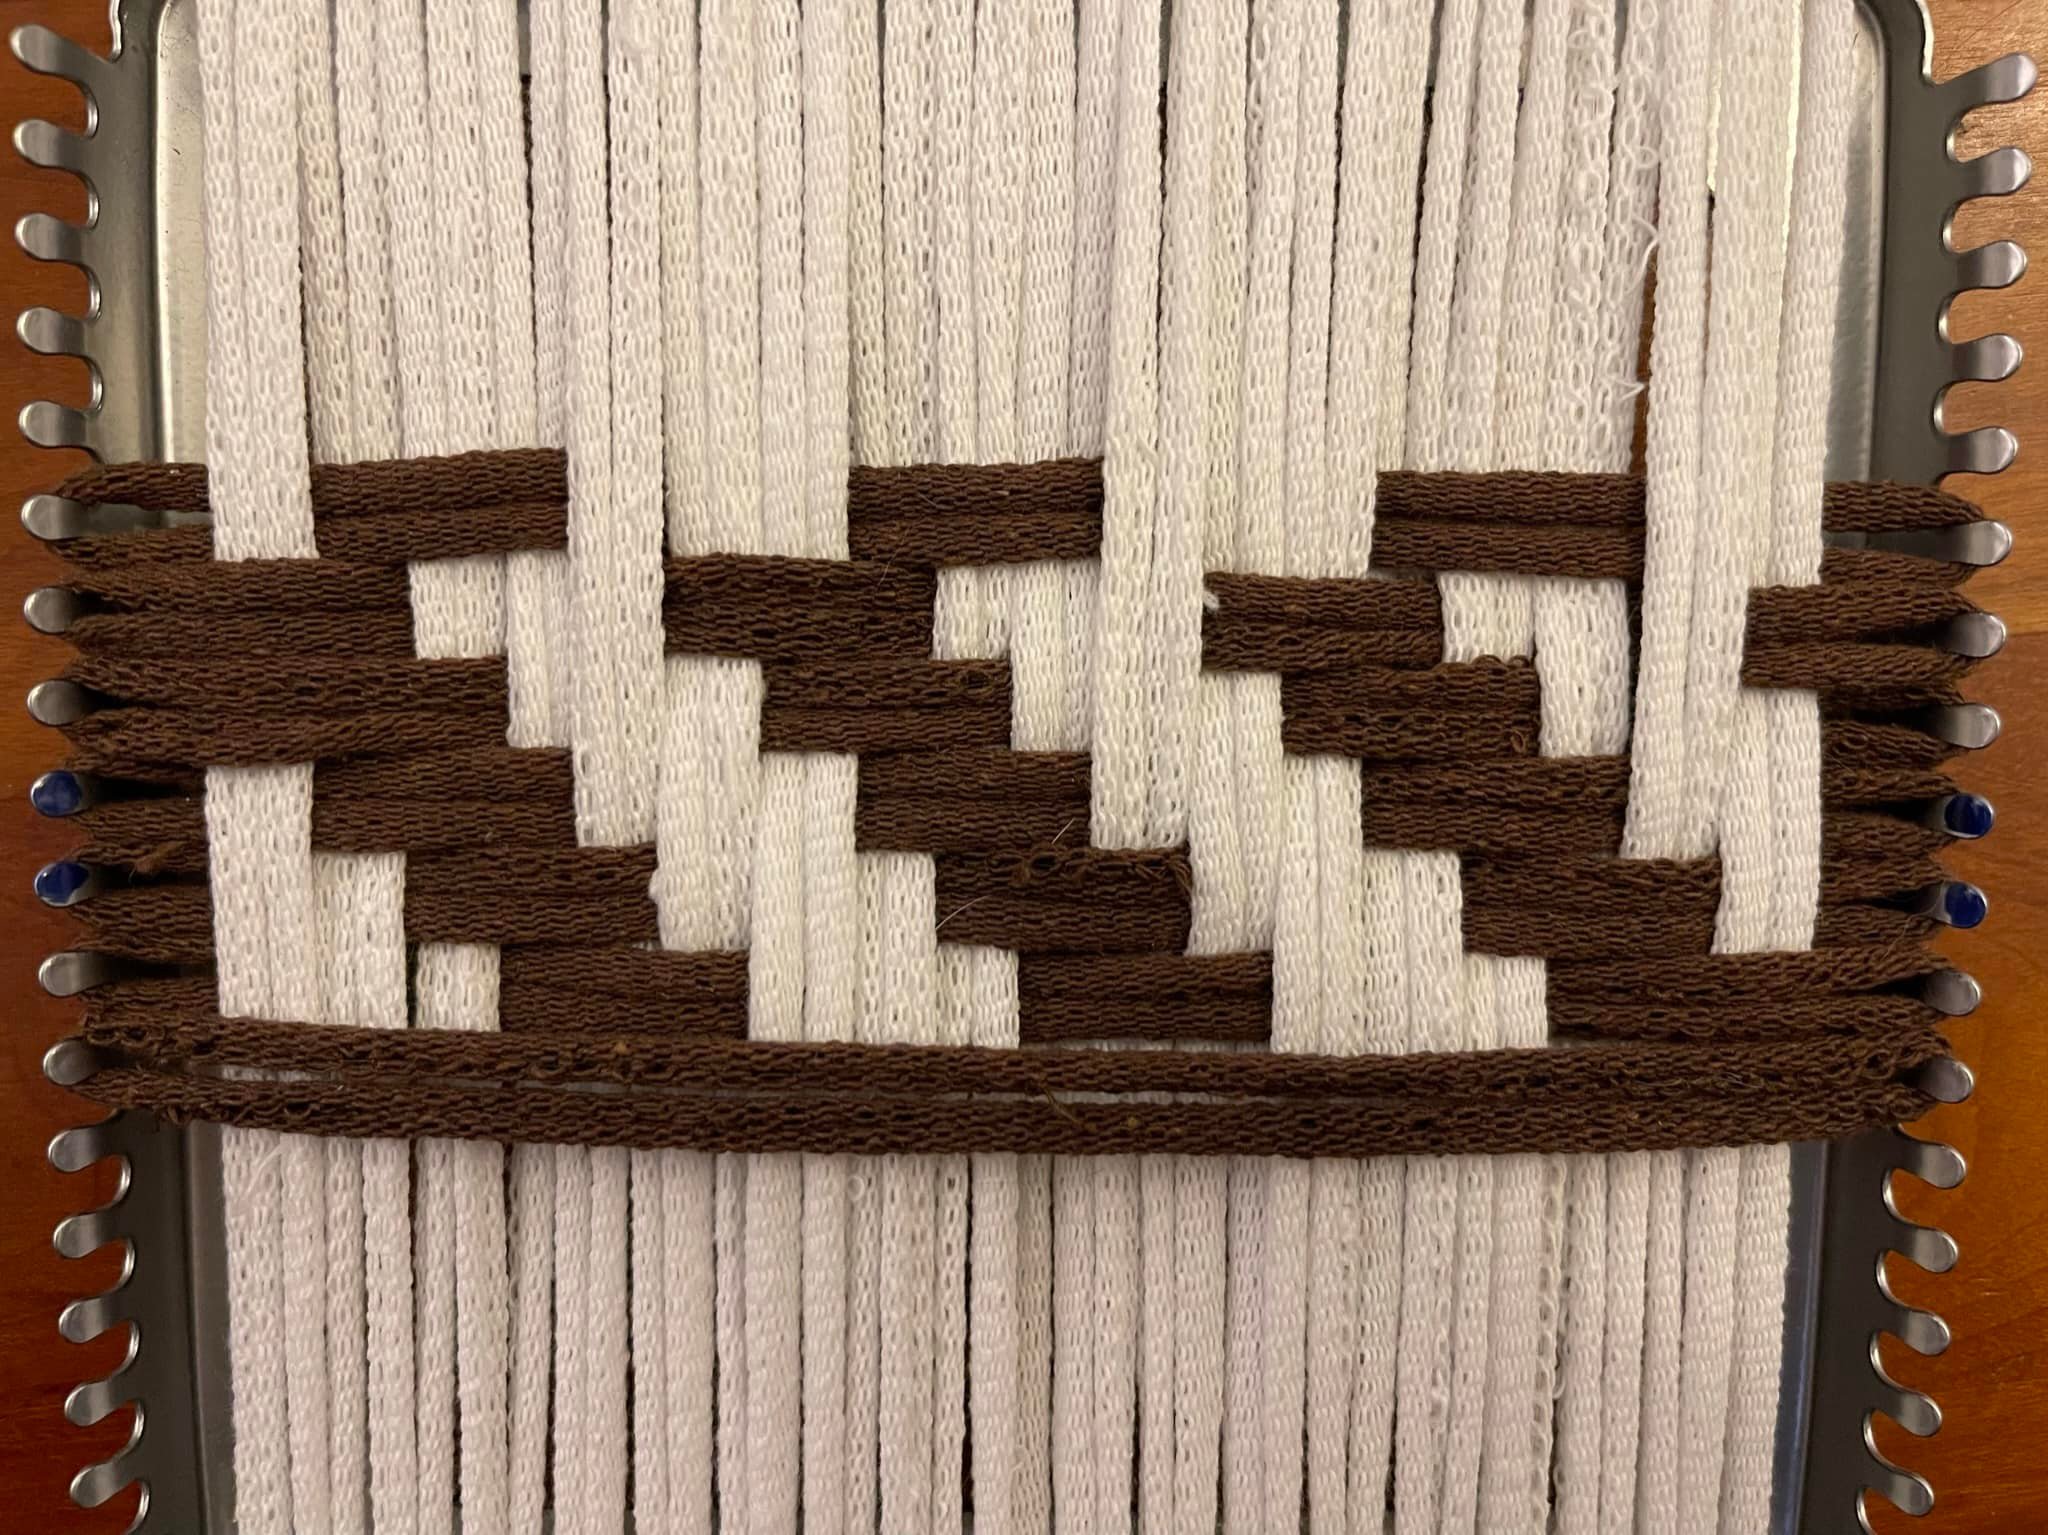
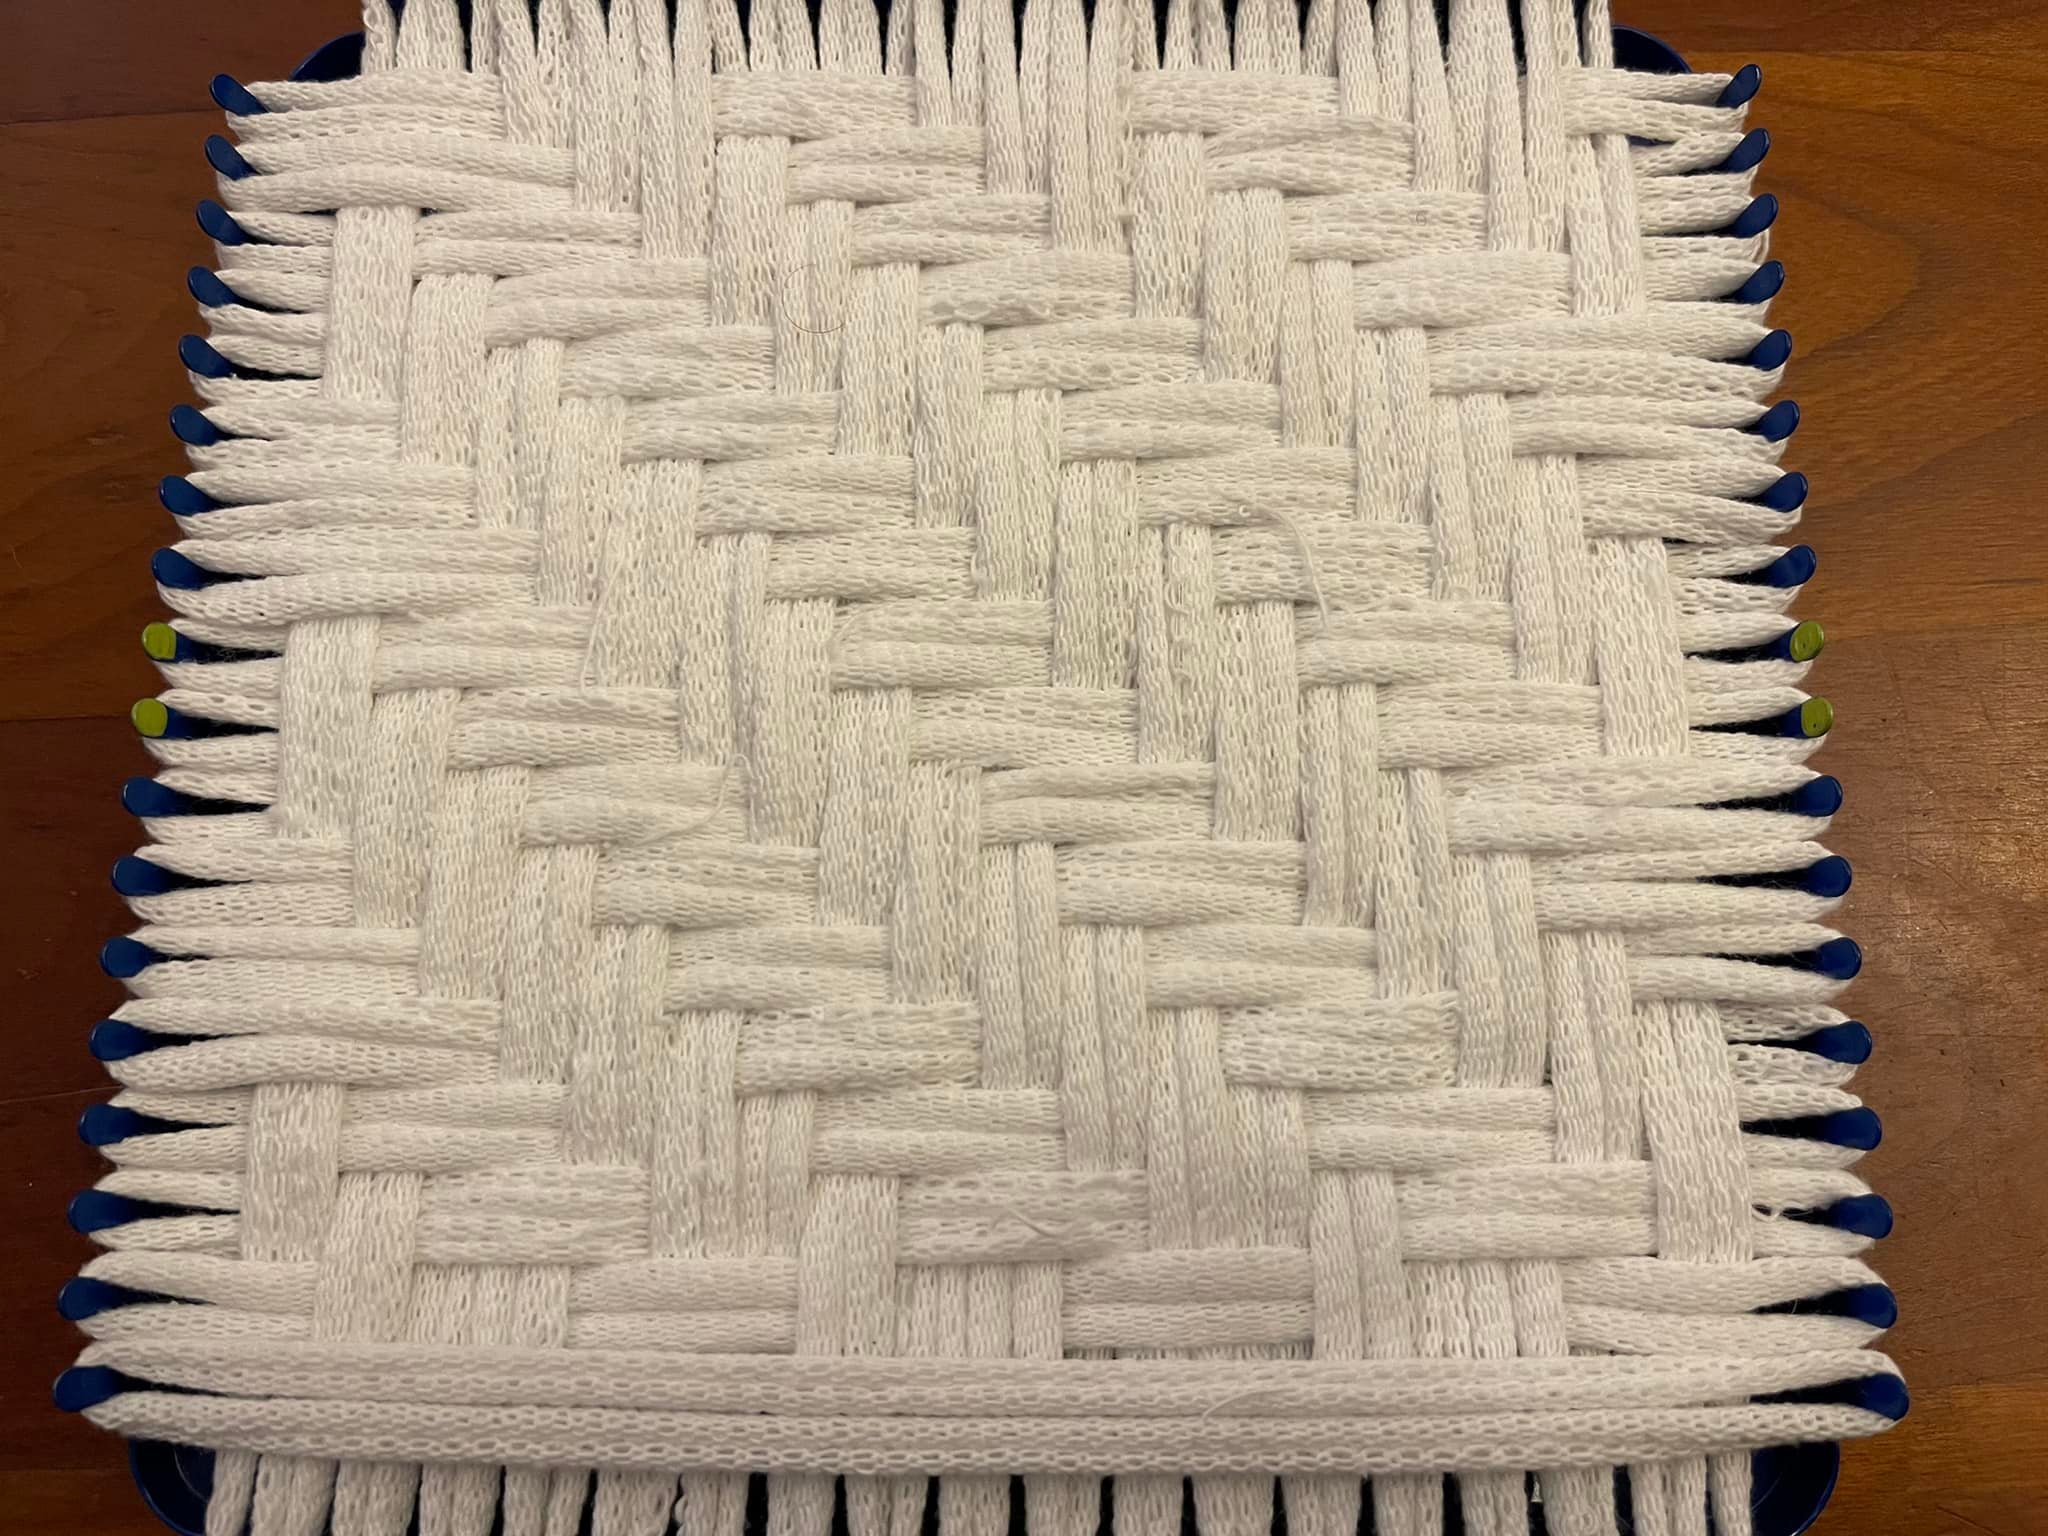
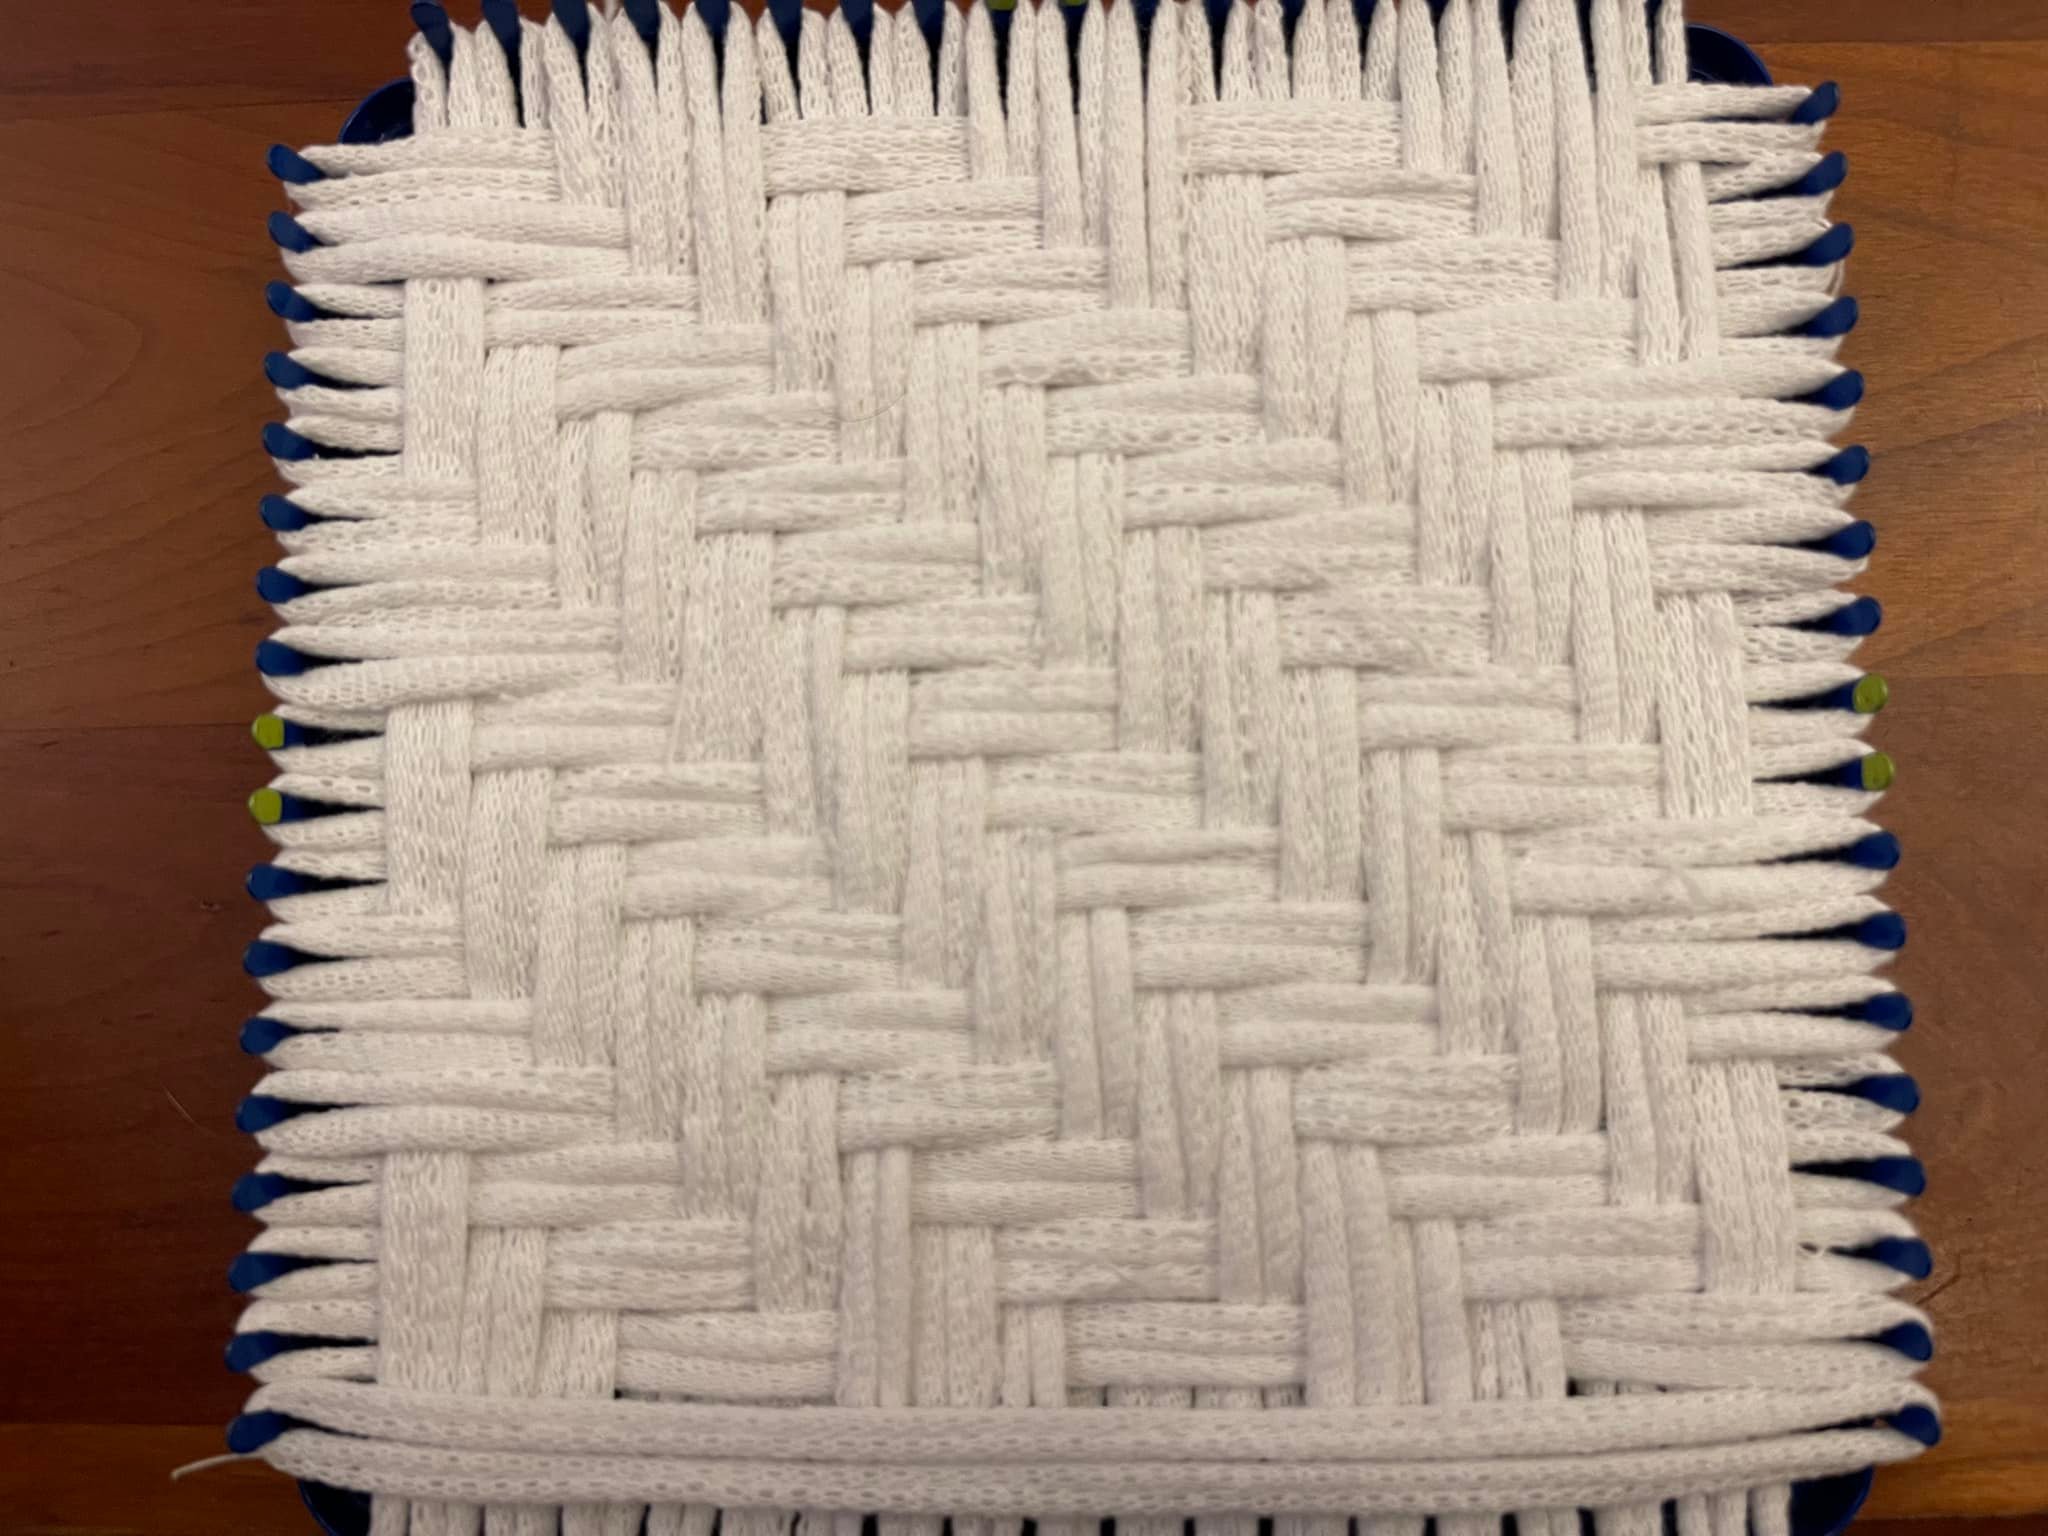
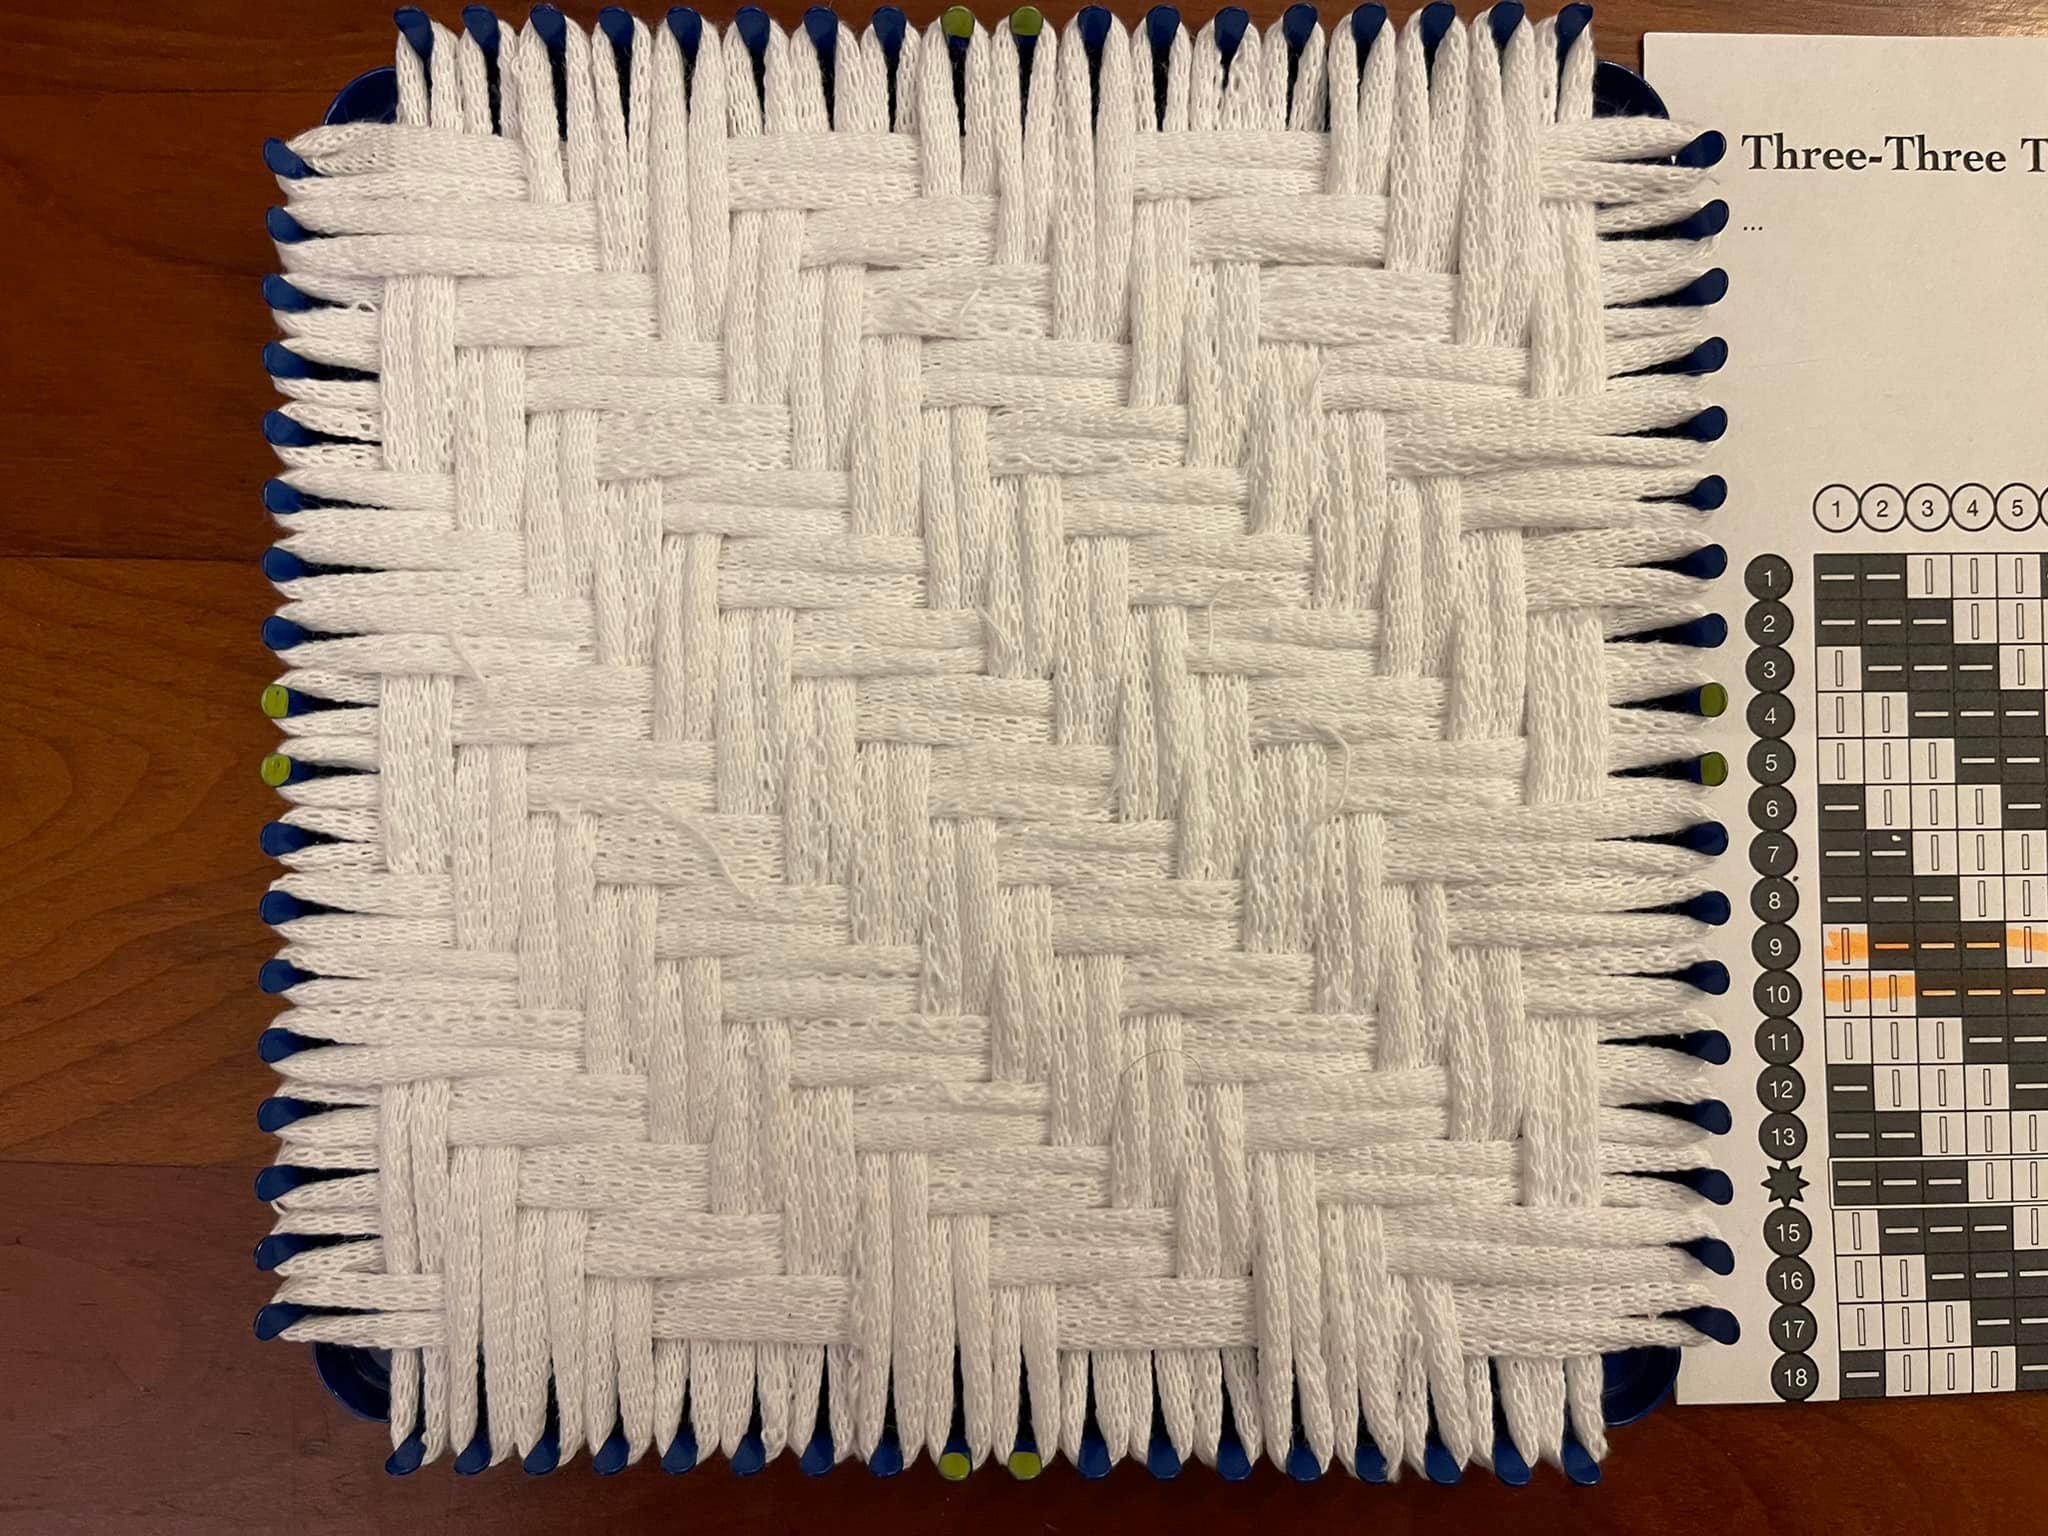
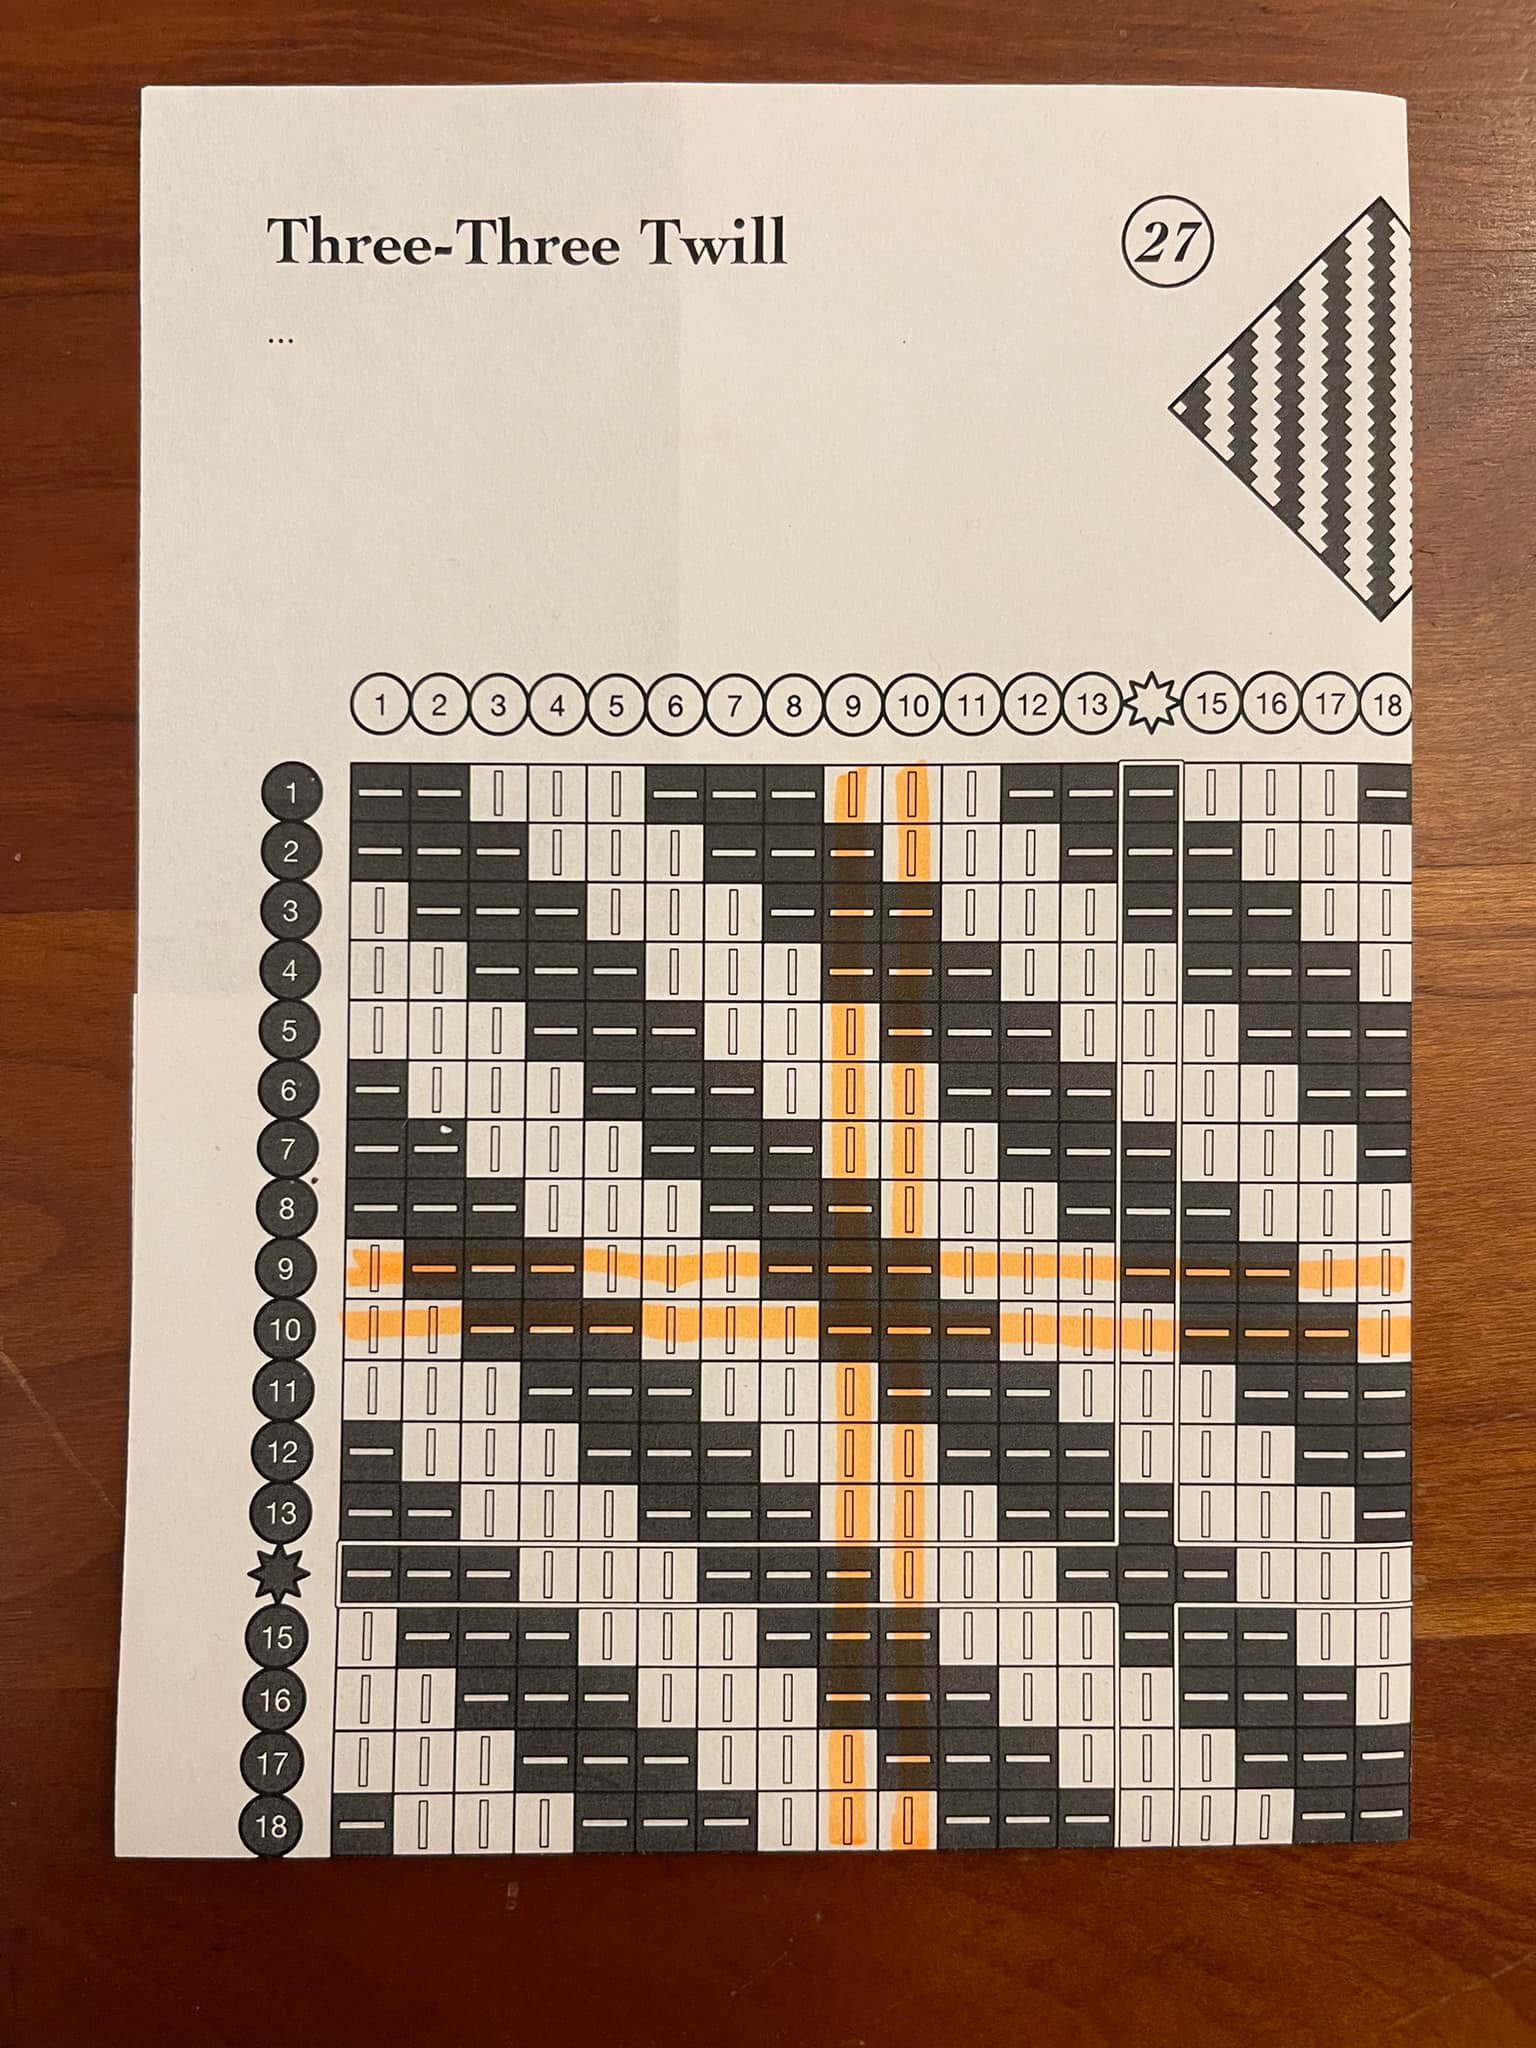
*THIS* is the heavy-duty version. 3-color fishscales, surprisingly easy to weave. Please don’t be daunted by the chart. Once you get going, the pattern establishes itself and it is very clear on each row what you want to do. Texturally, the fabric is remarkably flat and evenly flexible, despite its thickness, with very little bias.

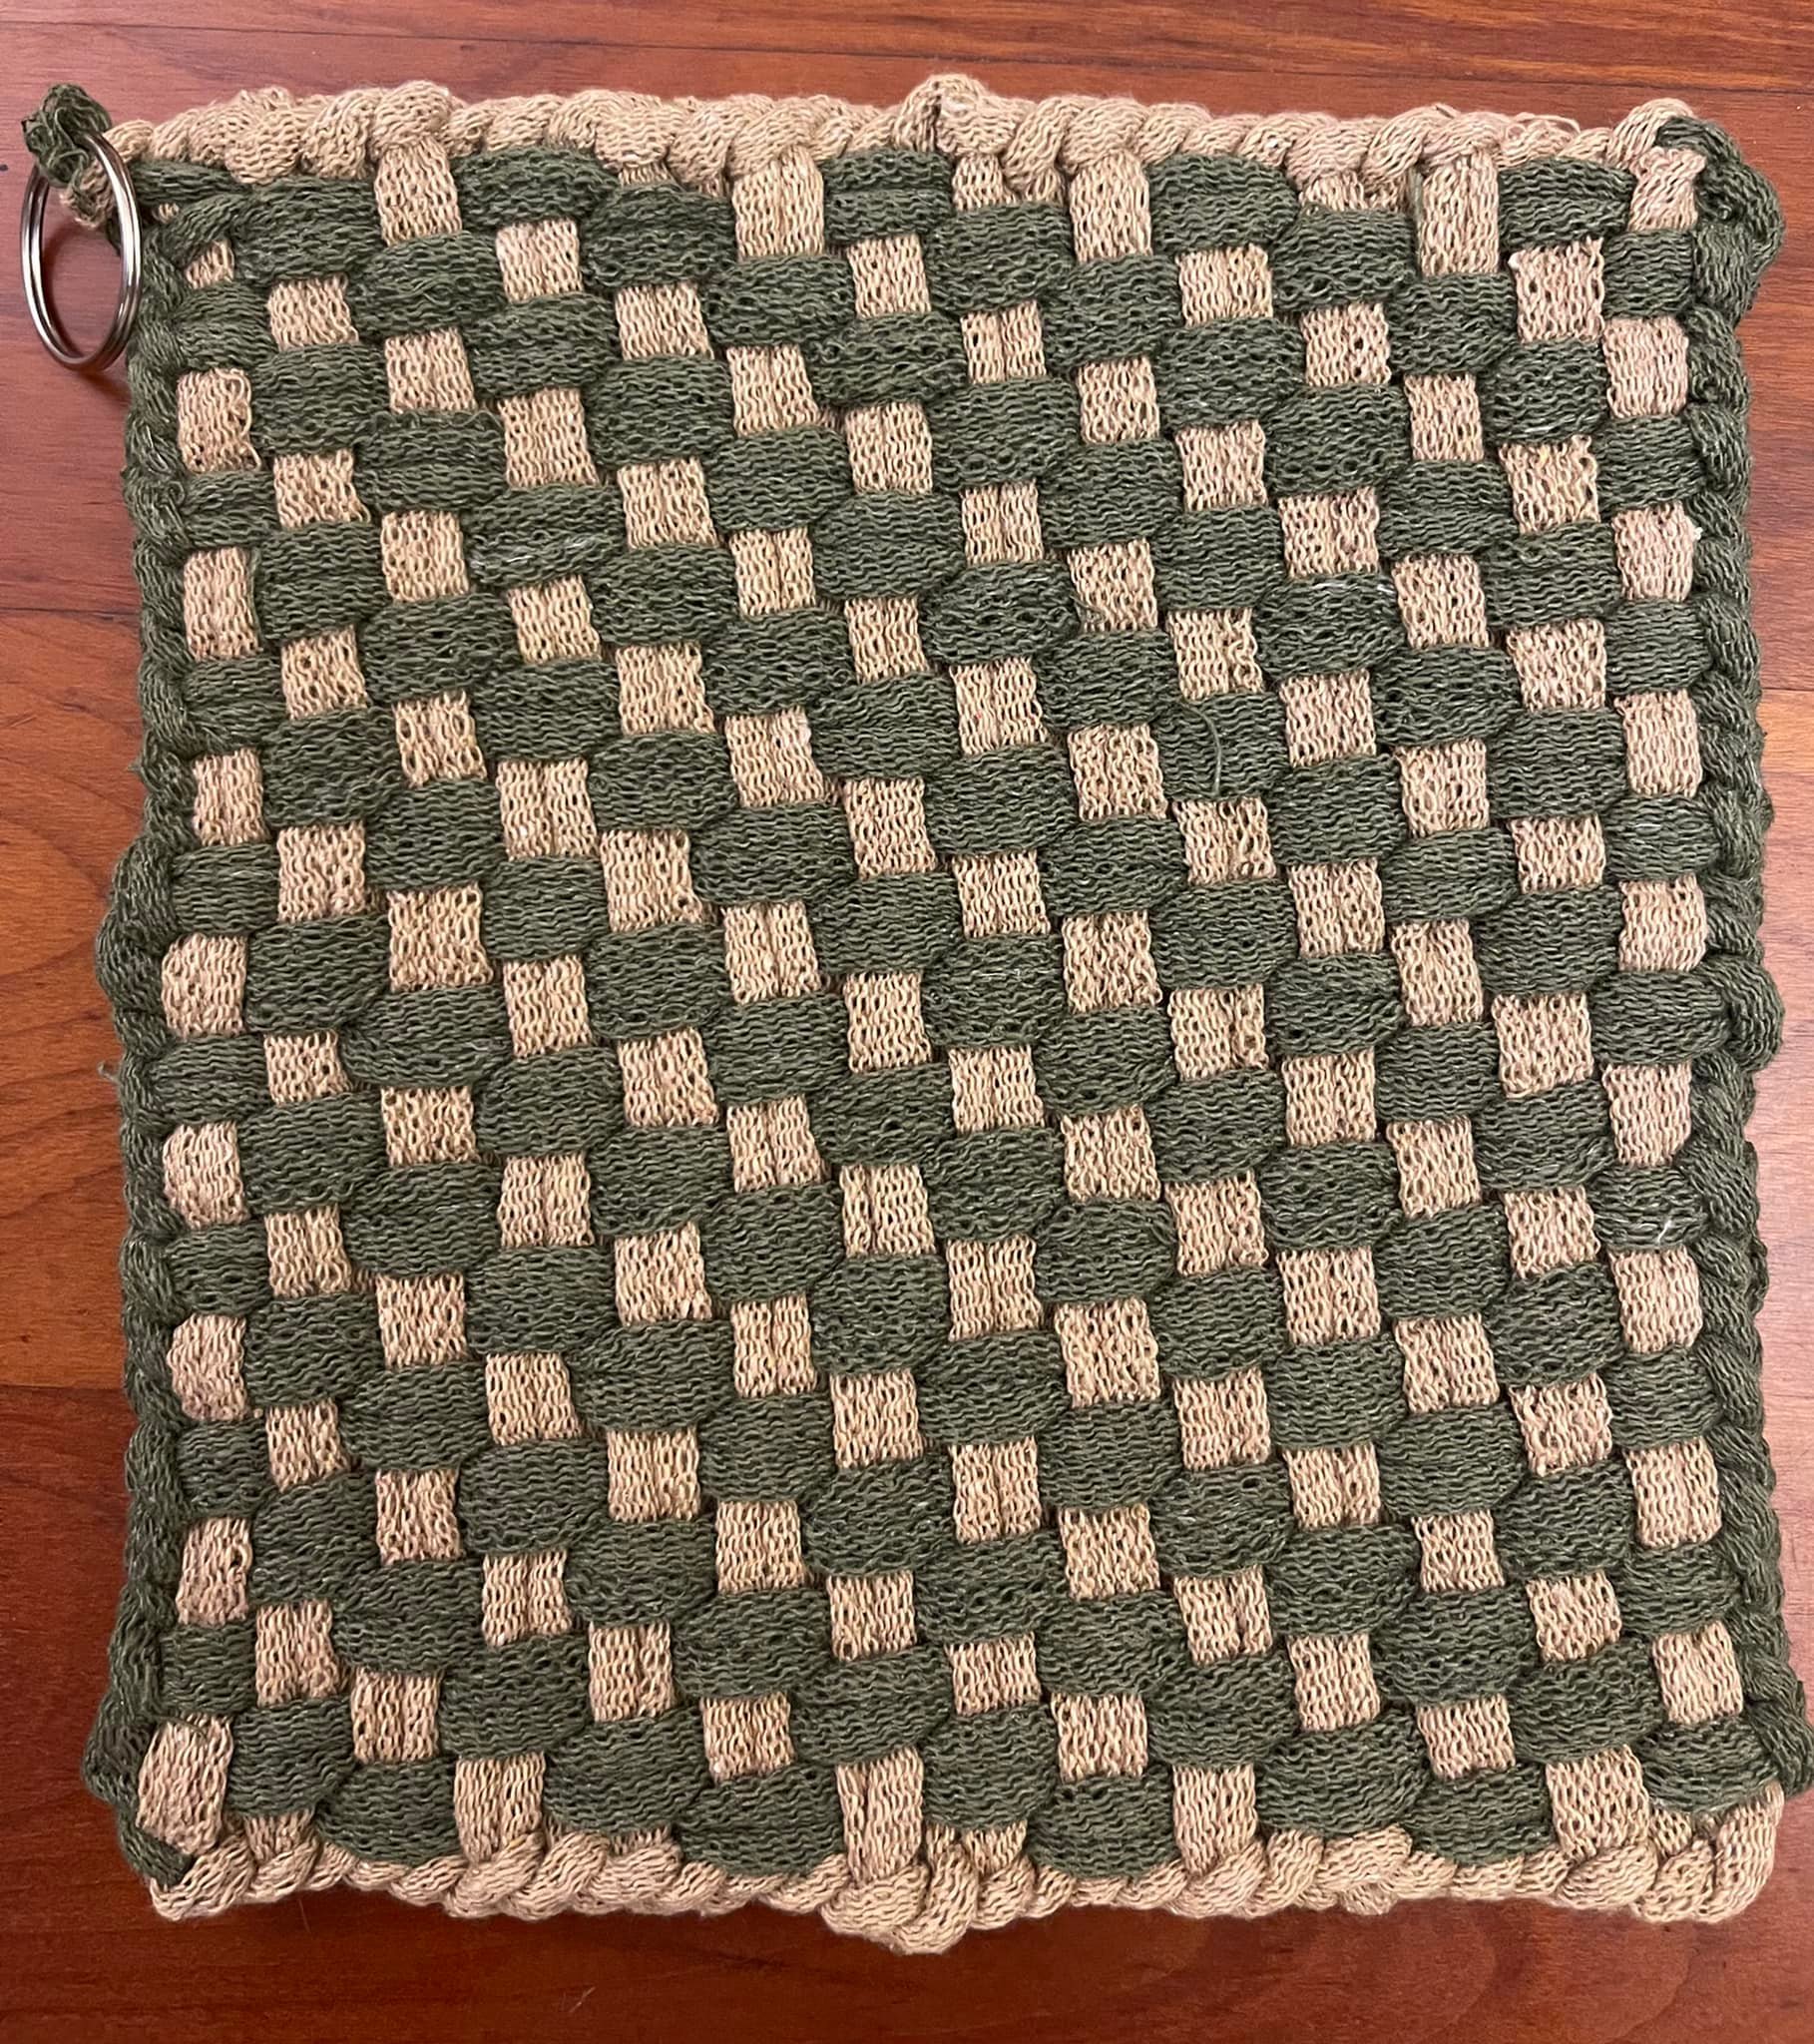
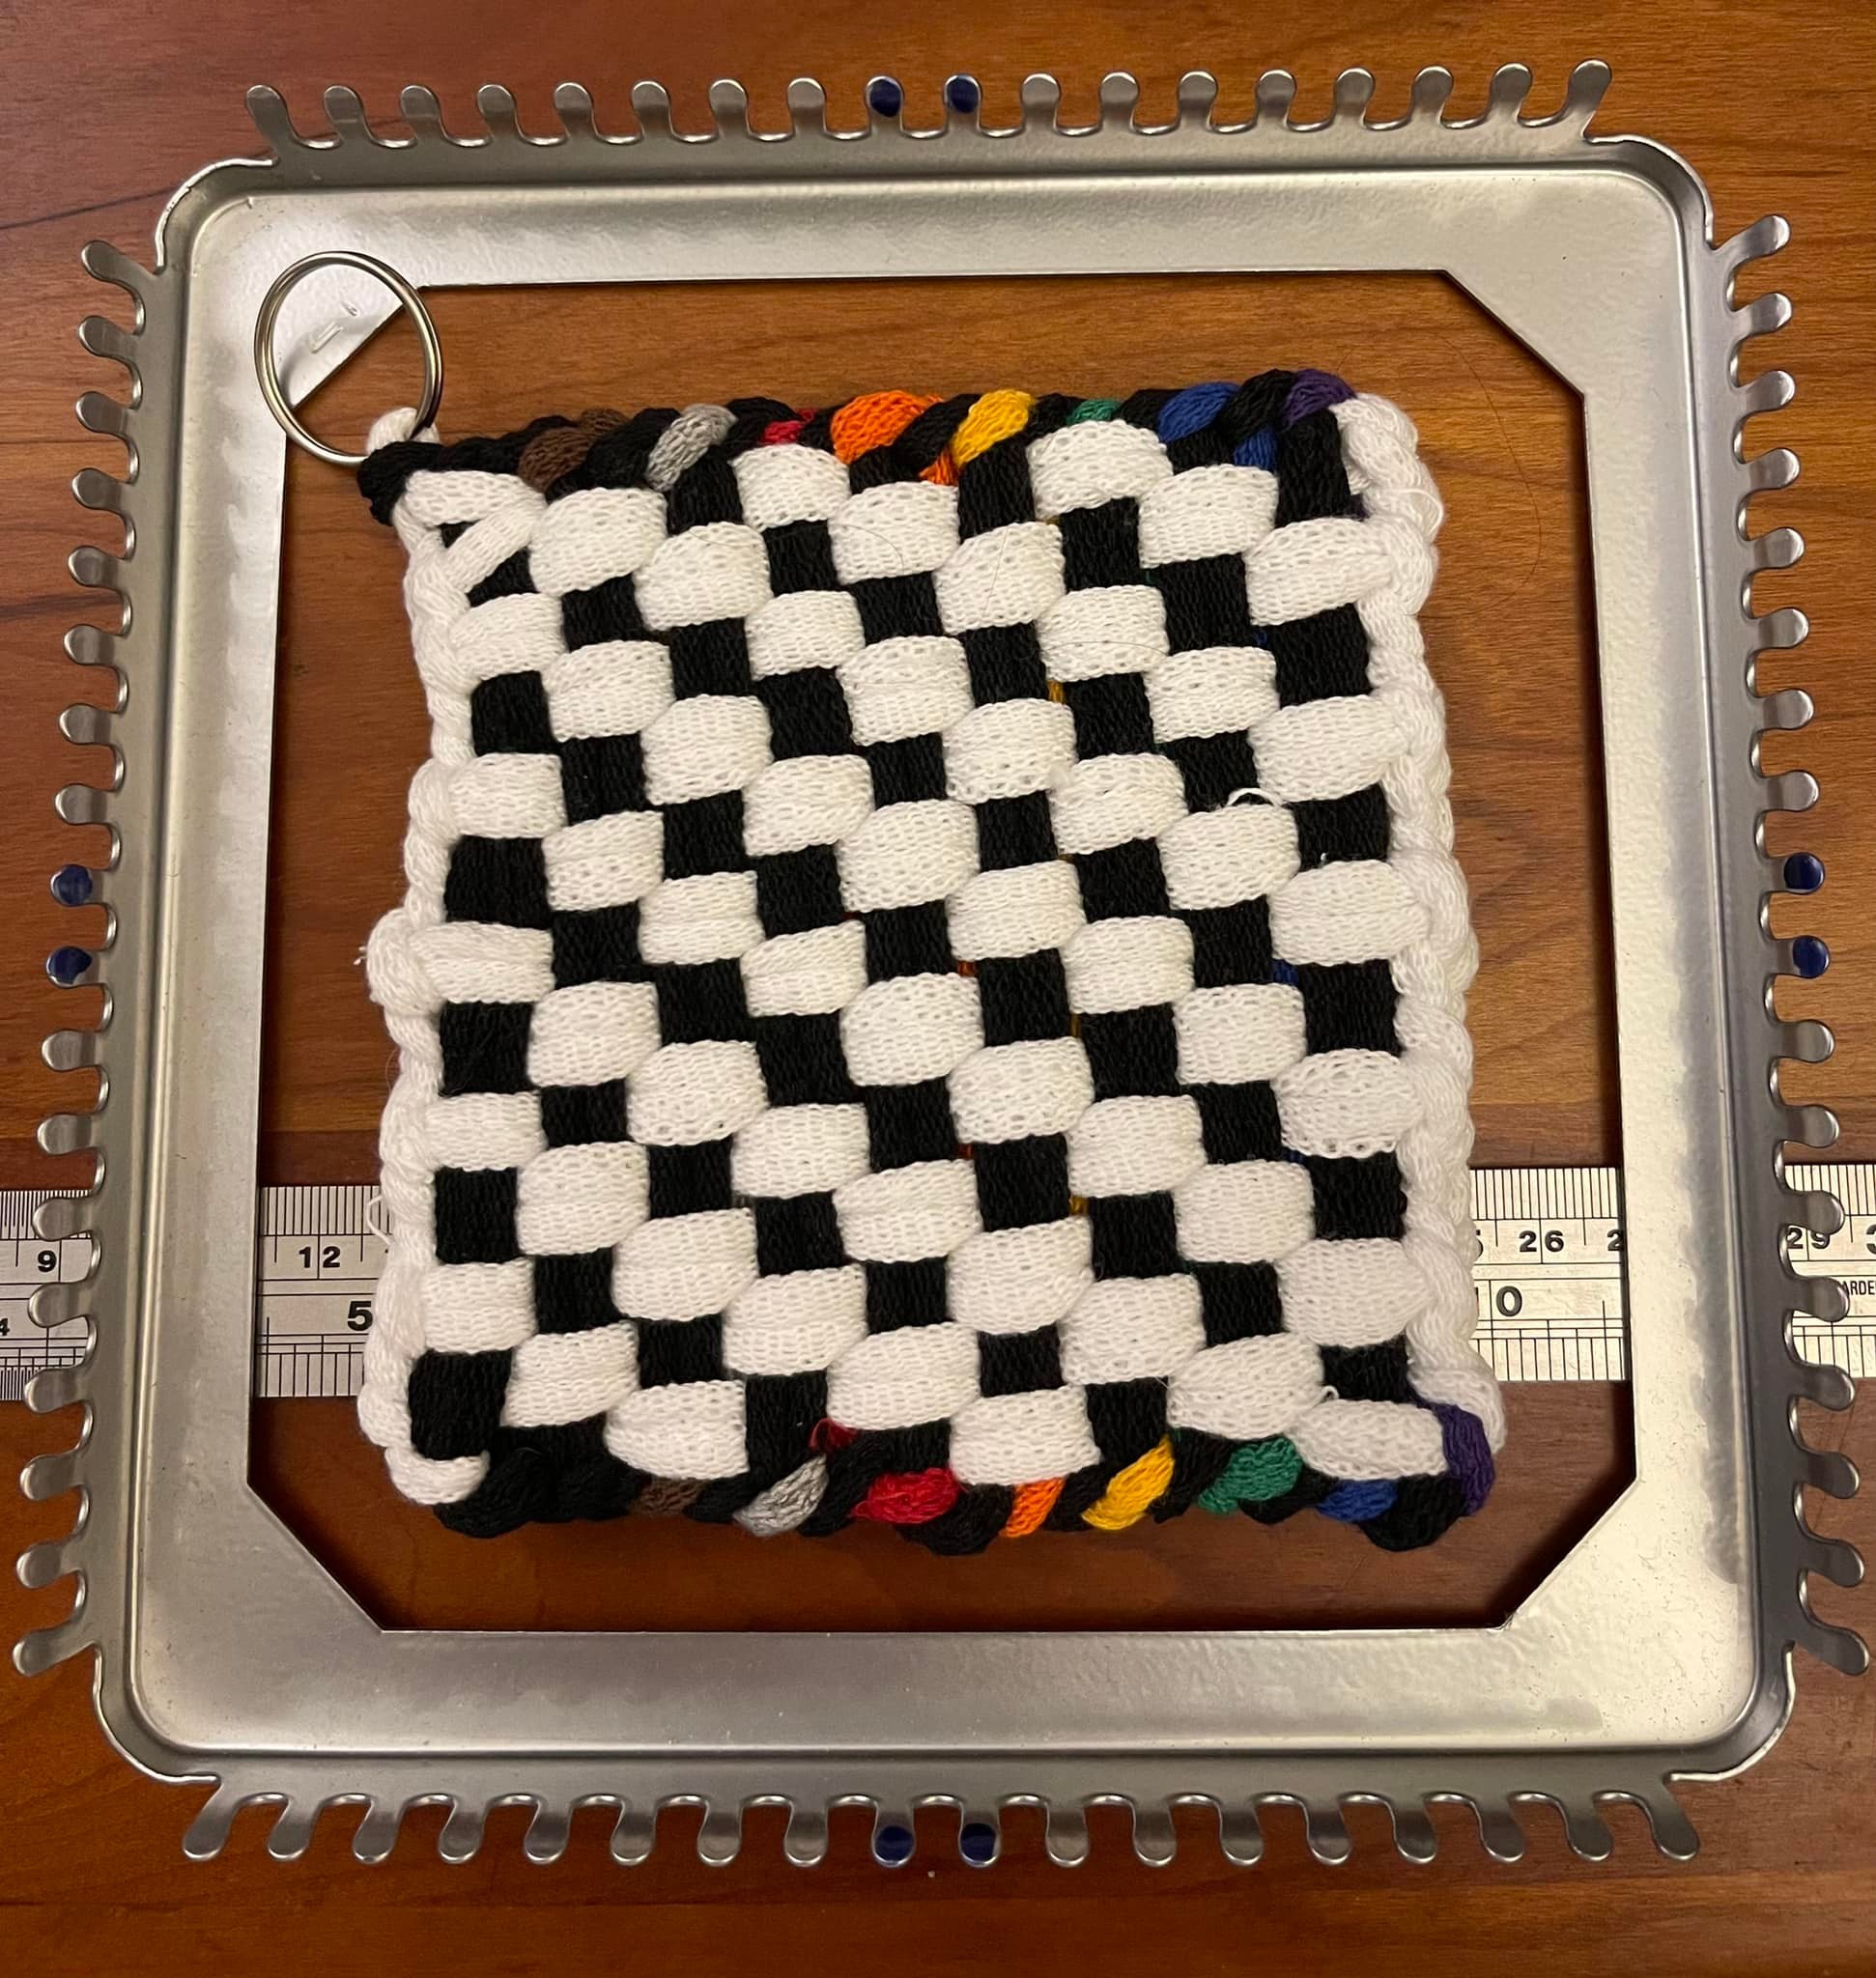
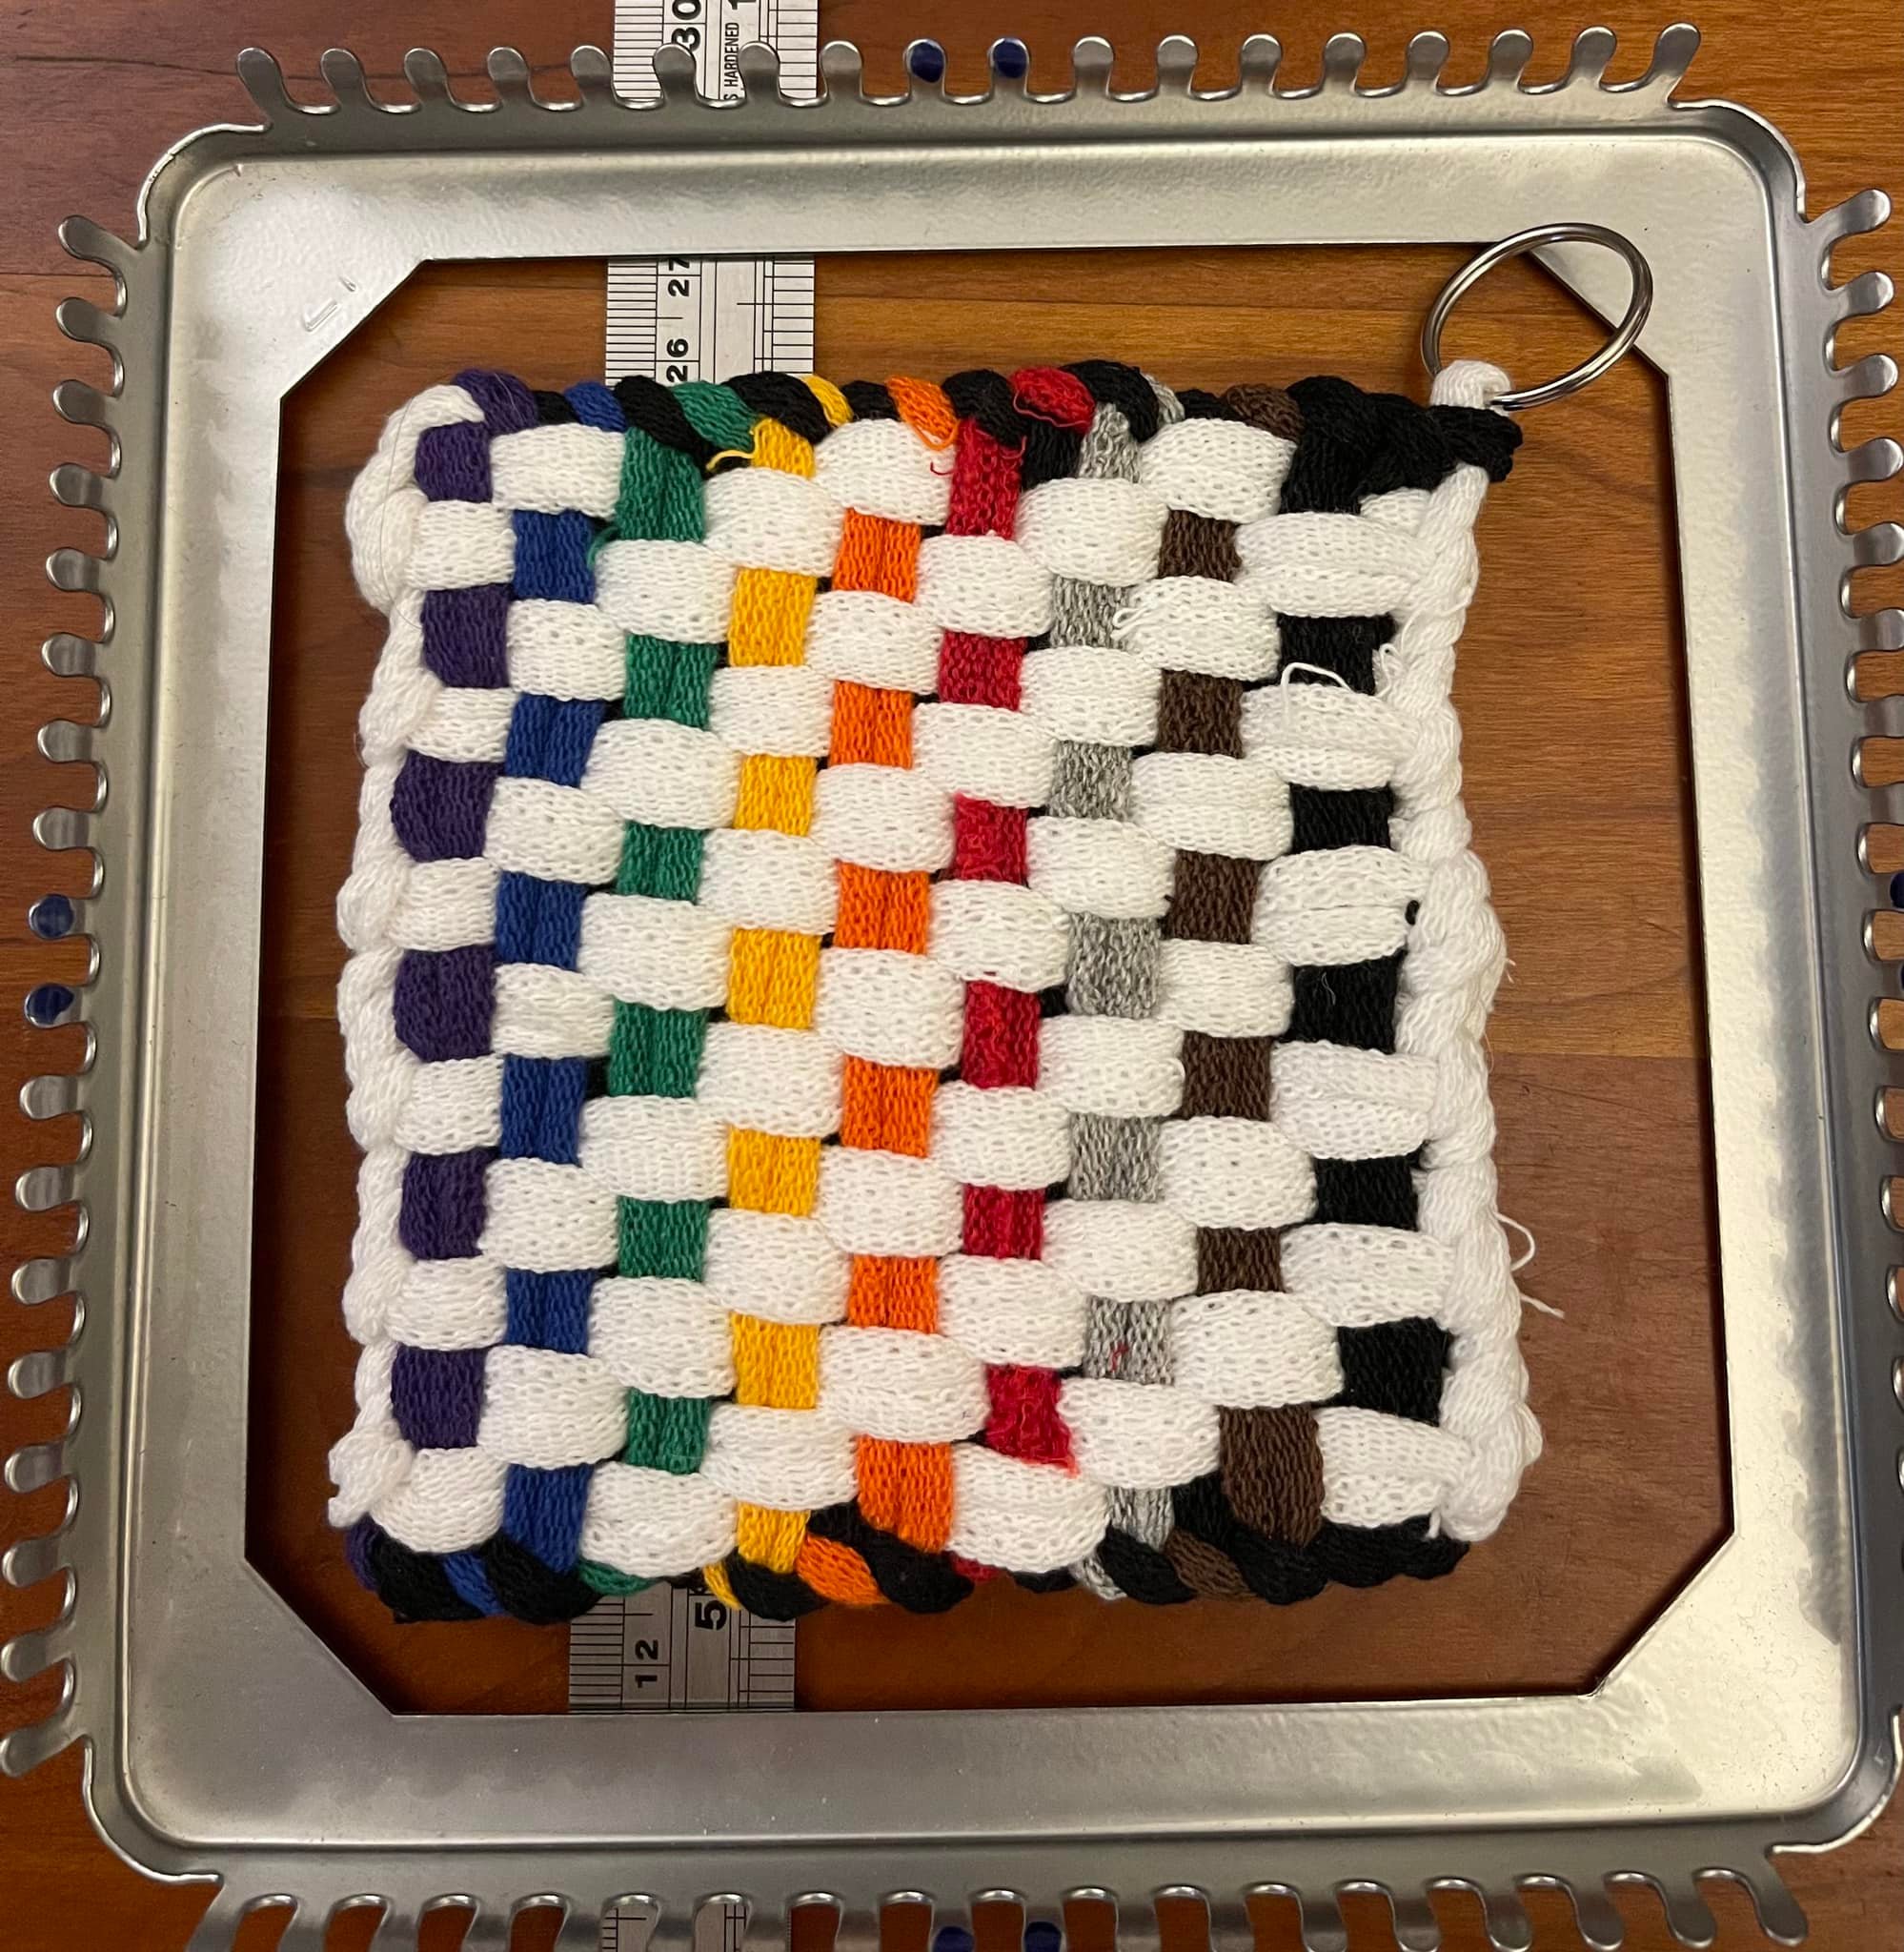
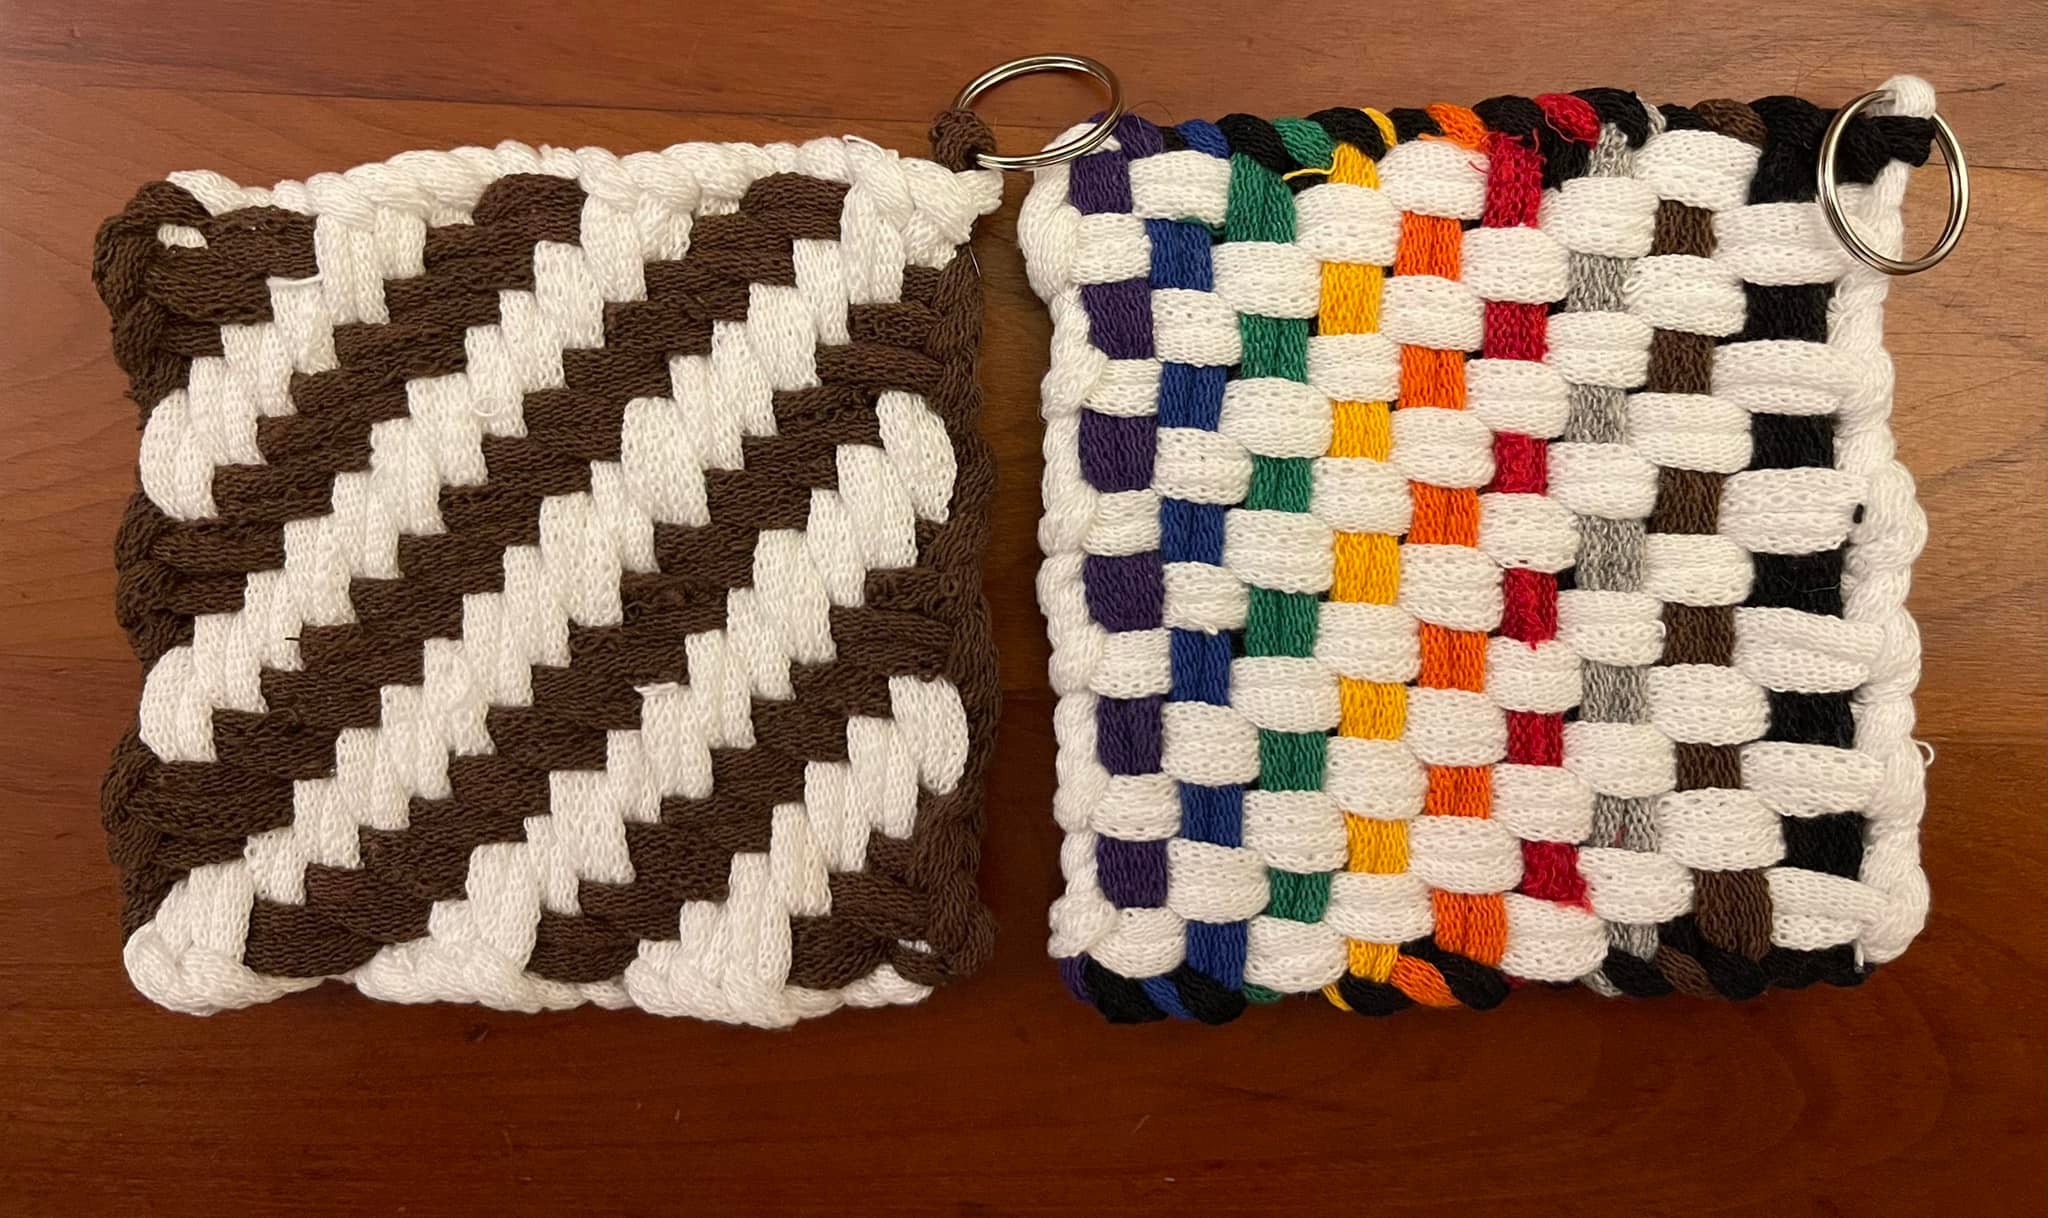
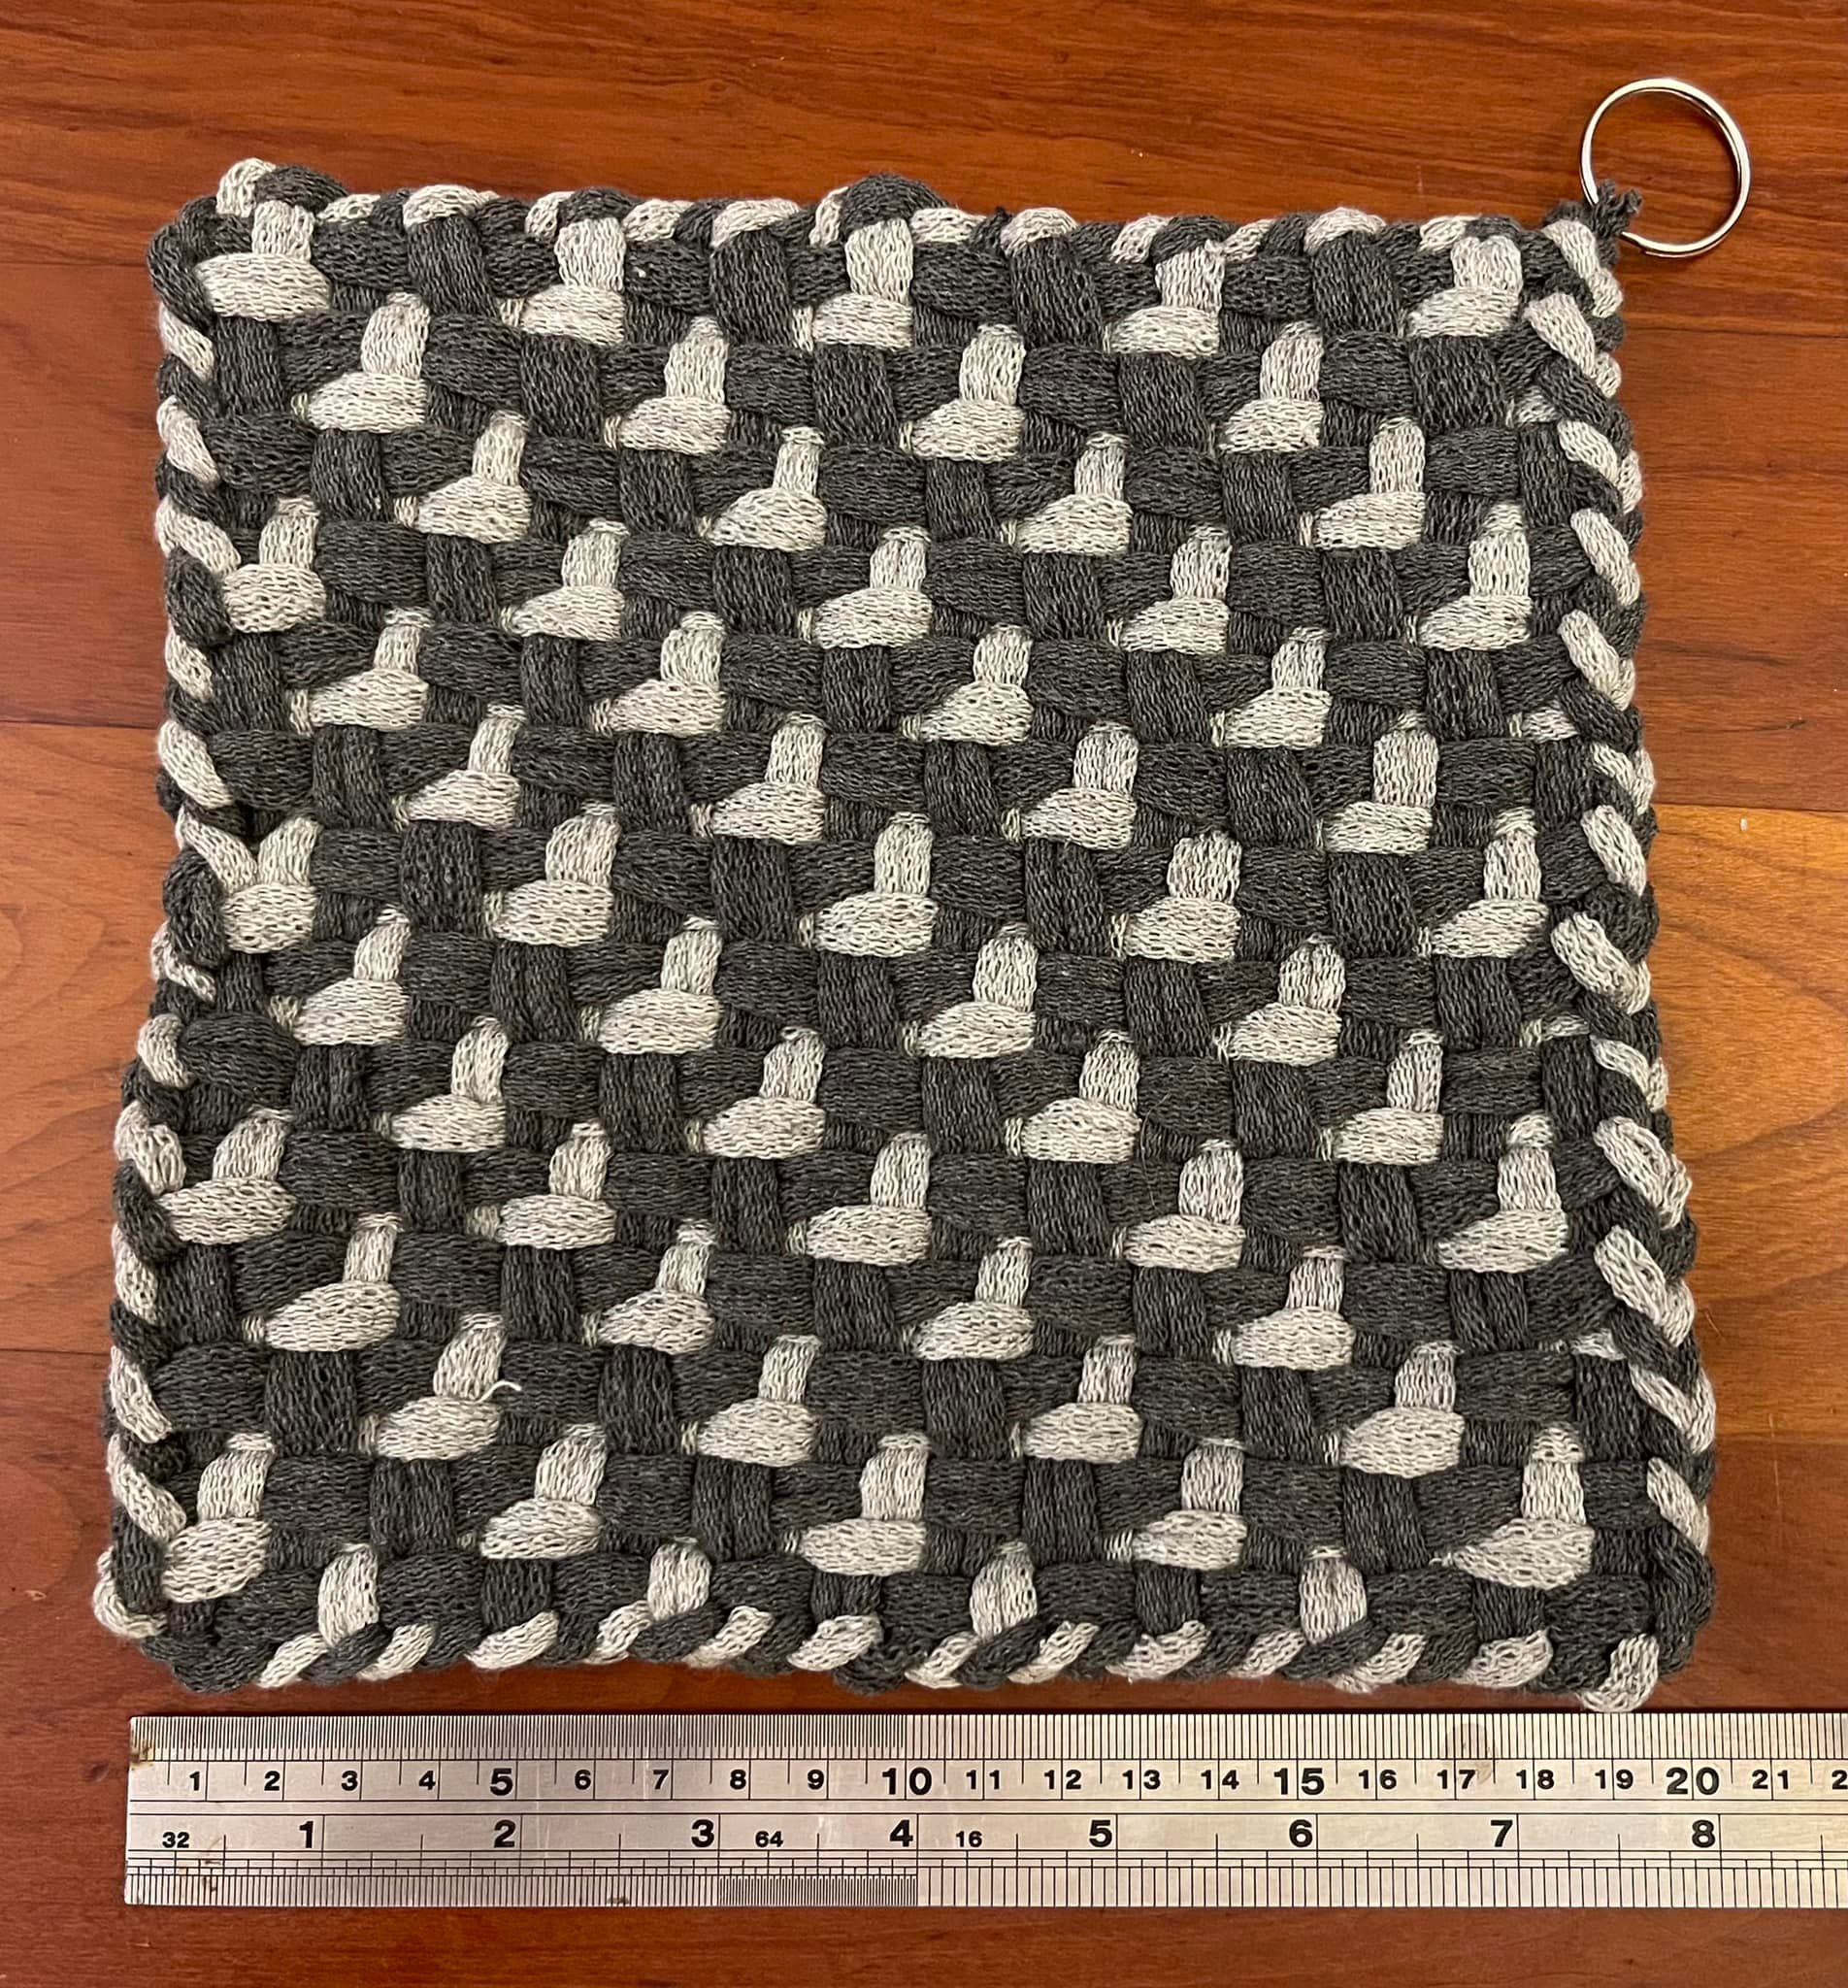
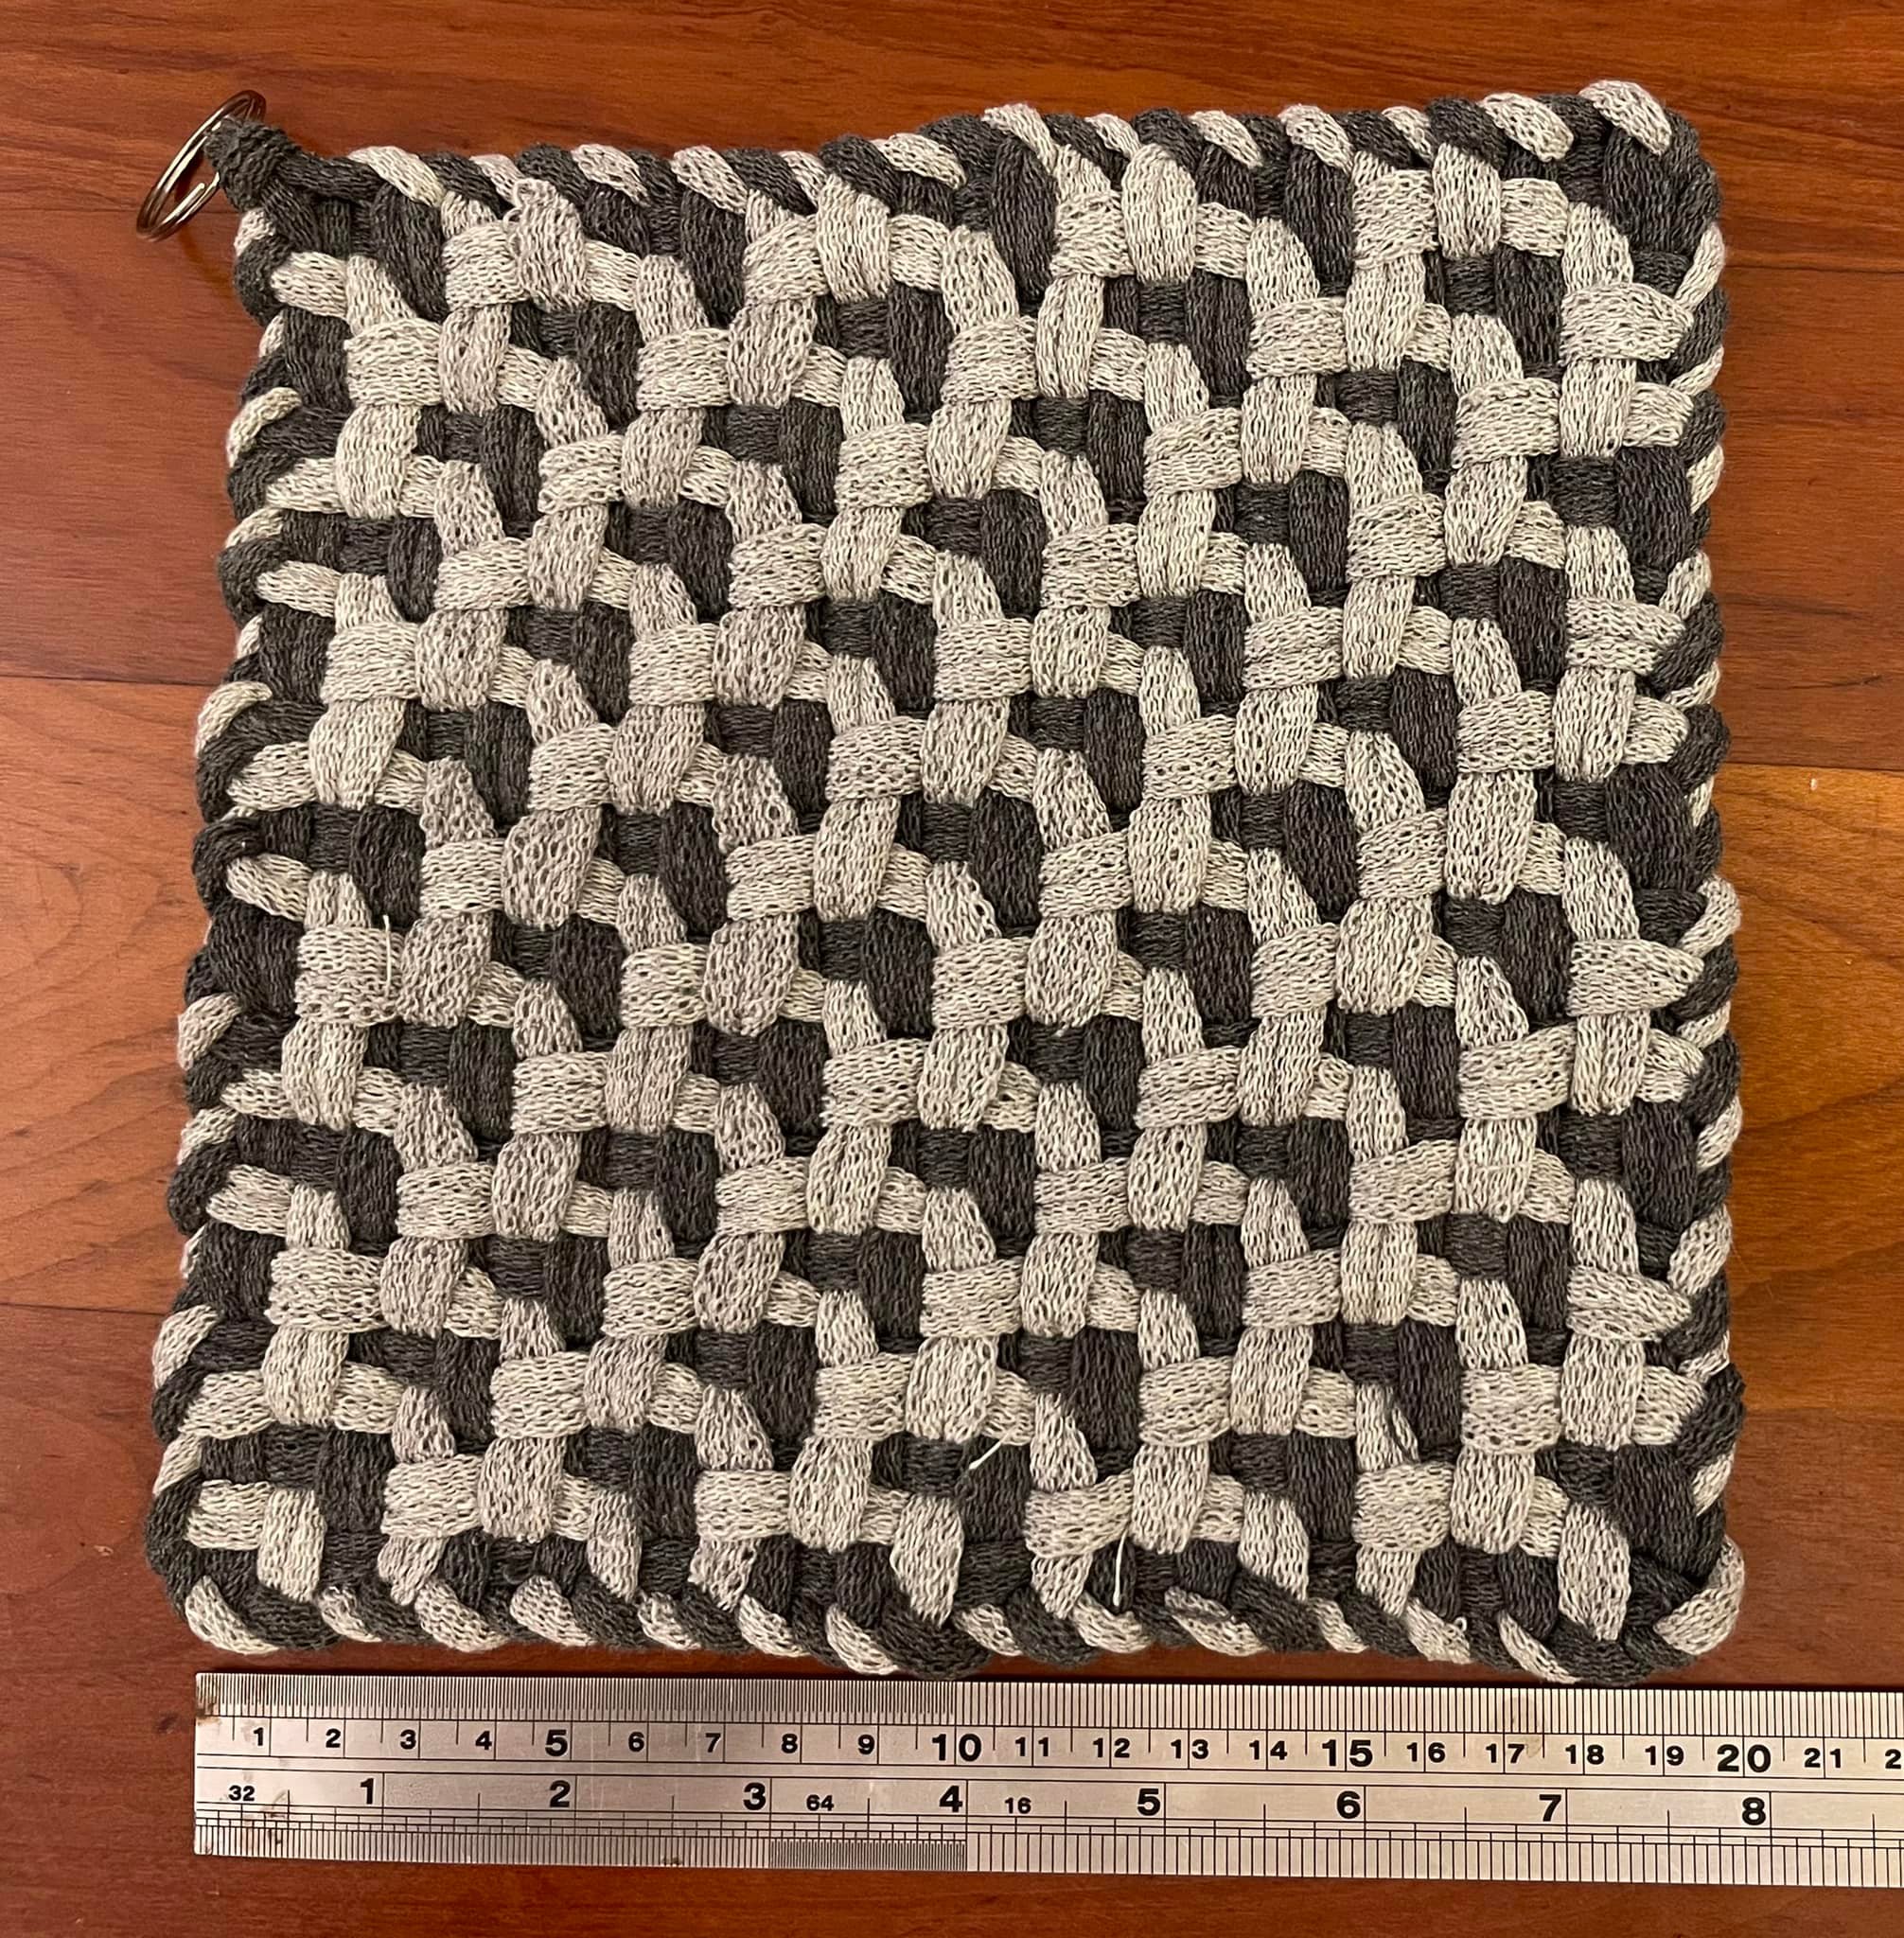
In my sample, I used black, pewter, gray and white. I also bound off so that the scales lay sideways, as they would on a fish in the water. The pattern also bears a strong resemblance to blooms and hearts. If you work in green with pastels, or reds/pinks/whites, you would have a lovely garden or multiple hearts.

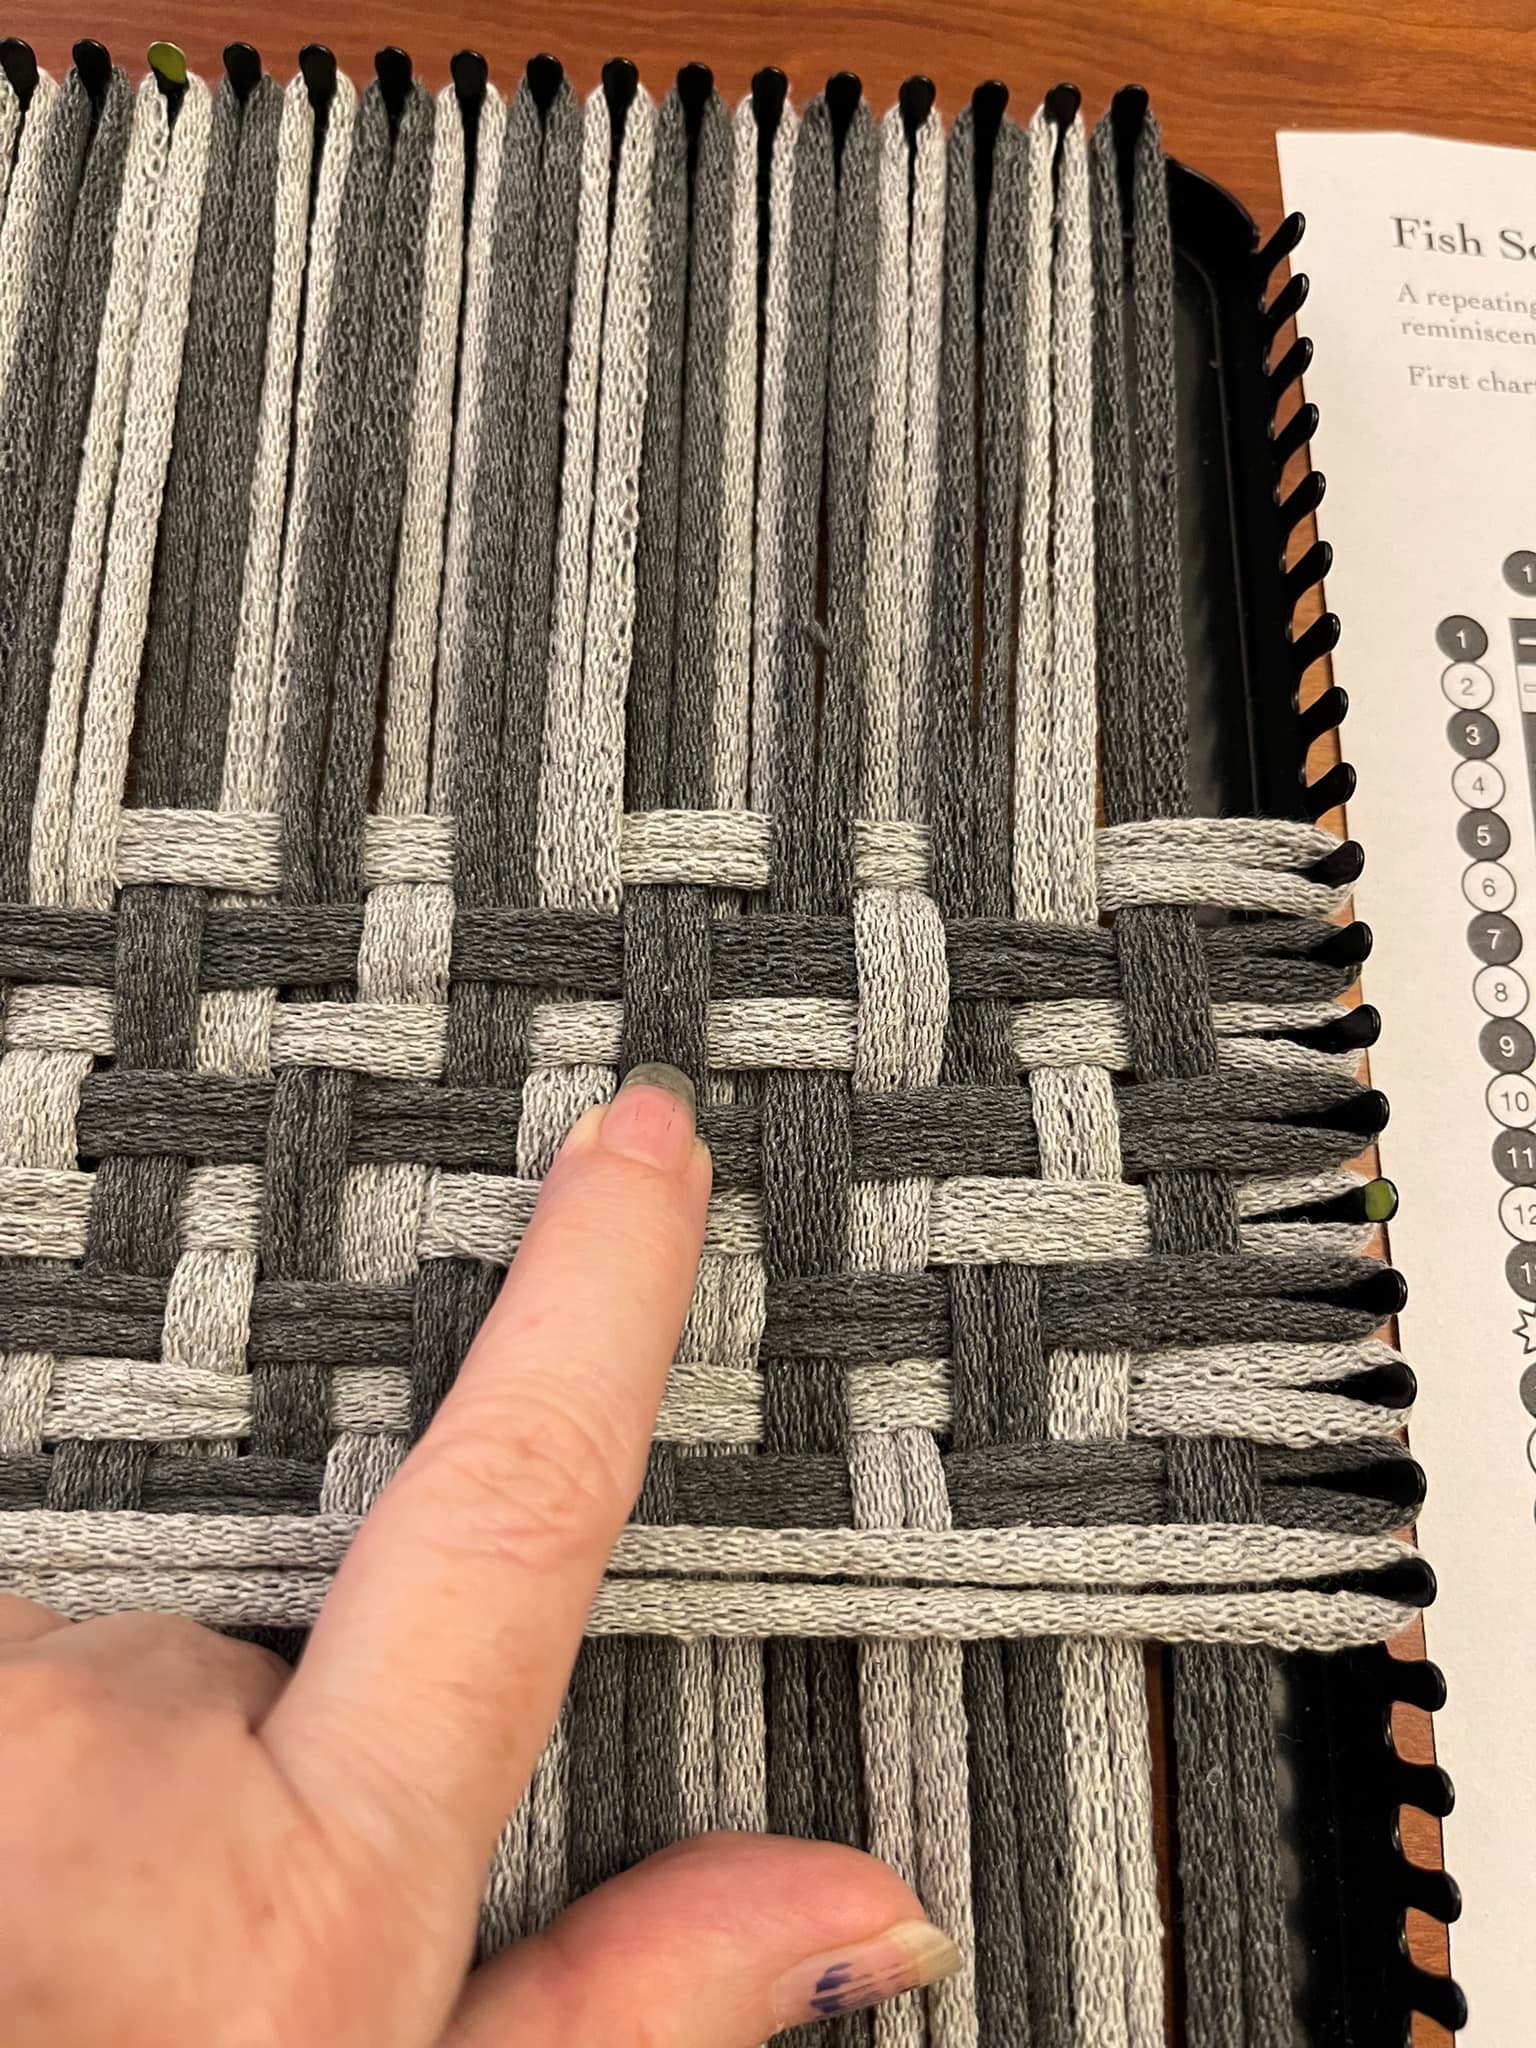
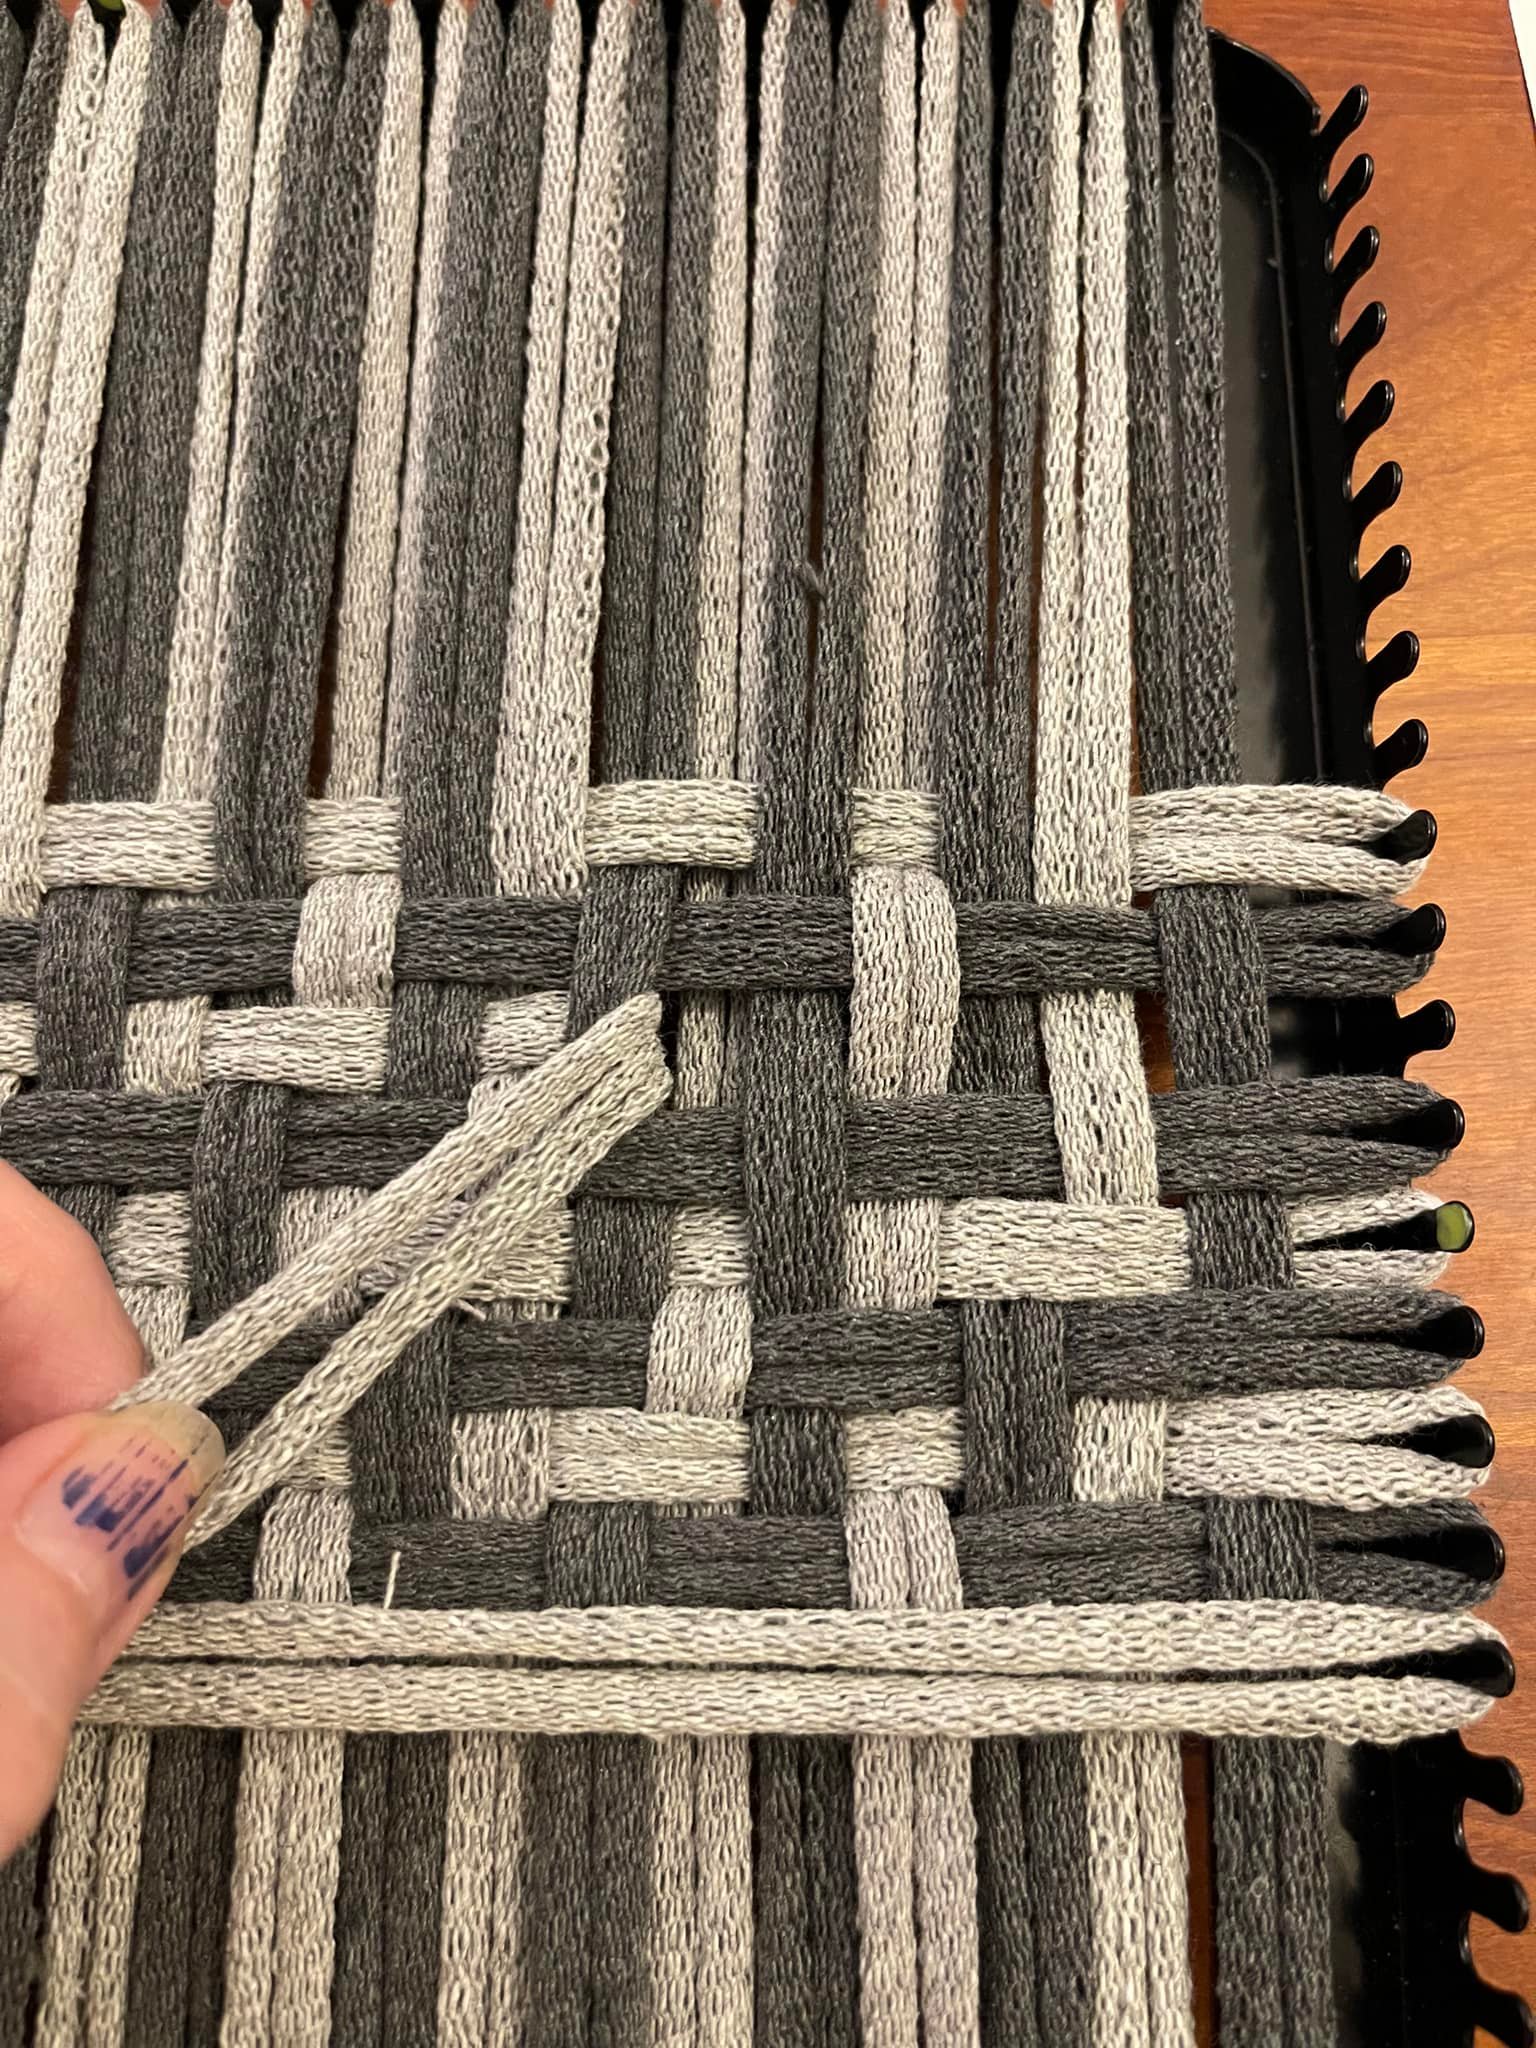
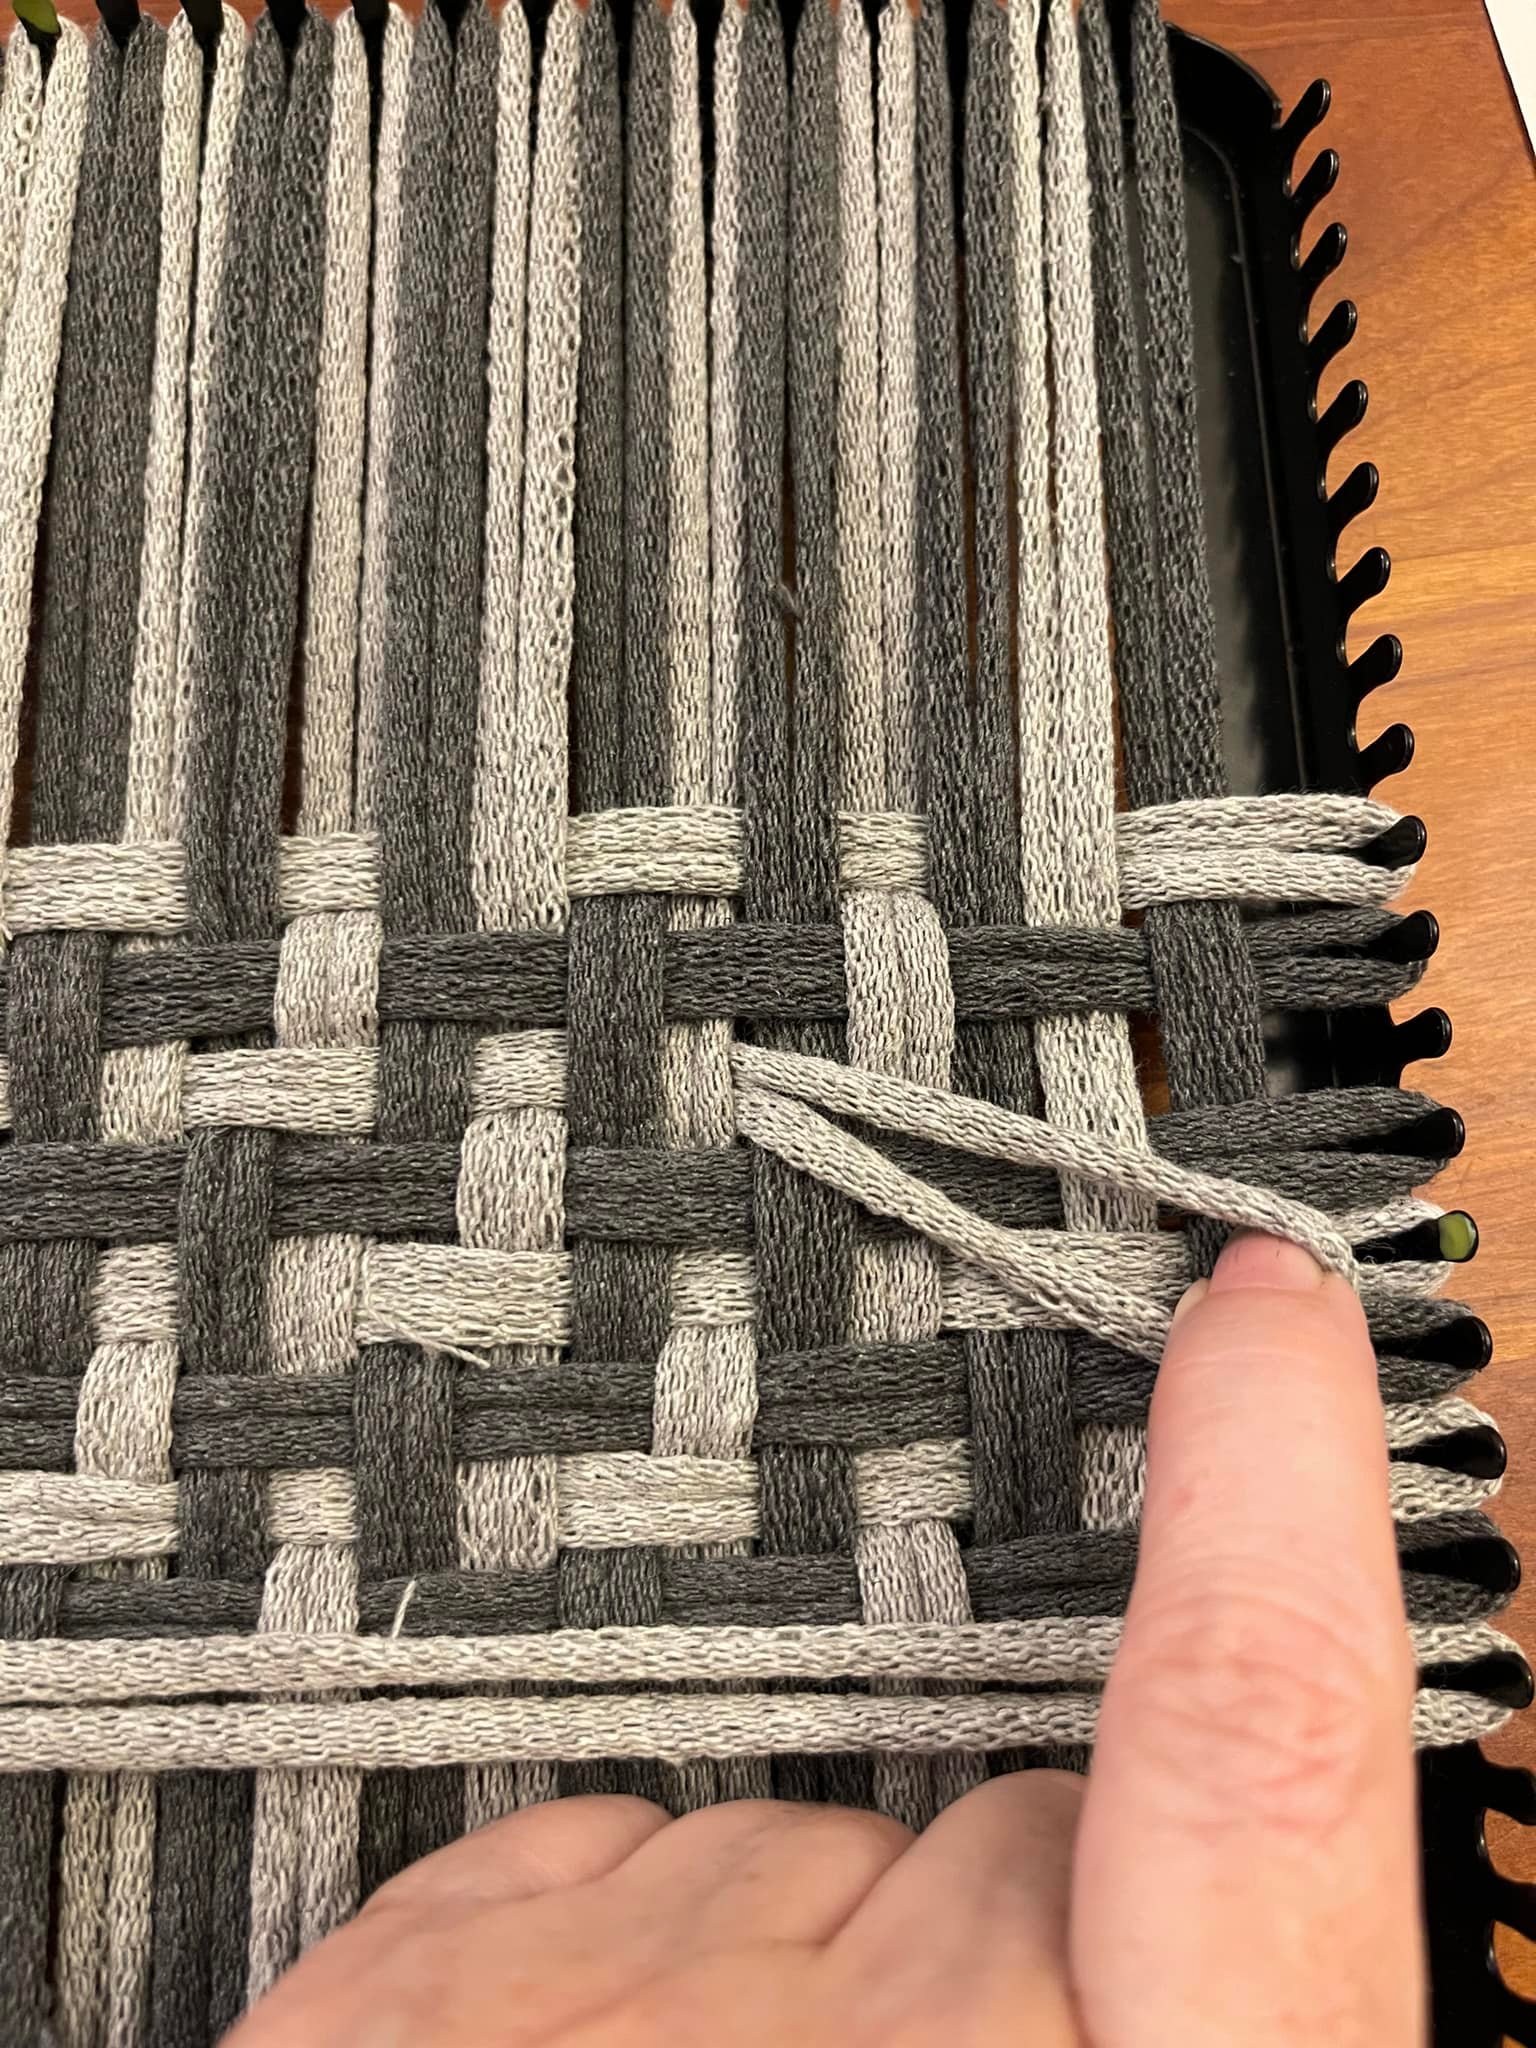
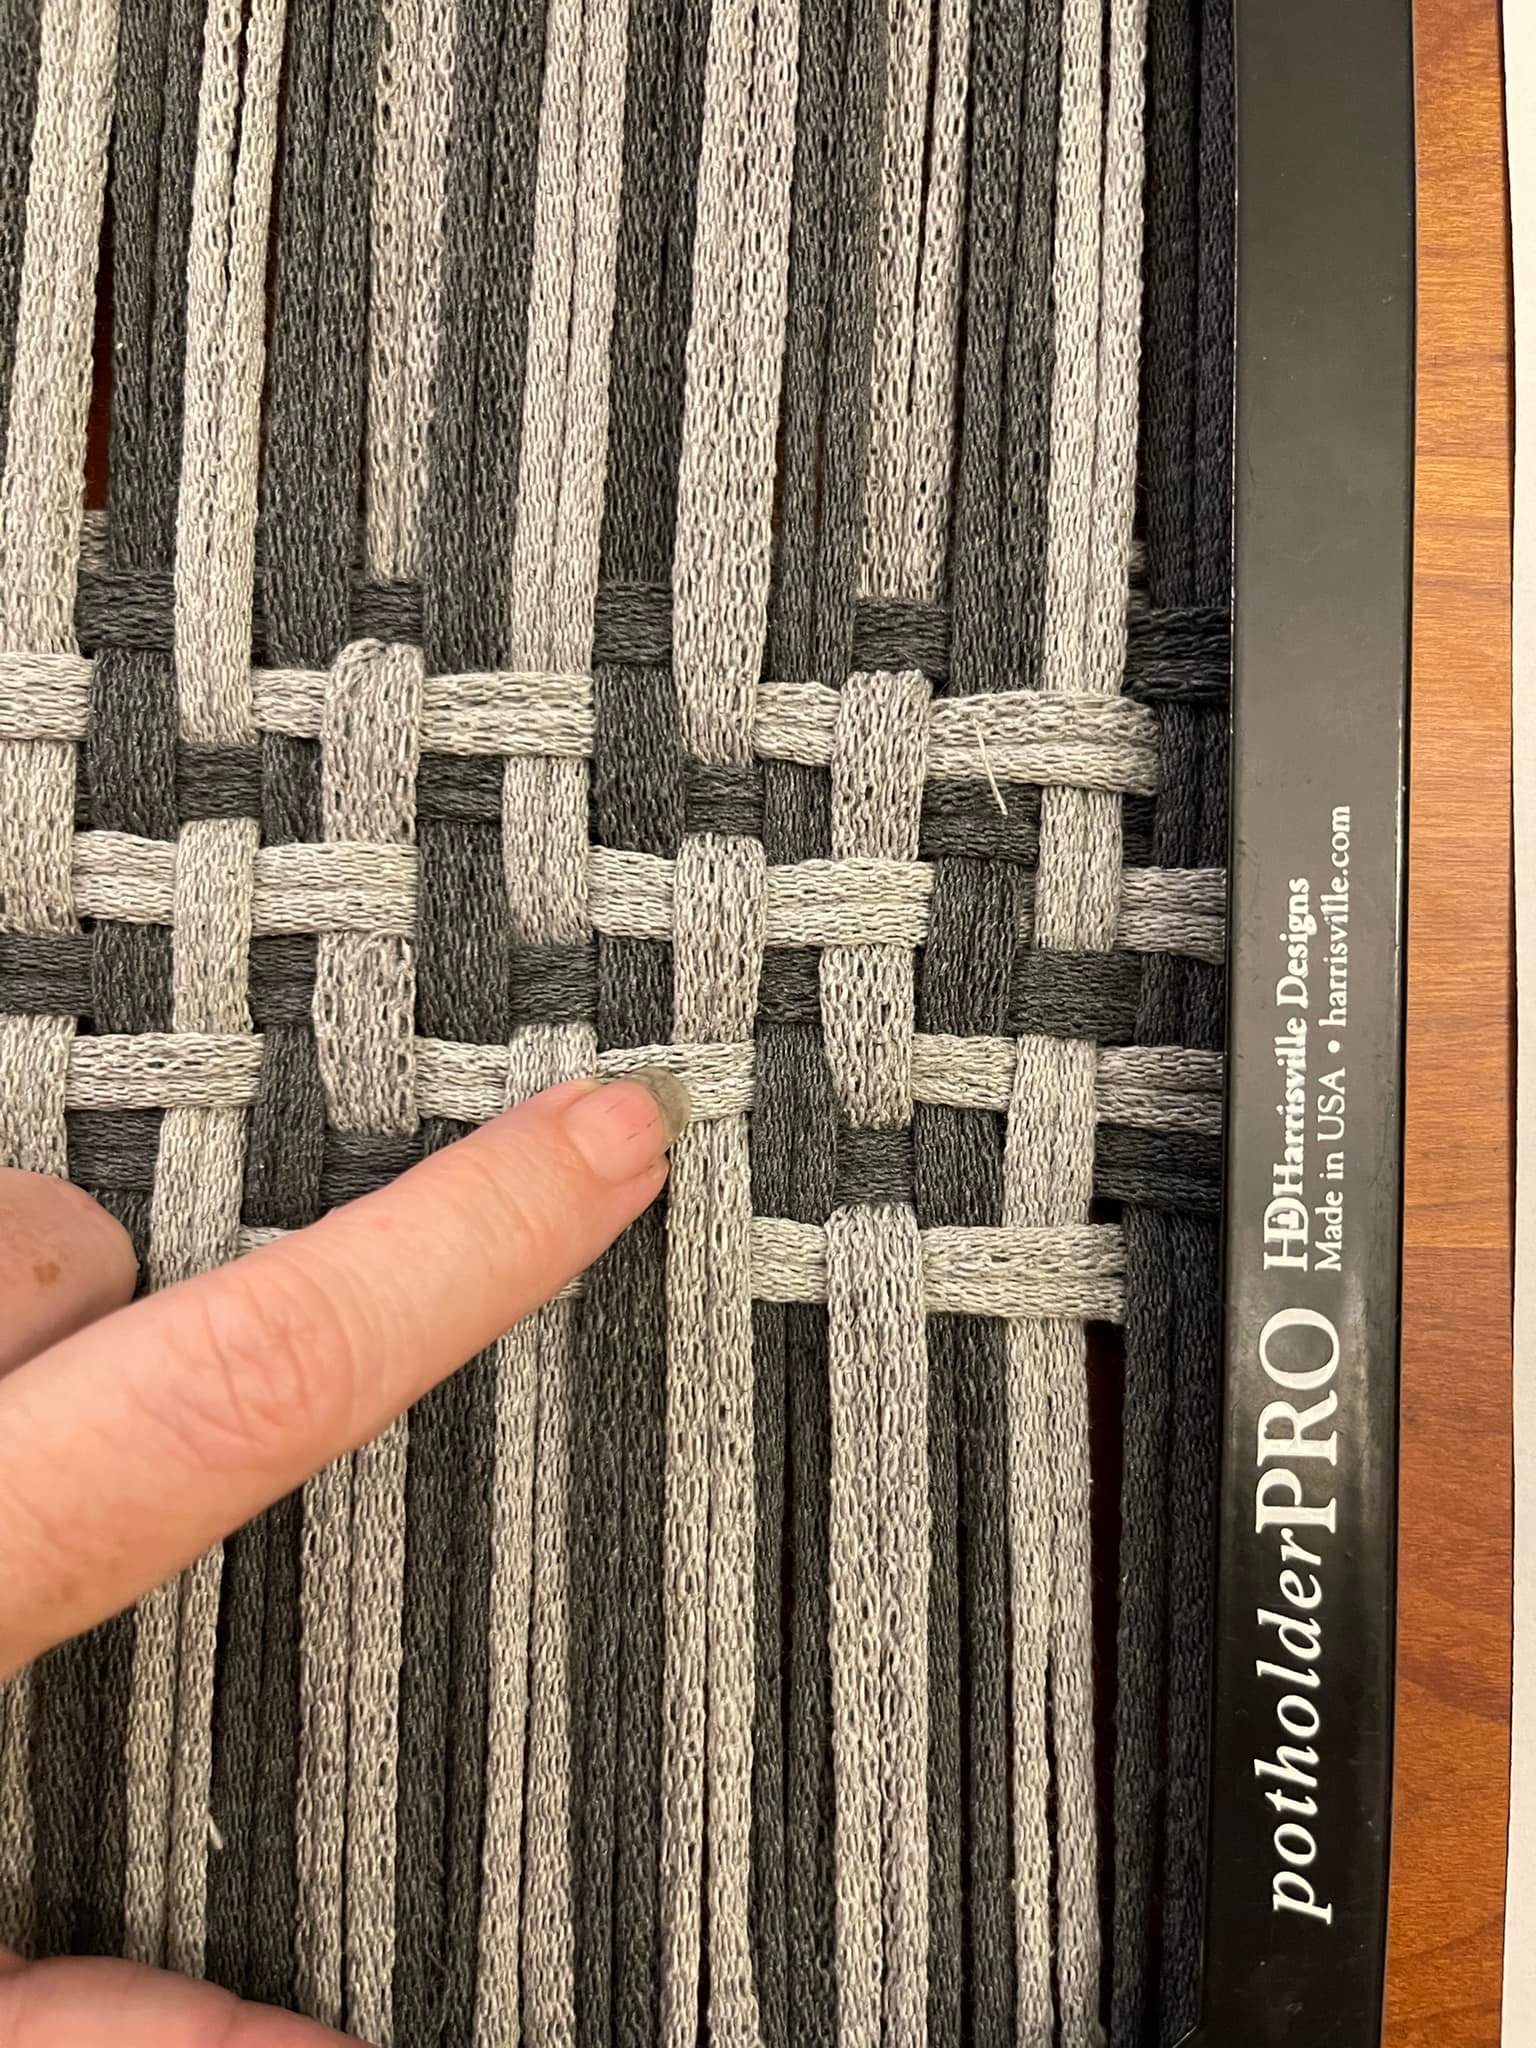
Threading in both directions follows an ABACAD squence starting from the top-left or bottom-right corner. Weaving switches between rows of over-2/under-1 and rows of over-3/under-3, shifting by one warp on each row.

Three-Three Shift Twill

This is another of those double-thick magic weaves that looks like one thing on the loom, then draws up very differently when bound off. The result is thick, flat, and resembles a tabby (over/under) weave with a slight bias to the pattern.

The weaving pattern is very simple, 3 over / 3 under across the row, moving 2 columns to the right with each subsequent row. Moving one column to the right produces the pattern we called three-three twill, which has the same 3/3 pattern in the columns. This new pattern, moving 2 columns, we’re calling three-three shift twill, and it has a 2/1 pattern in the columns. Alternating columns are forced to overlap each other when the rows draw up across their 3-floats. Picture time!

27-peg version on the loom
Off the loom: front.
Off the loom: back.

you can see by the photos with the ruler that the outcome of 3/3 slant twill is rectangular. The pro size comes out about 6.5 x 7 inches, the traditional 5 x ~5.25. 
This warp will put all black columns on one side, and a rainbow of columns on the other.
Woven with white throughout.
The back looks similar on the loom, but with the rainbow more prominent and less of the black visible, hinting at the transformation to come.
The collapse is already visible, as I bind off around the edge. Columns are being forced on top of each other as the rows draw up across their long floats.
Collapse completed, we now have a black and white potholder.
No, wait, a rainbow and white potholder!
Left: 3/3 twill (moving one column) in brown and white. Right: 3/3 slant twill in black/white/rainbow.

Branch vs Corners

A very minor tweak to a pattern can have a dramatic effect on the resulting fabric. Here, we look at a modified tabby pattern that is mostly over/under with one 2-float per row, and examine the difference between aligning the floats in a diagonal of 2 overs per row, moving by one column from one row to the next, or in a diagonal of stacked floats, 2-over in one row and 2-under in the neighboring row, each pair of floats moving by one column every other row.

The diagonal floats produce a fabric that looks and feels very much like tabby, with a design pattern of lines that turn a corner. The stacked diagonal floats, in contrast, pull the fabric together, forcing the floats into a raised wiggly line on each side. The outcome is also a bit smaller, because of the pulling. The distinct center ridge is very raised, making this too bumpy to be a good choice for a trivet or coaster, although very protective against heat.

Here are Branch and Corners (left and right, respectively) on the loom. The patterns look very different already, even without the surprise of taking them off the loom and watching the stacked floats draw up on themselves.
Left, the new pattern Branch. Right, Corners. Both use a diagonal line of 2-floats, to dramatically different effect.
Rear view of Branch and Corners, You can see that the other color is highlighted on the back of Branch, whereas Corners looks very much the same on both sides.
On Corners, all the floats are over-2, and proceed in a neat diagonal.
Here on the chart for Branch, I have highlighted the under-2 / over-2 stacked floats on the diagonal.

Purse

When is a potholder not a potholder? When it’s a purse!

Whip stitch to close the bottom flap, and then a bit of stitching at the top corners to encourage the top flap to fold on a straight line, and not warp as it ages. We’ll see how well that works in practice.

Here’s a closeup of the reinforcement, anchoring in one loop, and whip stitching the loops beside it together to form a pinch point.

I strung the small loop through the lower flap, then use it to tie down the ring.

Cushion-y, spacious, secure.


The stitching is pretty rough, with some linen thread I had already cut, waxed, and ironed in my sewing basket. I can fix that if I like how it works in practice. I think seaming with thread is important for security if I’m using it to hold things. I considered a cut potholder loop to match the weave, and rejected it on the grounds of it being stretchy and not fixative enough.

All tucked up again!

Rear view so you can see the scales.

See Also:

  • Fish Scales, to see how the original potholder was made.

Mid-Weave Corrections

There I am, weaving along, when something on the back feels wrong…

Here’s a closeup of where I noticed the row had gone wrong…

And when I flip it over to look at the back, I find a loose column! That is absolutely not in the pattern.

Here is the point at which I went wrong, in the row before this one. The pattern on the even row is 2/2/1/1 repeating. Here, I went 2/2/1/1/1 before continuing 2/2/1/1 through the end of the row.

Pull out the offending row to the crossing that I made the wrong way…

Pick up the next under, and now we are back in pattern of 2/2/1/1…

Continue re-weaving into the pattern, picking up the next 1…

…ending with a 1 (so it looks like 2/2/1/1/1 at the end. of the 3rd row down) because that is the odd row out. It would be part of the first 2 of the 2/2/1/1 pattern if there were more columns to weave.

Check the back to confirm that the loose column is properly tied down.

And we’re done!

Oh, wait. This looks weird? See the small boxes at the top? We don’t have those on our chart. Note also the pattern direction change? Yes, I turned my loom upside down in the course of weaving the row before this one, but then worked that last row as if it were row 1.

So, to make things easier, I turn my chart upside down, and fix the “last” row, which is now at the top of my chart.

All better! No more boxes, scales all the way to the edge.

See Also:

  • Fish Scales, to see the completed fabric off the loom.
  • Purse, to see this folded and sewn into a small container.

Fish Scales

Fish Scales is a *very* interesting fabric. Before we begin, please note, this is a *light-duty* potholder. Use for trivets, bowl cozies, other flexible fabric cushion-y choices. DO not risk burning yourself (or your gift recipient!!) on hot heavy cast-iron.

The surface is notably dimpled with slight puffiness. The fabric is flat and feels slightly stiff, more like a tabby (over/under across the row) than a twill. It has the flexibility of twill, in all cardinal directions.

I could not restrain myself to <color>-and-white for this one. I needed to see the fish scales in pewter and silver. Aren’t they lovely!? If you work in red or pink, you would also get lovely hearts.

The pattern is extremely regular. Every odd row repeats 2/1/2/1 etc. across the row. Every even row repeats 2/2/1/1/ across the row. Use the chart to keep track of the shifts from one pattern row to the next.

The finished potholder comes out about 8″ square.
With a reverse video back view.
And holes in the weave!! Because of the way the twills align, they pull tiny holes inside the dimples in the fabric. This is great for flexibility. Not so great for pokey hot things. Sailor take warning!
Binding off, we see the magic begin to happen! Every new fabric off the loom is an adventure in possibility constraining itself down to the physics of reality.

See Also:


Sharktooth Twill

The full stability and flexibility of a 2/2 twill combined with an interesting pattern formed entirely by the threading plus twill makes for a delightful potholder that you can weave up quickly.

Black & white Harrisville pro loom & loops. Threading AAABBB in both directions, woven in 2/2 twill.

Pattern chart attached, but you don’t really need it to work, once you work your first row. All others can be worked by reference.

Twill Mesh

Super elegant, with a rewarding cushion-y feel in the hand, twill mesh, adapted from a pattern by Eugenio Poma archived on handweaving.net. Harrisville pro purple and white loops.

You can see by my chart that I highlighted more than usual, working this chart. I noticed within 3 rows of beginning to weave that all even rows were 2/2 twill across (ending with 1 for the odd number of columns). I highlighted all those rows with purple before going further, then highlighted the odd rows in other colors as I wove them. This one is going directly onto my own potholder hook in the kitchen. ❤ 🙂

Three-Three Twill

“Honey, how do you think 3/3 twill would weave up?”
“I don’t know, my love, shall we find out?”
“OK!”

I am SO GLAD we did. You know the problem of enameled cast iron dutch ovens? Super hot, with knobs that need grasping? Solution!! 3/3 twill. Double-thick, extremely flexible, very protective.

I’m including a chart, but you don’t really need it. I found it helpful because I wanted to start my weaving in the middle and still be certain where my ends would come out. I wanted to have the strong diagonal across the center, and not have any 3-overs or -unders on the corners.

Worked in a single color, the texture draws more attention to the chevrons. Worked in 2 colors, the diagonal lines are eye-catching. The finished potholders are quite small, 5″ square. And 3/8″ thick! The flexibility of the fabric means you could work an excellent oven mitt using a pro loom and a traditional/pro rectangle loom. A 10″ pro should come out around 7″ square.
Because there are only 3 stretches per row going under, this is an incredibly fast weave. Work carefully, because it is easy to split loops while you are working this pattern. The loops get pushed into each other, and never fully locked into place, so the spacing the pegs force on them remains throughout your work. There will always be a bit of a gap between strands of one loop.
Whoops! Mistake. Always a good idea to pause and stare at your work before moving on the next row. I made all the right crossings… backwards. Easy to pull out and re-weave.
Much of the way through the chocolate and white exemplar, I am seized with yearning to know how this fabric looks when you highlight the texture instead of the pattern. Thanks to a gracious benefactor, I can throw on a monochrome and test it out right away! ❤
Can you spot the mistake? Look carefully at the bottom woven row.
Fixed! (Narrator: no, it is not. You may have to zoom in to see the split loop in the last place the bottom-to-last row surfaces before connecting to the right peg…)
Nailed it!
Here are both finished potholders, still on their looms. Monochrome vs. two-color changes the focus from texture to design. Lots of room for playing with color here. A monochrome center, for example, would amuse the eye with its focus switching. And you can always taste the rainbow. 🌈
Here is a closeup of the chocolate and white potholder, ready to bind off the loom.
And a closeup of the white potholder, ready to be released from its pegs.
A chart is not necessary for this pattern. You are simply proceeding over 3 / under 3 across the row, shifting by one column for each adjacent row. I like having the chart so I can start in the middle and still be sure that my corners will come out with the over/under arrangement that I wanted. (It’s also helpful to have charts for very simple patterns, when trying to illustrate how to read the charts for more complicated designs.)
Here, I’ve taken the 27-peg chart that Matthew drafted for me, and folded it to show the 18 pegs I want to use. I’ve highlighted the central rows and columns (9 & 10), to make it easy to see my starting point. Once I’ve woven those two rows, I can work up and down by referring to adjacent rows, so I don’t need to mark my place on the chart as I go.
Immediately after binding off, the edges are very curved and the loops that held my tension while I was working the edge are markedly distorted. Fear not! Work them out with your fingers. YOU are in charge of your fabric. Manipulate and massage the edges until they lie flat enough. Yes, they will buckle and wave. You can give it an appealing evenness and straighten the corners for a satisfactory result.
Marvel at the size! 5″ square, and 3’8″ thick, on a 7″ loom.
As a 27-peg chart.
As an 18-peg chart.


May Edition

The May edition of Piglet’s Portfolio of Priceless Potholder Patterns was published last night. Now over 70 designs, many in multiple sizes, for a total of over 100 charts. Posted both as a downloadable PDF and as individual page images. Clear monochrome charts can be used on-screen or printed affordably. Available for free under an “open culture” license so you can use, print, share, copy, adapt, and change to create new designs.

Folks who are familiar with our efforts will know that we add new charts from time to time, and May has been especially productive. If you downloaded a PDF six weeks ago it would have had 53 pages — but the latest version is now 113 pages, and it will continue to grow in the future.

We recognize that this “moving target” creates a challenge for folks who want to be able to print the whole thing out one time and treat it as a completed paper book, but it seems like an inescapable part of releasing our work as we go.