A priceless portfolio of weaving charts for loop potholders.
Three-Three Twill
“Honey, how do you think 3/3 twill would weave up?”
“I don’t know, my love, shall we find out?”
“OK!”
I am SO GLAD we did. You know the problem of enameled cast iron dutch ovens? Super hot, with knobs that need grasping? Solution!! 3/3 twill. Double-thick, extremely flexible, very protective.
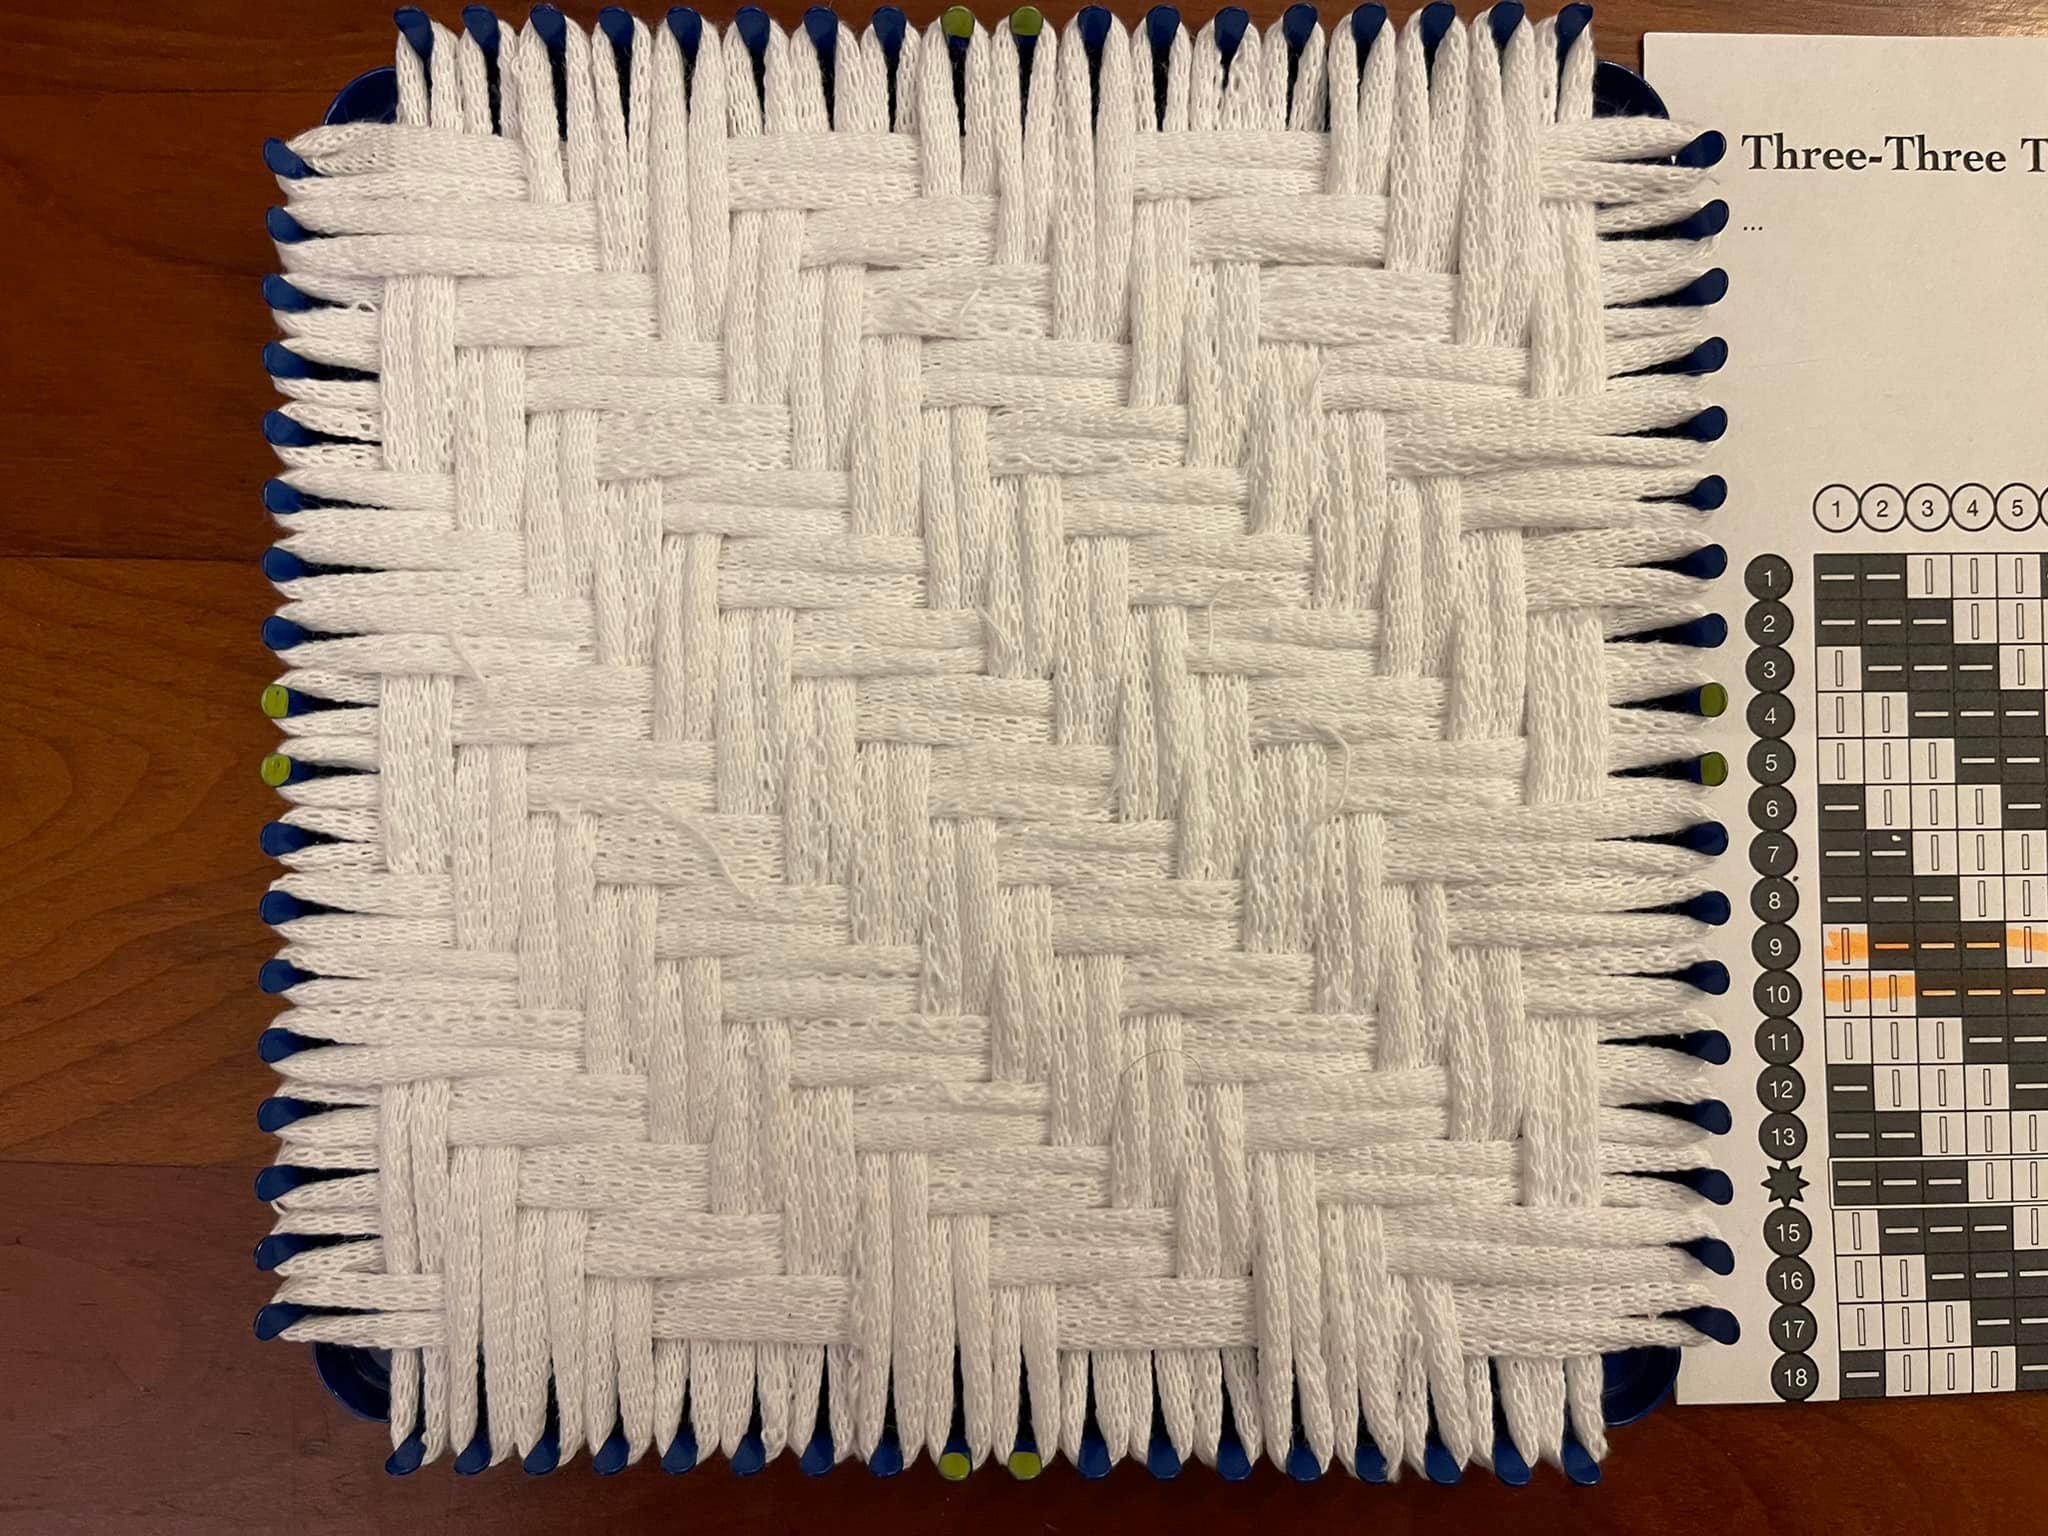
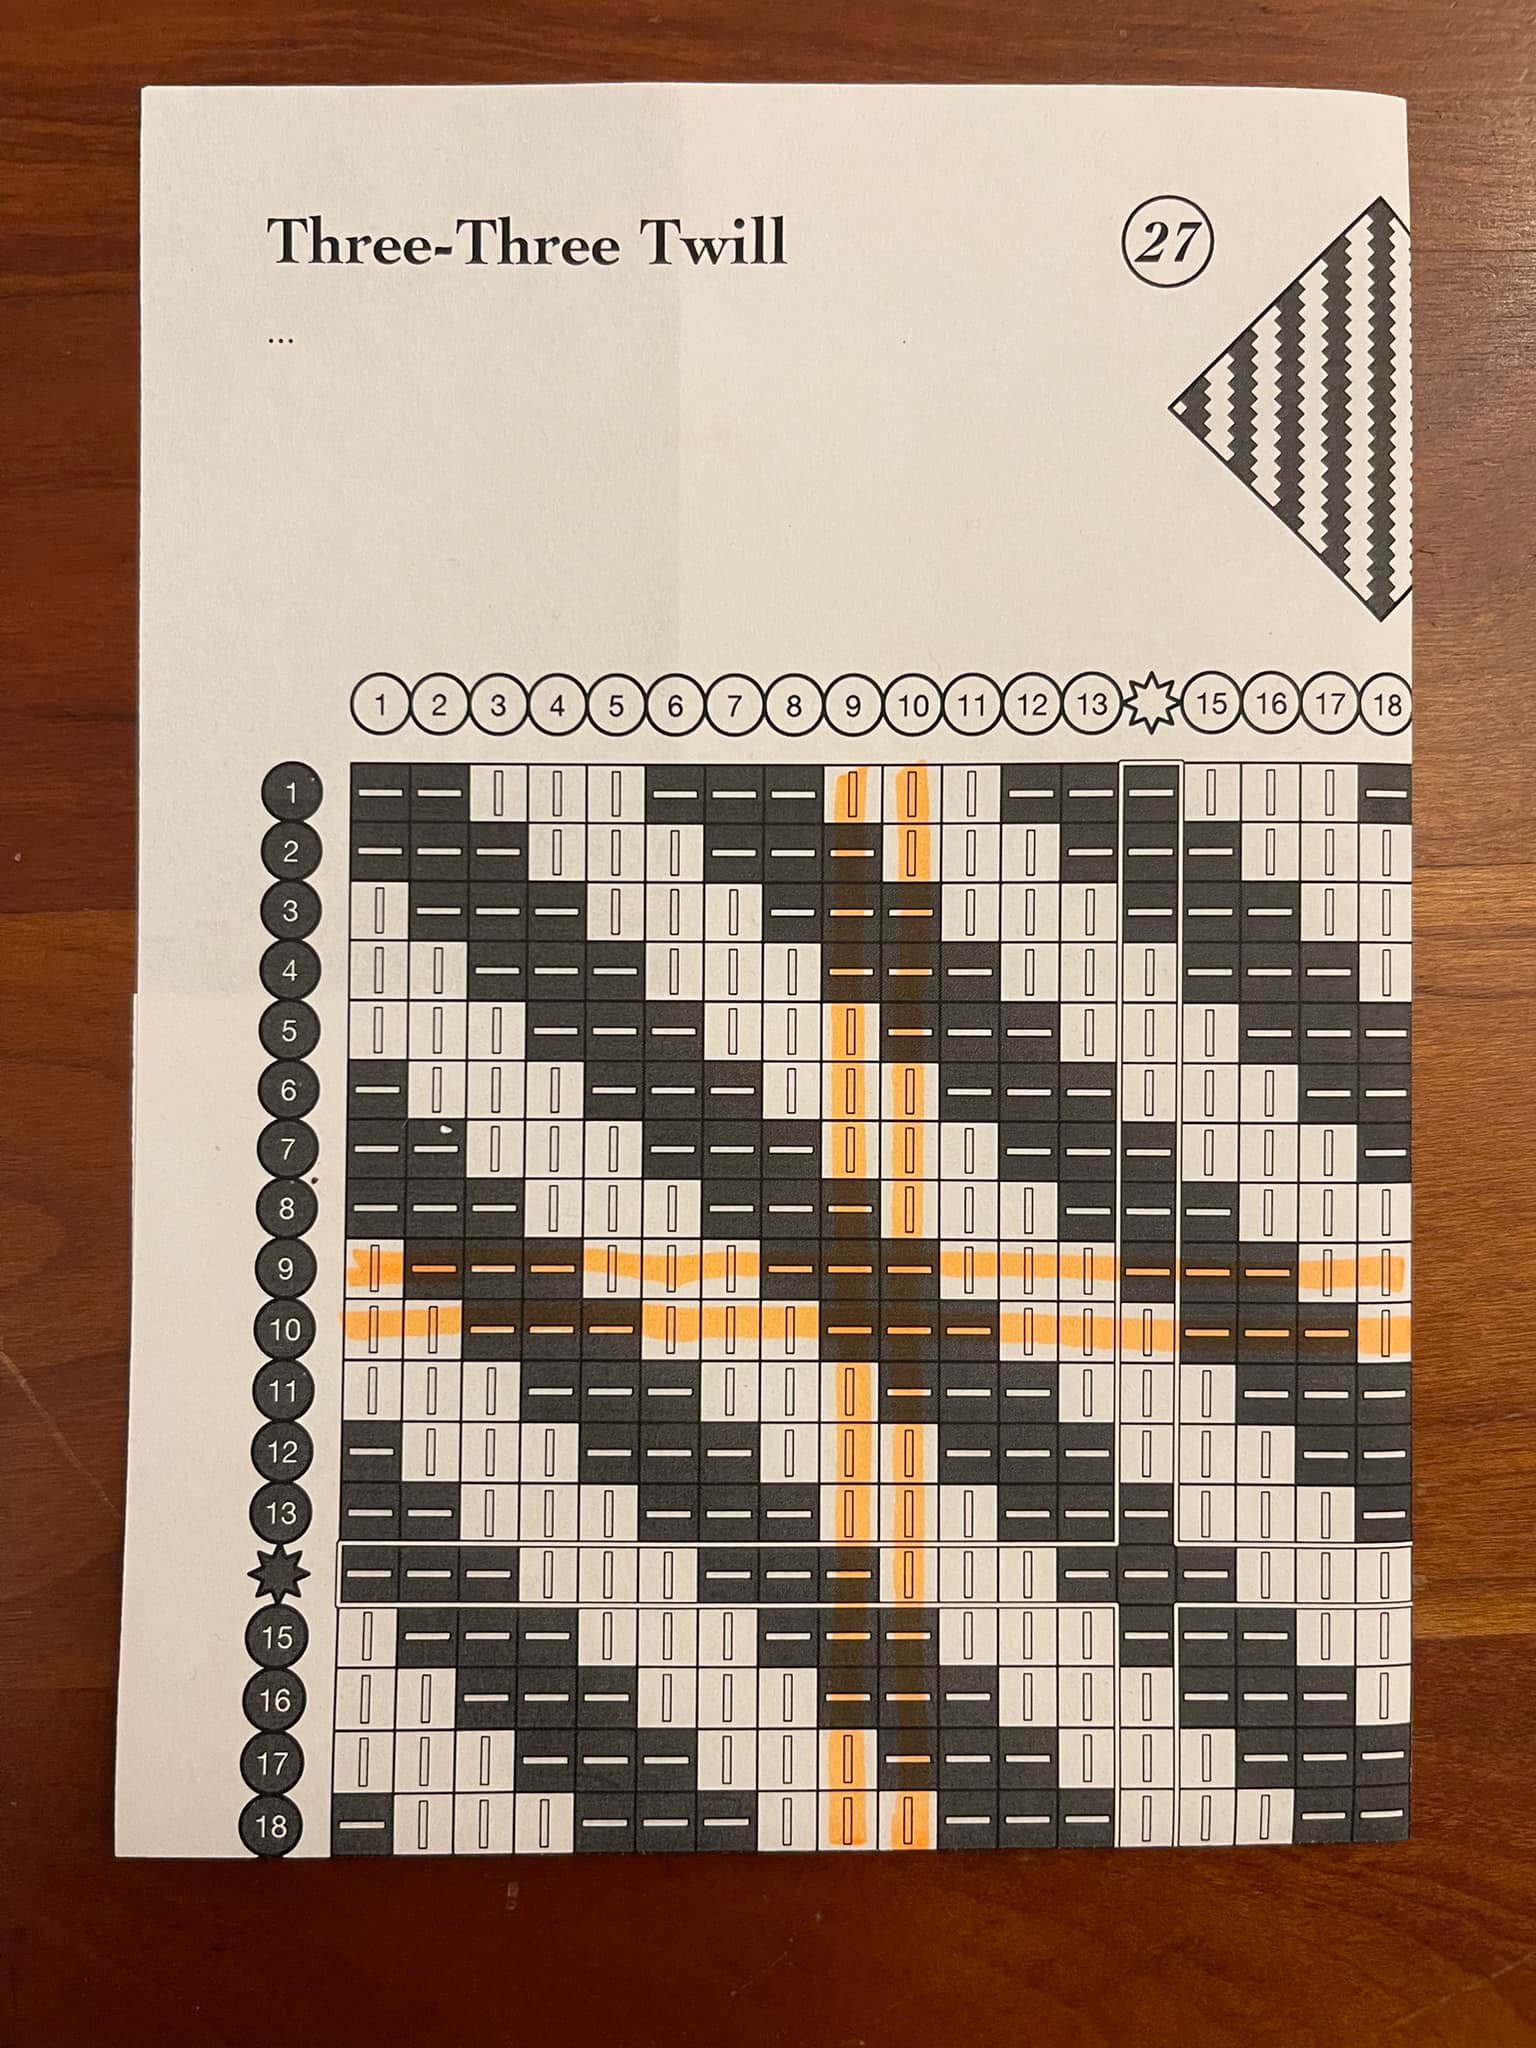
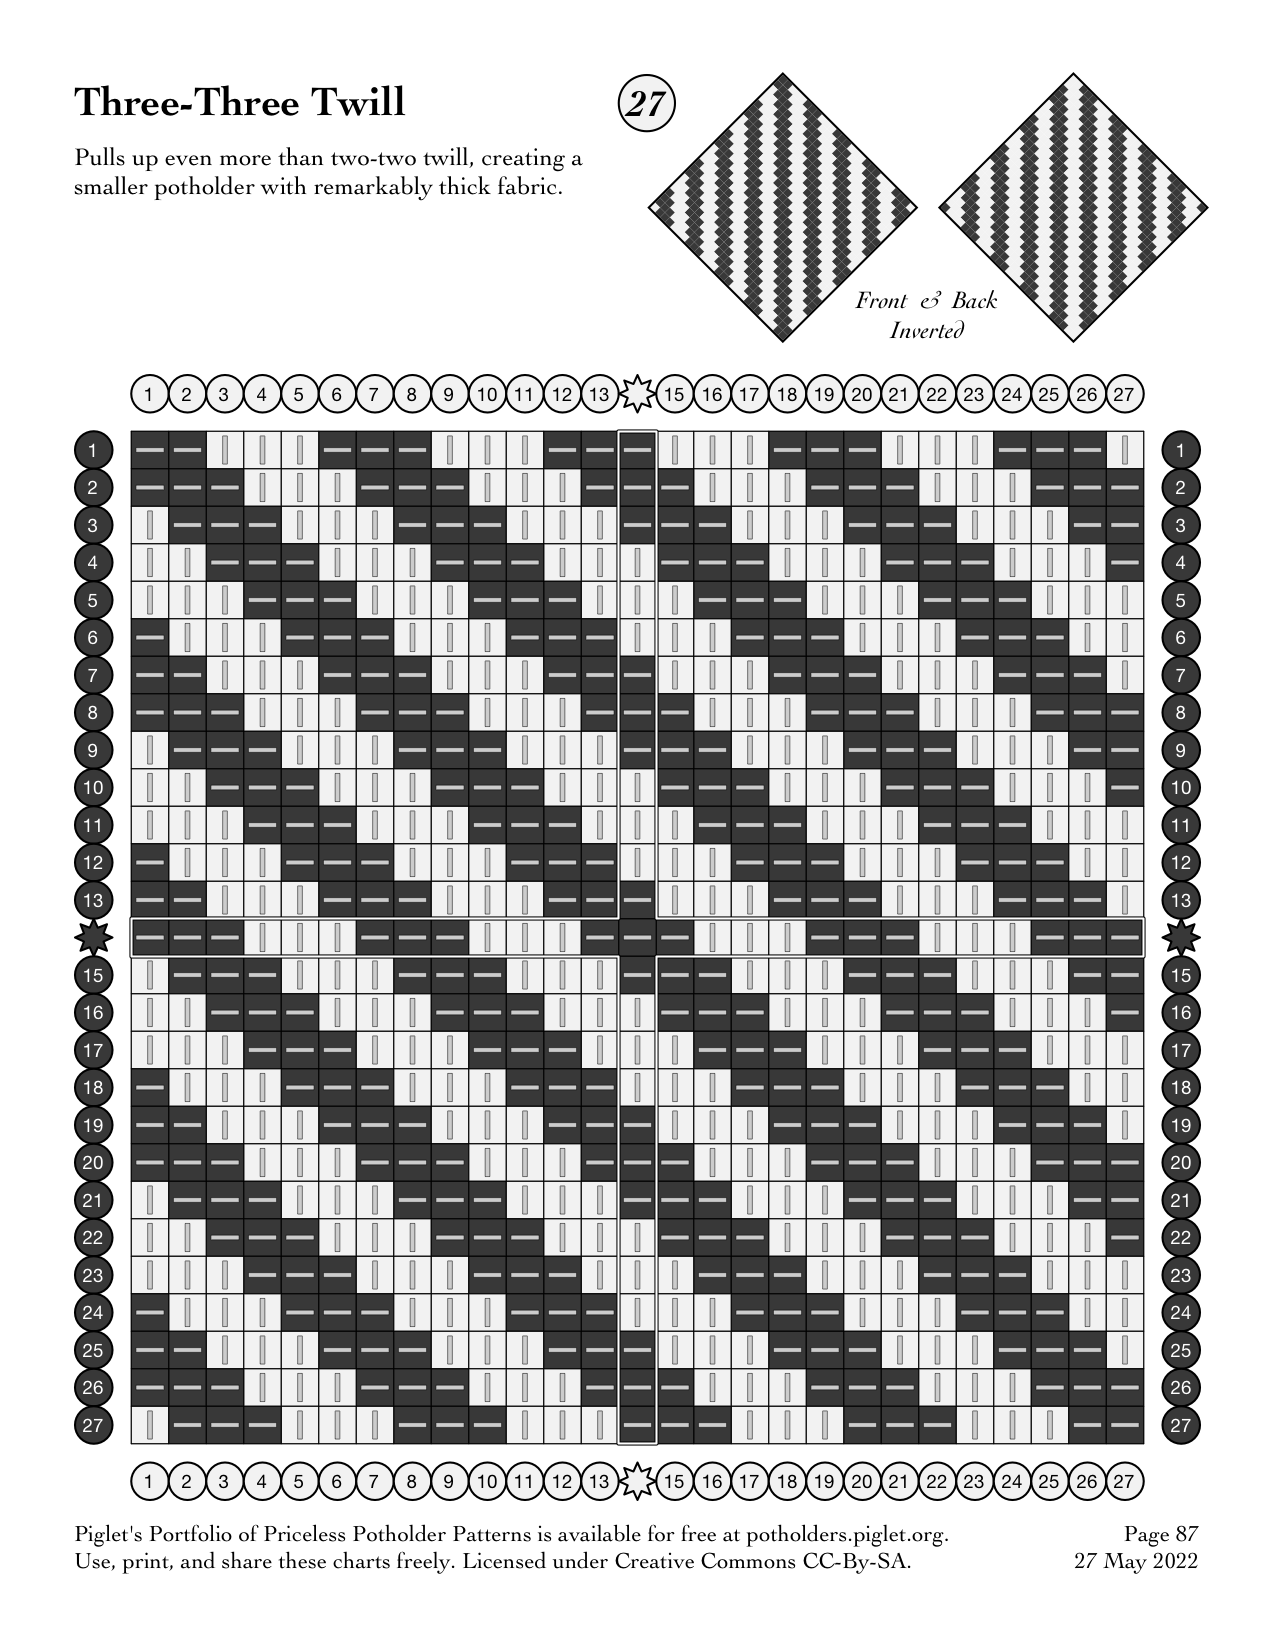
I’m including a chart, but you don’t really need it. I found it helpful because I wanted to start my weaving in the middle and still be certain where my ends would come out. I wanted to have the strong diagonal across the center, and not have any 3-overs or -unders on the corners.
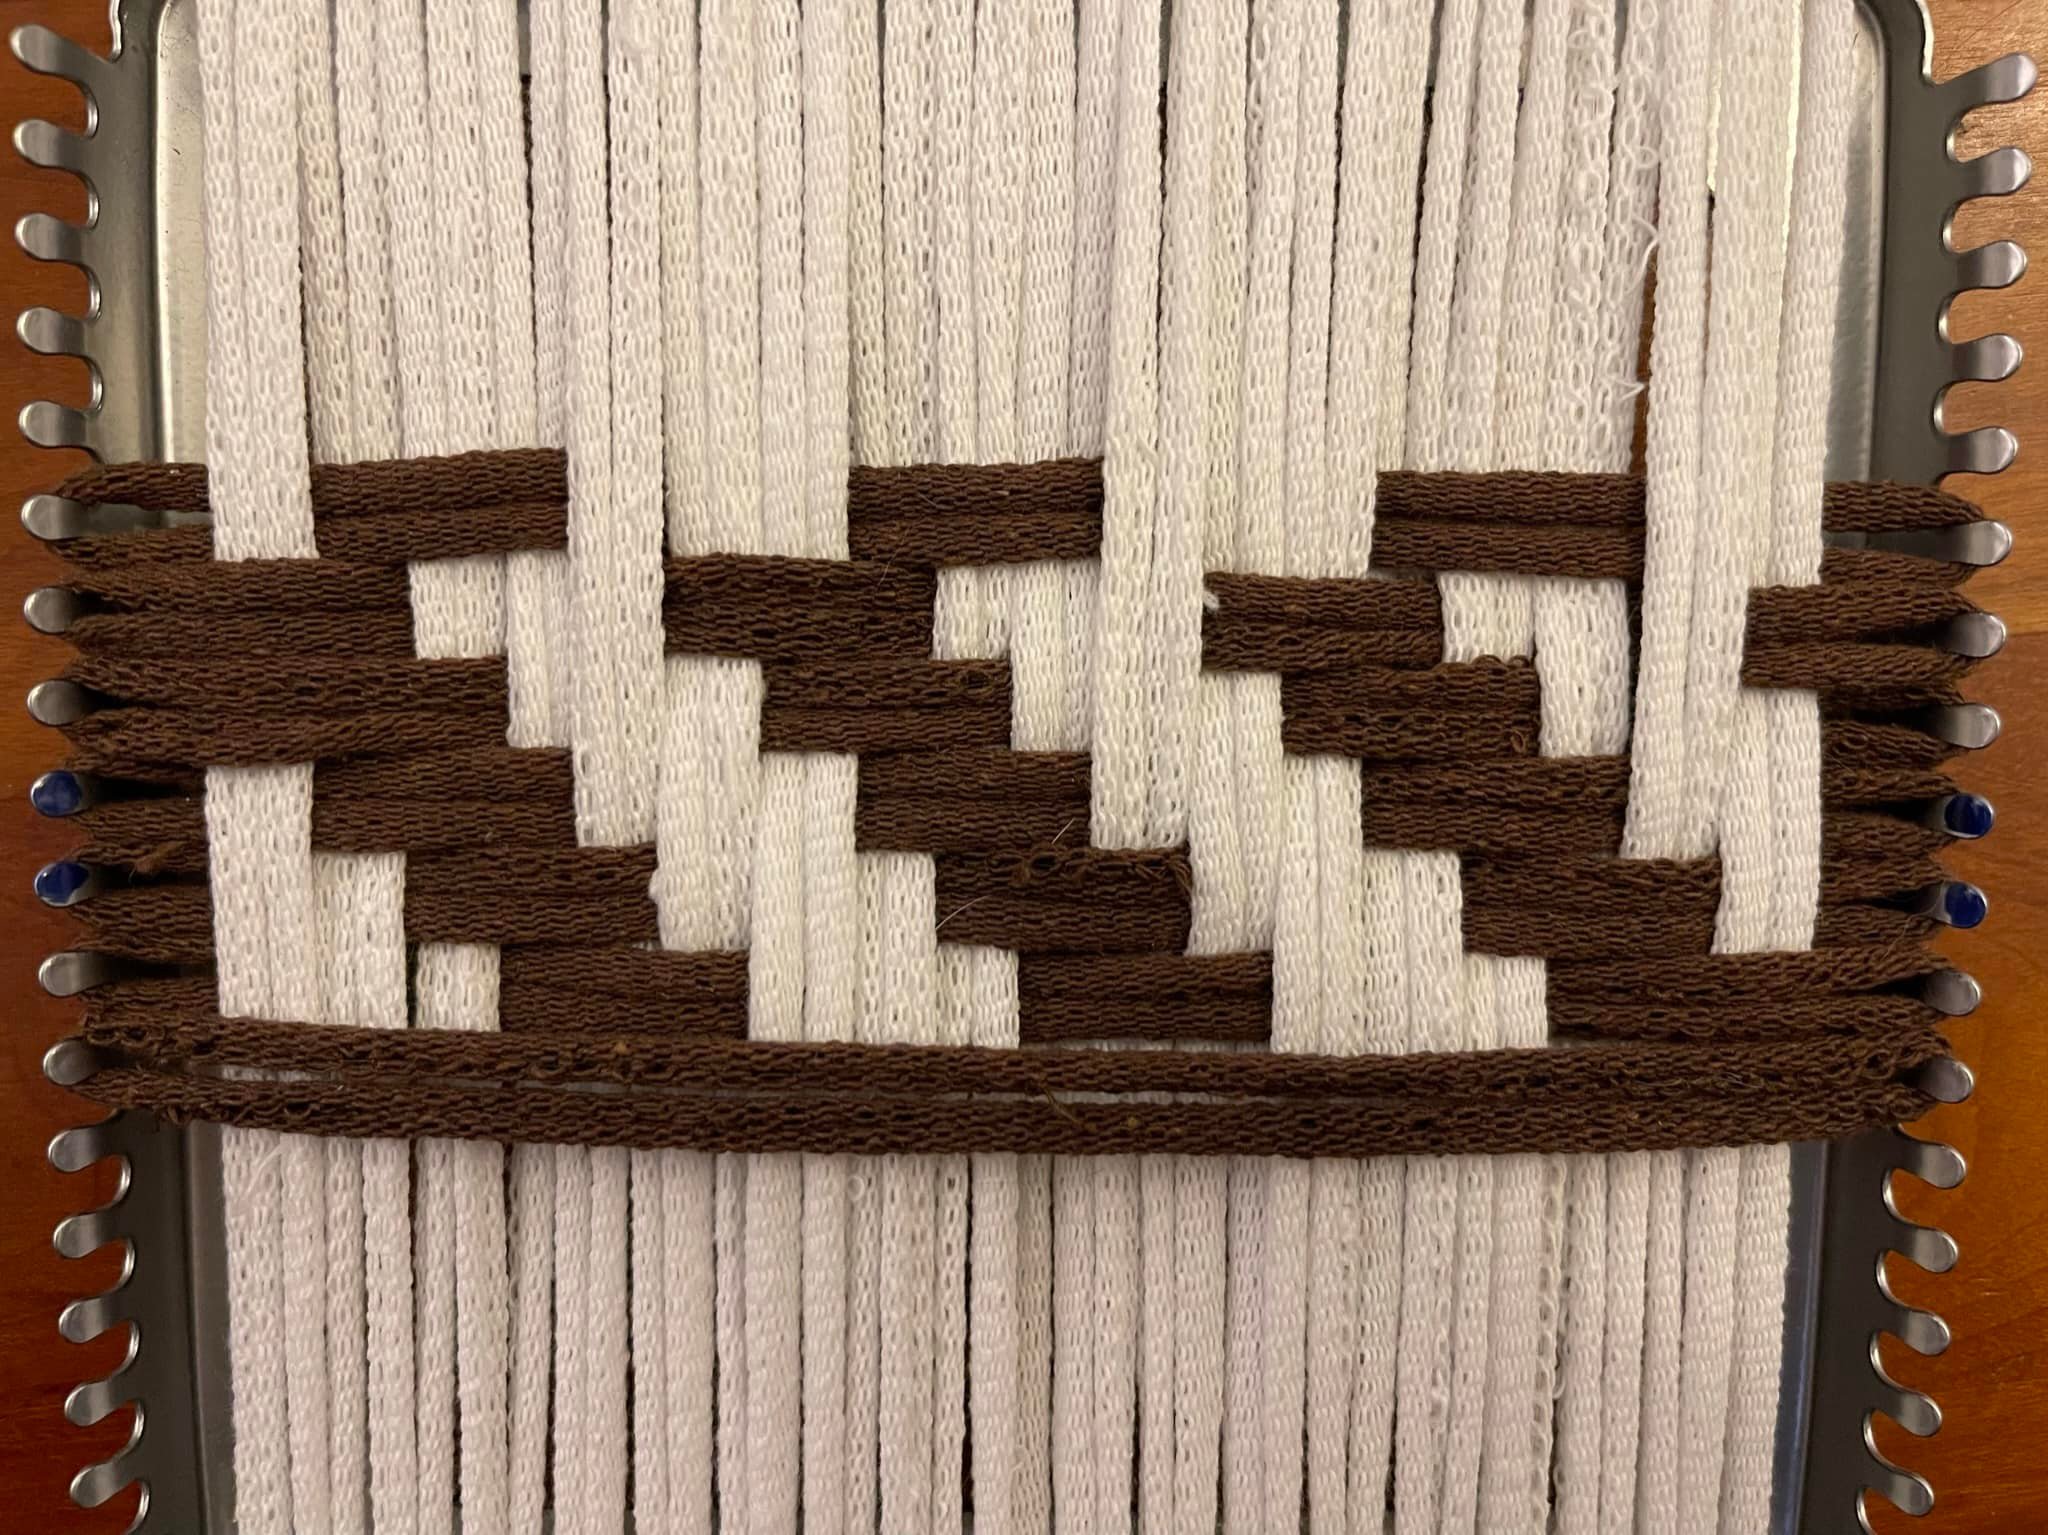
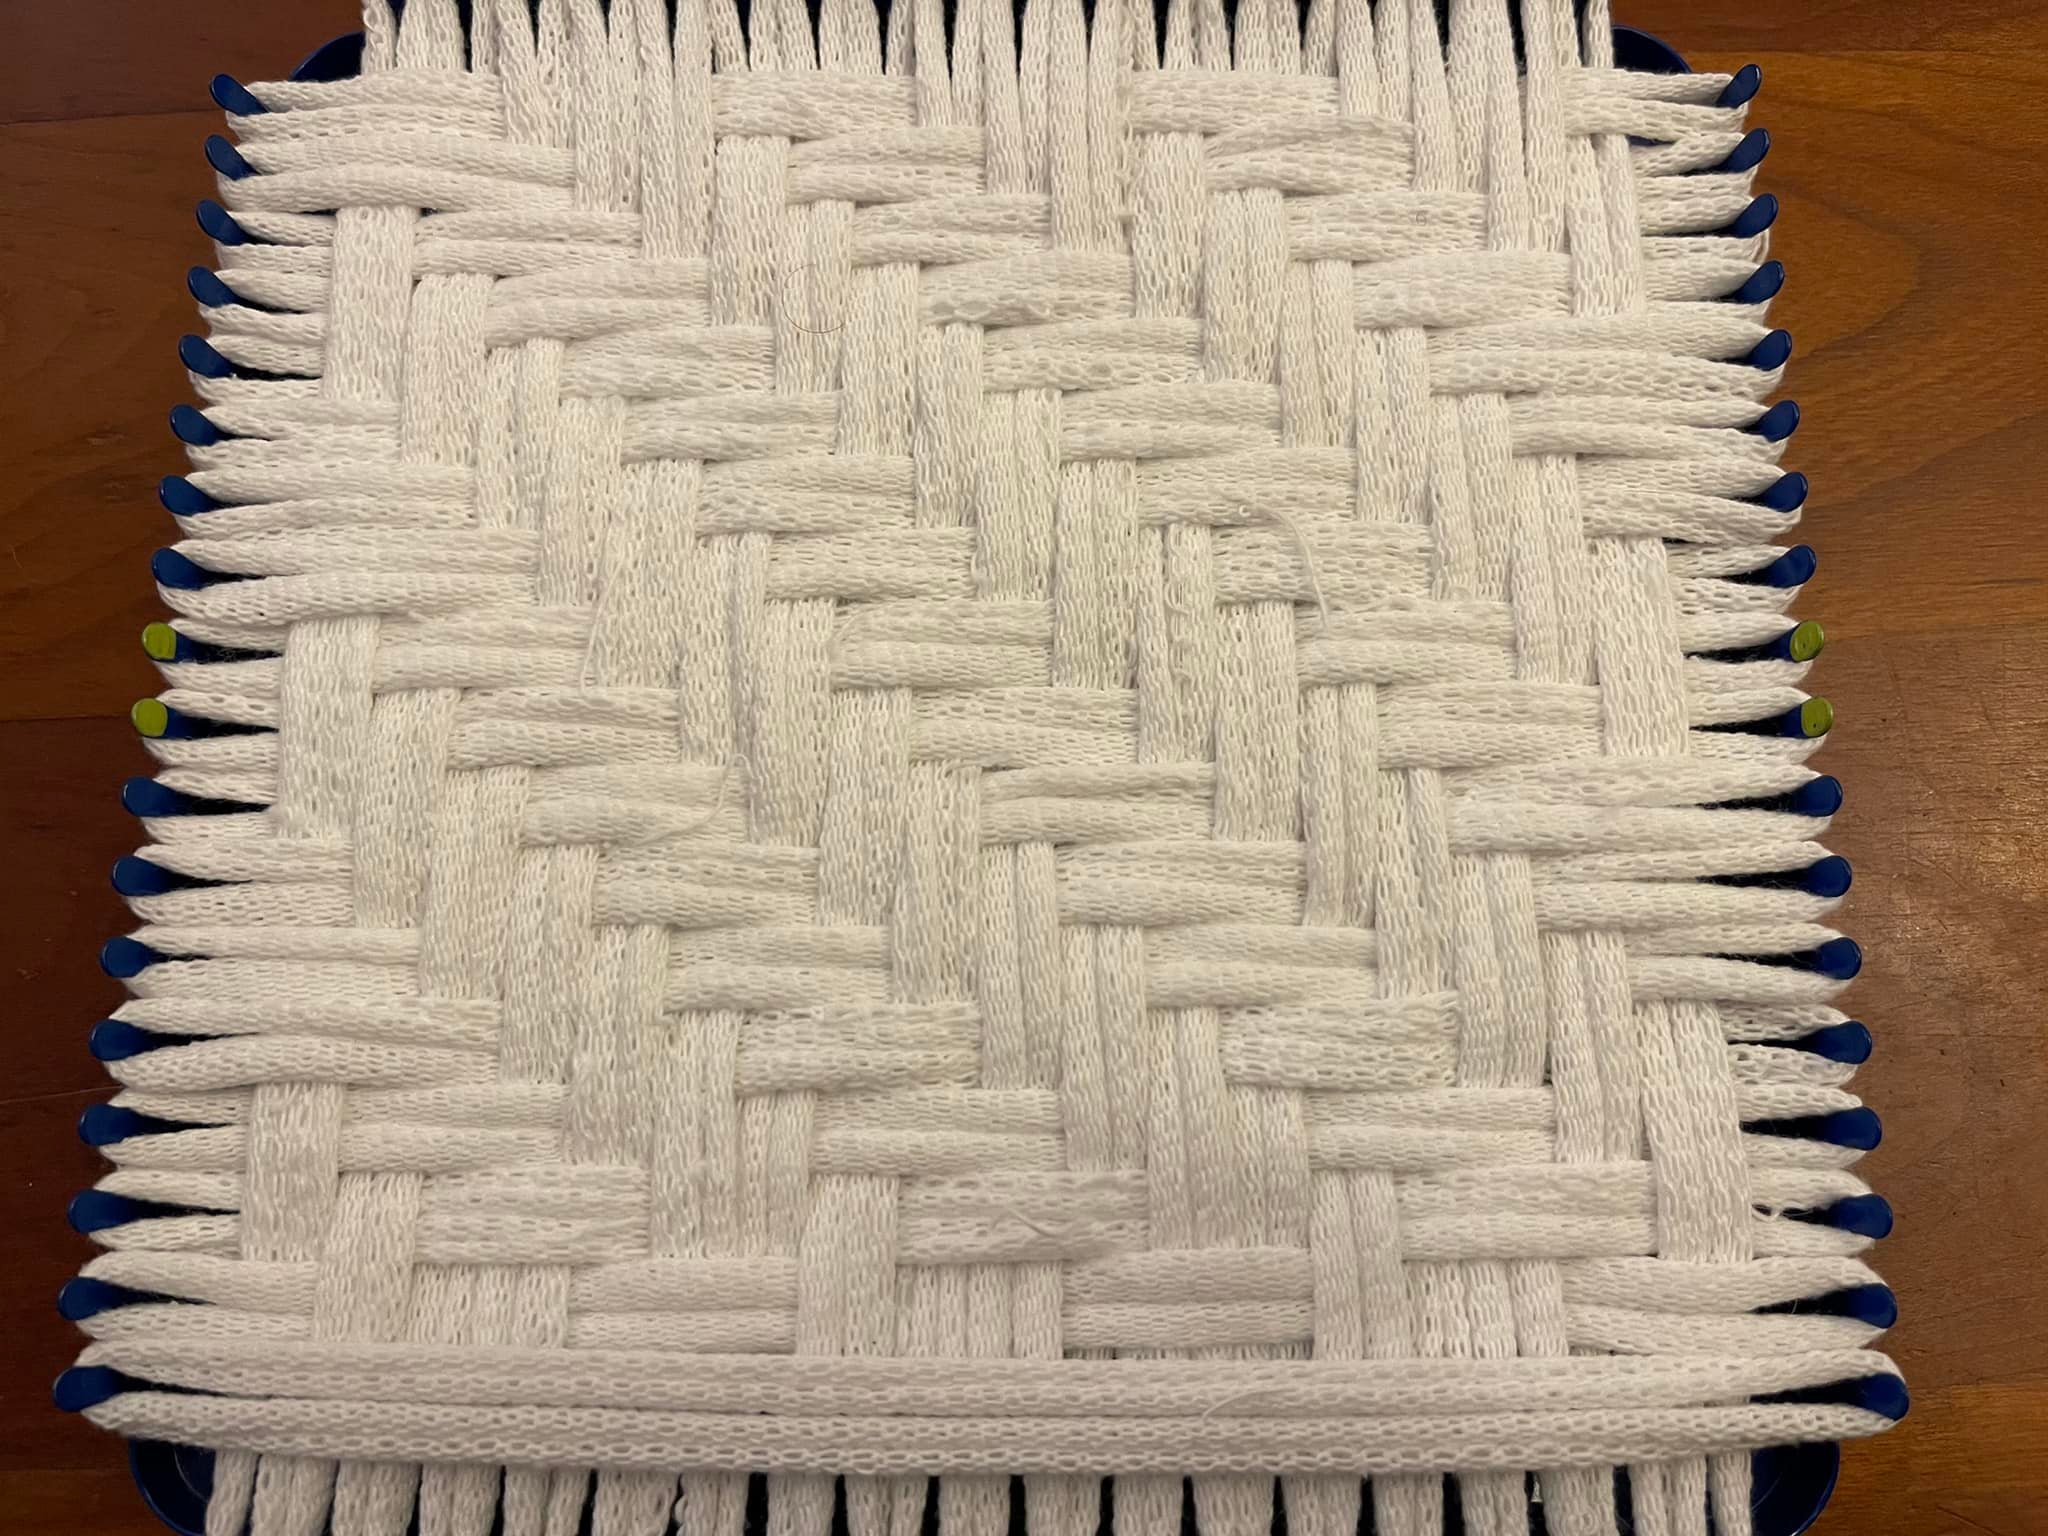
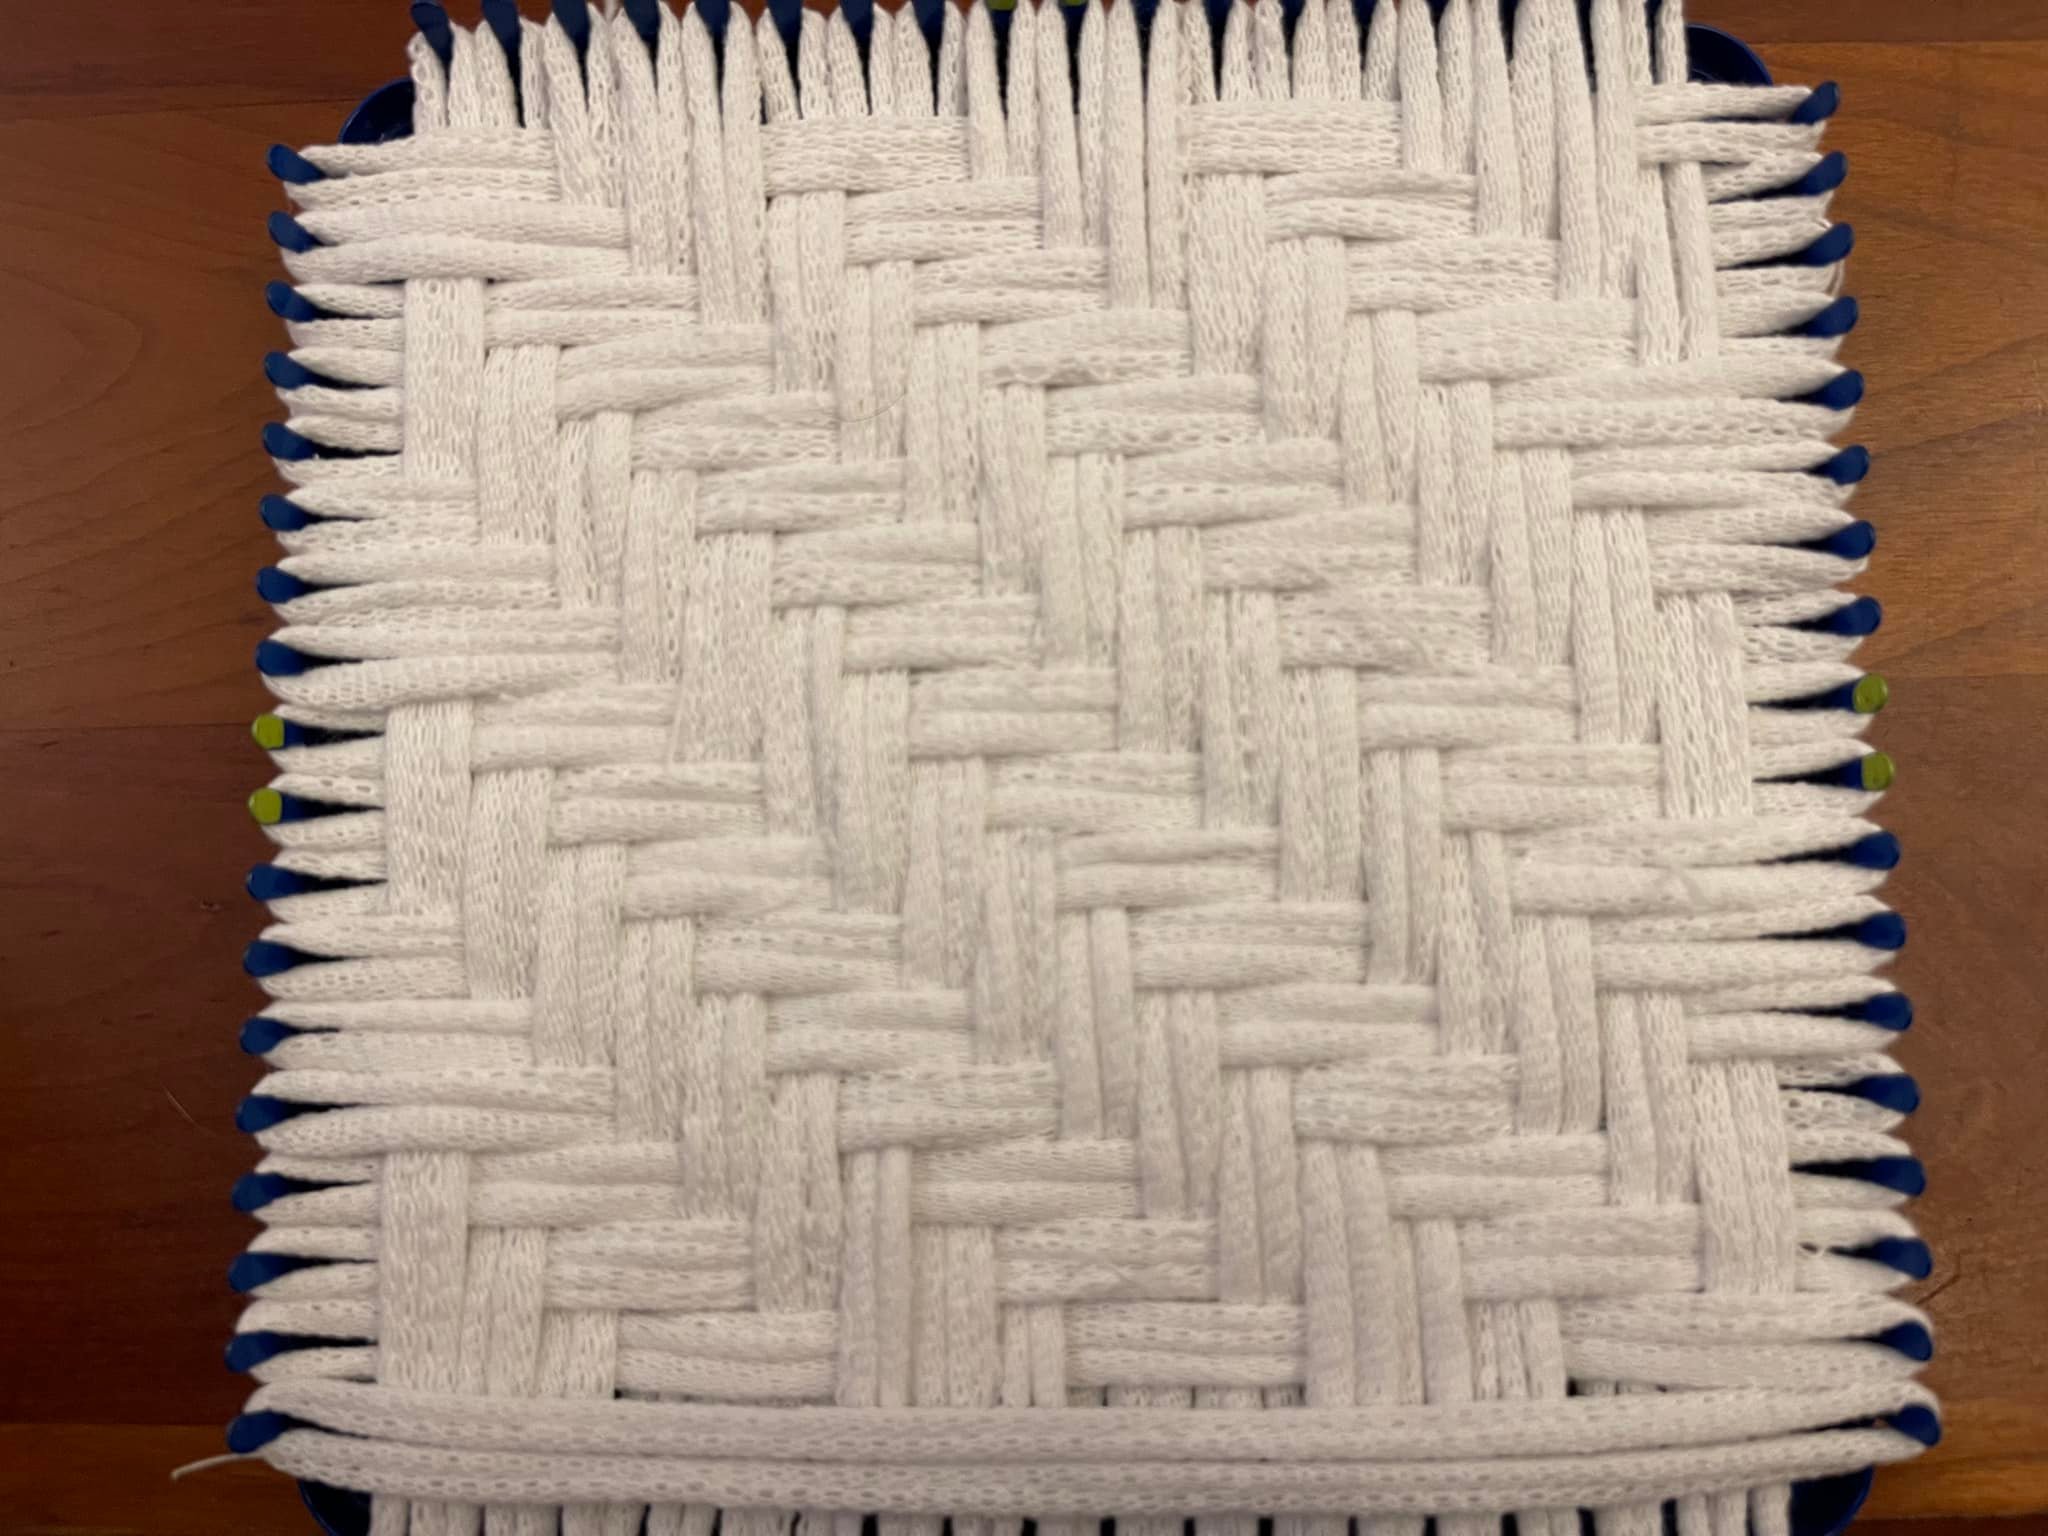
Worked in a single color, the texture draws more attention to the chevrons. Worked in 2 colors, the diagonal lines are eye-catching. The finished potholders are quite small, 5″ square. And 3/8″ thick! The flexibility of the fabric means you could work an excellent oven mitt using a pro loom and a traditional/pro rectangle loom. A 10″ pro should come out around 7″ square.Because there are only 3 stretches per row going under, this is an incredibly fast weave. Work carefully, because it is easy to split loops while you are working this pattern. The loops get pushed into each other, and never fully locked into place, so the spacing the pegs force on them remains throughout your work. There will always be a bit of a gap between strands of one loop.Whoops! Mistake. Always a good idea to pause and stare at your work before moving on the next row. I made all the right crossings… backwards. Easy to pull out and re-weave.Much of the way through the chocolate and white exemplar, I am seized with yearning to know how this fabric looks when you highlight the texture instead of the pattern. Thanks to a gracious benefactor, I can throw on a monochrome and test it out right away! ❤Can you spot the mistake? Look carefully at the bottom woven row.Fixed! (Narrator: no, it is not. You may have to zoom in to see the split loop in the last place the bottom-to-last row surfaces before connecting to the right peg…)Nailed it!Here are both finished potholders, still on their looms. Monochrome vs. two-color changes the focus from texture to design. Lots of room for playing with color here. A monochrome center, for example, would amuse the eye with its focus switching. And you can always taste the rainbow. 🌈Here is a closeup of the chocolate and white potholder, ready to bind off the loom.And a closeup of the white potholder, ready to be released from its pegs.A chart is not necessary for this pattern. You are simply proceeding over 3 / under 3 across the row, shifting by one column for each adjacent row. I like having the chart so I can start in the middle and still be sure that my corners will come out with the over/under arrangement that I wanted. (It’s also helpful to have charts for very simple patterns, when trying to illustrate how to read the charts for more complicated designs.) Here, I’ve taken the 27-peg chart that Matthew drafted for me, and folded it to show the 18 pegs I want to use. I’ve highlighted the central rows and columns (9 & 10), to make it easy to see my starting point. Once I’ve woven those two rows, I can work up and down by referring to adjacent rows, so I don’t need to mark my place on the chart as I go.Immediately after binding off, the edges are very curved and the loops that held my tension while I was working the edge are markedly distorted. Fear not! Work them out with your fingers. YOU are in charge of your fabric. Manipulate and massage the edges until they lie flat enough. Yes, they will buckle and wave. You can give it an appealing evenness and straighten the corners for a satisfactory result.Marvel at the size! 5″ square, and 3’8″ thick, on a 7″ loom.As a 27-peg chart.As an 18-peg chart.