A priceless portfolio of weaving charts for loop potholders.
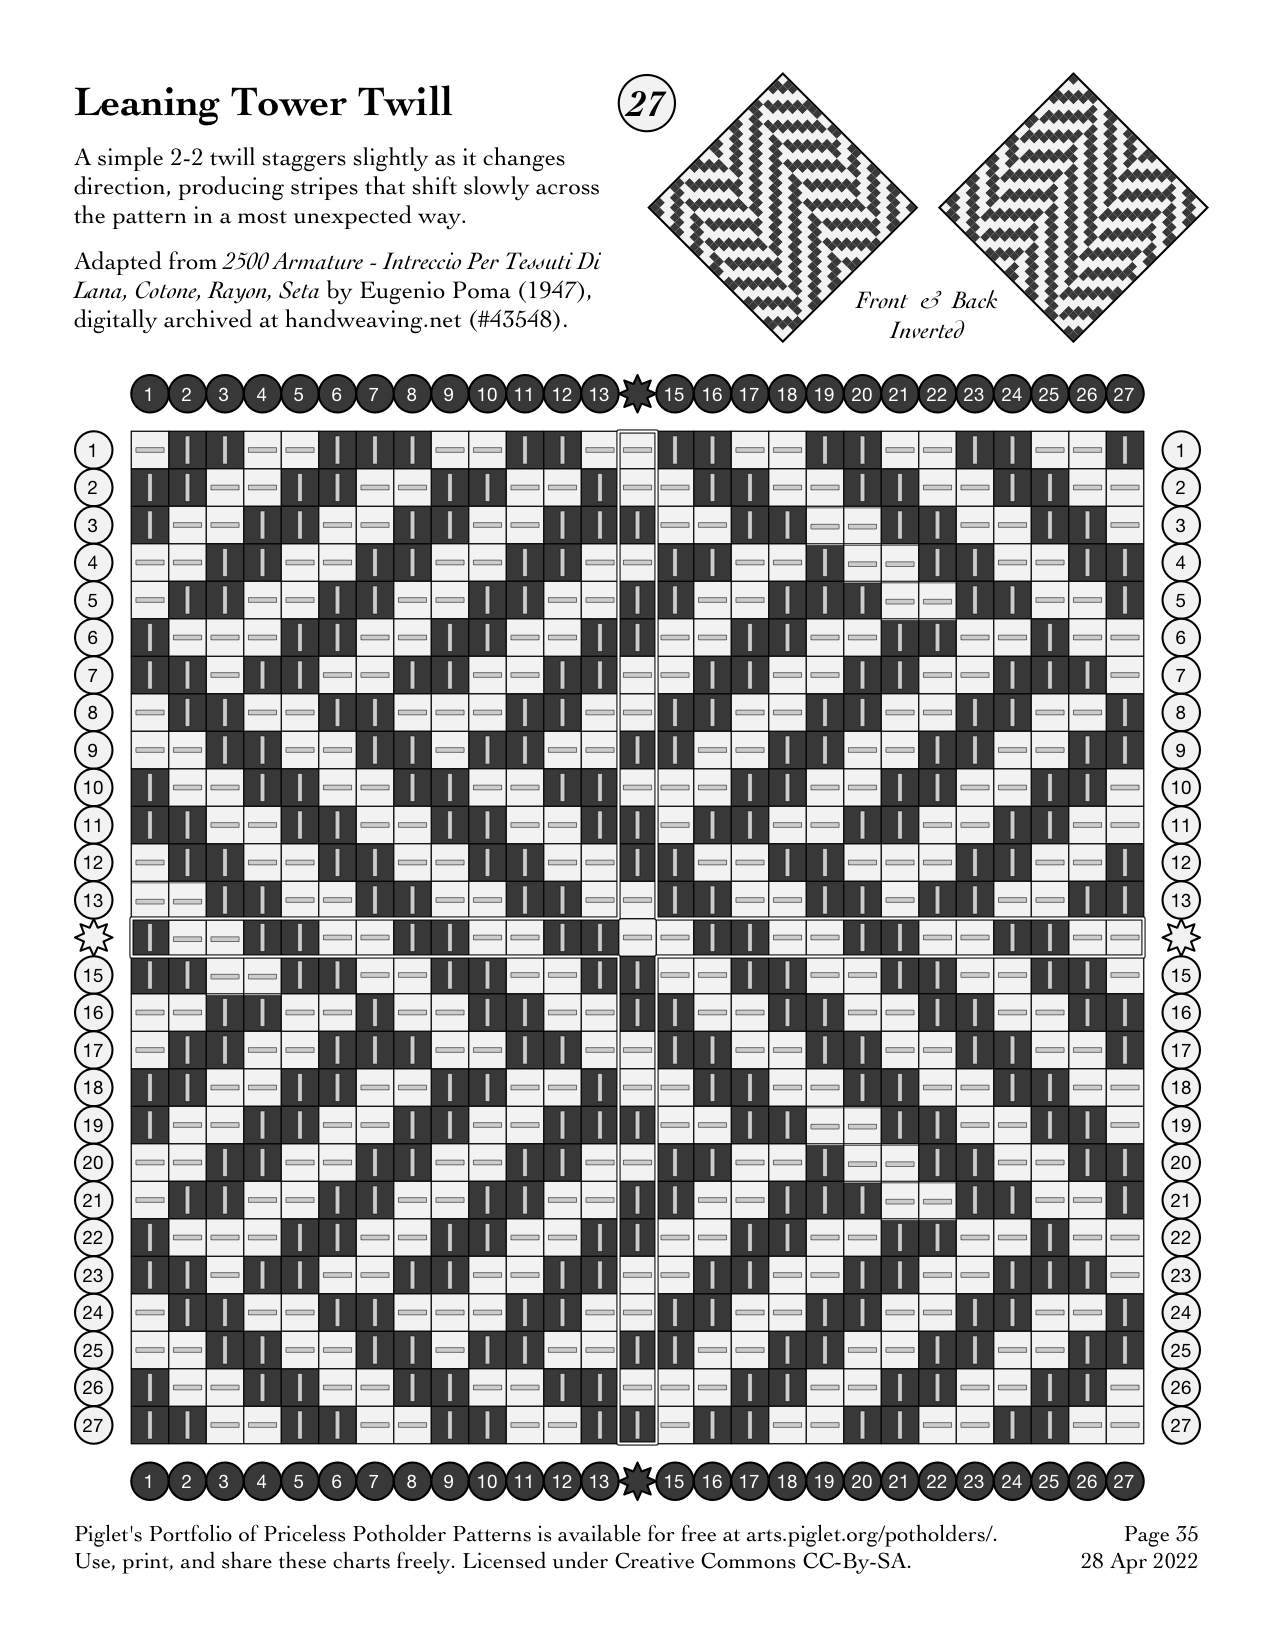
Leaning Tower Twill
Look at this amazing chart I woke up to this morning!! I had to work in lime for the contrast because this pattern is SO SHOCKING.
I don’t think this pattern will be effective in an 18-peg version that is a subset. I think it would need to be re-charted to get the full unsettling sensation. It would make a very interesting placemat, with the greater expanse of fabric.
Texturally, the fabric is supple yet stable, as you would expect from any 2×2 twill. The pattern changes do not significantly distort the result.
Finished lime & white twill-patterned potholder, front.Finished potholder, rear view showing the pattern inverted on the back.Finished potholder, front side viewed diagonally, highlighting the skew in the pattern.First few loops are challenging. It takes a while for the loops to lock in with each other, as with most 2×2 twill. Unhighlighted, the pattern is visually confusing. Where are we going!!?!?? Unclear…Decoding the chart makes the weaving easier. The center row and the row below it, highlighted in yellow, are straight up 2×2 twill (2 over, 2 under across the row, shifted one column to the right for the next row). 4 of the rows (6 & 7, 22 & 23) have 2 discontinuities in them. The other 21 rows have one discontinuity per row. They form small T shapes, with a 3 float in one row and a 1 float in the paired row, highlighted in pink. Start with the center row and the row below, which helps lock in your loops to their correct columns (they do love to roll around, especially in 2×2 twill). Working from the center row to the top and bottom rows, start your weaving in each row with the discontinuity in that row. For the 4 rows with 2 discontinuities, start your weaving in the middle and work out to the pattern changes, which will be at each end of your row.Woven potholder, tensioned on the loom.The highlighted chart, showing where the pattern changes happen.


